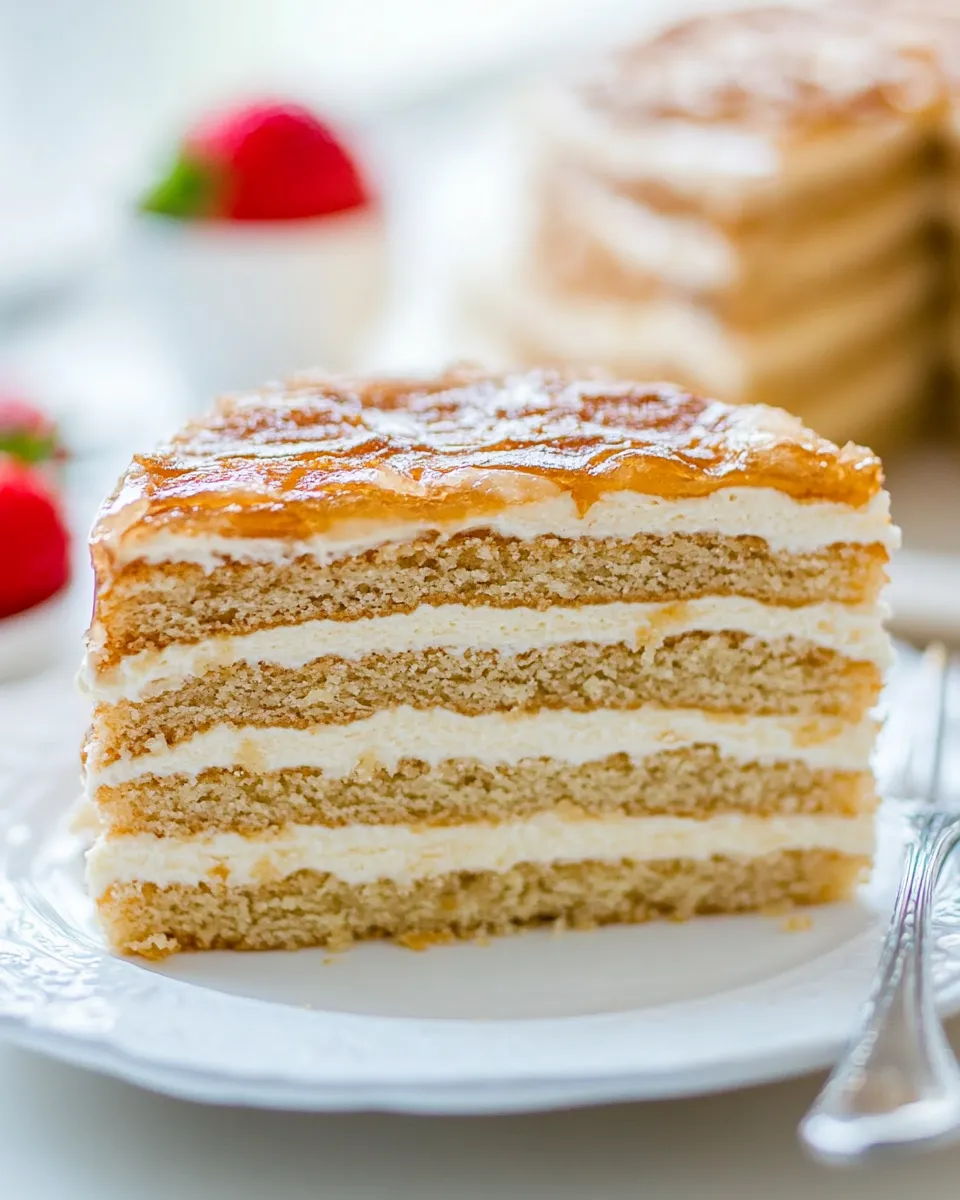
8-Layer Honey Cake Recipe (Medovik)
This Medovik—eight delicate, honey-scented layers stacked with a light sour cream frosting—is a cake that rewards patience. The layers are thin and tender; the frosting is tangy and smooth. Together they create a soft, yielding cake that tastes like a memory more than a recipe.
I test this version whenever I want a showstopper that travels well and improves with time. It’s straightforward once you get the technique: warm dough, thin rolling, quick bakes, and an overnight chill. The result is worth the careful steps.
Ingredients
- 4 Tbsps honey (1/4 cup) — provides the signature honey flavor and helps the dough brown and stay pliable while warm.
- 3/4 cup granulated sugar — sweetens the dough and helps with caramelization for those lightly golden edges.
- 2 Tbsp unsalted butter — adds richness and helps the dough hold together.
- 3 large eggs, room temperature, beaten with a fork — structure and moisture; room temperature helps them incorporate smoothly.
- 1 tsp baking soda — tenderizes the layers and gives a gentle lift.
- 3 cups all-purpose flour, I used unbleached, organic — the base of the dough; add in increments until the dough is firm.
- 32 oz sour cream — the base of the frosting; tart, creamy, and key to the traditional Medovik texture.
- 2 cups powdered sugar — sweetens the sour cream frosting and helps it set slightly.
- 1 cup heavy whipping cream — whipped and folded into the sour cream mixture to lighten the frosting.
- 1/2 lb strawberries, optional — for a fresh, bright garnish or a thin layer between cakes if desired.
Shopping List
- All ingredients listed above (buy full amounts; sour cream and heavy cream are used generously).
- Parchment paper, a 9″ plate or 9″ springform base for trimming circles.
- Plastic wrap for overnight chilling.
- Optional: a small food processor or plastic bag and rolling pin for crushing scraps into crumbs.
Mastering 8-Layer Honey Cake (Medovik): How-To
- Preheat the oven to 350°F (175°C). Line 2 baking sheets with parchment paper and have a 9″ plate or springform base and a rolling pin ready.
- In a medium saucepan over medium–low heat, combine 3/4 cup granulated sugar, 4 Tbsp (1/4 cup) honey, and 2 Tbsp unsalted butter. Heat, whisking occasionally, until the sugar is fully melted and the mixture is smooth (about 5–7 minutes). Keep the heat at medium–low to avoid scorching.
- Remove the pan from the heat. While whisking constantly, add the 3 beaten large eggs in a slow, steady stream until fully incorporated (this prevents the eggs from scrambling).
- Whisk in 1 tsp baking soda until no lumps remain.
- Using a spatula, fold in 3 cups all-purpose flour, adding it in 1/2-cup increments. Continue folding until the dough reaches a firm, clay-like consistency that does not stick to your hands.
- Divide the dough into 8 equal pieces. Work while the dough is still warm—these pieces roll out more easily when warm.
- On a well-floured surface, roll one piece at a time into a thin 9″ circle about 1/8″ thick. Dust the top with a little flour if needed and use the 9″ plate to trim a perfect circle with a pizza cutter. Transfer each trimmed circle (on the parchment) to a baking sheet. Keep the scraps for later.
- Bake two cake layers at a time at 350°F for 4–5 minutes, or until the edges and surface turn lightly golden. Remove from the oven and transfer the baked layers to a wire rack to cool completely before stacking. Repeat until all 8 layers are baked and cooled.
- Spread the reserved dough scraps evenly on a sheet of parchment (reusing a baking sheet). Bake at 350°F until the scraps are firm and golden—begin checking at 4–5 minutes. Let the baked scraps cool completely, then crush them to fine crumbs with a rolling pin or pulse them in a food processor.
- Make the frosting: beat 1 cup heavy whipping cream on high until fluffy and stiff peaks form (about 1–2 minutes). In a separate bowl, whisk together 32 oz sour cream and 2 cups powdered sugar until smooth.
- Fold the whipped heavy cream into the sour cream–powdered sugar mixture gently until combined. Refrigerate the frosting until you are ready to assemble.
- To assemble: place one cooled cake layer on your serving plate. Spread about 1/3 cup of the frosting evenly over the layer. Repeat with the remaining layers, using about 1/3 cup per layer, and press each layer down gently as you stack to remove air gaps.
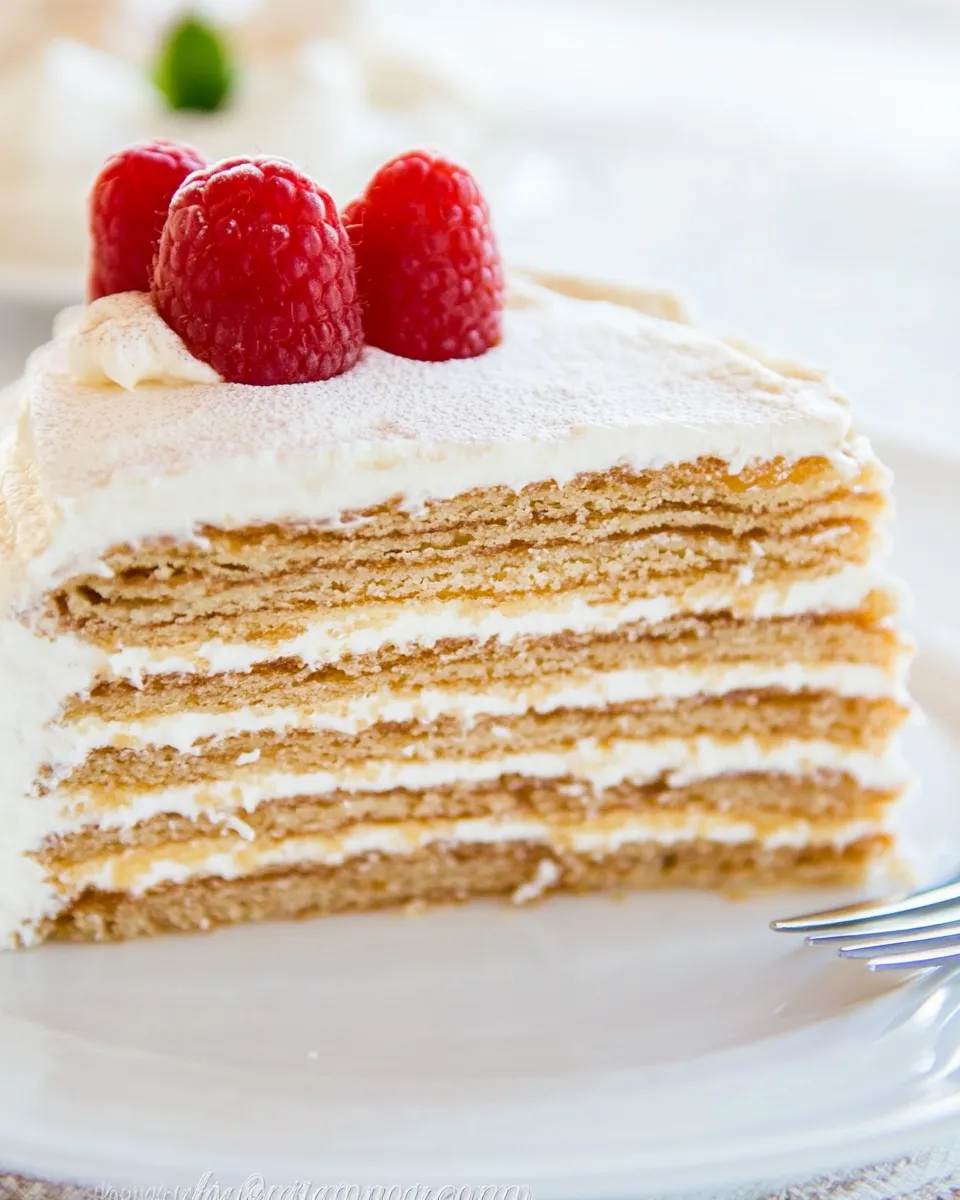
- Use the remaining frosting to cover the top and sides of the stacked cake. Press the cooled crumbs onto the top and sides to coat the cake.
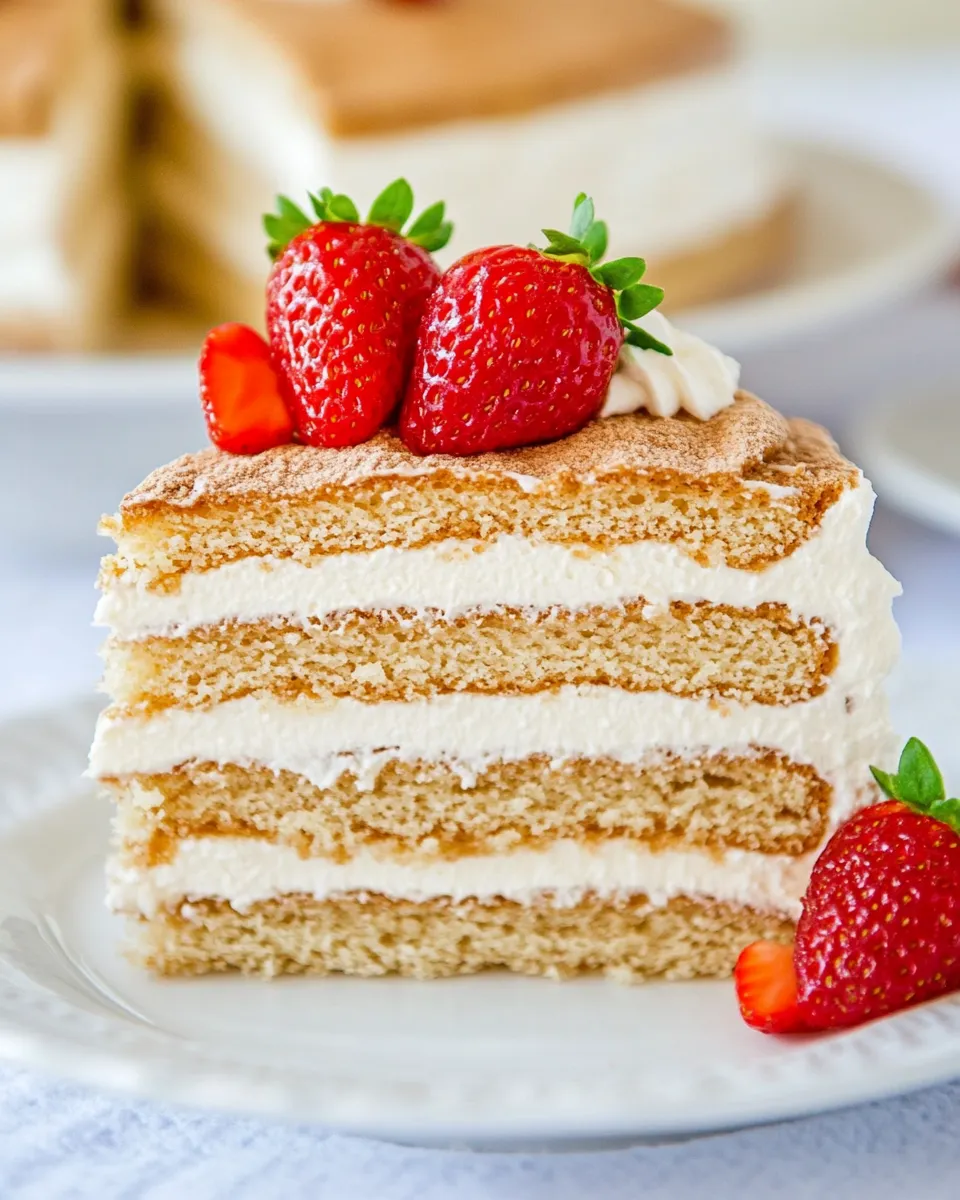
- If using the optional 1/2 lb strawberries, thinly slice them and either layer a few slices between layers while assembling or arrange them on top as decoration.
- Cover the cake with plastic wrap and refrigerate overnight. Chilling allows the layers to absorb the cream and the cake to soften. Serve chilled.
Why It’s Crowd-Pleasing
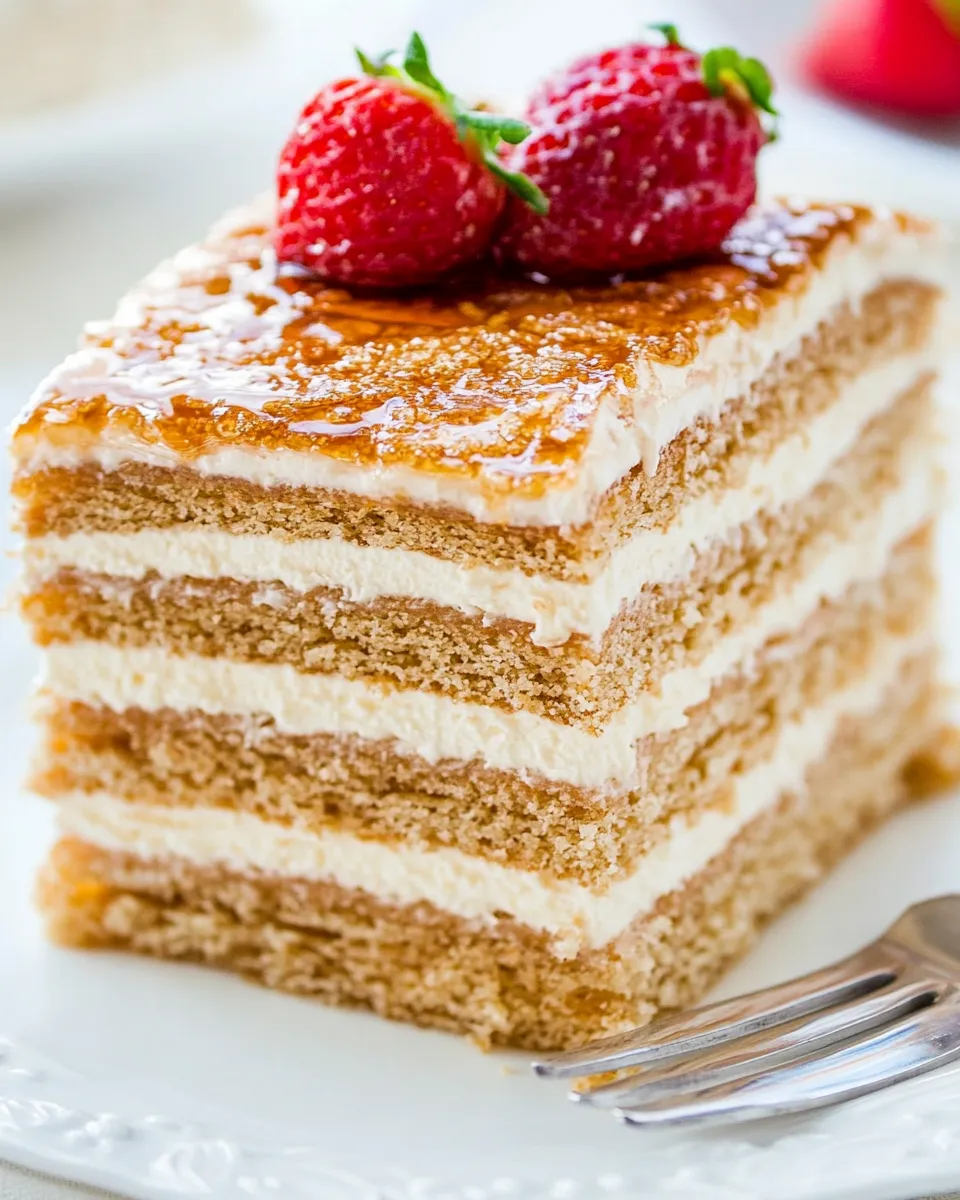
- Texture contrast: The thin, slightly crisp edges of the layers give way to a tender interior once the cake rests overnight. People notice that contrast immediately.
- Balanced sweetness: Honey and powdered sugar bring sweetness, but the large amount of sour cream keeps the frosting pleasantly tangy—so it never overwhelms.
- Looks impressive: Eight paper-thin layers stacked neatly and covered with crumbs look like a bakery cake, but you made it at home.
- Make-ahead magic: It improves after chilling, which makes it ideal for parties—bake ahead, assemble, and refrigerate.
Smart Substitutions
- If you don’t have honey, you can’t truly replicate Medovik, but a light maple syrup will add a similar depth (note: flavor differs noticeably).
- For a lower-fat frosting, use reduced-fat sour cream—but keep in mind the frosting will be looser and may need more chilling time to set.
- If you avoid eggs, this recipe isn’t easily veganized without changing structure—eggs are integral to the dough’s texture.
- Swap all-purpose flour for a 1:1 pastry flour blend for slightly more tender layers, but measure carefully—too soft a flour can make rolling harder.
Kitchen Gear Checklist
- Medium saucepan (for melting sugar, honey, and butter).
- Rolling pin and well-floured surface (essential for thin, even layers).
- Two baking sheets and plenty of parchment paper.
- 9″ plate or 9″ springform base and a pizza cutter for trimming perfect circles.
- Wire rack for cooling layers.
- Mixing bowls and an electric mixer or whisk (for whipping cream and mixing frosting).
- Food processor or heavy-duty plastic bag and rolling pin for crushing scraps.
- Spatula for folding and spreading frosting.
What Not to Do
- Don’t overheat the honey mixture. Medium–low heat is key. Scorching gives a bitter taste and ruins the smoothness.
- Don’t add eggs to a hot pan without tempering. The instructions say to remove from heat and add eggs slowly while whisking—do that.
- Don’t roll the discs too thick. You want ~1/8″ thickness; thicker layers take longer to bake and change the cake’s texture.
- Don’t skip chilling. The cake needs overnight refrigeration to soften and meld flavors. Serve only after it has rested.
- Don’t throw away scraps—bake and crush them. They become the rustic crumb finish that gives Medovik its signature look.
Season-by-Season Upgrades
- Spring: Add thinly sliced strawberries between a couple of layers or arrange them on top for a bright, fresh note.
- Summer: Mix a handful of lightly macerated berries into the frosting layers for a fruity twist—make sure to drain excess liquid first.
- Autumn: Stir a pinch of cinnamon or finely grated orange zest into the dough scraps before baking to add warmth to the crumb topping.
- Winter: Swap some or all of the strawberries for poached pears or a layer of caramelized apples between two thin layers—pairing well with honey.
Method to the Madness
Understanding why each step matters makes this cake easier and faster in practice.
- Warm dough rolls out thinly. You divide and roll while warm because the honey-butter-sugar mix firms up as it cools. If the dough stiffens, a few seconds in a low oven or wrap and let it come back to room temp makes rolling possible again.
- Baking two layers at a time keeps the process quick and consistent. These layers bake in just 4–5 minutes; watch the edges and tops for the first golden cues.
- The frosting uses whipped cream folded into sweetened sour cream to lighten the density and add air. This keeps the cake from feeling heavy while providing enough moisture for the layers to soften.
- Crushed scraps serve a practical and aesthetic role: they disguise any imperfect edges and add texture. Bake them until golden, then crush finely for an even coating.
Leftovers & Meal Prep
- Storage: Keep the cake refrigerated, covered, for up to 4 days. It keeps well because the frosting is primarily sour cream.
- Freezing: You can freeze individual slices tightly wrapped for up to one month. Thaw in the refrigerator overnight before serving.
- Make-ahead plan: Bake the layers and the crumbs a day in advance. Prepare the frosting the next day, assemble, and chill overnight. This splits the work into manageable steps.
8-Layer Honey Cake (Medovik) Q&A
- Q: Can I make fewer layers? A: Yes—scale the dough into fewer pieces, but keep them thin. The final balance of cake to frosting shifts if you change the layer count.
- Q: My frosting seems thin—what now? A: Chill it longer. If it’s still loose, whip a bit more heavy cream to stiff peaks and fold gently in small additions.
- Q: Layers are tearing when I transfer them—help. A: Trim with a plate and pizza cutter while they’re still slightly warm and flexible. Use the parchment to move them; lift by the paper, not the layer itself.
- Q: Can I use a stand mixer for the dough? A: The dough is best folded and finished by hand to avoid overworking. You can mix initial ingredients in a mixer but finish folding the flour by hand.
Next Steps
Make this cake once exactly as written. You’ll learn rolling and trimming by doing. After that, experiment: add citrus zest, layer thin jam, or try a sprinkle of toasted nuts in the crumbs. Serve slices chilled, with coffee or strong tea. Invite someone over. It’s the kind of cake that appreciates company and time.
8-Layer Honey Cake Recipe (Medovik)
Ingredients
Equipment
Method
- Preheat the oven to 350°F (175°C). Line 2 baking sheets with parchment paper and have a 9" plate or springform base and a rolling pin ready.
- In a medium saucepan over medium–low heat, combine 3/4 cup granulated sugar, 4 Tbsp (1/4 cup) honey, and 2 Tbsp unsalted butter. Heat, whisking occasionally, until the sugar is fully melted and the mixture is smooth (about 5–7 minutes). Keep the heat at medium–low to avoid scorching.
- Remove the pan from the heat. While whisking constantly, add the 3 beaten large eggs in a slow, steady stream until fully incorporated (this prevents the eggs from scrambling).
- Whisk in 1 tsp baking soda until no lumps remain.
- Using a spatula, fold in 3 cups all-purpose flour, adding it in 1/2-cup increments. Continue folding until the dough reaches a firm, clay-like consistency that does not stick to your hands.
- Divide the dough into 8 equal pieces. Work while the dough is still warm—these pieces roll out more easily when warm.
- On a well-floured surface, roll one piece at a time into a thin 9" circle about 1/8" thick. Dust the top with a little flour if needed and use the 9" plate to trim a perfect circle with a pizza cutter. Transfer each trimmed circle (on the parchment) to a baking sheet. Keep the scraps for later.
- Bake two cake layers at a time at 350°F for 4–5 minutes, or until the edges and surface turn lightly golden. Remove from the oven and transfer the baked layers to a wire rack to cool completely before stacking. Repeat until all 8 layers are baked and cooled.
- Spread the reserved dough scraps evenly on a sheet of parchment (reusing a baking sheet). Bake at 350°F until the scraps are firm and golden—begin checking at 4–5 minutes. Let the baked scraps cool completely, then crush them to fine crumbs with a rolling pin or pulse them in a food processor.
- Make the frosting: beat 1 cup heavy whipping cream on high until fluffy and stiff peaks form (about 1–2 minutes). In a separate bowl, whisk together 32 oz sour cream and 2 cups powdered sugar until smooth.
- Fold the whipped heavy cream into the sour cream–powdered sugar mixture gently until combined. Refrigerate the frosting until you are ready to assemble.
- To assemble: place one cooled cake layer on your serving plate. Spread about 1/3 cup of the frosting evenly over the layer. Repeat with the remaining layers, using about 1/3 cup per layer, and press each layer down gently as you stack to remove air gaps.
- Use the remaining frosting to cover the top and sides of the stacked cake. Press the cooled crumbs onto the top and sides to coat the cake.
- If using the optional 1/2 lb strawberries, thinly slice them and either layer a few slices between layers while assembling or arrange them on top as decoration.
- Cover the cake with plastic wrap and refrigerate overnight. Chilling allows the layers to absorb the cream and the cake to soften. Serve chilled.
Notes
Tips for Success: Roll out the next layers while the first ones are in the oven and total combined baking time shouldn't take more than 25-ish minutes. Some of mine bubbled up a little on top which is fine since after it's frosted, it won't make a difference. I deflated any real whopping bubbles after they came out of the oven. Oh and I re-used my parchment paper (because I'm frugal that way).
If you don't have a baking sheet large enough to place the parchment paper on, just bake directly on the rack (that's what I did!)