Pickled Chilies
If you’re a fan of spice, then pickled chilies are about to become your new favorite condiment. Bright, tangy, and just the right amount of heat, these vibrant little bites can elevate any dish from ordinary to extraordinary. Perfect for topping tacos, stirring into stir-fries, or even enjoying straight from the jar, pickled chilies are versatile and easy to make at home. With just a few simple ingredients and minimal effort, you can enjoy the bold flavors of pickled chilies anytime you crave them.
Why It’s Crowd-Pleasing
Pickled chilies are not just about heat; they bring a delightful crunch and a burst of flavor that can complement a wide variety of dishes. Their tangy profile cuts through richness, making them a perfect accompaniment to fatty meats or creamy dishes. Whether served at a barbecue, added to a taco night spread, or enjoyed as a zesty garnish on salads, they are sure to please a crowd. Plus, they add a pop of color to your plate, making every meal just a little more exciting.
What’s in the Bowl
To create your own batch of pickled chilies, here’s what you’ll need:
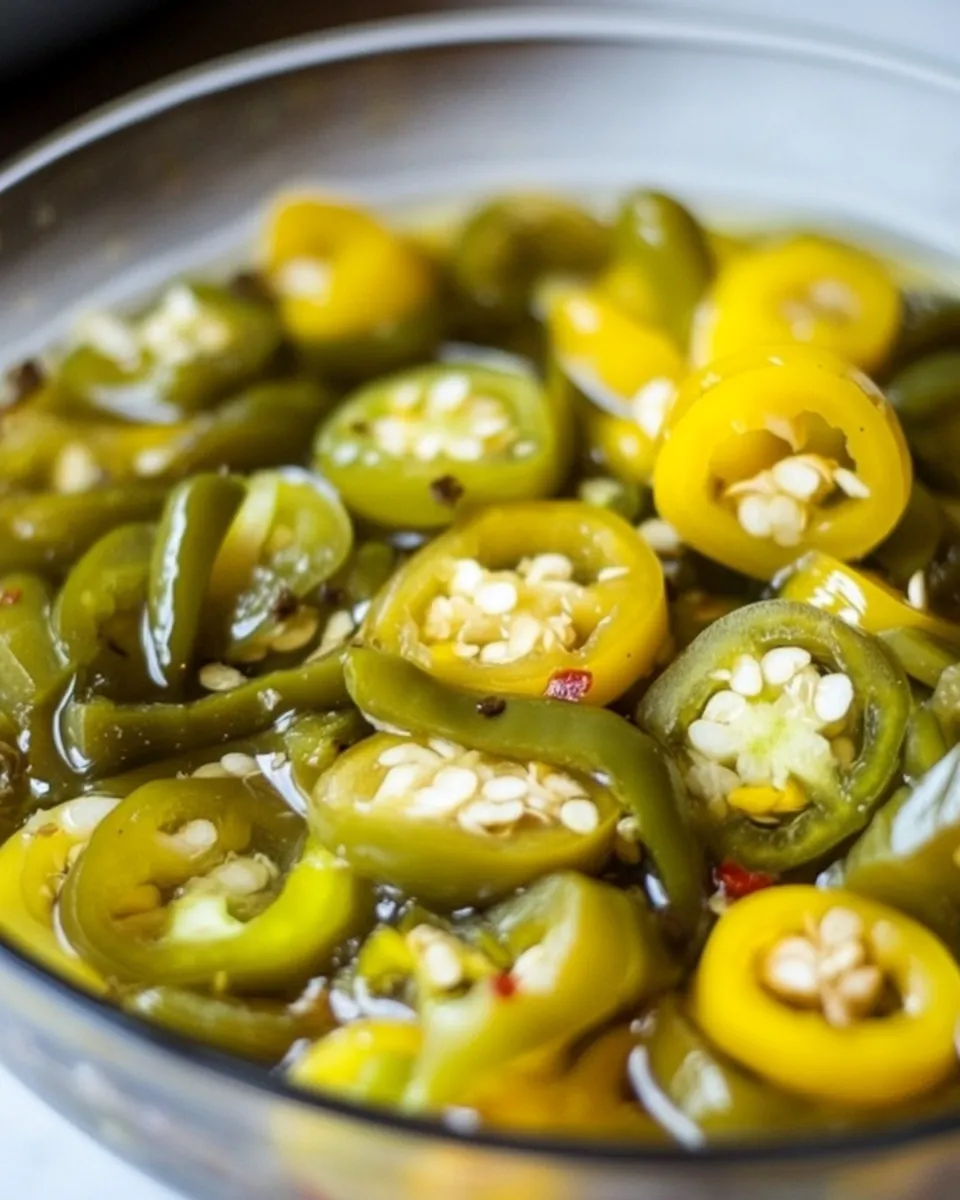
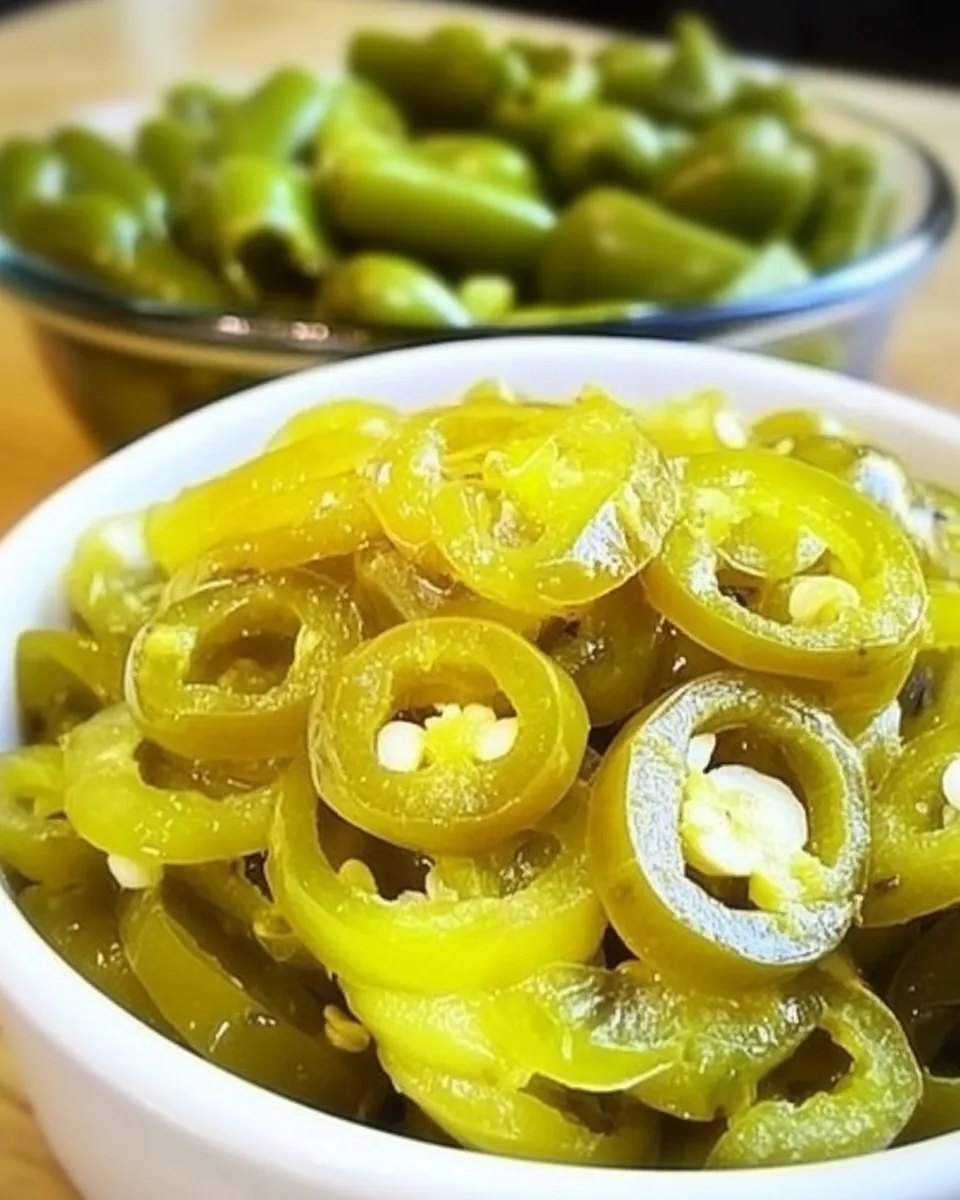
- 4 oz (125g) green chilies – These should be sliced into pieces, with the seeds discarded for a milder flavor.
- 1 cup Chinese rice vinegar – This vinegar provides a gentle, slightly sweet tang that pairs beautifully with the chilies.
- 1 teaspoon salt – Essential for flavor and preservation.
- 1/2 teaspoon sugar – This balances the tanginess of the vinegar.
- 1 cup boiled water – This helps to dissolve the sugar and salt, ensuring a well-mixed brine.
Tools & Equipment Needed
Before you start pickling, gather these tools:
- Cutting board and knife – For slicing your chilies.
- Measuring cups and spoons – To accurately measure your ingredients.
- Glass jar with a lid – Choose a clean jar to store your pickles; make sure it’s airtight.
- Small saucepan – For boiling the water and mixing the brine.
Pickled Chilies in Steps
Step 1: Prepare the Chilies
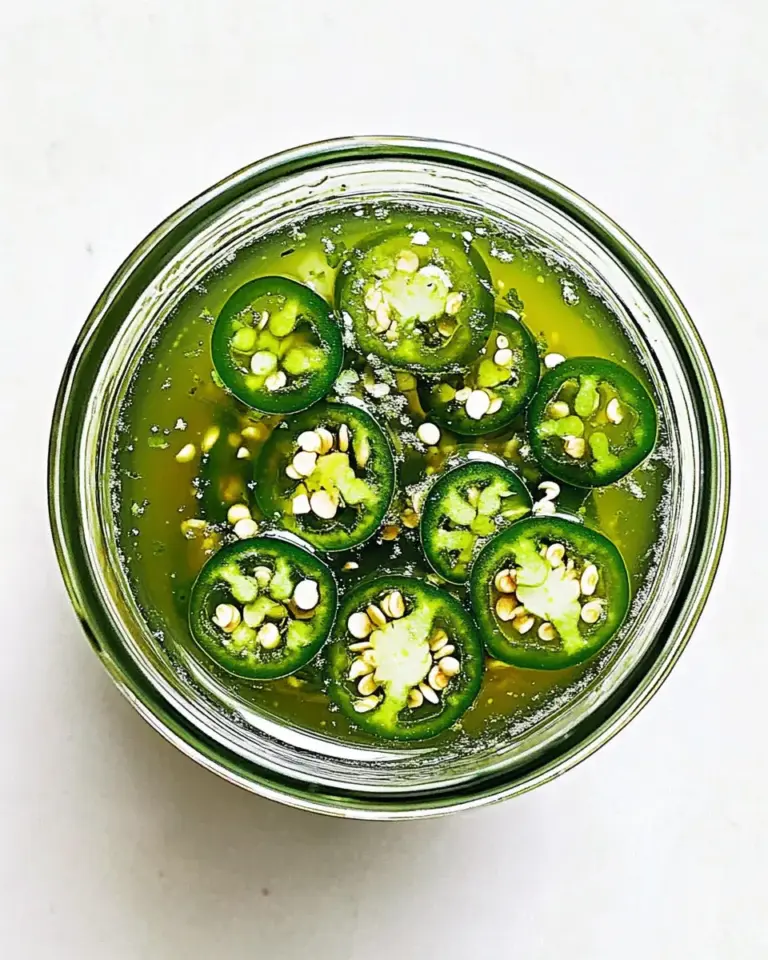
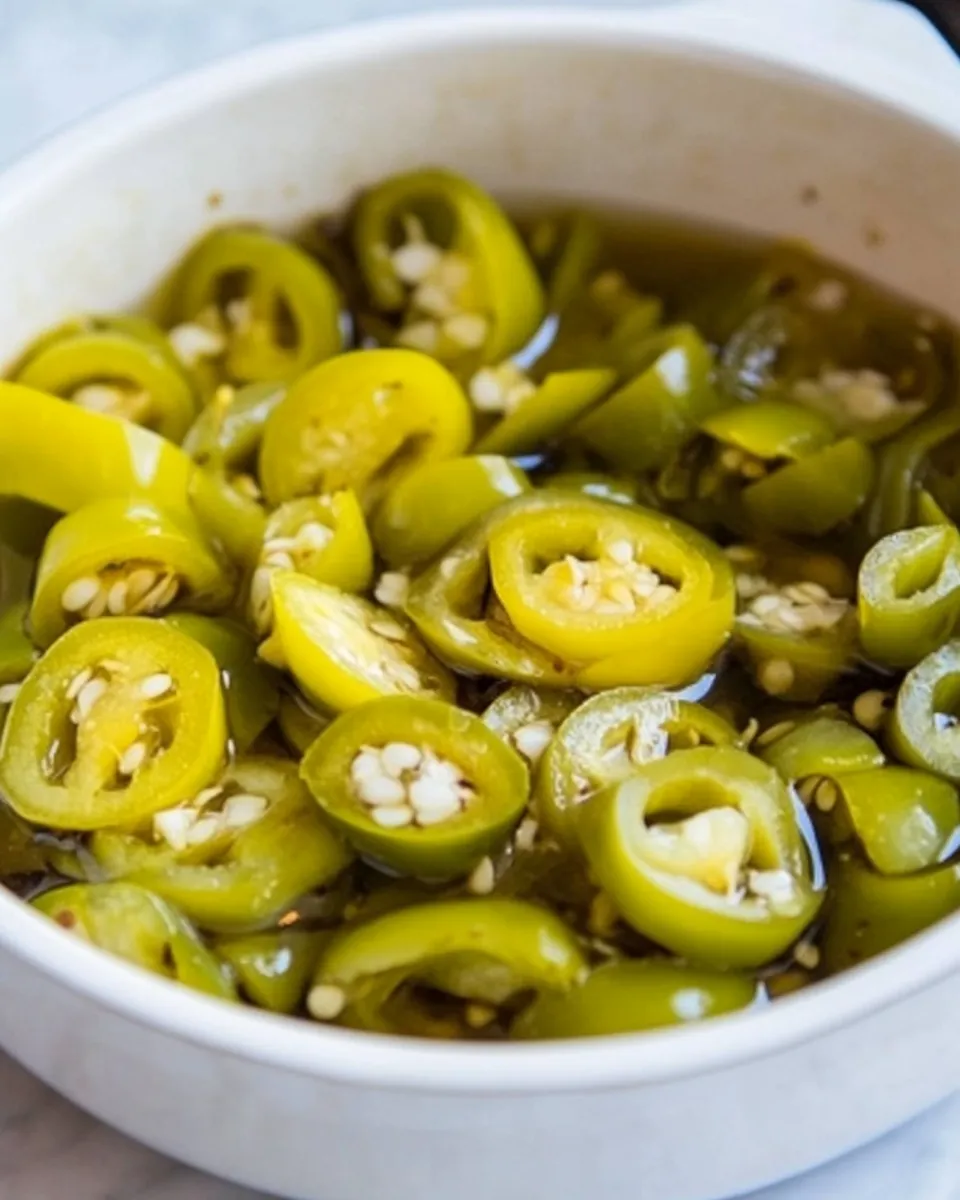
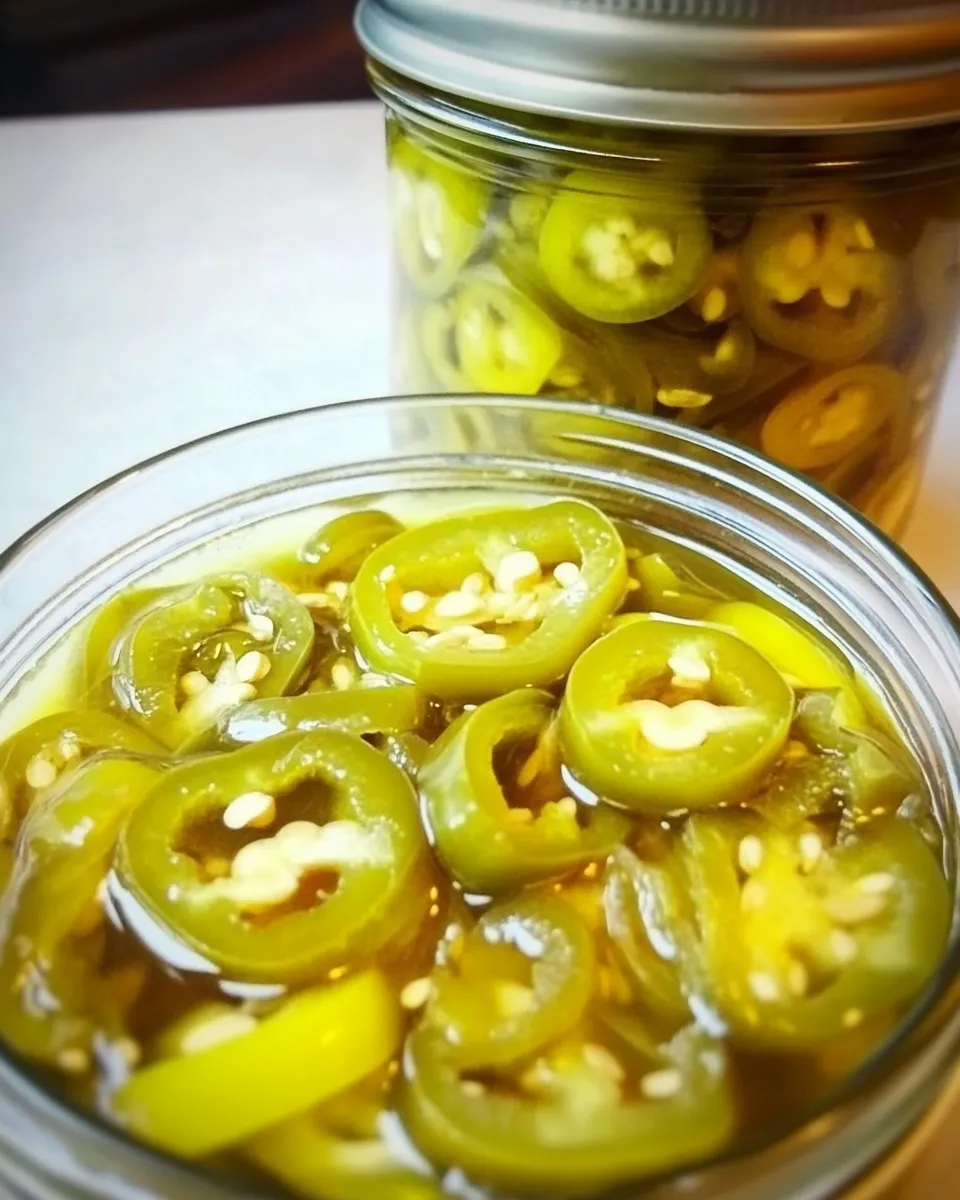
Start by washing the green chilies thoroughly. Using a sharp knife, slice them into pieces while discarding the seeds to control the heat level. Place the sliced chilies into your clean glass jar.
Step 2: Create the Brine
In a small saucepan, combine the Chinese rice vinegar, salt, sugar, and boiled water. Stir the mixture until the salt and sugar dissolve completely. This brine will infuse your chilies with flavor.
Step 3: Pour the Brine
Carefully pour the hot brine over the sliced chilies in the jar, ensuring that they are completely submerged. You may want to tap the jar gently to release any air bubbles trapped among the chilies.
Step 4: Seal and Cool
Seal the jar tightly with the lid and allow it to cool to room temperature. Once cooled, place the jar in the refrigerator.
Step 5: Wait for the Flavor
For the best flavor, let the pickled chilies sit in the refrigerator for at least 24 hours before using. This allows the chilies to absorb the tangy goodness of the brine.
Ingredient Flex Options
Feel free to experiment with your pickled chilies by trying these variations:
- Use different types of vinegar, such as apple cider vinegar or white wine vinegar, for a unique flavor twist.
- Add garlic cloves or slices of ginger to the brine for an additional layer of flavor.
- Mix in spices like mustard seeds or coriander for a more complex taste.
- Incorporate other vegetables, such as sliced carrots or radishes, for a colorful medley.
Insider Tips
- Make sure to use fresh, firm chilies for the best texture and flavor.
- If you prefer your chilies spicier, leave a few seeds in when slicing.
- For a milder version, opt for sweeter varieties of chilies, such as banana peppers.
- Store your pickled chilies in the refrigerator, where they will keep for about a month.
Keep It Fresh: Storage Guide
Once you’ve made your pickled chilies, proper storage is key to maintaining their freshness:
- Keep the jar tightly sealed to prevent air from getting in, which can lead to spoilage.
- Store in the refrigerator at all times; do not leave out at room temperature.
- Always use a clean utensil to remove chilies from the jar to avoid contamination.
Common Questions
How long do pickled chilies last?
When stored in the refrigerator, pickled chilies can last for about one month. However, they are usually best enjoyed within the first two weeks for optimal flavor and crunch.
Can I use other types of chilies?
Absolutely! Feel free to use any type of chili you prefer, such as jalapeños, serranos, or even habaneros for a spicier kick. Just keep in mind that different chilies will have varying levels of heat and flavor.
Do I need to sterilize the jar?
While it’s not strictly necessary for refrigerator pickles, sterilizing the jar can help prolong freshness. Simply wash the jar in hot, soapy water, or run it through the dishwasher before use.
Can I can these pickled chilies for long-term storage?
This quick pickling method is designed for refrigerator storage and is not suitable for long-term canning. If you wish to can them, you’ll need to follow a specific canning process to ensure safety.
Keep Cooking
If you enjoyed making pickled chilies, here are some other recipes to try:
- Spicy Taco Salad – A vibrant dish that pairs perfectly with your pickled chilies.
- Sweet and Sour Stir-Fry – Add a spoonful of pickled chilies for a zesty kick.
- Chili Garlic Sauce – A homemade condiment that can be made with your pickled chilies.
- Pork Belly Tacos – Top them off with your delicious pickled chilies for an unforgettable meal.
Ready, Set, Cook
Now that you have all the tools, tips, and tricks for creating your own pickled chilies, it’s time to get cooking! With just a handful of ingredients and a little bit of patience, you’ll have a jar of flavor-packed chilies ready to elevate your meals. Whether you’re looking to add a kick to your favorite dish or simply want to enjoy a bold snack, these pickled chilies are sure to impress.
Pickled chilies are a delicious addition to any kitchen. They offer a balance of heat and acidity that can brighten up your meals in an instant. As you experiment with flavors, you’ll find a combination that’s uniquely yours. So gather your ingredients, roll up your sleeves, and dive into the delightful world of pickling. You’ll wonder how you ever lived without this zesty condiment!
Pickled Chilies
Ingredients
Equipment
Method
- Wash the green chilies thoroughly, slice them, and discard the seeds. Place them in a clean glass jar.
- In a small saucepan, combine the Chinese rice vinegar, salt, sugar, and boiled water. Stir until dissolved.
- Pour the hot brine over the sliced chilies, ensuring they are submerged. Tap the jar gently to release air bubbles.
- Seal the jar tightly and let it cool to room temperature. Then, refrigerate.
- For the best flavor, let the chilies sit in the refrigerator for at least 24 hours before using.
Notes
- Use fresh, firm chilies for the best flavor.
- For spicier chilies, leave some seeds in.
- Store in the refrigerator for up to one month.