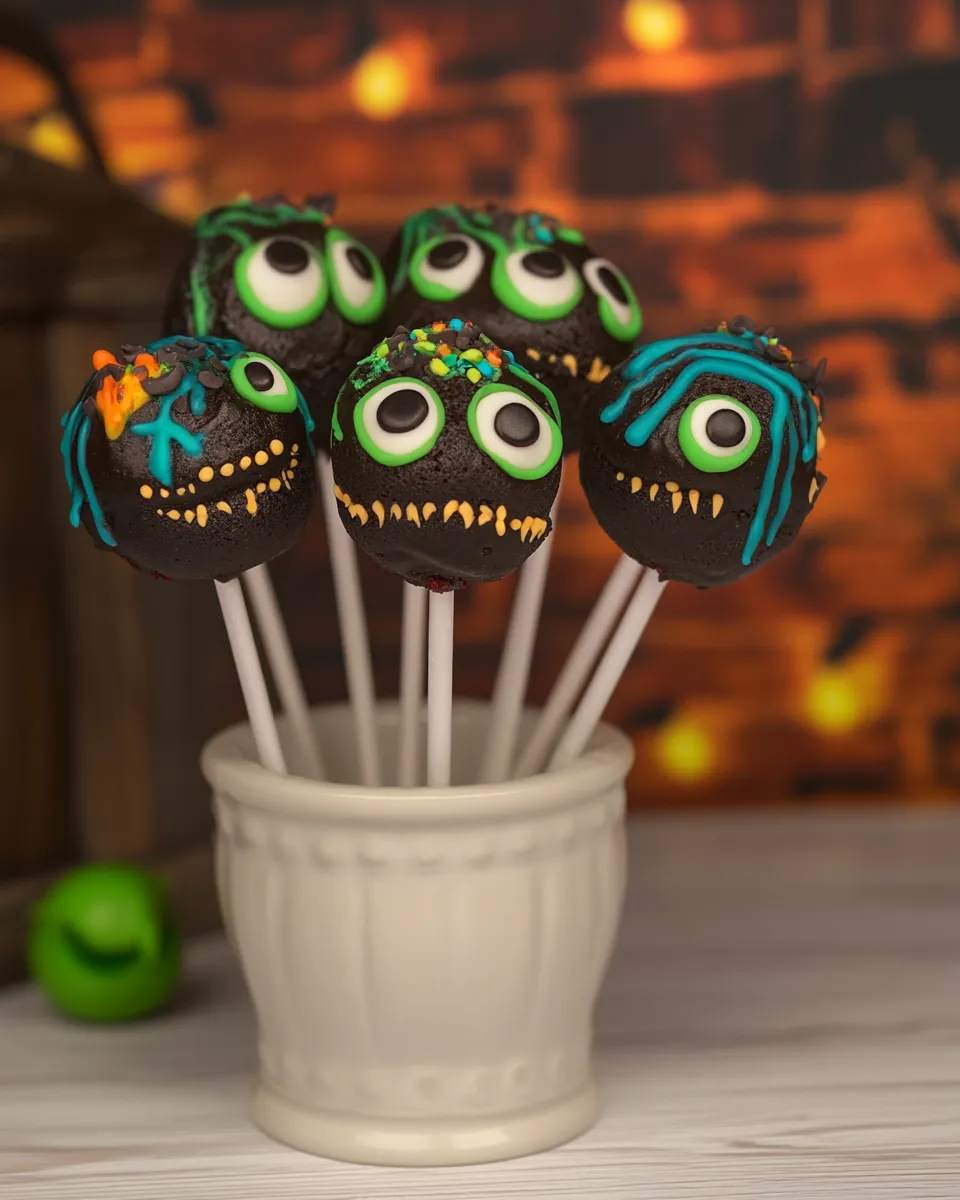
Red Velvet Monster Cake Pops
If you’re looking to create a dessert that’s not only delicious but also a feast for the eyes, look no further than these Red Velvet Monster Cake Pops! These adorable treats combine the rich flavors of red velvet cake with a fun, monster-themed twist. Perfect for parties, celebrations, or simply as a delightful afternoon snack, these cake pops will impress everyone with their vibrant color and delicious taste. Let’s dive into the world of Red Velvet Monster Cake Pops and discover why they’re sure to be your new favorite treat!
Why This Red Velvet Monster Cake Pops Stands Out

These Red Velvet Monster Cake Pops stand out for several reasons. First, they are visually striking with their vibrant red hue and playful monster decorations. Secondly, the combination of moist red velvet cake and creamy frosting creates an irresistible flavor profile that is hard to resist. Lastly, these cake pops are an excellent way to enjoy cake in a fun, portable form. Whether you’re serving them at a birthday party or enjoying them at home, they are sure to bring smiles to everyone’s faces.
What’s in the Bowl
To make these delicious Red Velvet Monster Cake Pops, you’ll need the following ingredients:
- 1 cup unsalted butter, softened
- 1 cup caster sugar
- 2 large eggs
- 2 tablespoons cooking oil
- 1 teaspoon unsweetened cocoa powder
- 2 tablespoons red food coloring liquid
- 1 teaspoon pure vanilla extract
- 2 teaspoons white vinegar
- 1 cup all-purpose flour
- 1 teaspoon baking soda
- 1 teaspoon salt
- 1 cup buttermilk
- 1 cup unsalted butter, softened (for frosting)
- 2 cups powdered sugar
- 1 teaspoon pure vanilla extract (for frosting)
- 5 tablespoons heavy whipping cream
- 1 pinch salt
- 2 cups melted chocolate (milk, dark, or white, your choice)
- Food coloring (for decoration)
- White and black fondant (for monster features)
- Sprinkles, crumbs, or drizzle extra chocolate (for garnish)
Kitchen Gear Checklist
Before you start baking, make sure you have the following kitchen gear on hand:
- Mixing bowls: For combining ingredients.
- Electric mixer: To cream the butter and sugar together.
- Spatula: For folding ingredients and scraping the sides of the bowl.
- Baking pan: For baking the cake.
- Cake pop sticks: Essential for creating the cake pops.
- Melting pot or microwave-safe bowl: For melting chocolate.
- Piping bags: For decorating the pops with chocolate and fondant.
How to Prepare Red Velvet Monster Cake Pops
Creating these delightful Red Velvet Monster Cake Pops is a simple yet rewarding process. Follow these steps to bring your monster creations to life!
Step 1: Bake the Red Velvet Cake
Preheat your oven to 350°F (175°C). Grease and flour a baking pan. In a large mixing bowl, cream together the softened unsalted butter and caster sugar until light and fluffy. Add in the eggs, cooking oil, cocoa powder, red food coloring, vanilla extract, and vinegar, mixing until well combined.
Step 2: Combine Dry Ingredients
In another bowl, whisk together the all-purpose flour, baking soda, and salt. Gradually add the dry mixture to the wet ingredients, alternating with the buttermilk, starting and ending with the flour mixture. Mix until just combined. Pour the batter into the prepared baking pan and smooth the top.
Step 3: Bake and Cool
Bake in the preheated oven for 25-30 minutes, or until a toothpick inserted in the center comes out clean. Let the cake cool in the pan for 10 minutes before transferring it to a wire rack to cool completely.
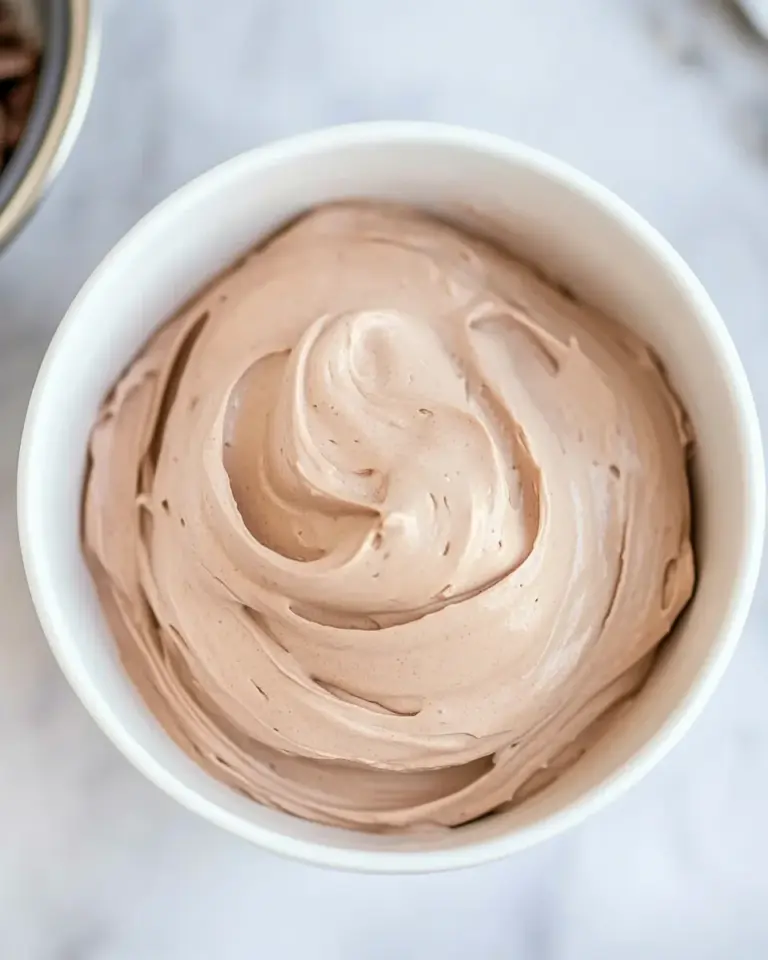
Step 4: Prepare the Frosting
While the cake is cooling, prepare the frosting. In a mixing bowl, beat the softened unsalted butter until creamy. Gradually add the powdered sugar, vanilla extract, heavy whipping cream, and a pinch of salt. Beat until smooth and fluffy.
Step 5: Crumble the Cake
Once the cake has cooled, crumble it into a large mixing bowl using your hands or a fork. Add a generous amount of the prepared frosting to the crumbled cake, mixing until the cake holds together when pressed. You may not need all the frosting, so add it gradually until you reach the desired consistency.
Step 6: Form the Cake Pops
Using your hands, roll the cake mixture into small balls, about the size of a tablespoon. Place the balls on a baking sheet lined with parchment paper. Insert cake pop sticks into each ball, then place the baking sheet in the refrigerator for at least 30 minutes to firm up.
Step 7: Dip the Cake Pops
Melt your choice of chocolate in a microwave-safe bowl or melting pot. Dip each chilled cake pop into the melted chocolate, ensuring they are fully coated. Allow any excess chocolate to drip off, then place the pops back on the parchment-lined baking sheet.
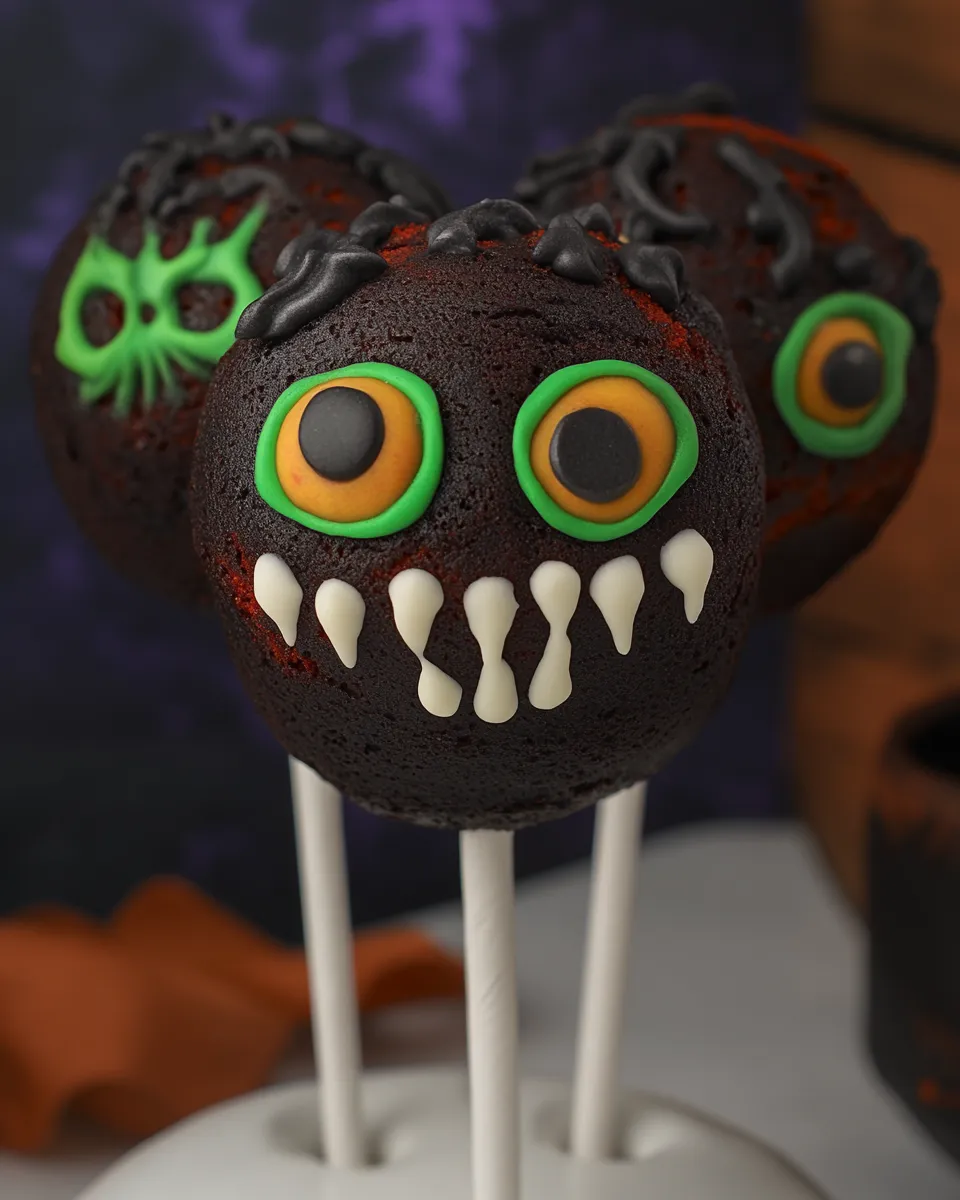
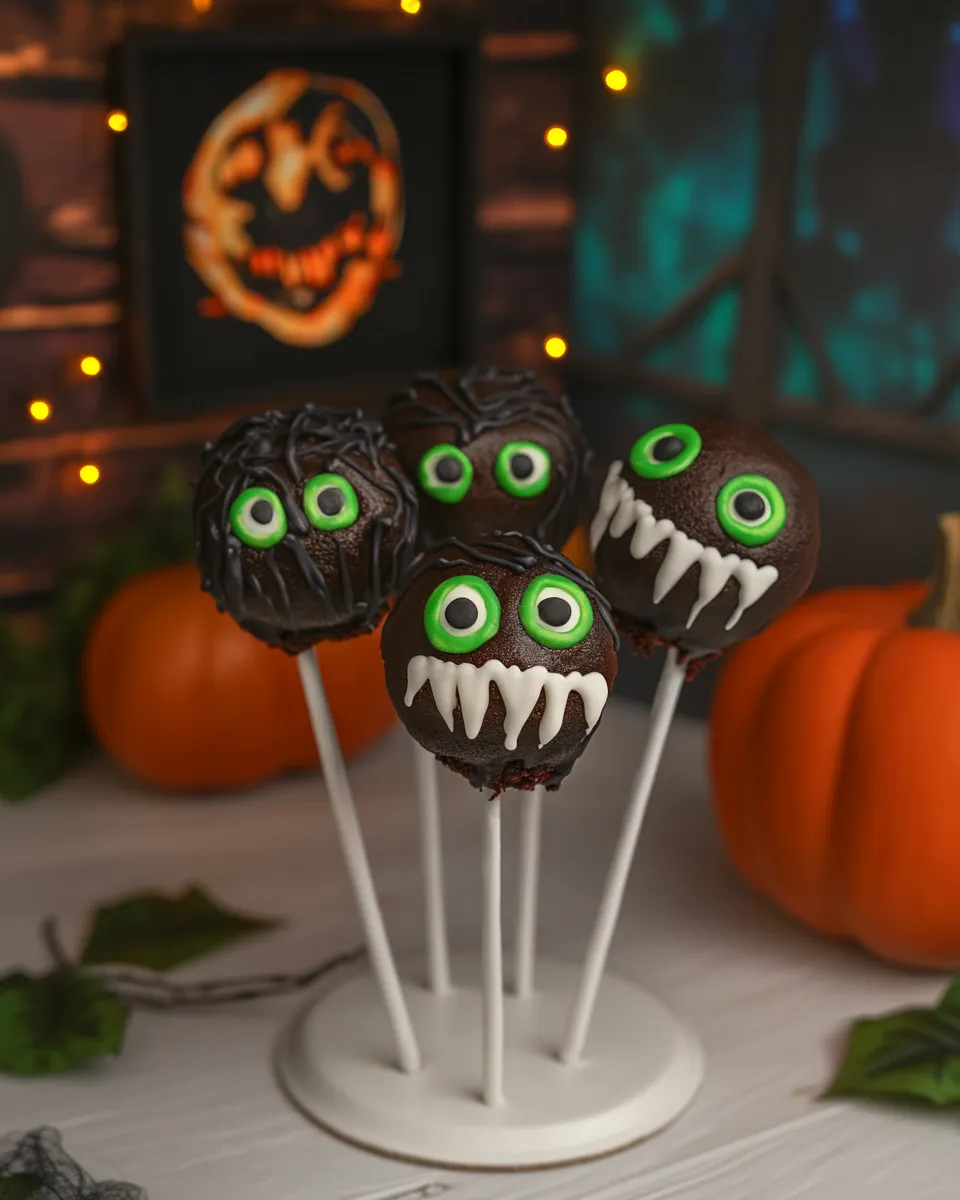
Step 8: Decorate Your Monsters
While the chocolate is still wet, decorate your cake pops with food coloring, fondant features, sprinkles, or drizzle extra melted chocolate on top. Let the decorations set before serving.
Nutrition-Minded Tweaks
If you’d like to make some adjustments to the recipe, consider these nutrition-minded tweaks:
- Replace half of the unsalted butter with unsweetened applesauce for a lower-fat option.
- Use whole wheat flour instead of all-purpose flour for added fiber.
- Substitute the caster sugar with coconut sugar or a sugar alternative to reduce calories.
- Consider using a sugar-free chocolate for dipping to cut down on sugar content.
Cook’s Commentary
- These Red Velvet Monster Cake Pops are versatile! You can customize the decorations based on themes or seasons, making them perfect for any occasion.
- Don’t rush the chilling process; it helps the cake pops hold their shape when dipped in chocolate.
- If you’re short on time, you can use a store-bought red velvet cake mix instead of making the cake from scratch.
- Feel free to experiment with different types of chocolate for coating—each will provide a unique flavor to your pops!
How to Store & Reheat
To store your Red Velvet Monster Cake Pops, place them in an airtight container in the refrigerator for up to one week. If you want to freeze them, wrap each pop individually in plastic wrap and place them in a freezer-safe container. They can be enjoyed directly from the freezer or thawed in the refrigerator. Avoid reheating, as the chocolate coating may not hold up well after being melted.
Helpful Q&A
Can I make these cake pops in advance?
Absolutely! You can prepare the cake pops up to a week in advance. Just store them in the refrigerator or freeze them for longer storage. Just be sure to let them thaw in the fridge before serving.
What is the best way to melt chocolate for dipping?
The best method is to use a double boiler or a microwave. If using a microwave, heat the chocolate in short bursts of 15-20 seconds, stirring in between until smooth.
Can I use a different flavor of cake for these pops?
Yes! While red velvet is traditional, you can use any flavor of cake you prefer, like vanilla, chocolate, or even lemon for a fun twist!
How do I get the chocolate to set properly on the pops?
Make sure the chocolate is not too hot when dipping, and allow the pops to sit at room temperature until the chocolate hardens. You can also place them in the fridge for a few minutes to speed up the process.
Reader Favorites
Make It Tonight
Now that you have all the information you need, it’s time to roll up your sleeves and make these delightful Red Velvet Monster Cake Pops! They’re not just a treat; they’re an experience that will bring joy to your kitchen and smiles to your loved ones. Gather your ingredients, follow the steps, and let your creativity shine as you decorate these fun cake pops. Enjoy the process and, more importantly, enjoy every delicious bite!
Red Velvet Monster Cake Pops
Ingredients
Equipment
Method
- Preheat your oven to 350°F (175°C). Grease and flour a baking pan. In a large mixing bowl, cream together the softened unsalted butter and caster sugar until light and fluffy. Add in the eggs, cooking oil, cocoa powder, red food coloring, vanilla extract, and vinegar, mixing until well combined.
- In another bowl, whisk together the all-purpose flour, baking soda, and salt. Gradually add the dry mixture to the wet ingredients, alternating with the buttermilk, starting and ending with the flour mixture. Mix until just combined. Pour the batter into the prepared baking pan and smooth the top.
- Bake in the preheated oven for 25-30 minutes, or until a toothpick inserted in the center comes out clean. Let the cake cool in the pan for 10 minutes before transferring it to a wire rack to cool completely.
- While the cake is cooling, prepare the frosting. In a mixing bowl, beat the softened unsalted butter until creamy. Gradually add the powdered sugar, vanilla extract, heavy whipping cream, and a pinch of salt. Beat until smooth and fluffy.
- Once the cake has cooled, crumble it into a large mixing bowl using your hands or a fork. Add a generous amount of the prepared frosting to the crumbled cake, mixing until the cake holds together when pressed. You may not need all the frosting, so add it gradually until you reach the desired consistency.
- Using your hands, roll the cake mixture into small balls, about the size of a tablespoon. Place the balls on a baking sheet lined with parchment paper. Insert cake pop sticks into each ball, then place the baking sheet in the refrigerator for at least 30 minutes to firm up.
- Melt your choice of chocolate in a microwave-safe bowl or melting pot. Dip each chilled cake pop into the melted chocolate, ensuring they are fully coated. Allow any excess chocolate to drip off, then place the pops back on the parchment-lined baking sheet.
- While the chocolate is still wet, decorate your cake pops with food coloring, fondant features, sprinkles, or drizzle extra melted chocolate on top. Let the decorations set before serving.
Notes
- These cake pops are great for customizing decorations based on themes or seasons.
- Don't rush the chilling process; it helps the cake pops hold their shape when dipped in chocolate.
- If you're short on time, consider using a store-bought red velvet cake mix.