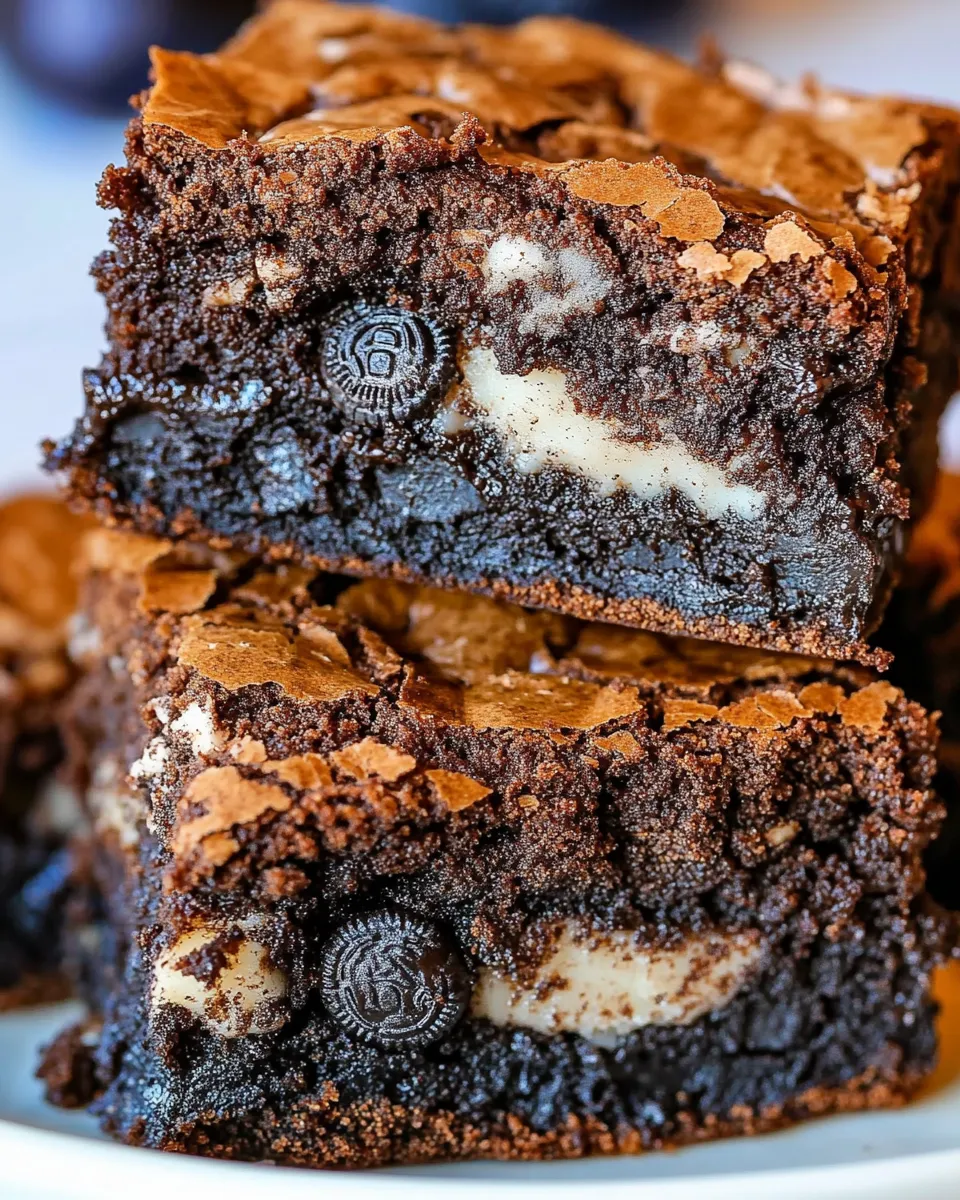
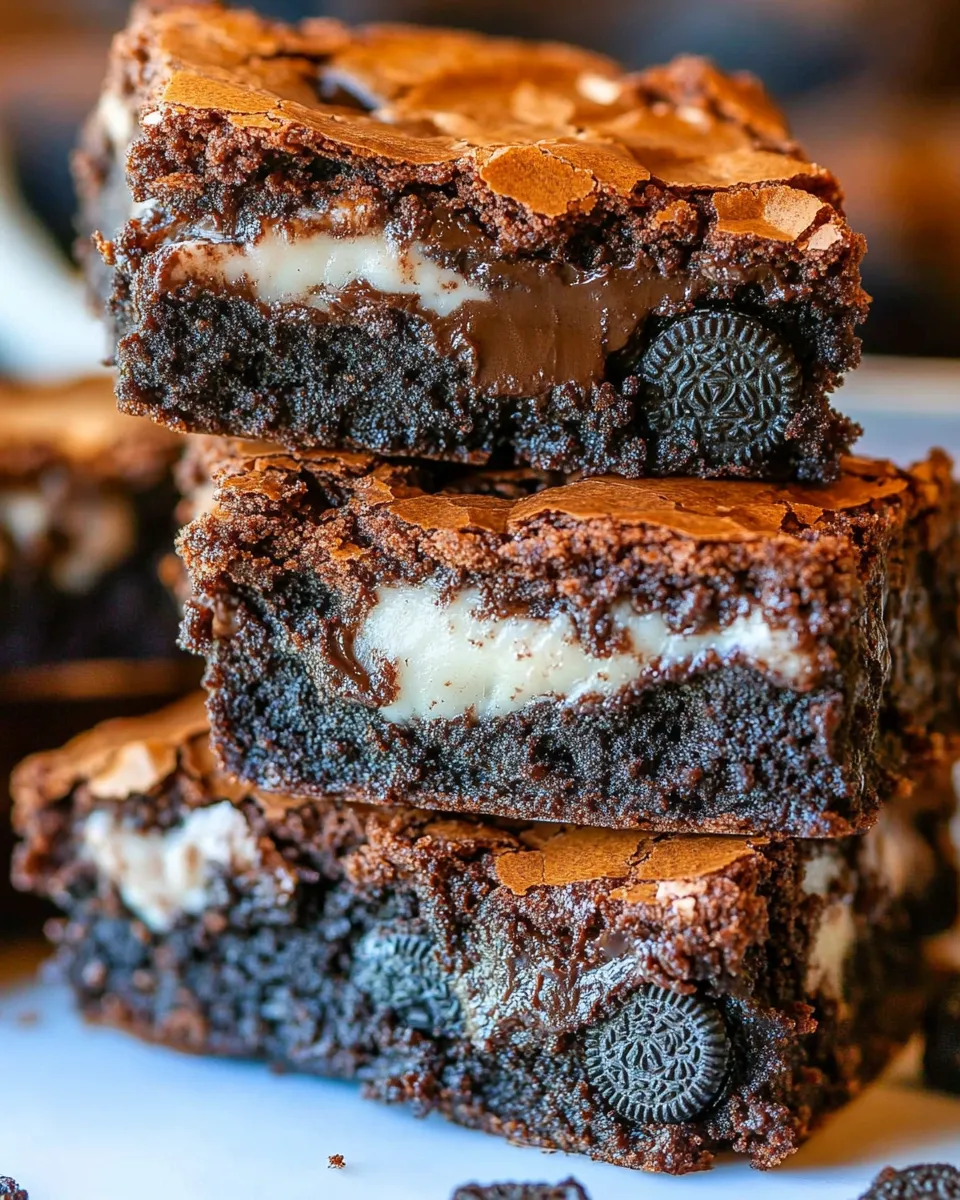
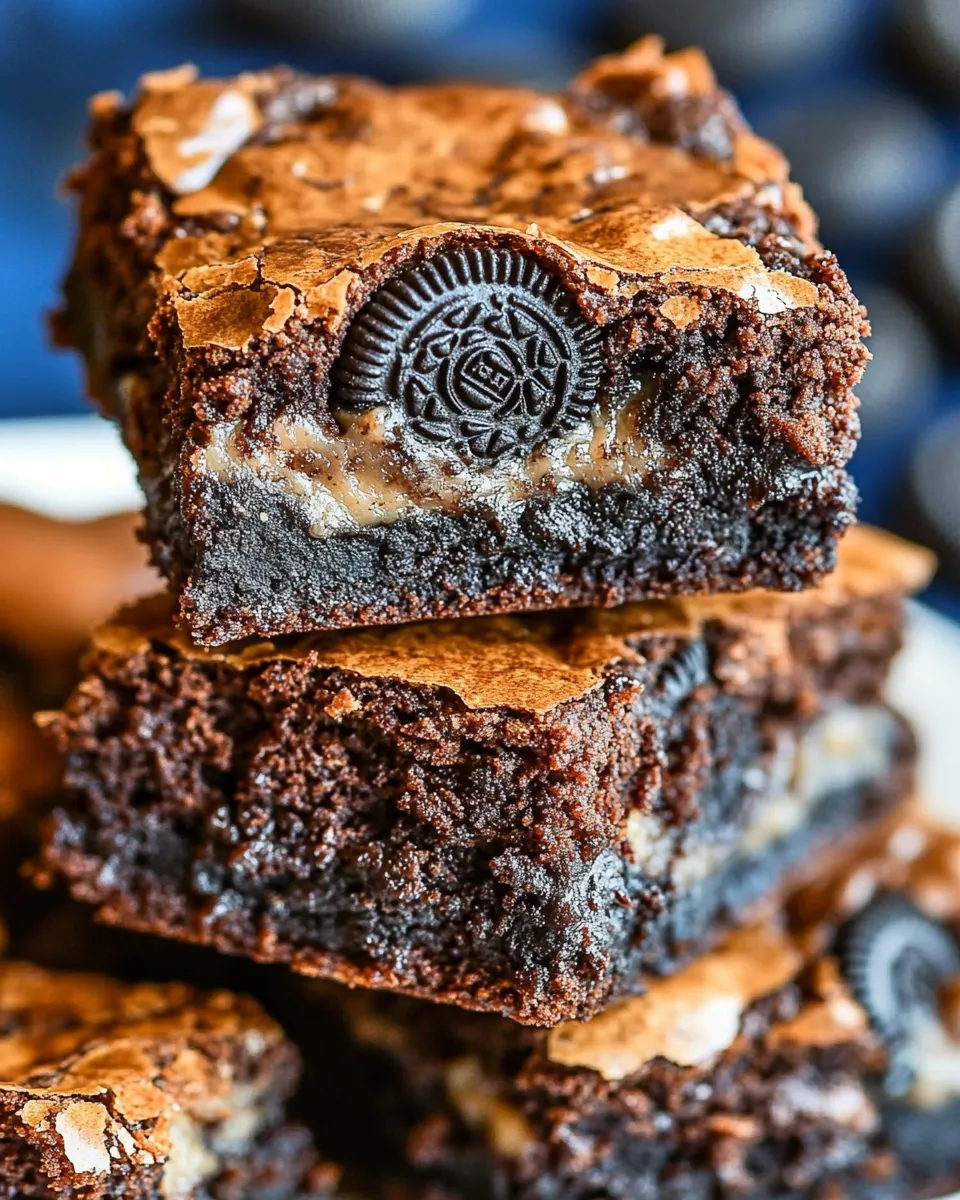
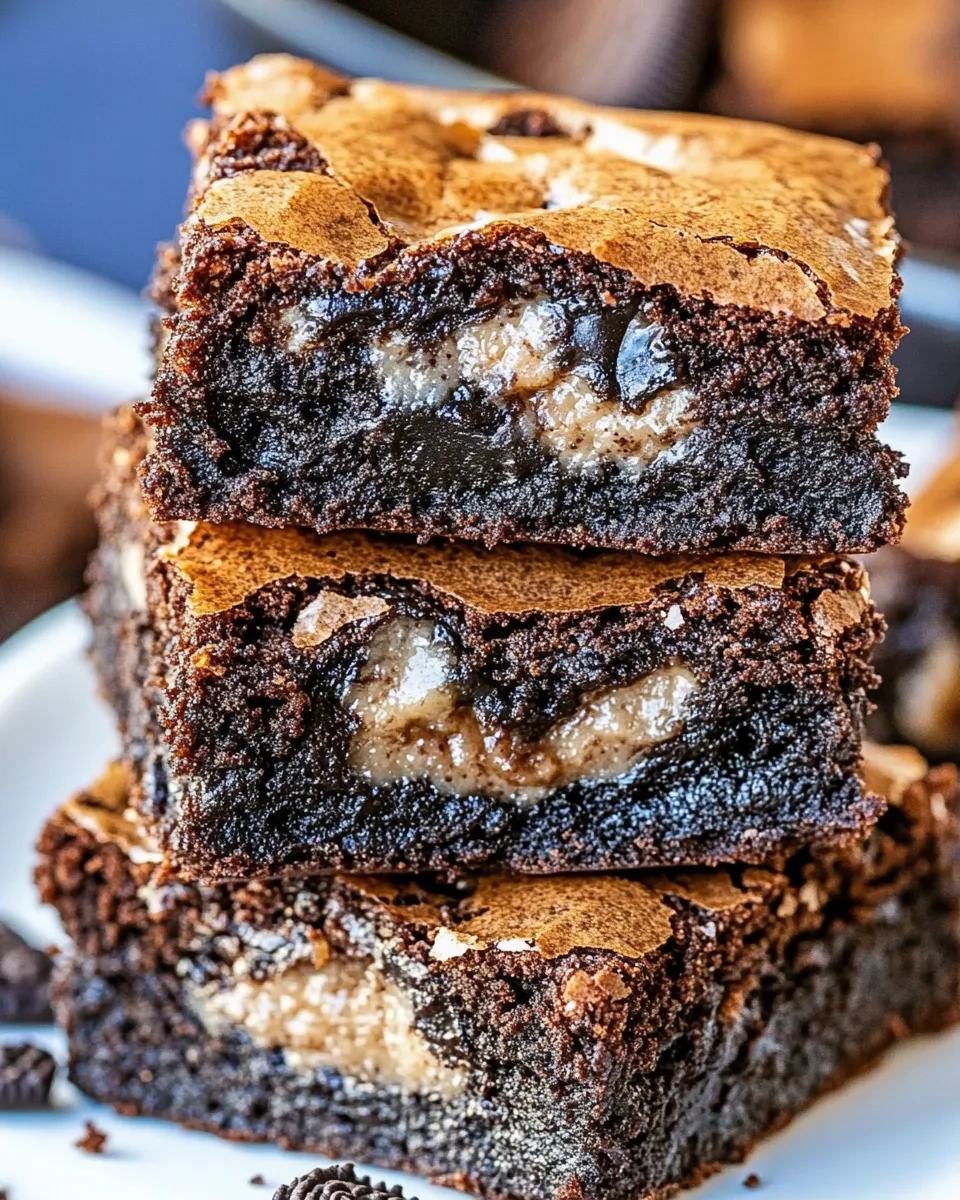
Fudgy Oreo Brownies
If you’re searching for the ultimate treat to satisfy your chocolate cravings, look no further than these Fudgy Oreo Brownies. Rich, decadent, and loaded with your favorite cookies, these brownies are the perfect combination of fudgy chocolate goodness and crunchy Oreos. With every bite, you’ll experience a delightful contrast of textures and flavors that will leave you wanting more. Whether you’re baking for a special occasion or simply treating yourself, this recipe will quickly become a go-to in your baking repertoire.
Why This Recipe Works
These Fudgy Oreo Brownies are a game-changer, and here’s why:
1. **Quality Ingredients**: Using unsweetened baking chocolate and high-quality cocoa powder ensures a deep chocolate flavor that is both rich and satisfying.
2. **Brownie Texture**: The combination of melted butter and eggs creates a fudgy texture that is dense without being overly sweet.
3. **Oreo Surprise**: The addition of Oreo cookies not only enhances the chocolate flavor but also adds a delightful crunch that contrasts beautifully with the smooth brownie base.
Ingredient Checklist
To make these irresistible Fudgy Oreo Brownies, you will need the following ingredients:
- 4 ounces (113g) unsweetened baking chocolate, chopped
- 1 cup (226g) unsalted butter, sliced
- 2 cups (400g) granulated sugar
- 1/2 cup (20g) unsweetened cocoa powder
- 4 large eggs
- 1 teaspoon (5ml) vanilla extract
- 1 teaspoon salt
- 1 1/2 cups (162g) all-purpose flour
- 24 Oreo cookies
Before You Start: Equipment
Before diving into the baking process, gather your equipment to ensure a smooth experience:
- 8×8 inch baking pan – for perfectly-sized brownies.
- Mixing bowls – to combine your ingredients.
- Whisk – for mixing wet ingredients.
- Rubber spatula – to fold in flour without overmixing.
- Double boiler or microwave-safe bowl – for melting chocolate and butter.
- Cooling rack – to cool the brownies evenly.
Fudgy Oreo Brownies Cooking Guide
Follow these steps to create your scrumptious Fudgy Oreo Brownies:
Step 1: Preheat the Oven
Preheat your oven to 350°F (175°C). This ensures that the brownies will bake evenly.
Step 2: Melt the Chocolate and Butter
In a double boiler or microwave-safe bowl, combine the chopped unsweetened baking chocolate and sliced butter. If using a microwave, heat in 30-second intervals, stirring in between until melted and smooth.
Step 3: Mix the Sugar and Cocoa
In a large mixing bowl, combine the granulated sugar and unsweetened cocoa powder. Stir until well blended.
Step 4: Add the Chocolate Mixture
Pour the melted chocolate and butter mixture over the sugar and cocoa. Stir until fully combined.
Step 5: Incorporate Eggs and Vanilla
Add the eggs, one at a time, mixing well after each addition. Then, stir in the vanilla extract until fully incorporated.
Step 6: Add Dry Ingredients
Sprinkle the salt and all-purpose flour over the wet mixture. Gently fold the ingredients using a rubber spatula until just combined. Be careful not to overmix; it’s okay if there are a few flour streaks remaining.
Step 7: Fold in the Oreos
Chop the Oreo cookies into quarters and gently fold them into the brownie batter, allowing for an even distribution throughout.
Step 8: Bake
Pour the brownie batter into a greased 8×8 inch baking pan, spreading it evenly. Bake in the preheated oven for 30-35 minutes or until a toothpick inserted in the center comes out with a few moist crumbs (not wet batter).
Step 9: Cool and Serve
Once baked, remove the brownies from the oven and let them cool in the pan for about 10 minutes. Transfer them to a cooling rack and allow them to cool completely before cutting into squares. Enjoy your Fudgy Oreo Brownies!
Better Choices & Swaps
If you’re looking to make some adjustments to suit your dietary preferences, consider these options:
- Butter Alternatives: Use coconut oil or a plant-based butter for a dairy-free version.
- Gluten-Free Option: Substitute all-purpose flour with a 1:1 gluten-free baking blend.
- Reduced Sugar: Replace half of the granulated sugar with a sugar substitute like monk fruit sweetener.
- Dark Chocolate: For a richer flavor, use dark chocolate instead of unsweetened baking chocolate.
Pro Perspective
For the fudgiest brownies, it’s essential to not overbake them. The toothpick test is your best friend; a few moist crumbs clinging to the toothpick indicate perfect doneness. These brownies are delightful on their own, but for an extra indulgent treat, serve them warm topped with a scoop of vanilla ice cream or a drizzle of chocolate sauce. Trust me, it’s heaven on a plate!
Keep-It-Fresh Plan
To keep your Fudgy Oreo Brownies fresh, store them in an airtight container at room temperature for up to 4 days. For longer storage, wrap them tightly in plastic wrap and place them in the refrigerator for up to a week. You can also freeze the brownies for up to 3 months. Just be sure to thaw them in the refrigerator overnight before enjoying.
Top Questions & Answers
Can I use milk chocolate instead of unsweetened baking chocolate?
Yes, you can use milk chocolate, but keep in mind that it will make the brownies sweeter. Adjust the sugar accordingly if desired.
What can I do if my brownies are too cakey?
If your brownies turn out cakey, it may be due to overmixing or baking them too long. Next time, mix just until combined and keep an eye on the baking time.
Can I add nuts or other mix-ins?
Absolutely! Feel free to fold in some chopped nuts, chocolate chips, or even a swirl of peanut butter for added flavor and texture.
How do I know when my brownies are done baking?
Check for doneness by inserting a toothpick in the center. If it comes out with a few moist crumbs, your brownies are ready. If the toothpick is wet, they need more time.
One Pan, More Ideas
Looking for more delicious recipes to try? Here are some fantastic ideas:
Next Steps
Now that you have the ultimate recipe for Fudgy Oreo Brownies, it’s time to get baking! Gather your ingredients and equipment, and treat yourself to this rich, chocolatey delight. Don’t forget to share your delicious creations on social media and tag your favorite baking friends. Happy baking!
Fudgy Oreo Brownies
Ingredients
Equipment
Method
- Preheat your oven to 350°F (175°C).
- In a double boiler or microwave-safe bowl, combine the chopped unsweetened baking chocolate and sliced butter. Heat until melted and smooth.
- In a large mixing bowl, combine the granulated sugar and unsweetened cocoa powder. Stir until well blended.
- Pour the melted chocolate and butter mixture over the sugar and cocoa. Stir until fully combined.
- Add the eggs, one at a time, mixing well after each addition. Stir in the vanilla extract.
- Sprinkle the salt and all-purpose flour over the wet mixture. Gently fold the ingredients until just combined.
- Chop the Oreo cookies into quarters and gently fold them into the brownie batter.
- Pour the brownie batter into a greased 8x8 inch baking pan and bake for 30-35 minutes.
- Let the brownies cool in the pan for about 10 minutes, then transfer to a cooling rack to cool completely before cutting.
Notes
- For dairy-free brownies, substitute butter with coconut oil or plant-based butter.
- Use a gluten-free baking blend for a gluten-free option.
- Check for doneness with a toothpick; a few moist crumbs indicate perfect brownies.