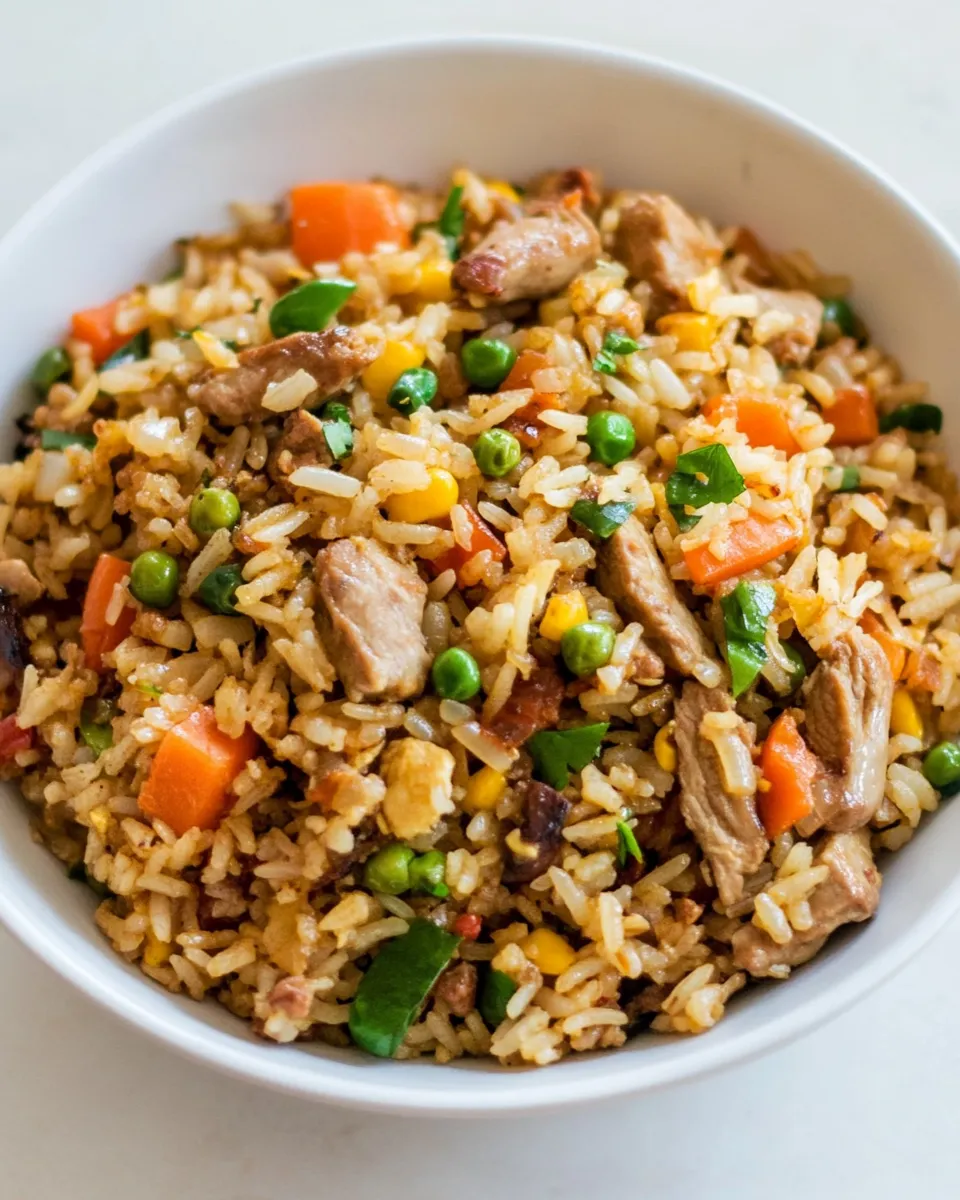
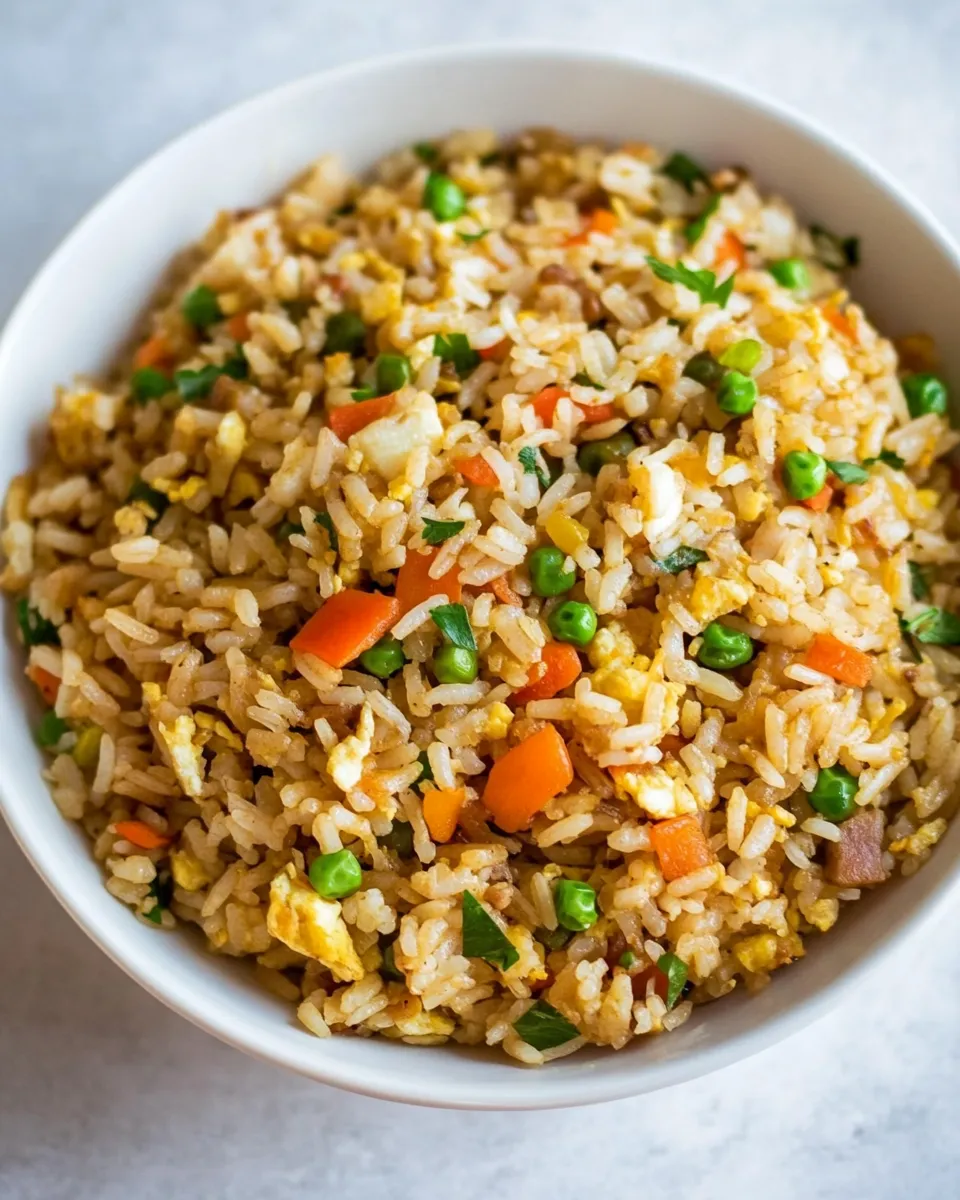
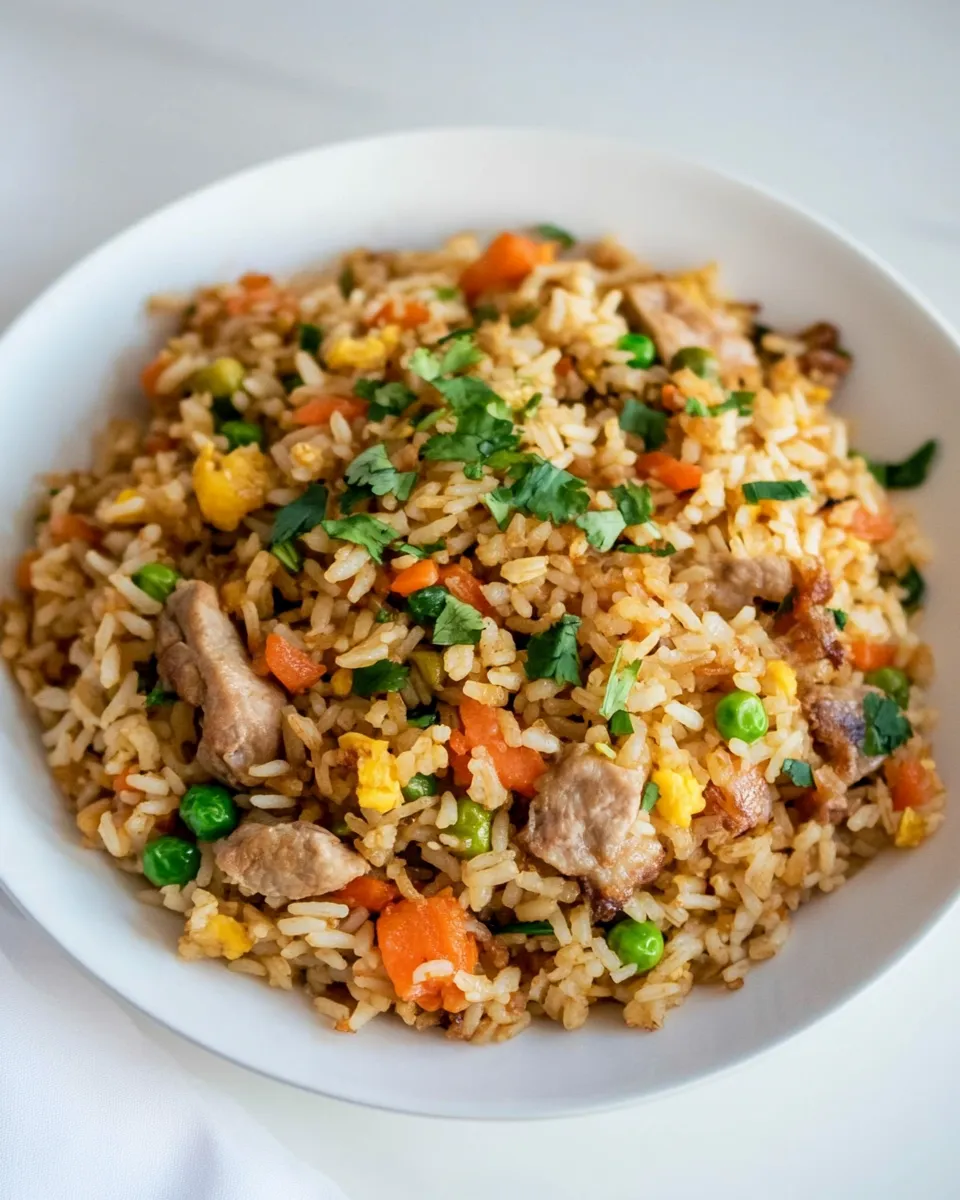
Arroz Chaufa (Peruvian Fried Rice)
I fell in love with arroz chaufa the first time I tasted that salty, smoky, slightly sweet fried rice in a tiny Lima restaurant. It felt like a hug — comfort food with a kick and a story. This version is practical for weekday dinners: quick, forgiving, and built from pantry-friendly ingredients. You’ll find familiar textures — soft chicken, browned hot dog slices (yes, they belong here), bright scallions, and a snappy bell pepper — all tied together with soy sauce and sesame oil.
I write this recipe the way I cook: straightforward and with small trade-offs that keep the flavor without making the process fussy. If you have cold rice, cooked chicken, and two minutes to chop, you can have a bowl of arroz chaufa ready in about twenty minutes from start to finish. I’ll walk you through the exact order to stir-fry, how to handle the eggs, what to watch for at the wok, and how to adjust seasoning at the end.
Follow the steps exactly the first time and taste as you go. Once you’re comfortable, tweak the soy to your salt preference, swap the proteins or add more veg. This post includes a tidy ingredients list, the literal step-by-step instructions I used while testing, substitution ideas, troubleshooting, storage, and little chef’s answers to questions I get most often. Let’s get cooking.
What Goes In
Ingredients
- 2Tbssesame oil — toasted sesame oil gives the dish its nutty aroma and is the hot-fat base for stir-frying.
- 1bunchgreen onion, chopped, (divided into greener and whiter parts) — white parts go early for savory depth; green parts finish the dish with fresh color and bite.
- 1bell pepper, diced — adds sweetness and crunch; dice small so it softens quickly.
- 2hot dogs — classic in many Peruvian takes; they brown quickly and lend smoky, meaty bites.
- 2eggs, beaten — scrambled into the rice for richness and texture.
- 2garlic cloves — minced; add for aromatic backbone.
- 1tablespoonginger root, grated — bright, warm note that lifts the rice.
- 1cupcooked and shredded chicken — adds protein and body; leftover roast or rotisserie works well.
- 4cupspre-cooked, cold rice — day-old rice or fully cooled fresh rice prevents clumping and gives the right texture.
- 2-3Tablespoonssoy sauce(more or less to taste) — salty, savory seasoning; start with 2 Tbsp and add up to 3 as you prefer.
Arroz Chaufa (Peruvian Fried Rice) — Do This Next
- Prepare ingredients: chop the green onion and separate the white (whiter) parts from the green (greener) parts; dice the bell pepper; slice the hot dogs into bite-size pieces; mince the 2 garlic cloves; have the 2 eggs beaten, the 1 tablespoon grated ginger ready, the 1 cup cooked shredded chicken measured, and the 4 cups pre-cooked cold rice fluffed.
- Heat a large skillet or wok over medium-high heat. Add 2 Tbss sesame oil and heat until shimmering.
- Add the sliced hot dogs, the white parts of the green onion, and the diced bell pepper to the pan. Stir-fry 2–3 minutes until the hot dogs begin to brown and the pepper starts to soften.
- Add the minced garlic and grated ginger to the pan. Stir continuously for about 30 seconds until fragrant.
- Push the hot dog/vegetable mixture to one side of the pan. Pour the beaten eggs into the cleared side and let sit briefly, then scramble with a spatula until just set.
- Stir the scrambled eggs together with the hot dog and vegetable mixture so everything is combined.
- Add the shredded chicken and the 4 cups of cold rice to the pan. Break up any clumps of rice with your spatula and mix well to combine.
- Pour in 2 tablespoons soy sauce, then stir and fry the mixture 2–4 minutes until everything is heated through and evenly coated. Add additional soy sauce up to a total of 2–3 Tablespoons, more or less to taste.
- Stir in the green parts of the green onion during the last 30 seconds of cooking. Taste and season with additional salt only if needed.
- Remove from heat and serve immediately.
What You’ll Love About This Recipe
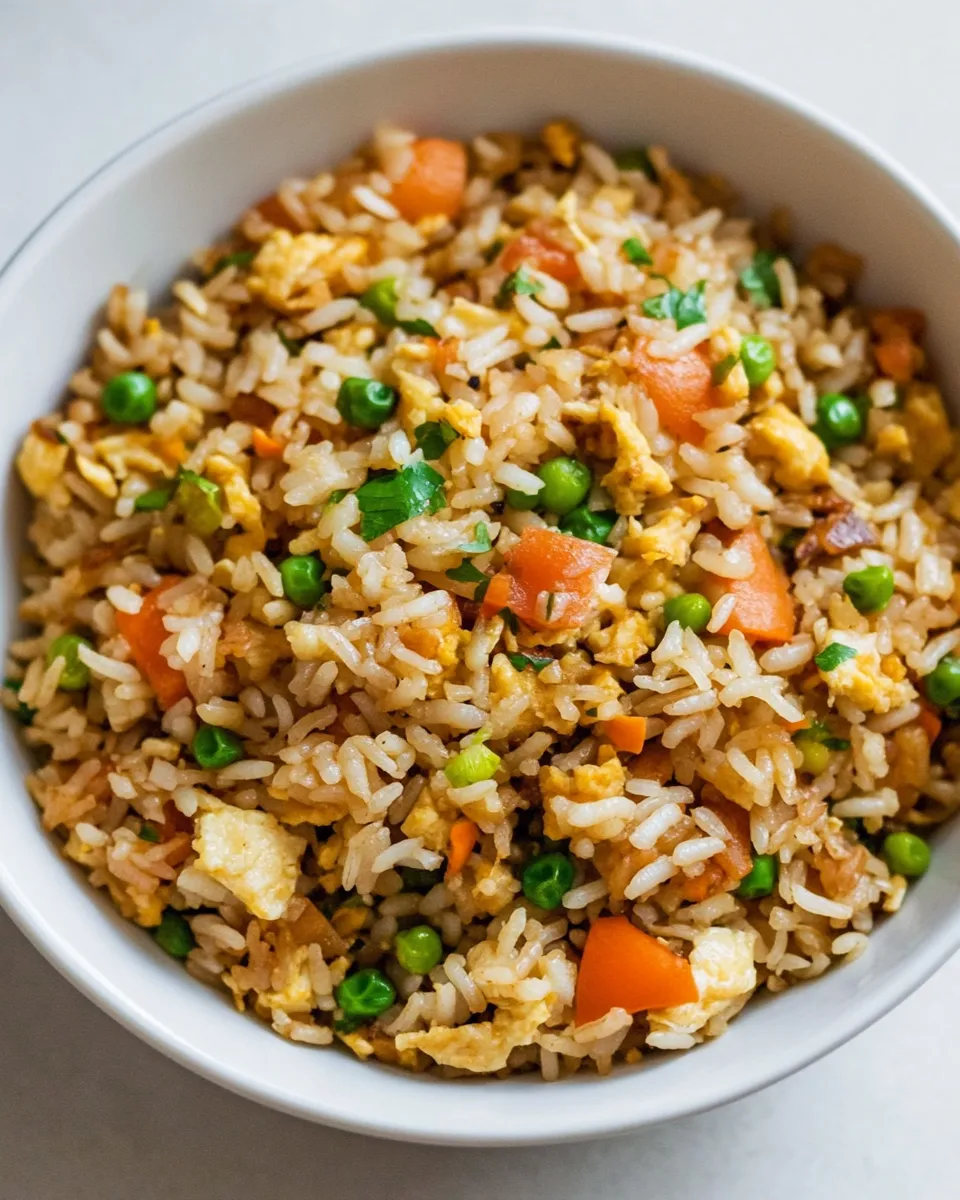
This arroz chaufa is fast, forgiving, and built for real kitchens. You don’t need perfect ingredients — use leftover rice, a store-bought rotisserie chicken, or whatever bell pepper color you have. Texture is the star: slightly crisp vegetables, soft shredded chicken, and chewy, lightly charred rice pieces. The sesame oil and soy sauce pair brilliantly, and the grated ginger keeps the flavor bright so the dish never tastes flat.
I also love how customizable it is. Follow the steps once to get the technique down — especially the order of adding aromatics, proteins, and rice — and you can riff from there. For weeknights, it’s a whole meal in one pan. For company, you can make multiple variations side-by-side: add pineapple for sweetness, extra chiles for heat, or swap proteins to suit tastes.
Smart Substitutions
Substitutions can change character but keep the dish practical. If you don’t want hot dogs, replace them with diced ham, bacon, or even smoked sausage — but note smoking and salt levels will change. If sesame oil is scarce, you can use neutral oil (vegetable or canola) for frying and add a teaspoon of toasted sesame oil at the end for flavor.
If you need the dish vegetarian, omit the hot dogs and chicken and add firm tofu (pan-fried) or extra vegetables like peas, carrots, and mushrooms. For lower sodium, use a low-sodium soy sauce and taste before adding extra. The single tablespoon of ginger is flexible — a little more if you want a fresher bite.
Essential Tools for Success
Good technique makes a huge difference. You don’t need fancy gear, but these tools help:
- Large skillet or wok — gives you space to toss and stir without crowding; the higher the heat, the better the char.
- Spatula or wok turner — for breaking rice clumps and pushing ingredients to the side when cooking the eggs.
- Sharp knife and cutting board — prep speed keeps the wok time short.
- Measuring spoons and cups — soy sauce and sesame oil amounts matter for balance.
Avoid These Mistakes
Most problems come from either wet rice or overcrowding the pan. Wet or freshly cooked rice sticks and turns mushy. Make sure rice is fully cooled and separated before it hits the pan. If you only have hot, fresh rice, spread it on a tray to cool, or refrigerate briefly.
A crowded pan drops the heat and makes everything steam instead of fry. If your skillet is small, work in batches: do the hot dog and veggies first, move them out briefly, cook eggs, then combine everything and finish with the rice and sauce. Finally, don’t pour all the soy sauce at once without tasting. Start with 2 Tbsp, stir, and then add up to 3 Tbsp based on your salt preference.
Adaptations for Special Diets
Gluten-free: Use tamari or gluten-free soy sauce. Confirm that any processed ingredients (like hot dogs) are gluten-free.
Vegetarian: Omit hot dogs and chicken. Add pan-fried firm tofu or a mix of vegetables and extra eggs for protein. Use vegetarian soy sauce if needed.
Lower-sodium: Use low-sodium soy sauce and limit added salt. Add fresh lime or more ginger to brighten flavors without relying on salt.
What I Learned Testing
I tested this exact sequence several times to find the most reliable order: aromatics and meat first, then eggs, then rice. Pushing the hot dog and veggies to one side and cooking the eggs on the other side gives you better texture and prevents overcooked eggs. Use cold rice straight from the fridge; it breaks apart easily and gets those desirable slightly crisp bits.
Also, the amount of soy sauce listed (2-3 Tbsp) covers a range of rice textures and personal salt preferences. I found 2 Tbsp is perfect when using a slightly salty hot dog and a seasoned shredded chicken. If your proteins are blander, closer to 3 Tbsp gives balance. Finally, don’t skip the green parts of the green onion at the end. They add freshness and contrast.
Store, Freeze & Reheat
Store: Cool rice quickly and refrigerate in an airtight container for up to 3–4 days. Keep moisture low to avoid sogginess — spread it flat in the container if possible so it cools faster.
Freeze: You can freeze portions for up to 2 months. Freeze in single-serving containers. Thaw overnight in the fridge before reheating for best texture.
Reheat: Reheat on the stovetop in a skillet over medium heat with a splash of oil or water to loosen rice. Stir frequently until heated through. Microwaving works for small portions; add a damp paper towel over the bowl and heat in short bursts to avoid drying out.
Ask the Chef
Q: Can I use freshly cooked rice? A: Fresh rice often becomes sticky. If you must use hot rice, spread it on a tray to cool and dry slightly or refrigerate briefly. Cold, separate grains work best.
Q: Why hot dogs? A: In many Peruvian home versions, hot dogs or sausages add smoke and texture and are a classic, approachable protein. If you prefer other proteins, swap in ham, bacon, or extra chicken. Be mindful of salt if using bacon.
Q: How can I add heat? A: Add a diced fresh chile with the bell pepper, or finish with a drizzle of hot sauce. Toasted chili oil also plays nicely with the sesame notes.
The Last Word
Arroz chaufa is comfort with rhythm: quick prep, high heat, and small adjustments at the end to make it yours. Follow the order and quantities in the instructions the first time to get reliable results. Use the ingredient list as written but feel free to adapt proteins and vegetables to what you have. In short: keep your rice cold, your pan hot, and taste before you salt. You’ll have a dish that’s simple, satisfying, and ready for weeknights or a relaxed weekend meal.
Arroz Chaufa (Peruvian Fried Rice)
Ingredients
Equipment
Method
- Prepare ingredients: chop the green onion and separate the white (whiter) parts from the green (greener) parts; dice the bell pepper; slice the hot dogs into bite-size pieces; mince the 2 garlic cloves; have the 2 eggs beaten, the 1 tablespoon grated ginger ready, the 1 cup cooked shredded chicken measured, and the 4 cups pre-cooked cold rice fluffed.
- Heat a large skillet or wok over medium-high heat. Add 2 Tbss sesame oil and heat until shimmering.
- Add the sliced hot dogs, the white parts of the green onion, and the diced bell pepper to the pan. Stir-fry 2–3 minutes until the hot dogs begin to brown and the pepper starts to soften.
- Add the minced garlic and grated ginger to the pan. Stir continuously for about 30 seconds until fragrant.
- Push the hot dog/vegetable mixture to one side of the pan. Pour the beaten eggs into the cleared side and let sit briefly, then scramble with a spatula until just set.
- Stir the scrambled eggs together with the hot dog and vegetable mixture so everything is combined.
- Add the shredded chicken and the 4 cups of cold rice to the pan. Break up any clumps of rice with your spatula and mix well to combine.
- Pour in 2 tablespoons soy sauce, then stir and fry the mixture 2–4 minutes until everything is heated through and evenly coated. Add additional soy sauce up to a total of 2–3 Tablespoons, more or less to taste.
- Stir in the green parts of the green onion during the last 30 seconds of cooking. Taste and season with additional salt only if needed.
- Remove from heat and serve immediately.