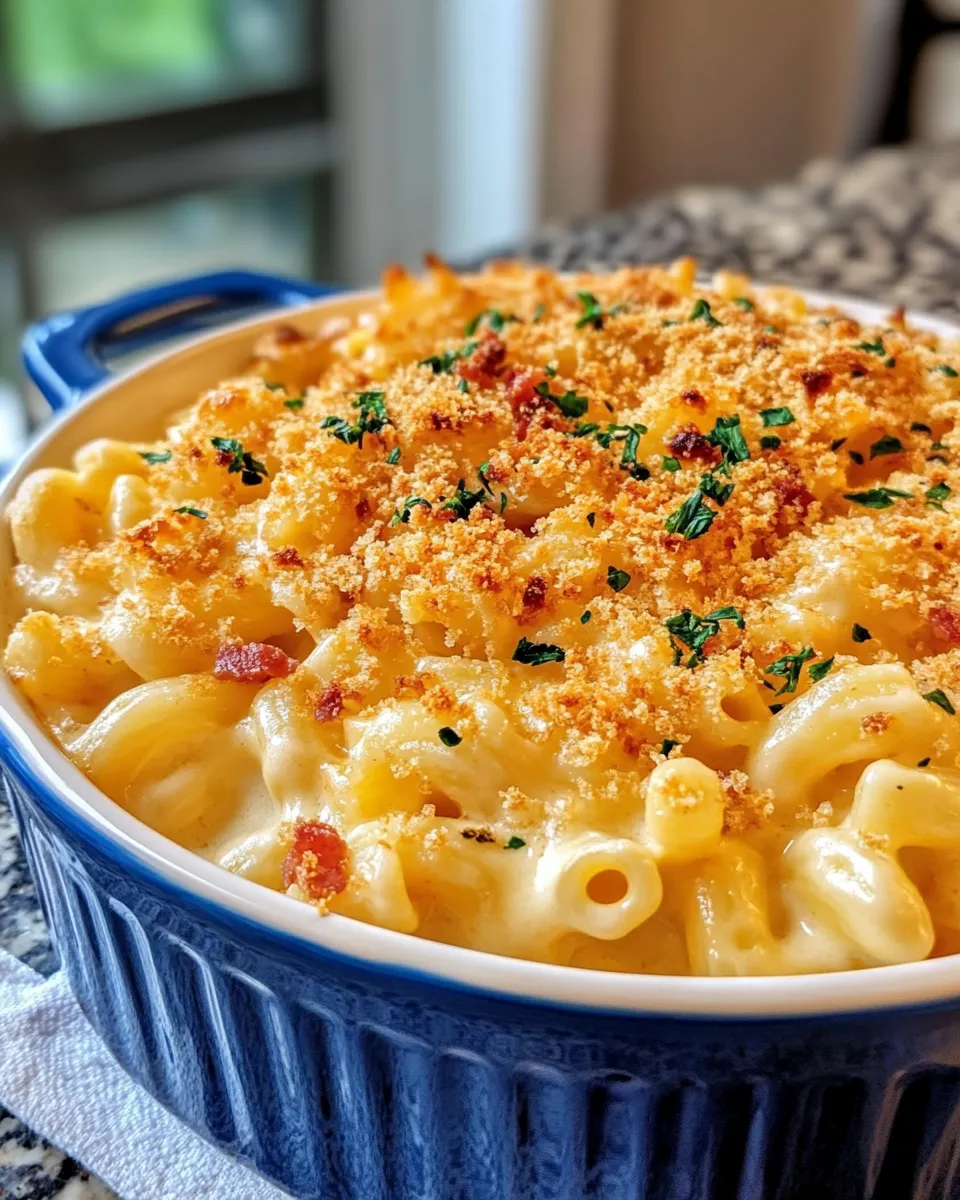
Baked Mac and Cheese
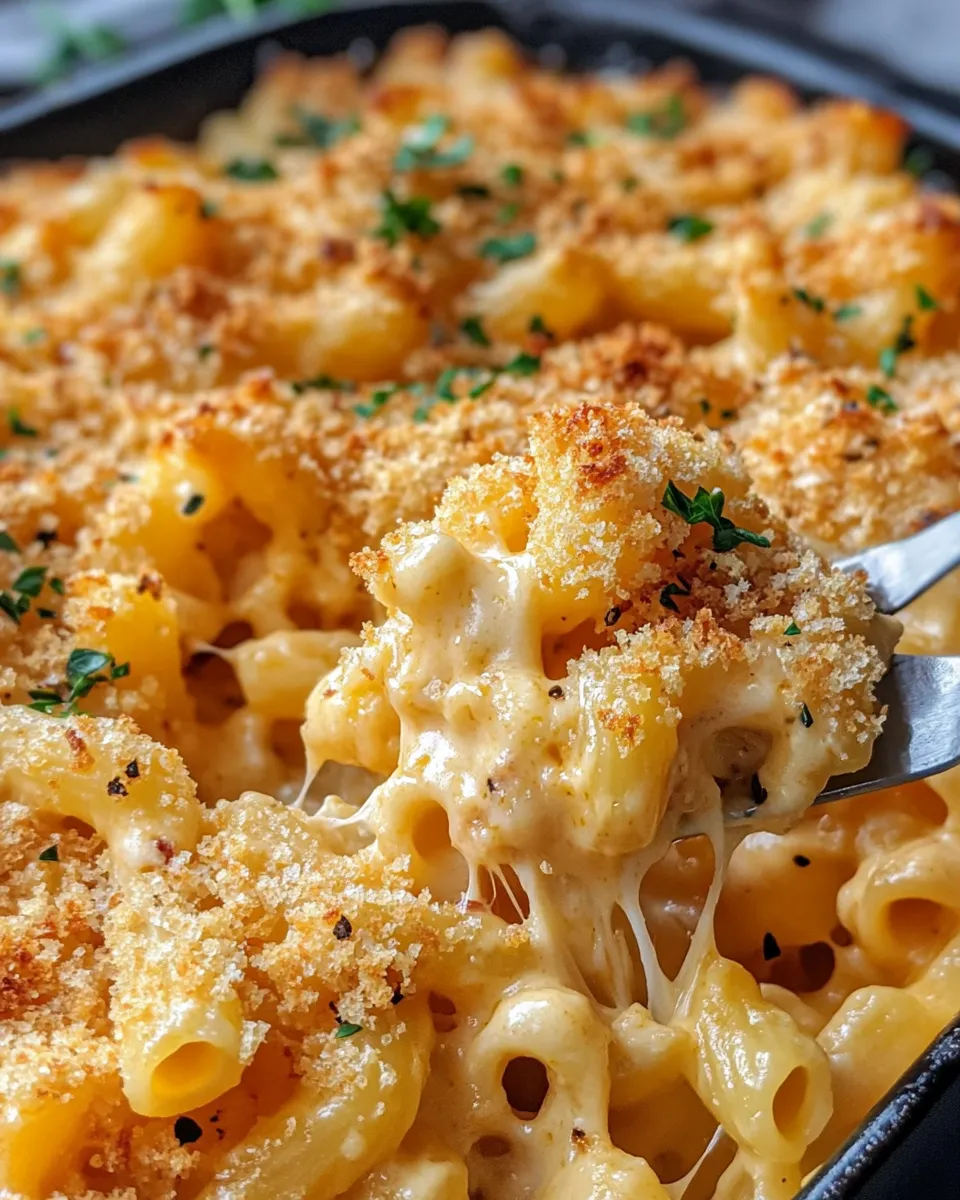
This is the sort of mac and cheese I make when I want dinner to feel like a warm, confident hug. It’s straightforward: a creamy, buttery cheese sauce, plenty of shredded cheese folded into cooked pasta, a light breadcrumb top for texture, and a short bake that brings everything together. No need for elaborate steps or unusual ingredients — just good technique.
The recipe leans on two meltable cheeses and a classic mustard-and-roux method to give the sauce body and flavor. The result is a creamy interior with a golden, slightly crisp surface. It’s forgiving, which is one reason it’s so often in my rotation.
Read on for the exact ingredients and step-by-step directions, plus practical notes on what to watch for, smart swaps if you don’t have something on hand, and how to store or reheat leftovers. I keep the notes short and actionable so you can get to the oven without fuss.
What We’re Using
At its core this version combines a flour-based roux with whole milk to make a béchamel-style sauce, then folds in two shreddable cheeses for creaminess and flavor. Dry mustard adds a layer of savory depth without tasting like mustard, and a small sprinkle of breadcrumbs gives the top a pleasant crunch. The recipe is built to be reliable: heat, thicken, melt, mix, and bake.
The technique focuses on a smooth sauce and evenly coated pasta. That’s what determines texture more than anything else — not bells and whistles. Knowing that helps you adapt if you’re short on time or a specific item.
Ingredients
- 7 tablespoons unsalted butter — for the roux and richness; melting point controls sauce texture.
- 2 tablespoons dry mustard — adds depth and a subtle tang that brightens the cheese.
- 6 tablespoons all-purpose flour — combines with butter to thicken the sauce into a roux.
- 3 cups whole milk — the liquid base for the sauce; keeps the finished mac rich and creamy.
- 3 cups shredded Havarti cheese, (approx. 10 ounces total) — contributes a supple, creamy melt and mild flavor.
- 3 cups shredded Gouda cheese, (approx. 10 ounces total) — gives a slightly smoky, buttery note and smooth melt.
- 1 pound elbow macaroni or any short pasta noodle — provides the structure to hold the sauce; short shapes work best.
- ¼ teaspoon kosher salt — seasons the sauce; adjust to taste if your cheeses are salty.
- ¼ teaspoon white ground pepper — gentle pepper flavor without visible specks; keeps the sauce looking pale.
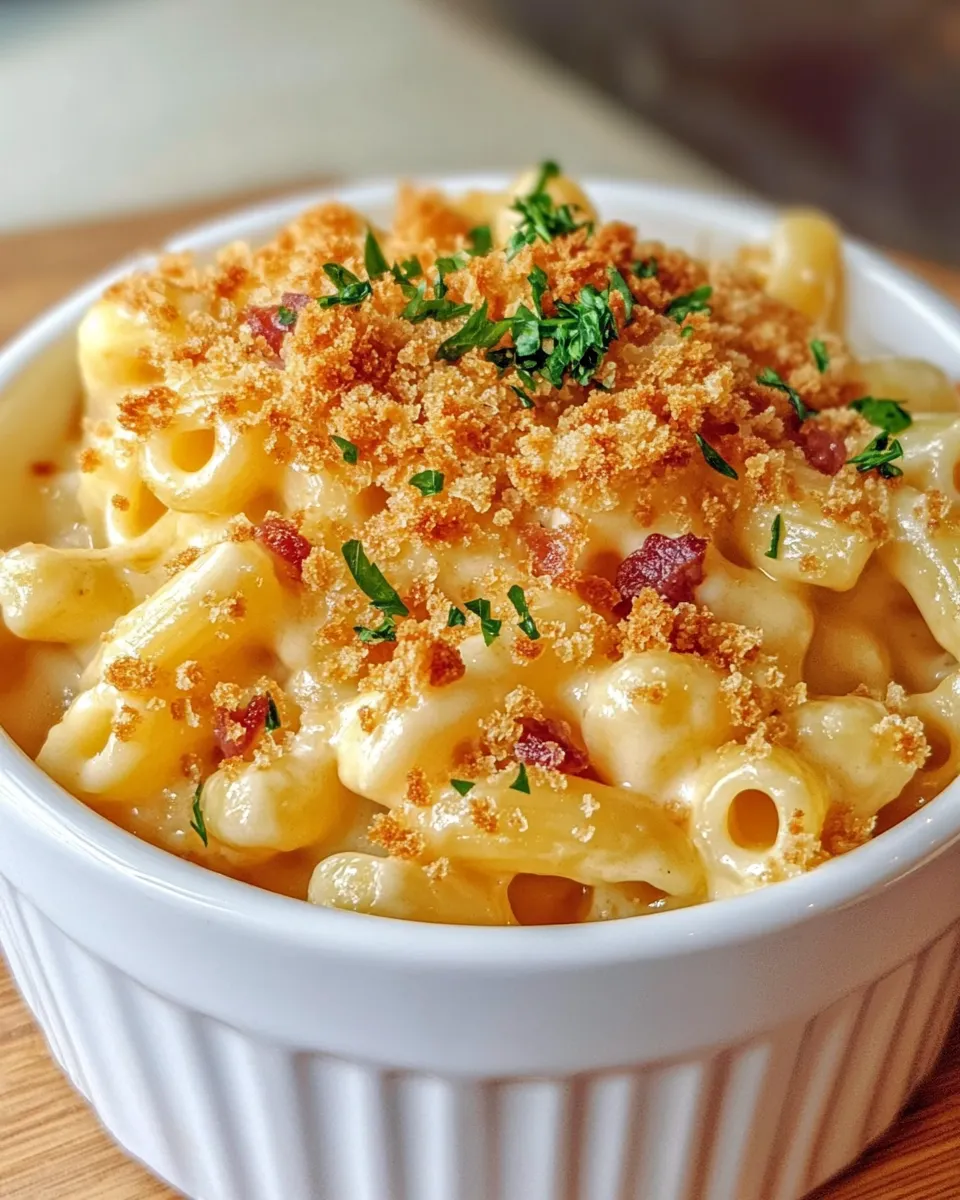
- 2 tablespoons breadcrumbs — for a light, toasty topping that contrasts the creamy interior.
- 2 tablespoons chopped parsley, optional — a fresh finish if you want a hint of color and brightness.
Baked Mac and Cheese: How It’s Done
- Preheat the oven to 350°F. Have a 9 x 13-inch casserole dish ready.
- In a deep-bottom saucepan, melt 7 tablespoons unsalted butter over medium heat.
- Add 2 tablespoons dry mustard and 6 tablespoons all-purpose flour to the melted butter. Whisk briskly for about 2 minutes to cook the flour and form a roux.
- Gradually pour in 3 cups whole milk while whisking continuously to prevent lumps. Continue whisking until the sauce thickens enough to coat the back of a spoon, about 2 to 3 minutes.
- Remove the saucepan from the heat (or reduce heat to low) and stir in the cheeses: add 3 cups shredded Havarti and 3 cups shredded Gouda in handfuls, stirring until smooth after each addition. Stir in 1/4 teaspoon kosher salt and 1/4 teaspoon white ground pepper.
- Meanwhile, cook 1 pound elbow macaroni (or any short pasta) in boiling water until just al dente according to package directions. Drain the pasta thoroughly.
- Pour the drained pasta into the pot with the cheese sauce and stir until the pasta is evenly coated.
- Transfer the mac and cheese mixture to the 9 x 13 casserole dish and spread it evenly. Sprinkle 2 tablespoons breadcrumbs evenly over the top. Cover the dish with foil.
- Bake covered for 15 minutes. Remove the foil and return the dish to the oven; bake an additional 10 to 15 minutes, or until the top is bubbling and golden brown.
- Remove from the oven and let rest a few minutes. If desired, sprinkle 2 tablespoons chopped parsley on top before serving.
Why Cooks Rave About It
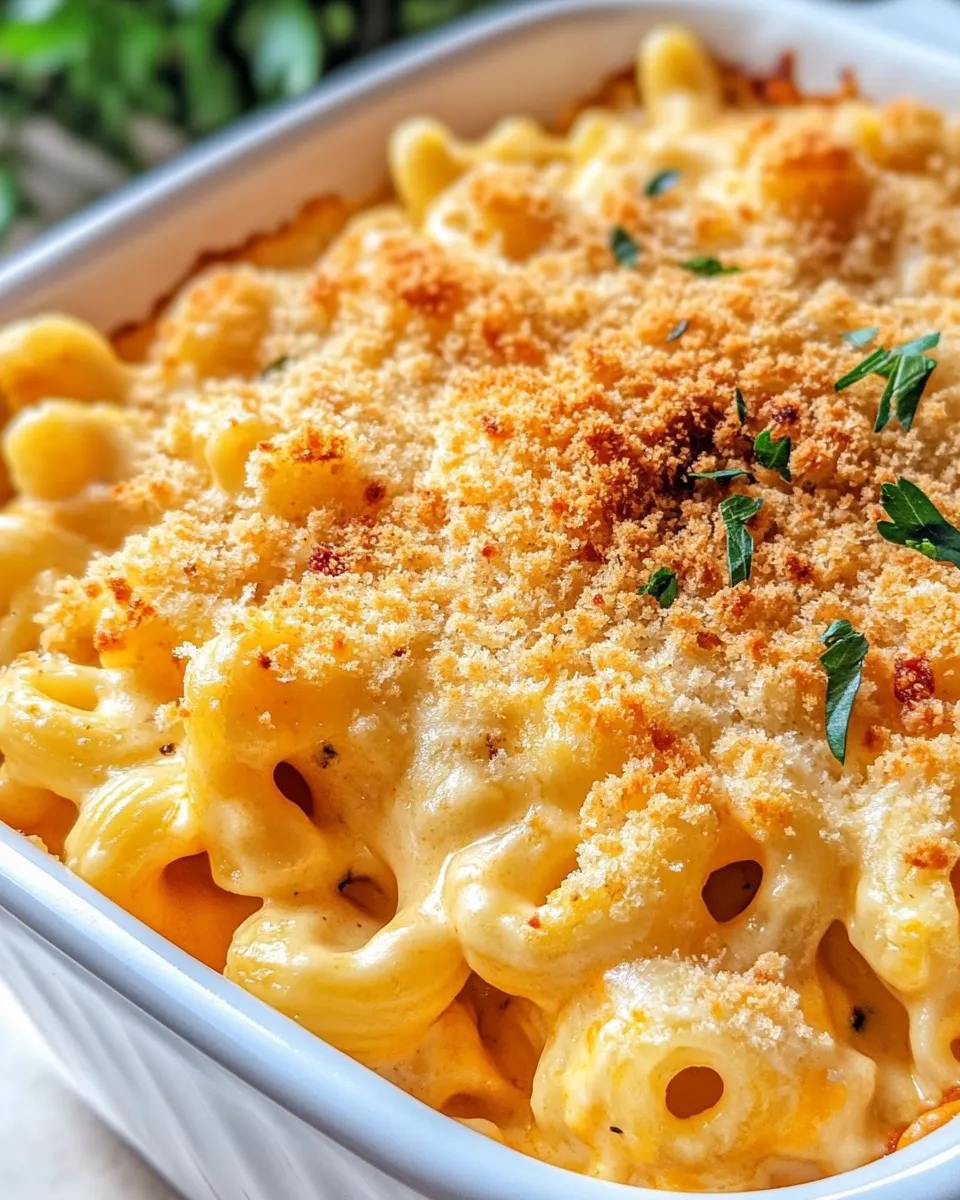
This recipe is a textbook example of technique over theatrics. The roux gives the sauce structure so it clings to each noodle rather than pooling in the dish. Using two different cheeses — a very creamy, melt-forward Havarti and a buttery Gouda — balances flavor and texture: one keeps it silky, the other adds character.
Dry mustard is a small addition but an important one. It doesn’t make the dish taste like mustard; it simply enhances the savory elements of the cheese. The brief covered bake keeps the pasta from drying out while allowing heat to finish the melt and integration of flavors. Then one final uncovered bake produces that desirable golden top without drying the interior.
Smart Substitutions
If you’re tweaking based on what you have, keep the following principles in mind: preserve the sauce’s fat-to-flour-to-liquid ratio and use cheeses that melt well.
Cheese and Dairy
- Stick to melt-friendly, shreddable cheeses if you swap. The recipe relies on melting behavior — choose something smooth and buttery if you must substitute.
- You can use a different milk, but whole milk gives the creamiest result; lower-fat milk will yield a thinner sauce and may need a bit more cooking to feel rich.
Pasta and Toppings
- Any short pasta that holds sauce (shells, cavatappi, small rigatoni) works in place of elbow macaroni.
- Breadcrumbs can be plain or seasoned — use what you have. The breadcrumbs are there for texture; quantity can be adjusted slightly to your liking.
What You’ll Need (Gear)
- 9 x 13-inch casserole dish — for baking and serving.
- Deep-bottom saucepan — gives you room to whisk and melt the cheese without splatter.
- Whisk — for a smooth roux and lump-free milk incorporation.
- Large pot for boiling pasta.
- Colander to drain the pasta thoroughly.
- Cheese grater if you’re shredding the Havarti and Gouda from blocks.
- Aluminum foil to cover while baking.
- Oven mitts and a heatproof spatula or spoon for transferring the mac and cheese.
Learn from These Mistakes
- Undercooking the roux — if you don’t cook the flour briefly in the butter, the sauce can taste “floury.” A quick 2-minute whisk does the trick.
- Adding cold milk too fast — pour slowly and whisk continuously to avoid lumps. Patience pays off here.
- Overheating the cheese — add cheeses off the heat or on very low so they melt smoothly. High heat can make cheese grainy or separate.
- Skipping the drain — excess water clinging to pasta will thin the sauce and make the bake soupy. Drain thoroughly.
- Baking too long uncovered — watch once you remove the foil. The top should be golden and bubbling, not dried out.
Seasonal Serving Ideas
This dish plays well with seasonal sides that contrast its richness. In spring and summer, pair with a crisp green salad or lightly dressed vegetables to add acidity and crunch. In fall and winter, serve alongside roasted root vegetables or a simple roasted green vegetable for a cozy plate.
Because the mac is richly flavored, choose sides that add brightness or texture rather than more creaminess. A squeeze of lemon on a side vegetable or a tangy vinaigrette works well to balance the meal.
Recipe Notes & Chef’s Commentary

Time your steps so the pasta finishes cooking right as the sauce comes together. That keeps you from overcooking the noodles or letting the sauce sit and thicken too much before mixing. The goal in step 4 is a sauce thick enough to coat the back of a spoon; if you go a touch thicker it will still be fine once the cheeses and pasta are added.
The cheese measurements are generous and intentionally so — 3 cups each of Havarti and Gouda produce a lush, melty texture. If your cheeses are saltier than average, reduce the added kosher salt slightly and taste after melting to adjust.
Let the dish rest a few minutes after baking. That short rest lets the sauce settle so portions hold together better on the plate.
Leftovers & Meal Prep
Store leftovers in an airtight container in the refrigerator for 3–4 days. Reheat individual portions in a microwave, covered with a damp paper towel to retain moisture, stirring halfway through. For better texture, reheat in a 350°F oven until warmed through; cover at first to prevent drying, then uncover for the last few minutes to refresh the top.
To freeze: cool completely, portion into freezer-safe containers, and freeze up to 2 months. Thaw overnight in the refrigerator before reheating. Expect a slight change in texture after freezing — a quick oven refresh helps.
Reader Questions
Q: Can I make this ahead and bake later?
A: Yes. Assemble the mac and cheese, cover tightly, and refrigerate for up to 24 hours before baking. You may need to add an extra 5–10 minutes to the bake time if it’s coming straight from the fridge.
Q: My sauce went grainy — what happened?
A: Graininess usually means the cheese was overheated or the sauce separated. Next time, remove the saucepan from heat before adding the cheese and stir gently until melted.
Q: Can I skip the breadcrumbs?
A: Absolutely. Breadcrumbs add texture and a toasty contrast, but the dish is still fully satisfying without them.
That’s a Wrap
This Baked Mac and Cheese delivers reliable, comforting results without fuss. Follow the roux-and-milk ratio, melt cheeses gently, and bake just long enough to get a golden top — those are the keys. Make it on a weeknight or for company; it’s adaptable and forgiving. Enjoy the creamy interior, the crisp topping, and the simple pleasure of a dish that feels like home.
Baked Mac and Cheese
Ingredients
Equipment
Method
- Preheat the oven to 350°F. Have a 9 x 13-inch casserole dish ready.
- In a deep-bottom saucepan, melt 7 tablespoons unsalted butter over medium heat.
- Add 2 tablespoons dry mustard and 6 tablespoons all-purpose flour to the melted butter. Whisk briskly for about 2 minutes to cook the flour and form a roux.
- Gradually pour in 3 cups whole milk while whisking continuously to prevent lumps. Continue whisking until the sauce thickens enough to coat the back of a spoon, about 2 to 3 minutes.
- Remove the saucepan from the heat (or reduce heat to low) and stir in the cheeses: add 3 cups shredded Havarti and 3 cups shredded Gouda in handfuls, stirring until smooth after each addition. Stir in 1/4 teaspoon kosher salt and 1/4 teaspoon white ground pepper.
- Meanwhile, cook 1 pound elbow macaroni (or any short pasta) in boiling water until just al dente according to package directions. Drain the pasta thoroughly.
- Pour the drained pasta into the pot with the cheese sauce and stir until the pasta is evenly coated.
- Transfer the mac and cheese mixture to the 9 x 13 casserole dish and spread it evenly. Sprinkle 2 tablespoons breadcrumbs evenly over the top. Cover the dish with foil.
- Bake covered for 15 minutes. Remove the foil and return the dish to the oven; bake an additional 10 to 15 minutes, or until the top is bubbling and golden brown.
- Remove from the oven and let rest a few minutes. If desired, sprinkle 2 tablespoons chopped parsley on top before serving.
Notes
When cooking your pasta, be sure to cook it just until al denté. When it’s baked in the oven, the macaroni will continue to cook and you don’t want to end up with mush.