Better-Than-Box-Mix Brownies
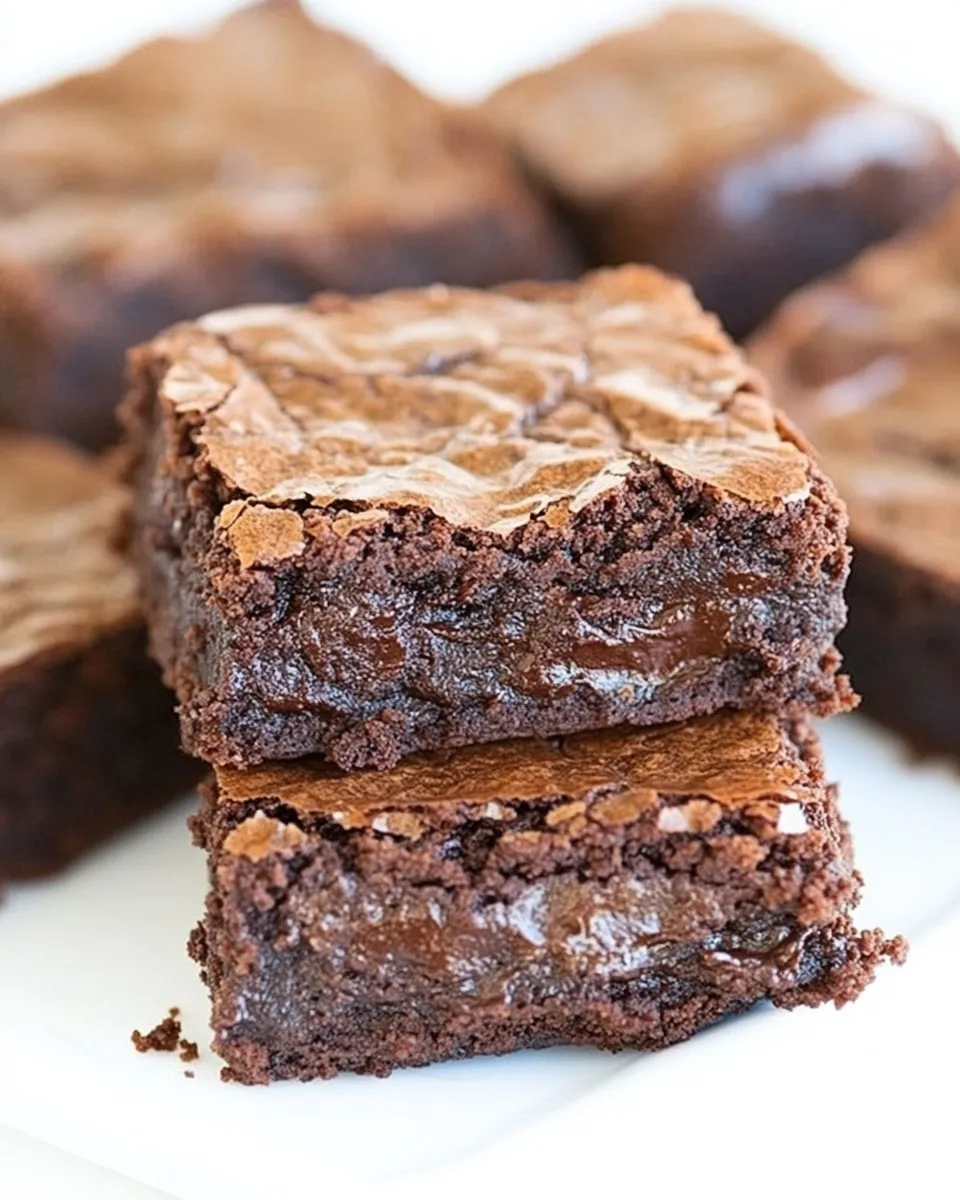
These brownies are the home-baker’s shortcut to spectacular chocolate: not fussy, but clearly better than anything from a box. You get a shiny, crackly top, chewy middle and pockets of melty chips. I make these when I want to impress without staging a production—straightforward steps, predictable results.
Timing is honest here. There’s a short cooling window that makes a big difference in texture, and the recipe gives you exact temps and times so you don’t guess. Follow the few technique notes inside and you’ll turn out brownies that slice cleanly and taste like you spent more time than you did.
I’ll walk you through the shopping basics, the step‑by‑step method, swaps for dietary needs, gear to have on hand, and the common slip‑ups to avoid. Keep the ingredient list as written, follow the baking order, and these brownies will reliably outshine a boxed mix.
Shopping List
Buy good chocolate and the basic pantry staples. Nothing exotic is required, but quality matters for the chocolate-forward flavor.
Ingredients
- ⅓ cup (28.67g) Dutch-processed cocoa — provides deep chocolate color and flavor; dissolves into the hot liquid.
- ½ cup (125ml) + 2 tablespoons boiling water — blooms the cocoa and melts the chocolate for a glossy batter.
- 2 ounces (56.7g) unsweetened chocolate, finely chopped — adds body and chocolate intensity beyond cocoa powder.
- 4 tablespoons unsalted butter, melted — adds richness and contributes to the brownie’s tender crumb.
- ½ cup (109ml) plus 2 tablespoons vegetable oil — oil keeps the brownies moist and gives a slightly fudgier texture than butter alone.
- 2 eggs — structure and lift; whole eggs help set the center while keeping chew.
- 2 egg yolks — extra yolks add silkiness and richness without adding too much lift.
- 2 teaspoons vanilla extract — rounds and brightens the chocolate flavors.
- 2½ cups (500g) granulated sugar — sweetness and contributes to the glossy top; don’t reduce without adjusting texture.
- 1¾ cups (218.75g) all-purpose flour — provides the framework; measure accurately to avoid dry brownies.
- ¾ teaspoon (0.75 teaspoon) salt — essential to balance sweetness and enhance chocolate.
- 1 cup (180g) semisweet chocolate chips — pockets of melted chocolate in the baked brownies; fold in last.
The Method for Better-Than-Box-Mix Brownies
- Adjust the oven rack to the lowest position and preheat oven to 350°F (175°C). Line a 9×13-inch baking pan with foil, leaving about a 1-inch overhang on all sides, and spray the foil with nonstick cooking spray.
- In a large heatproof bowl, whisk the Dutch-processed cocoa and the boiling water (½ cup + 2 tablespoons) together until smooth.
- Add the finely chopped unsweetened chocolate to the cocoa mixture, let sit 30 seconds, then whisk until the chocolate is fully melted and the mixture is smooth.
- Whisk in the melted unsalted butter and the vegetable oil (½ cup + 2 tablespoons). The mixture may look slightly curdled—this is normal.
- Let the chocolate mixture cool for about 1 minute, then whisk in the 2 whole eggs, 2 egg yolks, and the 2 teaspoons vanilla extract until smooth and homogeneous.
- Whisk in the 2½ cups granulated sugar until fully incorporated.
- Add the 1¾ cups all-purpose flour and ¾ teaspoon salt. Use a rubber spatula to fold and mix just until the dry ingredients are combined—do not overmix.
- Fold in the 1 cup semisweet chocolate chips until evenly distributed.
- Scrape the batter into the prepared pan and spread it into an even layer.
- Bake on the lowest oven rack at 350°F for 30–35 minutes, or until a toothpick inserted about halfway between the edge and the center comes out with just a few moist crumbs attached. Begin checking at 30 minutes.
- Transfer the pan to a wire rack and cool for 1½ hours.
- Use the foil overhang to lift the brownies from the pan, set them on the wire rack, and cool completely for about 1 more hour.
- Cut into 2-inch squares and serve. Store brownies in an airtight container at room temperature for up to 4 days.
Why It Deserves a Spot
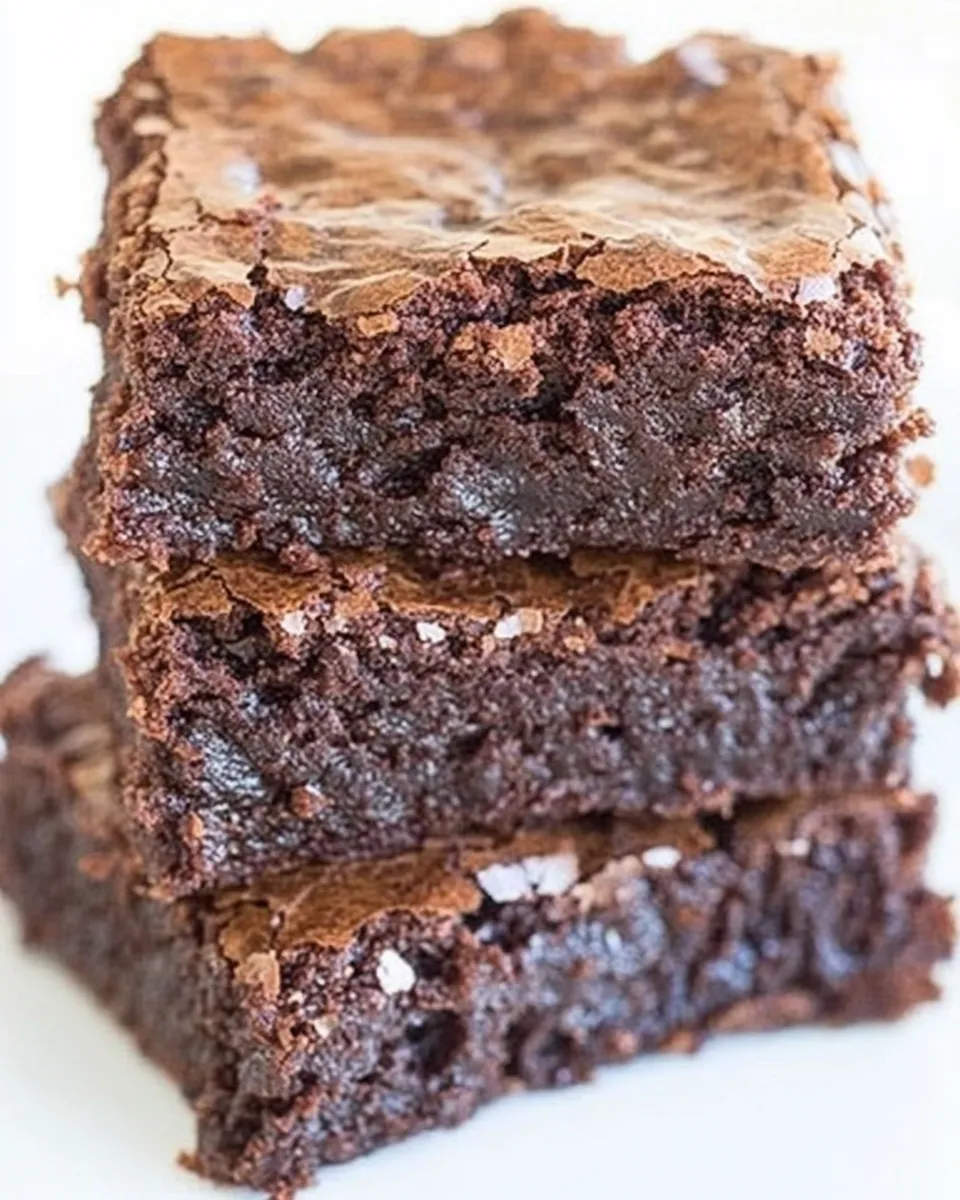
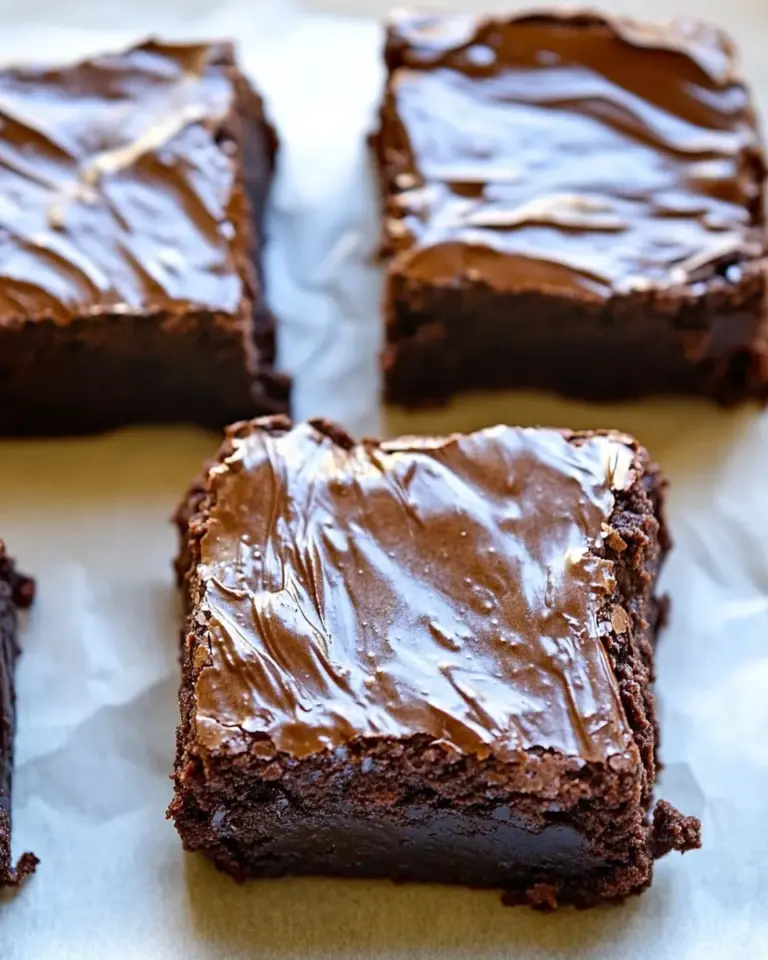
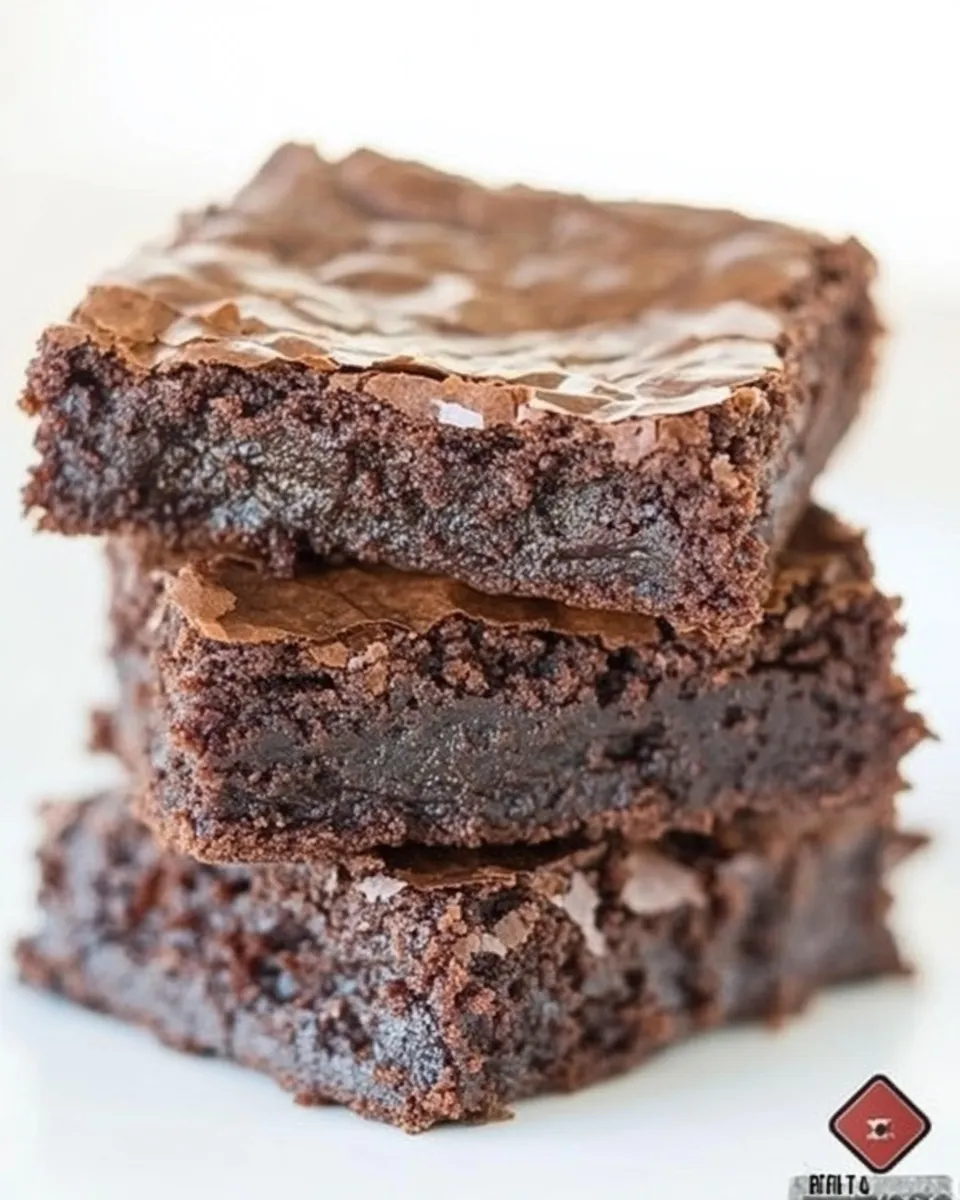
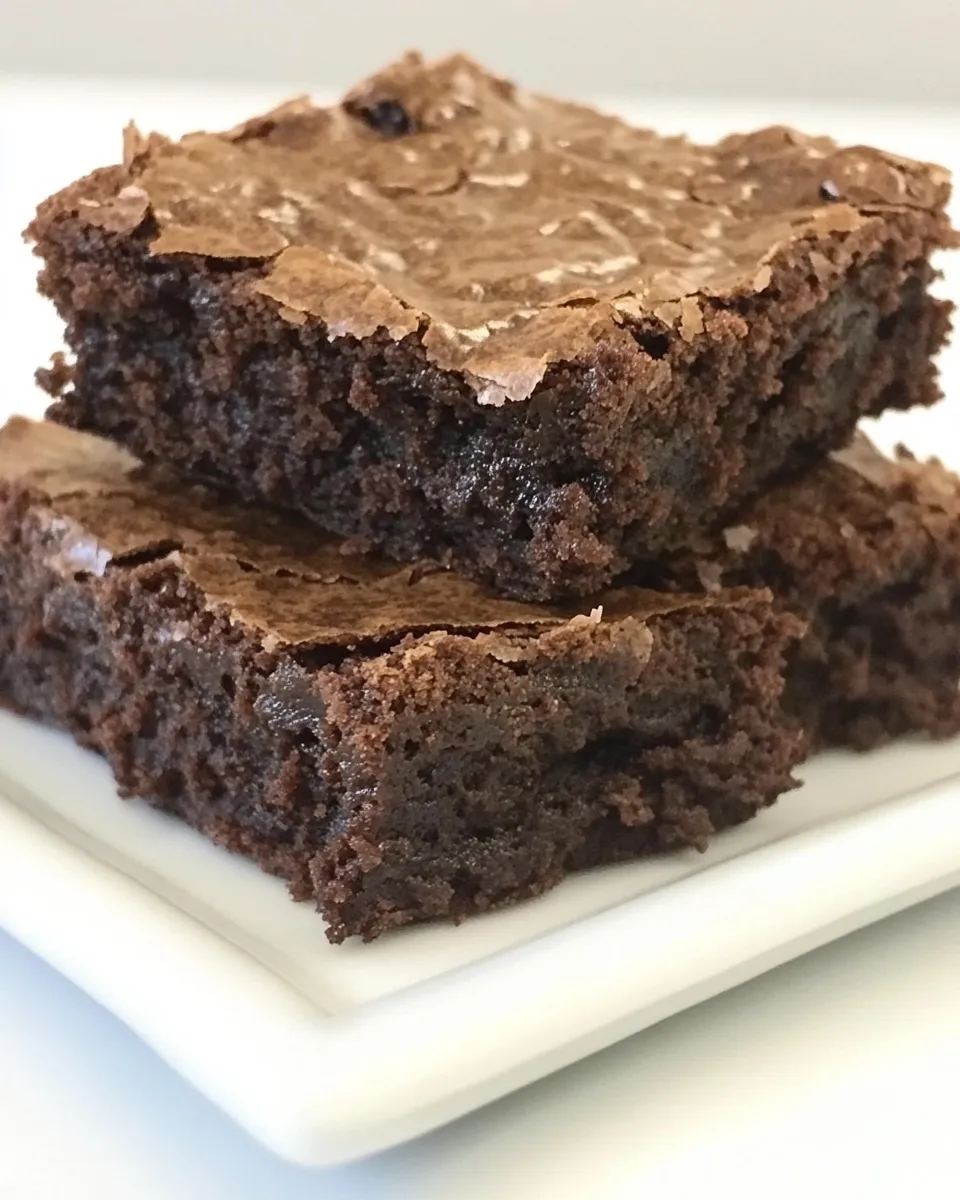
These brownies hit a sweet spot between fudgy and cakey—leaning fudgy—because of the combined butter and oil, plus extra yolks. The melted unsweetened chocolate layers in real chocolate depth that cocoa alone can’t achieve, so you get more complex flavor than a box mix.
The technique is forgiving: bloom the cocoa in boiling water and let the chopped chocolate melt, and you’ll get a smooth batter. The resting/cooling steps are the real game-changer—rushing them reduces density and causes crumbly slices. Keep to the timings and you’ll see why this recipe consistently outperforms boxed options.
Dairy-Free/Gluten-Free Swaps
If you need dairy-free or gluten-free options, these swaps work well but change texture slightly:
- Dairy-free: Replace the unsalted butter with an equal amount of a neutral-flavored dairy-free margarine or use extra vegetable oil (reduce total added oil slightly by 1 tablespoon if doubling up). Use dairy-free chocolate chips and ensure the unsweetened chocolate is dairy-free.
- Gluten-free: Use a 1:1 gluten-free all-purpose flour blend that contains xanthan gum; measure by weight for best results. Expect a slightly different crumb but similar flavor.
Kitchen Gear Checklist
- 9×13-inch baking pan — lined with foil for easy removal.
- Large heatproof mixing bowl — for shaping the hot chocolate mixture.
- Whisk and rubber spatula — whisk for wet ingredients, spatula for gentle folding.
- Measuring cups and spoons — use the volumes given; weigh flour and sugar if you prefer precision.
- Sharp knife and cutting board — for finely chopping the unsweetened chocolate.
- Wire rack — for the specified cooling times to set the brownies properly.
- Instant-read thermometer (optional) — not necessary, but handy if you watch internal temps for other bakes.
Learn from These Mistakes
Common missteps and how to avoid them:
- Skipping the cooling time: Cutting too soon gives a gooey mess that won’t slice nicely. Follow the 1½-hour + 1-hour cool schedule to set the crumb.
- Overmixing after flour: Stir until just combined. Overmixing develops gluten and yields cakier brownies.
- Using low-quality chocolate: Cheap unsweetened chocolate or chips with odd stabilizers affect flavor and texture. Use decent-quality chocolate for the 2 ounces and the chips.
- Not using foil overhang: Lining the pan with foil and leaving an overhang lets you lift the entire slab out cleanly—no heroic digging with your spatula.
- Incorrect oven placement: The recipe specifies the lowest oven rack. Placing the pan too high can brown the top too fast and undercook the center.
Allergy-Friendly Swaps
For common allergies beyond dairy and gluten:
- Egg allergy: Replacing eggs in rich chocolate brownies is tricky and will change texture significantly. Consider a tested vegan brownie recipe if eggs must be avoided—this recipe relies on 2 whole eggs + 2 yolks for structure and chew.
- Nut allergy: This recipe has no nuts. Still, choose chocolate chips labeled nut-free and prevent cross-contact if baking in a nut-free environment.
- Soy allergy: Many chocolate chips and some vegetable oils may contain soy lecithin or traces. Look for soy-free chocolate and verify the oil you use.
Chef’s Notes
Texture and temperature
The combination of butter plus a substantial amount of oil gives these brownies a fudgy, slightly glossy interior. The baking time (30–35 minutes) is critical; start checking at 30 minutes with a toothpick inserted partway between edge and center. You’re aiming for a few moist crumbs, not wet batter.
Chocolate choices
Use unsweetened chocolate for the best depth—semi-sweet or sweet chocolate would add extra sugar and change balance. The semisweet chips folded in at the end create hot-spots of melted chocolate after baking; if you prefer uniform chocolate, chop some semisweet bar and fold that in instead of chips.
Measuring tips
Weighing flour and sugar is the most accurate approach. If you use cups, spoon the flour into the cup and level it—don’t pack the flour down. The recipe’s sugar quantity is intentionally high to yield that crackly top and balanced sweetness; reduce at your own risk and expect a different texture.
Storing, Freezing & Reheating
Store at room temperature in an airtight container for up to 4 days as the recipe states. If you want to keep them longer:
- Freezing: Wrap cooled, cut brownies tightly in plastic wrap, then place in a freezer bag or airtight container. Freeze up to 3 months. Thaw overnight in the refrigerator or at room temperature for a few hours.
- Reheating: For a just-baked feel, microwave a single brownie for 8–12 seconds (watch closely) to soften the middle and revive melty pockets of chocolate. For multiple pieces, reheat briefly in a preheated 300°F oven on a baking sheet for 5–8 minutes.
Questions People Ask
Can I use natural cocoa instead of Dutch-processed?
Yes, but you’ll notice a shift in flavor and color. Dutch-processed cocoa is less acidic and gives a smoother, darker profile here. If you substitute natural cocoa, the batter may react differently if a recipe relies on baking soda—this one doesn’t, so it’s a mild change mostly in taste.
Why is the recipe using both butter and oil?
Butter adds flavor; oil keeps brownies moist and gives a fudgy texture. Together they create richness with a tender crumb—something a single fat might not deliver as well.
My top cracked—what happened?
A crackly top is normal and desirable. If you mean large fissures and dryness, you likely overbaked. Pull at the lower end of the bake time when the center still has moist crumbs on a toothpick.
Can I halve the recipe?
You can halve the ingredients and bake in a smaller pan (8×8-inch), but baking time will change—start checking around 20–25 minutes and look for moist crumbs on a toothpick. Cooling times are still important but may be slightly shorter.
In Closing
Follow the ingredient list and the method as written and you’ll end up with reliably superior brownies—richer, shinier, and more chocolatey than a box mix. The extra steps (blooming cocoa, melting chocolate, patient cooling) add only a few minutes of active work and yield a much better result.
Make them for a weeknight dessert, a potluck, or whenever you want a brownie that tastes like you made something special without fuss. Keep the chopping fine, the oven position low, and the patience high—and enjoy the payoff.
Better-Than-Box-Mix Brownies
Ingredients
Equipment
Method
- Adjust the oven rack to the lowest position and preheat oven to 350°F (175°C). Line a 9×13-inch baking pan with foil, leaving about a 1-inch overhang on all sides, and spray the foil with nonstick cooking spray.
- In a large heatproof bowl, whisk the Dutch-processed cocoa and the boiling water (½ cup + 2 tablespoons) together until smooth.
- Add the finely chopped unsweetened chocolate to the cocoa mixture, let sit 30 seconds, then whisk until the chocolate is fully melted and the mixture is smooth.
- Whisk in the melted unsalted butter and the vegetable oil (½ cup + 2 tablespoons). The mixture may look slightly curdled—this is normal.
- Let the chocolate mixture cool for about 1 minute, then whisk in the 2 whole eggs, 2 egg yolks, and the 2 teaspoons vanilla extract until smooth and homogeneous.
- Whisk in the 2½ cups granulated sugar until fully incorporated.
- Add the 1¾ cups all-purpose flour and ¾ teaspoon salt. Use a rubber spatula to fold and mix just until the dry ingredients are combined—do not overmix.
- Fold in the 1 cup semisweet chocolate chips until evenly distributed.
- Scrape the batter into the prepared pan and spread it into an even layer.
- Bake on the lowest oven rack at 350°F for 30–35 minutes, or until a toothpick inserted about halfway between the edge and the center comes out with just a few moist crumbs attached. Begin checking at 30 minutes.
- Transfer the pan to a wire rack and cool for 1½ hours.
- Use the foil overhang to lift the brownies from the pan, set them on the wire rack, and cool completely for about 1 more hour.
- Cut into 2-inch squares and serve. Store brownies in an airtight container at room temperature for up to 4 days.
Notes
Nutritional values are based on one serving