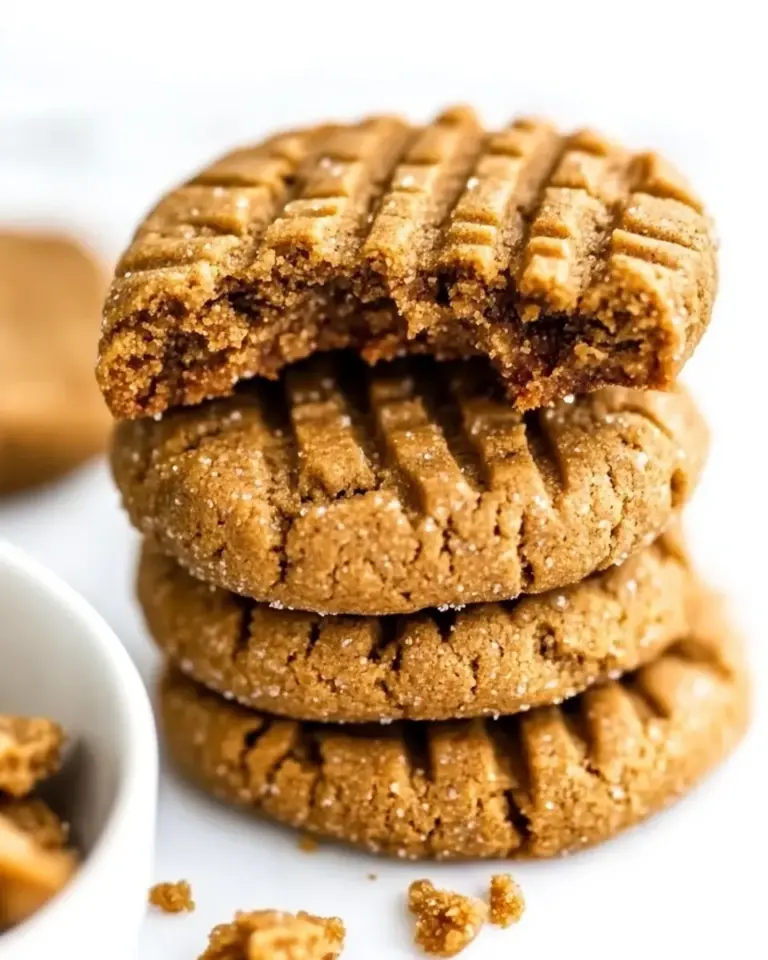
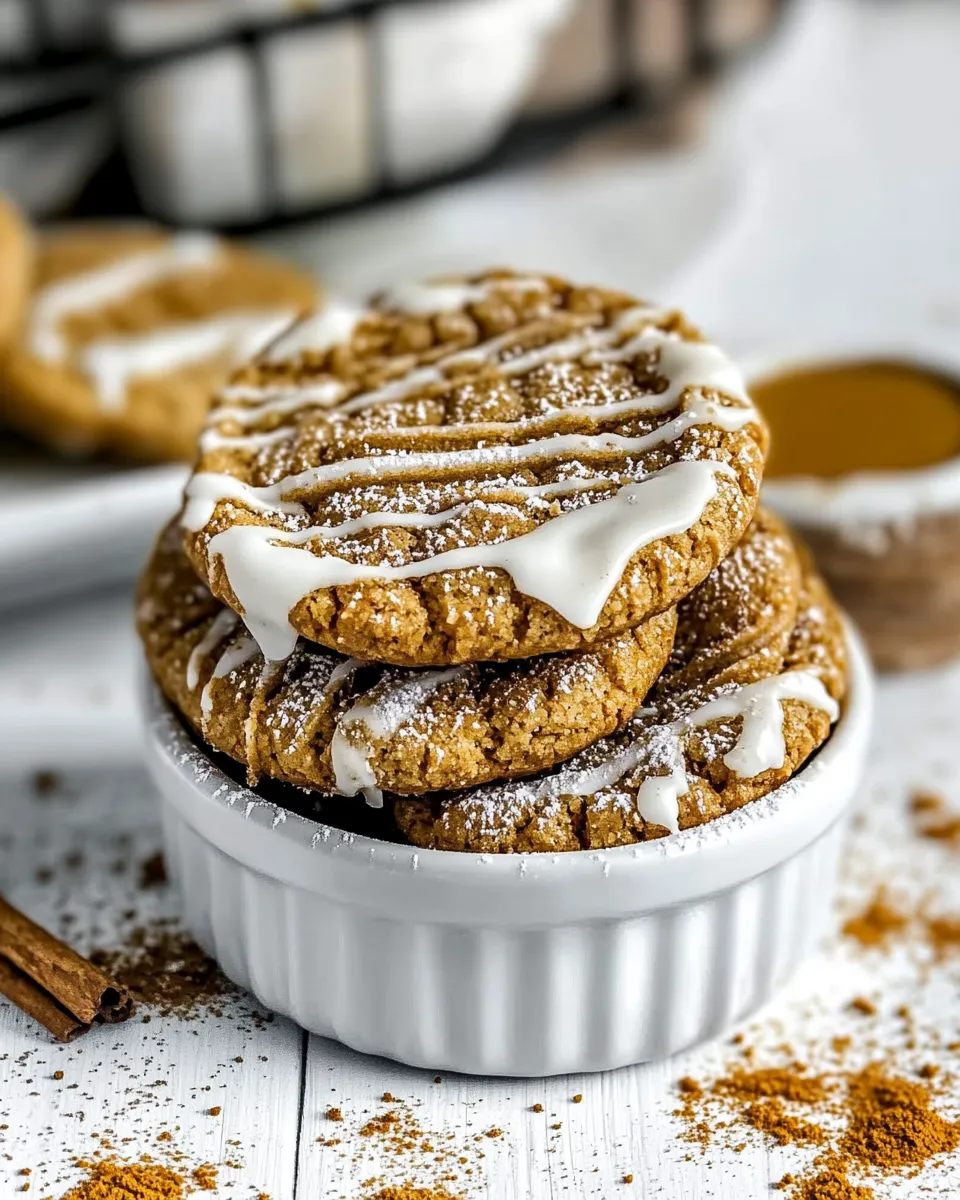
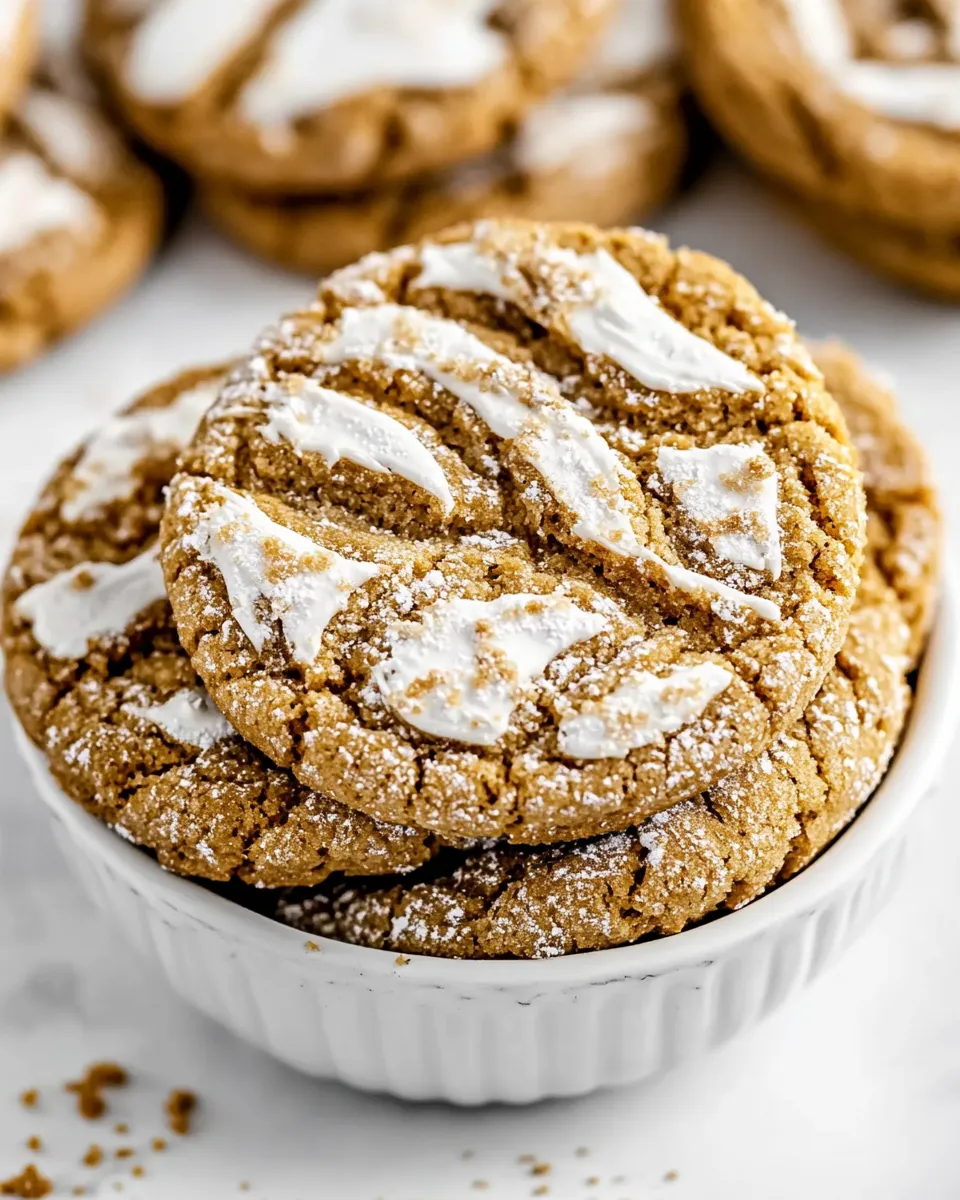
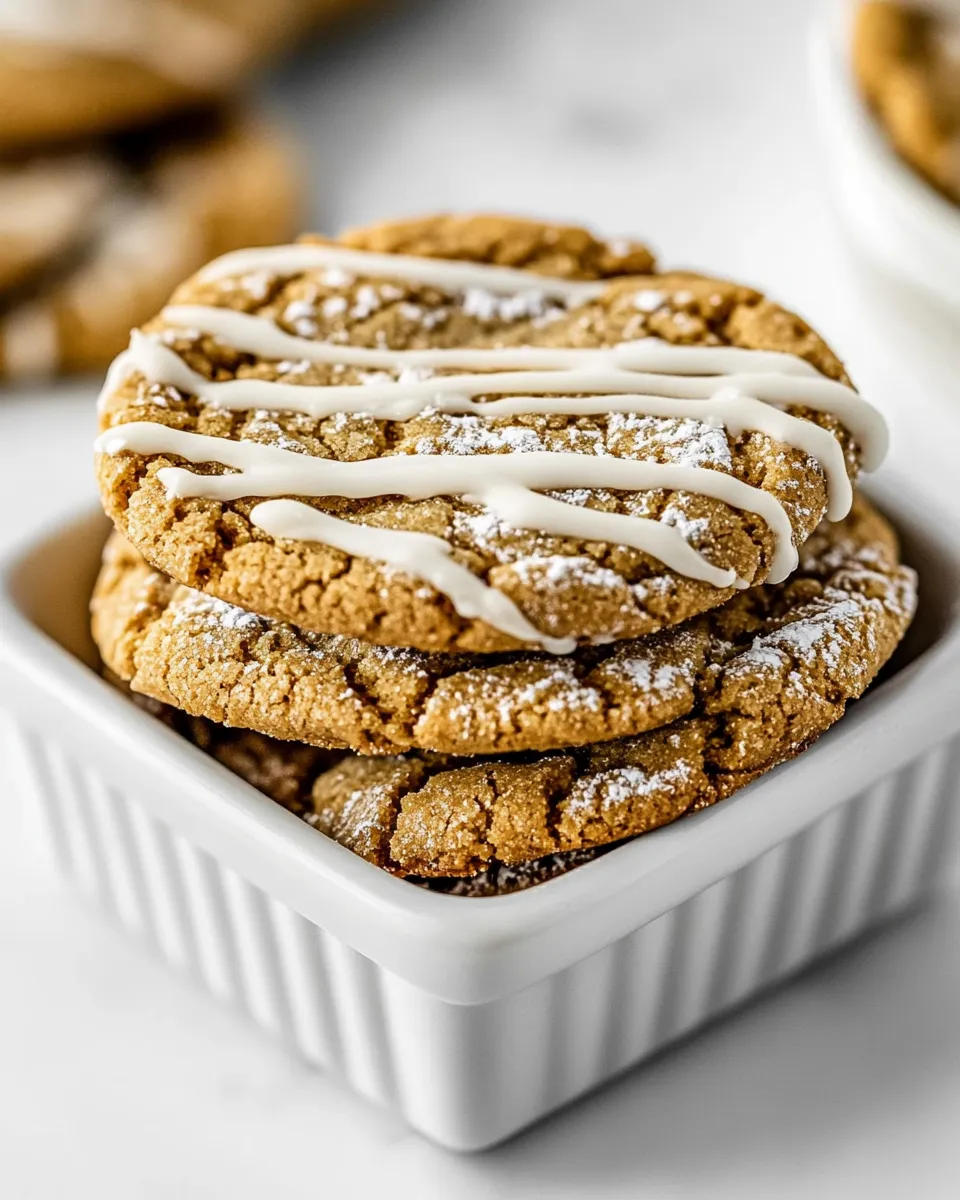
Biscoff Cookies
These Biscoff Cookies land exactly where comfort meets a little bit of fancy — soft, chewy cookies with a gooey Biscoff center and white chocolate hits on top. They’re straightforward to make, but there are a few small steps that make a big difference: pre-freezing the cookie butter, sealing the center properly, and resisting the urge to overbake.
I test this formula a lot because it’s a favorite to bring to gatherings and to pack in lunchboxes. The cookie butter melts into a soft pocket while the cookie bakes, so every bite has that distinctive spiced speculoos flavor. The white chocolate brightens the dough and gives pockets of creamy sweetness.
No gimmicks here — just dependable technique, times you can trust, and a few practical tips so the cookies always come out chewy with a soft center. If you like a cookie that’s satisfying without being fussy, this one is worth the 30-minute chill and the tiny bit of prep up front.
Ingredient Rundown
- 1 cup unsalted butter, room temp (227 g) — provides richness and structure; room temperature ensures smooth creaming with the sugars.
- 1 1/2 cups light brown sugar (330 g) — adds moisture and a caramel note that complements the Biscoff; pack lightly when measuring.
- 1/2 cup granulated sugar (100 g) — balances sweetness and helps with spread and texture.
- 14 oz container lotus cookie butter*, divided (about 1.5 cups cookie butter or speculoos) (400 g) — the star flavor; divided so some is mixed into the dough and some is frozen for the center.
- 2 large eggs, room temp — bind the dough and add lift; room temperature eggs incorporate more evenly.
- 1 egg yolk — adds extra richness for a tender, slightly fudgy crumb.
- 2 teaspoons vanilla extract (10 ml) — lifts and rounds the flavors; use pure vanilla if you have it.
- 3 cups all-purpose flour (375 g) — the base; measure by weight or spoon-and-level for consistent results.
- 1 teaspoon baking soda (5 g) — helps with spread and browning.
- 1 teaspoon baking powder (5 g) — gives a gentle lift to keep cookies tender.
- 1 teaspoon kosher salt (5 g) — enhances flavor; adjust slightly if using table salt.
- 11 oz bag white chocolate chips, divided (312 g) — fold most into the dough for pockets of creamy sweetness and reserve some for topping.
- 10 Biscoff cookies, crushed — a final crunchy, spiced sprinkle that ties the cookies to the cookie butter filling.
- 1/2 cup vanilla melting wafers, or chopped almond bark, melted, for drizzle (optional) (85 g) — optional finishing drizzle; melts smoothly and sets with a glossy finish.
Biscoff Cookies, Made Easy
- Preheat oven to 375°F. Line one or more baking sheets with parchment paper.
- From the 14 oz container of cookie butter, measure out and set aside 1 cup for the dough. Using the remaining 1/2 cup, drop 24 small scoops (about 1 teaspoon each) onto a small piece of parchment or a small baking sheet and place them in the freezer while you make the dough.
- In the bowl of a stand mixer (or using a hand mixer), add the room-temperature unsalted butter, light brown sugar, and granulated sugar. Beat on medium speed about 1 minute until combined.
- Add the 1 cup of reserved cookie butter to the mixer and beat 2–3 minutes, until the mixture is lighter in color and fluffy. Scrape down the bowl as needed.
- Add the 2 large eggs, the egg yolk, and the vanilla extract. Mix until just combined.
- In a separate bowl, whisk together the all-purpose flour, baking soda, baking powder, and kosher salt. Gradually add the dry ingredients to the wet mixture and mix until just combined; do not overmix.
- Stir in 1 1/2 cups of the white chocolate chips. Reserve any remaining white chocolate chips from the bag for topping.
- Portion the dough into 24 balls, about 3 tablespoons each (roughly 70 g) and place them on a plate or baking sheet.
- Remove the frozen cookie butter scoops from the freezer. Press a deep indentation into the center of each dough ball, place one frozen cookie butter scoop into the indentation, then seal the dough completely around it and roll back into a smooth ball. Press a few reserved white chocolate chips onto the top of each filled dough ball, if desired.
- Cover the filled dough balls and refrigerate for 30 minutes.
- Place dough balls on the prepared baking sheet about 1 inch apart. Bake for 12–15 minutes, until the edges are set and the tops are no longer shiny. Avoid over-baking.
- Allow the cookies to cool on the baking sheet for at least 15 minutes, then transfer to a wire rack to cool completely.
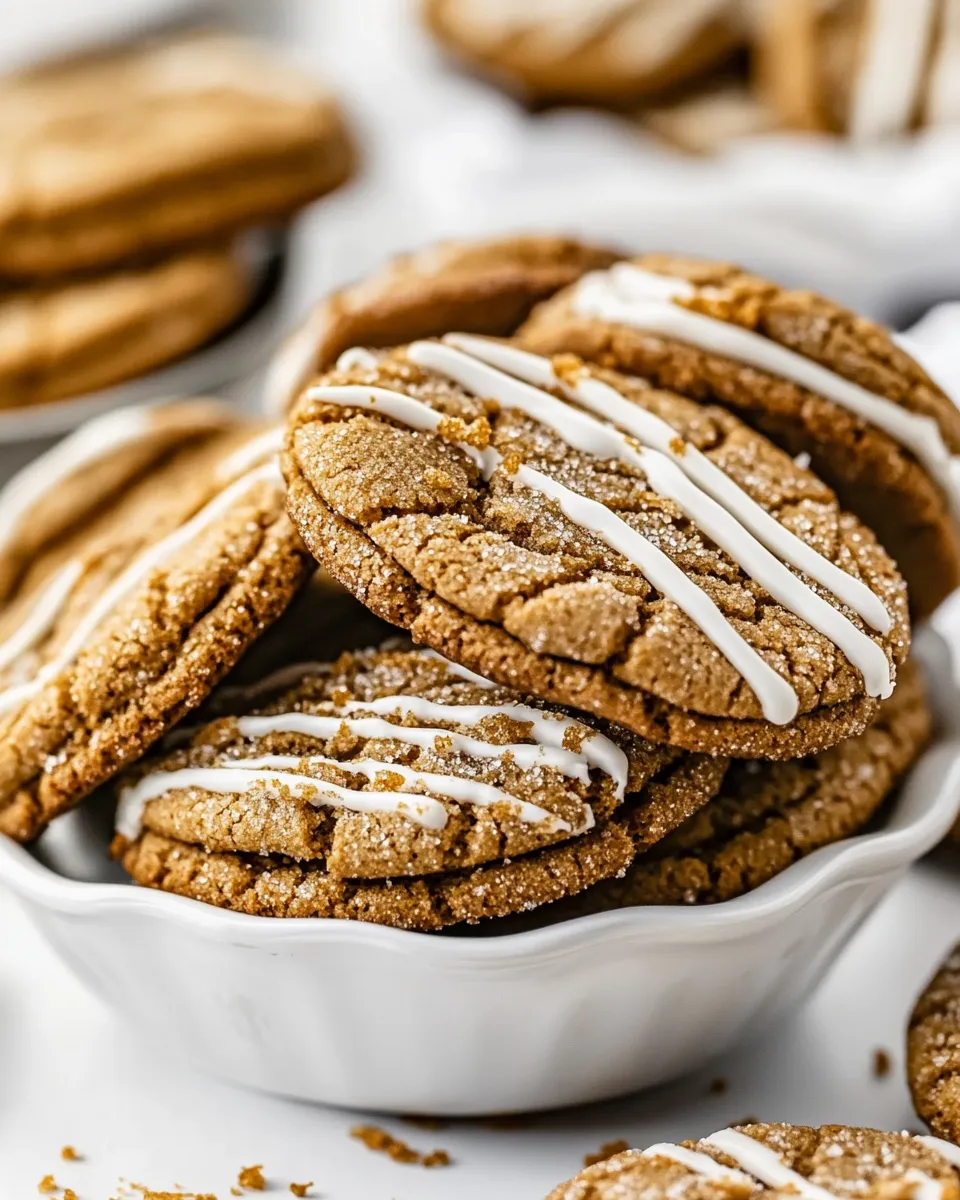
- If using, melt the vanilla melting wafers (or chopped almond bark) according to package instructions and drizzle over cooled cookies. Sprinkle with the crushed Biscoff cookies and any extra white chocolate chips.
Why You’ll Keep Making It
These cookies hit several satisfying notes: the spiced caramel depth from the cookie butter, the creamy pops of white chocolate, and the contrast of a tender cookie exterior with a molten center. They’re impressive to serve but not finicky to make — most of the work is standard creaming and mixing. Freezing the cookie butter scoops is a small step that yields a big payoff: a perfectly contained molten center instead of a greasy puddle on the tray.
They’re also versatile. Serve them warm, slightly cooled, or fully set and drizzled. They travel well if chilled, freeze beautifully, and make a great addition to cookie boxes or holiday trays. Once you learn the sealing technique (press, insert, seal, roll), the whole process moves quickly.
Allergy-Friendly Substitutes
- Dairy-free option: Swap the unsalted butter for an equal amount of firm vegan butter (use a block-style product, not spread). Choose dairy-free white chocolate or omit the white chocolate and use more cookie butter pieces.
- Egg-free option: Use commercial egg replacer equivalent to 2 eggs and skip the extra yolk, or try 1/4 cup unsweetened applesauce plus 1 tablespoon extra oil per egg—texture will be slightly different.
- Gluten-free option: Substitute a 1:1 gluten-free flour blend that contains xanthan gum; weigh to match 375 g for best results.
- Nut-free: Ensure any white chocolate or almond bark alternatives are labeled nut-free; the recipe itself doesn’t require nuts.
Must-Have Equipment
- Stand mixer or electric hand mixer — for smooth creaming and even mixing.
- Baking sheets and parchment paper — prevent sticking and make clean-up simple.
- Small scoop or teaspoon — to portion the frozen cookie butter centers consistently.
- Kitchen scale (optional but recommended) — for accurate dough portioning (70 g per ball).
- Wire rack — cool cookies properly to finish setting without becoming soggy.
Mistakes That Ruin Biscoff Cookies
- Not freezing the cookie butter scoops: If the filling isn’t frozen, it will leak into the cookie and you’ll lose that neat molten center.
- Sealing poorly: If there’s any gap when you wrap the dough around the frozen scoop, the cookie butter can escape during baking. Seal completely and roll smooth.
- Overmixing after adding flour: Work until just combined. Overmixing develops gluten and yields a tougher cookie.
- Overbaking: These cookies look slightly underdone when perfect. Bake until edges are set and tops are not shiny; remove before they brown too much.
- Skipping the chill: Refrigerating the filled balls for 30 minutes firms them so they keep their shape and bake with the right texture.
Fit It to Your Goals
Want softer, cakier cookies? Reduce bake time slightly and keep the centers thicker by using a slightly larger dough portion. Prefer chewier edges? Let them sit a few minutes on the hot sheet after removing from oven before transferring to the rack. Looking to make a gift batch? Double the recipe, portion and freeze unbaked balls (with frozen centers already sealed) on a tray, then transfer to a freezer bag — bake from frozen, adding a few extra minutes to the bake time.
For smaller cookies, portion dough into 1.5 tablespoon balls and make proportionally smaller cookie butter scoops; reduce baking time and watch closely. If you want a more pronounced cookie butter flavor in the dough, you can fold in an extra tablespoon or two of cookie butter into the dough, but be cautious: adding too much can change dough consistency and spreading.
Testing Timeline
- Prep and freezing cookie butter scoops: 5–10 minutes active prep, then freeze while you make the dough (about 10–15 minutes of your mixer time).
- Dough mixing: ~10 minutes (creaming 1 minute, additional 2–3 minutes after adding cookie butter, then mixing in eggs and dry ingredients).
- Portioning and shaping: 10–15 minutes to portion dough, insert frozen centers, and seal (faster with a partner).
- Chill filled dough balls: 30 minutes in the refrigerator.
- Baking: 12–15 minutes per tray; allow 15 minutes cooling on the sheet afterward.
- Finishing: 5–10 minutes to melt wafers and drizzle, plus sprinkling crushed cookies.
Storage & Reheat Guide
Store cooled cookies in an airtight container at room temperature for up to 3 days. For longer storage, freeze cooled cookies in a single layer on a tray until firm, then transfer to a freezer-safe container or bag for up to 3 months. Thaw at room temperature.
To revive a cookie and bring the center back to molten, microwave a single cookie for 7–10 seconds (timer varies by microwave) or warm in a 300°F oven for about 3–4 minutes. If cookies were frozen, allow them to come to room temperature first before reheating briefly.
Quick Questions
- Can I use another cookie butter brand? Yes. Any speculoos or cookie butter will work; flavor intensity may vary slightly.
- What if my cookie butter is too runny? Chill the jar slightly to firm it up before scooping, or chill the scoops longer in the freezer.
- Why are my centers leaking? Most likely the seal wasn’t complete — press, fold, and roll until there’s no seam.
- Can I skip the white chocolate? Yes. The cookies will still be excellent — consider sprinkling extra crushed Biscoff on top for texture.
Save & Share
If you try these, save the recipe and note the bake time that worked best for your oven. Share a photo with friends — a warm cookie with a slightly oozing center is irresistible. These travel well to parties and make a thoughtful homemade gift wrapped with a few extra crushed Biscoff cookies on top.
Happy baking — enjoy the little pockets of spiced cookie butter in every bite.
Ingredients
Equipment
Method
- Preheat oven to 375°F. Line one or more baking sheets with parchment paper.
- From the 14 oz container of cookie butter, measure out and set aside 1 cup for the dough. Using the remaining 1/2 cup, drop 24 small scoops (about 1 teaspoon each) onto a small piece of parchment or a small baking sheet and place them in the freezer while you make the dough.
- In the bowl of a stand mixer (or using a hand mixer), add the room-temperature unsalted butter, light brown sugar, and granulated sugar. Beat on medium speed about 1 minute until combined.
- Add the 1 cup of reserved cookie butter to the mixer and beat 2–3 minutes, until the mixture is lighter in color and fluffy. Scrape down the bowl as needed.
- Add the 2 large eggs, the egg yolk, and the vanilla extract. Mix until just combined.
- In a separate bowl, whisk together the all-purpose flour, baking soda, baking powder, and kosher salt. Gradually add the dry ingredients to the wet mixture and mix until just combined; do not overmix.
- Stir in 1 1/2 cups of the white chocolate chips. Reserve any remaining white chocolate chips from the bag for topping.
- Portion the dough into 24 balls, about 3 tablespoons each (roughly 70 g) and place them on a plate or baking sheet.
- Remove the frozen cookie butter scoops from the freezer. Press a deep indentation into the center of each dough ball, place one frozen cookie butter scoop into the indentation, then seal the dough completely around it and roll back into a smooth ball. Press a few reserved white chocolate chips onto the top of each filled dough ball, if desired.
- Cover the filled dough balls and refrigerate for 30 minutes.
- Place dough balls on the prepared baking sheet about 1 inch apart. Bake for 12–15 minutes, until the edges are set and the tops are no longer shiny. Avoid over-baking.
- Allow the cookies to cool on the baking sheet for at least 15 minutes, then transfer to a wire rack to cool completely.
- If using, melt the vanilla melting wafers (or chopped almond bark) according to package instructions and drizzle over cooled cookies. Sprinkle with the crushed Biscoff cookies and any extra white chocolate chips.
Notes
Yield:
2 dozen cookies.
Cookie Butter:
Should be easy to find at any grocery store (Walmart, Target and
Amazon
carry the Lotus brand), or use
Speculoos Cookie Butter
from Trader Joes, or store brand cookie butter, found near the peanut butter.
To Make Ahead:
Biscoff cookie dough can be stored in the fridge for 1-2 days.
To Freeze:
You can freeze cookie dough balls, or baked cookies in an air-tight freezer safe container for up to 3 months.