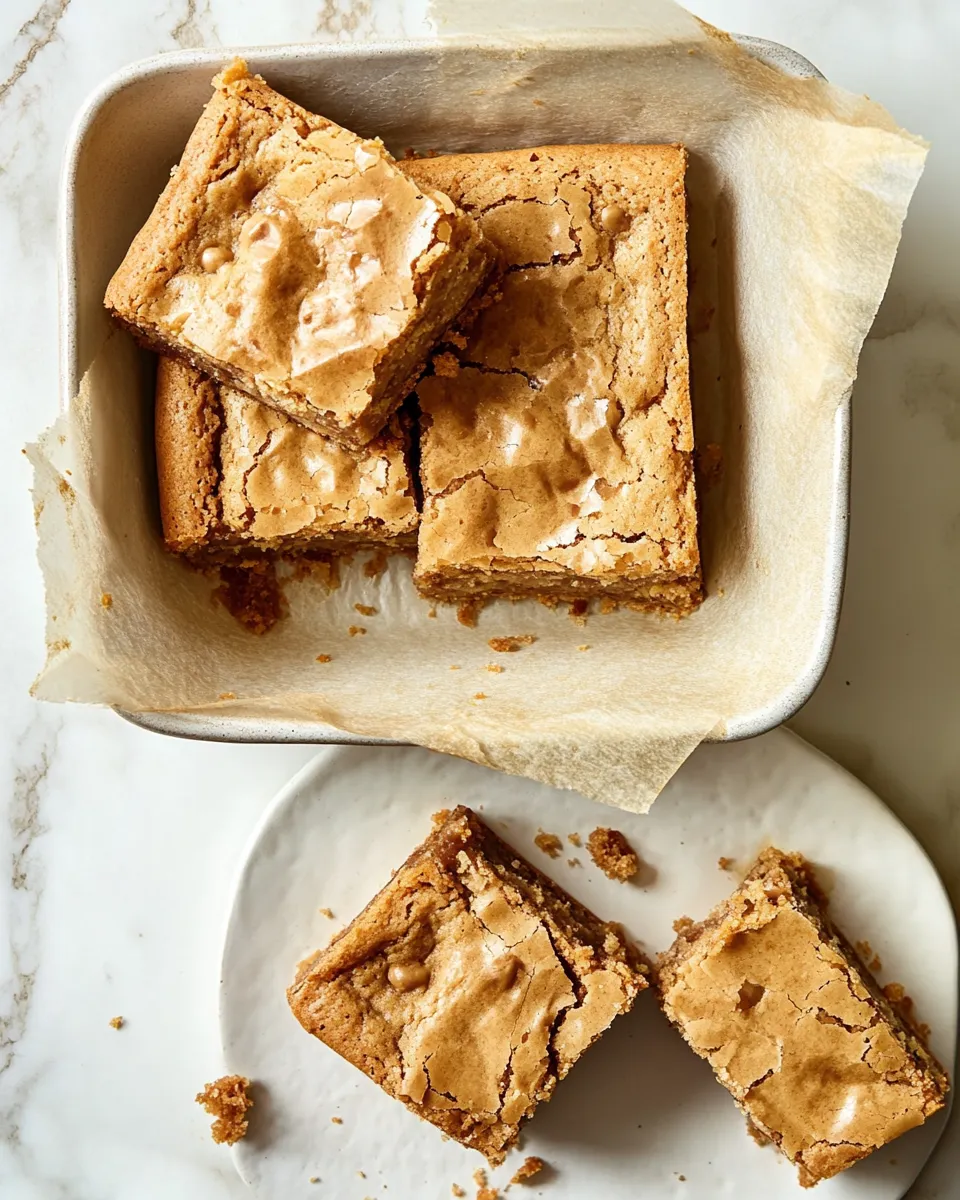
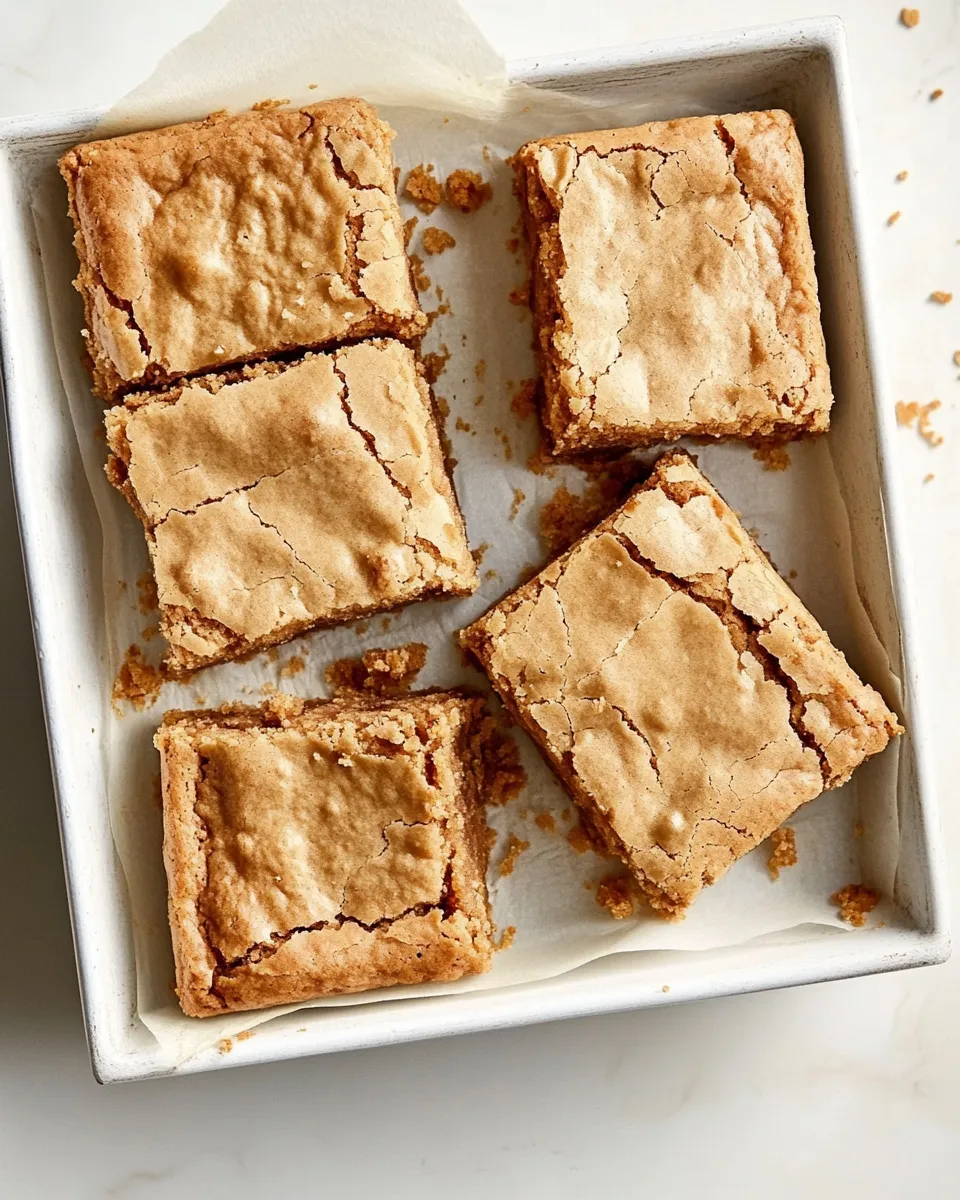
Blondies Recipe
These blondies are the kind of bake that becomes a weekday staple and a party favorite without much fuss. They come together from simple pantry ingredients, rely on technique more than trickery, and reward you with a chewy, deeply caramel-flavored bar studded with walnuts and white chocolate. I make them when I want something impressive that doesn’t take all day.
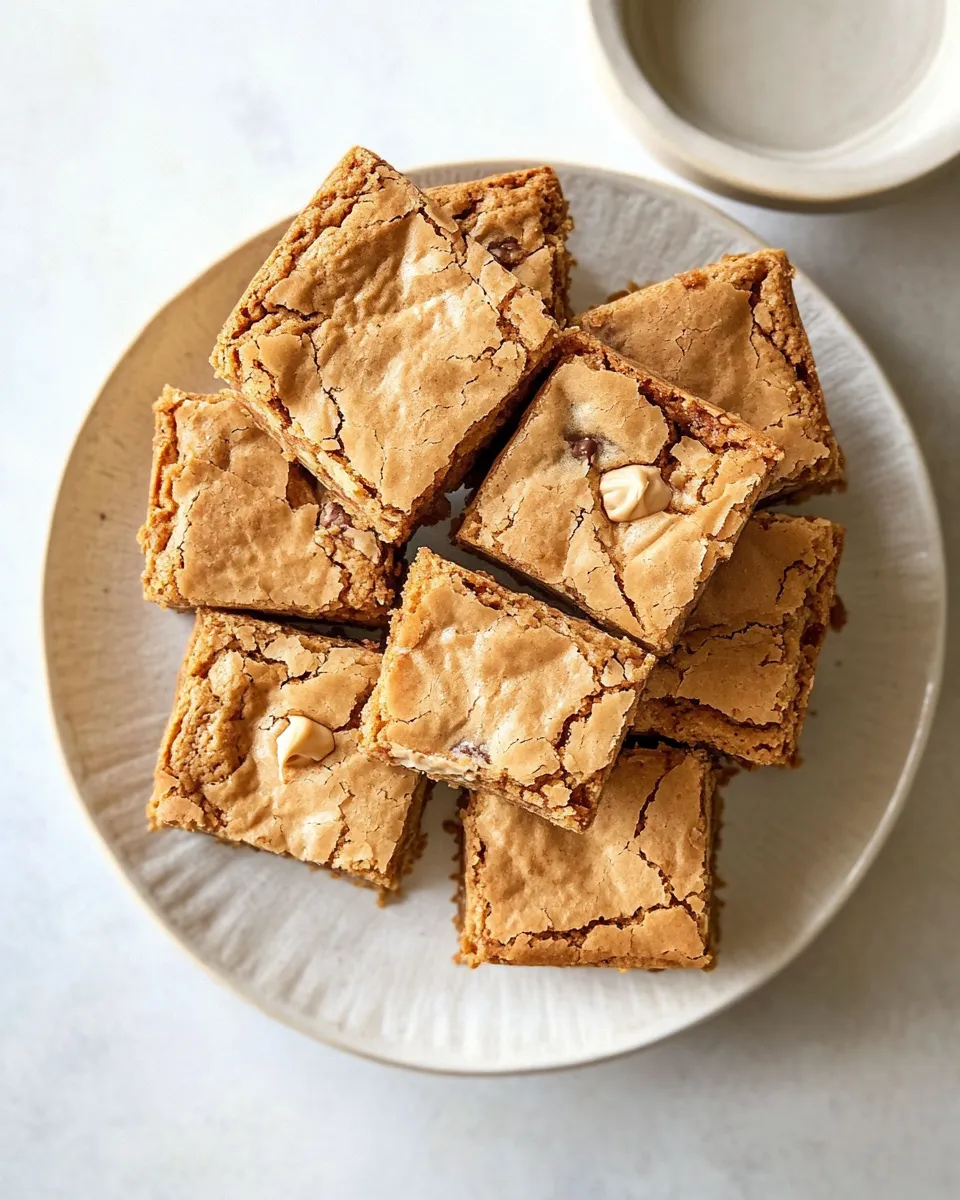
The key is browned butter and a confident hand when folding in the flour. Browning the butter adds toasted, nutty depth that turns ordinary brown sugar into something almost toffee-like. The result is dense and tender, with small surface cracks and golden edges that hint at that perfect chew inside.
I’ll walk you through the ingredients I use, the exact step-by-step method, and the realistic tips I rely on when testing these blondies at home. No fluff — just a practical approach so your first pan comes out great and your next batch gets even better.
What We’re Using
- ¾ cup (1½ sticks) unsalted butter, sliced into pats, plus more for the pan — Browning this gives the blondies their toasty, caramel notes; reserve extra for greasing.
- 1½ cups light or dark brown sugar — Adds moisture, chew, and deep molasses flavor; dark will yield richer caramel tones.
- 2 large eggs — Provide structure and richness; bring to room temperature for even mixing.
- 1 large egg yolk — Adds extra richness and chew without making the batter cakey.
- 1 tablespoon vanilla extract — Rounds and brightens the brown-sugar flavor.
- 1 teaspoon sea salt — Balances sweetness and enhances the butter’s nuttiness; scatter it on top of batter briefly if you like a salty finish.
- 1½ cups all-purpose flour, spooned and leveled — The bulk of the structure; spoon into the measuring cup then level off to avoid a dense bar.
- ½ cup chopped walnuts, plus more for topping — Adds crunch and a toasty counterpoint to the sweet chips; chop evenly so pieces bake uniformly.
- ½ cup white chocolate chips, plus more for topping — Provide pockets of creamy sweetness; reserve some to press on top for a pretty finish.
The Method for Blondies Recipe
- Preheat the oven to 350°F. Grease an 8×8-inch baking dish with some of the extra butter and line it with parchment paper, leaving an overhang to lift the blondies out after baking.
- Place the ¾ cup (1½ sticks) unsalted butter, sliced into pats, in a light-colored saucepan and melt over medium heat.
- Stir the butter constantly as it cooks. The butter will foam, then the foam will subside; continue cooking, stirring, for about 5 to 10 minutes, until the milk solids at the bottom turn golden brown and the butter smells nutty.
- Remove the pan from the heat and immediately pour the browned butter into a large heatproof bowl to stop the cooking. Allow the butter to cool slightly until it is warm (not hot) to the touch.
- Add the 1½ cups light or dark brown sugar, the 2 large eggs, the 1 large egg yolk, and the 1 tablespoon vanilla extract to the warm browned butter. Whisk until smooth and well combined.
- Sprinkle the 1 teaspoon sea salt over the mixture and whisk briefly to incorporate.
- Add the 1½ cups all-purpose flour (spooned and leveled) to the bowl. Use a spatula to fold and stir the batter until the flour is just incorporated; do not overmix.
- Fold in the ½ cup chopped walnuts and the ½ cup white chocolate chips, reserving some walnuts and chips to press on top if you like.
- Transfer the batter to the prepared pan and spread it into an even layer. Press the reserved walnuts and white chocolate chips onto the top of the batter.
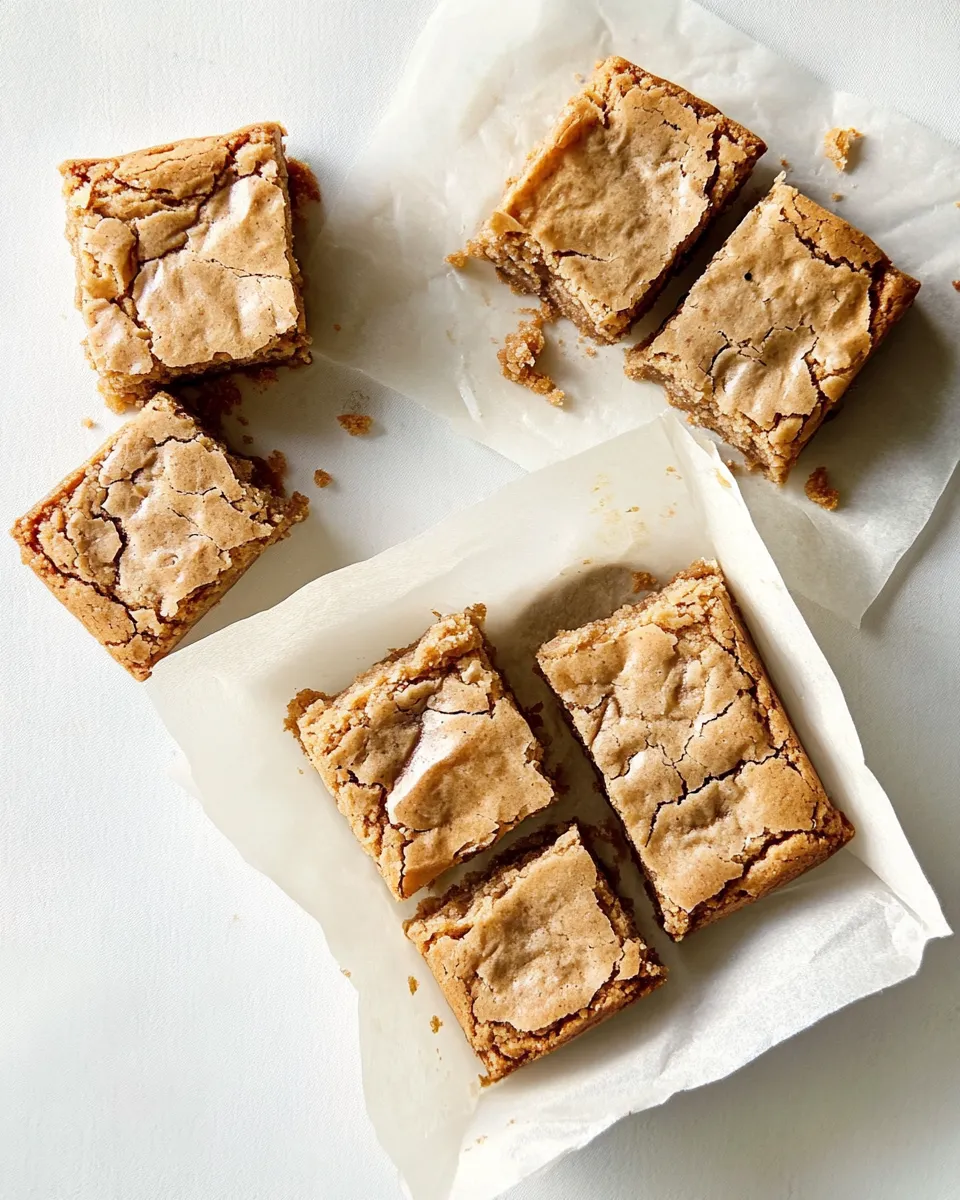
- Bake for 28 to 30 minutes, or until the edges are golden brown and small cracks form on the surface.
- Remove from the oven and allow the blondies to cool completely in the pan before using the parchment overhang to lift them out and slice.
Why This Recipe Belongs in Your Rotation
This blondies recipe is straightforward, forgiving, and reliably delicious. The combination of browned butter and brown sugar gives you that classic caramelized flavor without needing to cook sugar separately or temper chocolate. With a single bowl for the wet ingredients and a light fold-in of flour and mix-ins, it’s a low-mess bake that’s perfect for both last-minute guests and batch baking for the week.
They store well, freeze cleanly, and slice into neat squares once fully cooled. The texture lands squarely between fudgy and chewy — not cakey — which makes them a great counterpoint to coffee or a scoop of ice cream. If you’re short on time, the method still rewards careful browning of the butter; that one step transforms the whole bar.
Dairy-Free/Gluten-Free Swaps
If you need to avoid dairy, choose a solid plant-based butter that behaves like butter when melted and browned (look for one labeled suitable for baking). Brown the plant-based alternative in the same way, watching for similar visual cues: foaming, subsiding foam, and browned milk solids or toasted particles. Be patient — colors can look different, but the nutty aroma is the best signal.
For a gluten-free version, substitute a 1-to-1 gluten-free all-purpose flour blend that contains xanthan gum or a binder. Keep the flour quantity the same and fold gently; the batter should feel slightly dense. Because gluten-free flours can absorb moisture differently, allow the blondies to cool fully before slicing to avoid crumbling.
Kitchen Gear Checklist
- 8×8-inch baking dish — The size affects bake time and thickness; use this size for the listed times.
- Light-colored saucepan — Helps you see the milk solids as they brown in the butter.
- Heatproof mixing bowl — For whisking the warm butter with sugar and eggs.
- Whisk and spatula — Whisk for wet ingredients, spatula for folding the flour and mix-ins.
- Parchment paper — Makes lifting the blondies clean and easy.
- Measuring cups and spoons — Spoon and level the flour for accurate texture.
- Oven thermometer (optional) — Useful if your oven runs hot or cold; accurate temperature helps chewy bars.
Common Errors (and Fixes)
Burned or Bitter Browned Butter
Error: The butter goes past the golden-brown stage and smells acrid. Fix: Remove from heat at the first clear nutty aroma and transfer it immediately to a cool bowl to stop the carryover cooking. A lighter-colored pan makes it easier to watch the milk solids.
Blondies Too Cakey or Dry
Error: Overmixing after adding the flour or using too much flour makes the bars cake-like and dry. Fix: Measure flour by spooning into the cup and leveling; fold only until the flour disappears. If your batter looks stiff, stop — a slightly loose batter yields the chew you want.
Edges Browning Too Fast
Error: Edges get dark while the center is still underdone. Fix: Check oven temperature with a thermometer and consider lowering the rack one slot. If using a dark or glass pan, reduce bake time slightly or tent with foil toward the end of baking.
Blondies Fall Apart When Sliced
Error: Cutting immediately after baking causes crumbling. Fix: Cool completely in the pan so the crumb sets. Use the parchment overhang to lift the whole slab out, then slice with a sharp knife wiped clean between cuts.
Variations for Dietary Needs
Keep the structure of the recipe and you can adapt it without changing the ratios given. For a nut-free option, omit the chopped walnuts and press additional white chocolate chips on top. If you prefer a less sweet bar, use light brown sugar or reduce the white chocolate chips—remember that these swaps change flavor but not the baking behavior.
For a higher-protein variant without changing amounts, consider serving smaller squares alongside a protein-rich accompaniment (yogurt or milk) rather than altering the batter. That keeps the baking reliable while addressing dietary goals.
Testing Timeline
To reproduce this recipe reliably, follow a simple timeline: plan 10–15 minutes for mise en place (measuring and prepping), 10 minutes to brown the butter and cool it slightly, 5–10 minutes to combine and fold the batter, and 28–30 minutes to bake. Add at least 45–60 minutes of cooling time before slicing. Altogether, expect 1½ to 2 hours from start to neatly sliced blondies on the counter.
If you test once and adjust, evaluate the texture after a full cool: a slightly underbaked center at 28 minutes will firm up as it cools; if it seems underdone even after cooling, add 2–3 minutes next bake. Keep notes on your oven and pan type — that’s the fastest way to dial in consistent results.
Storing, Freezing & Reheating
Store fully cooled blondies in an airtight container at room temperature for up to 4 days. If you live somewhere humid, place a piece of parchment between layers to prevent sticking. For longer storage, freeze individual squares in a single layer on a tray until firm, then transfer to a freezer-safe container or bag for up to 3 months. Thaw at room temperature or warm gently in a low oven (about 300°F) for a few minutes to refresh the edges.
Reheat a single square in the microwave for 10–15 seconds to revive that just-baked warmth, or pop a slab in a preheated oven for 5–7 minutes. Avoid overheating, which will melt the white chocolate and dry the crumb.
Quick Questions
Q: Can I skip browning the butter?
A: You can, but you’ll lose the toffee-like depth that defines these blondies. If you’re in a pinch, melted butter will work, but expect a lighter, less toasted flavor.
Q: Can I substitute chocolate chips for the white chocolate?
A: Yes. Swap in regular chocolate chips in the same amount for a more traditional chocolatey bar. The bake time and texture should remain the same.
Q: Why does the recipe call for an extra egg yolk?
A: The extra yolk adds richness and chew without increasing rise — it keeps the interior dense and tender rather than cakey.
Q: How do I know when they’re done?
A: Look for golden-brown edges and small, connected cracks on the surface. The center will feel set but slightly soft; it firms as it cools. If a toothpick comes out with wet batter, bake a few minutes longer.
Let’s Eat
Slice these blondies into squares once completely cool, serve them with coffee or a scoop of ice cream, and watch them disappear. They’re dependable, deeply flavored, and friendly to tweaks once you understand how the browned butter and flour interact. Bake once with care, and you’ll have a go-to bar that’s both approachable and impressive.
If you bake a batch, tell me how you liked the texture and whether you kept the walnuts in or swapped them out. Small adjustments — a minute more in the oven, a few fewer chips on top — are how you make this recipe your own.
Blondies Recipe
Ingredients
Equipment
Method
- Preheat the oven to 350°F. Grease an 8x8-inch baking dish with some of the extra butter and line it with parchment paper, leaving an overhang to lift the blondies out after baking.
- Place the ¾ cup (1½ sticks) unsalted butter, sliced into pats, in a light-colored saucepan and melt over medium heat.
- Stir the butter constantly as it cooks. The butter will foam, then the foam will subside; continue cooking, stirring, for about 5 to 10 minutes, until the milk solids at the bottom turn golden brown and the butter smells nutty.
- Remove the pan from the heat and immediately pour the browned butter into a large heatproof bowl to stop the cooking. Allow the butter to cool slightly until it is warm (not hot) to the touch.
- Add the 1½ cups light or dark brown sugar, the 2 large eggs, the 1 large egg yolk, and the 1 tablespoon vanilla extract to the warm browned butter. Whisk until smooth and well combined.
- Sprinkle the 1 teaspoon sea salt over the mixture and whisk briefly to incorporate.
- Add the 1½ cups all-purpose flour (spooned and leveled) to the bowl. Use a spatula to fold and stir the batter until the flour is just incorporated; do not overmix.
- Fold in the ½ cup chopped walnuts and the ½ cup white chocolate chips, reserving some walnuts and chips to press on top if you like.
- Transfer the batter to the prepared pan and spread it into an even layer. Press the reserved walnuts and white chocolate chips onto the top of the batter.
- Bake for 28 to 30 minutes, or until the edges are golden brown and small cracks form on the surface.
- Remove from the oven and allow the blondies to cool completely in the pan before using the parchment overhang to lift them out and slice.