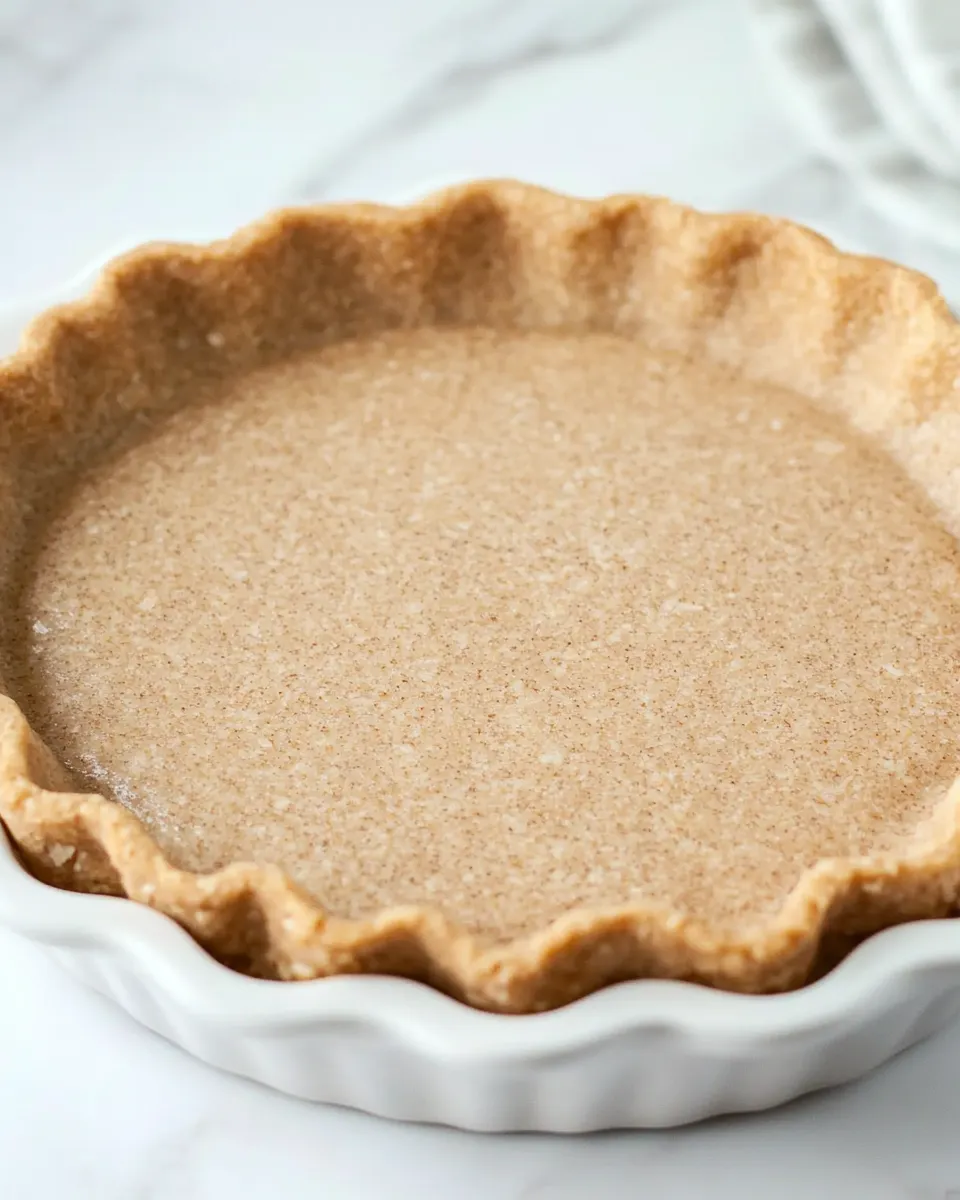
Buckwheat Flour Pie Crust
This buckwheat flour pie crust is one of those simple swaps that changes a pie from familiar to quietly unforgettable. Nutty, slightly earthy buckwheat gives the crust a depth that pairs beautifully with both sweet and savory fillings. I love using it when I want a crust with personality—think fruit pies, quiches, and no-bake cheesecakes that benefit from a pleasantly textured base.
The recipe is straightforward and forgiving: a food processor does the heavy lifting, cold dairy-free butter keeps it tender, and a short chill makes rolling manageable. If you’re baking gluten-free or serving someone with dairy sensitivities, this crust hits both marks without fuss.
I’ll walk you through every step, list what to buy, offer swaps and troubleshooting tips, and finish with storage and timing notes so your next pie comes out crisp and reliable. No fluff—just practical advice so you can get the crust right the first time.
What You’ll Need
Ingredients
- ¾ cup Buckwheat flour — Provides the crust’s signature nutty, earthy flavor and structure; gentle, robust taste that pairs well with sweet and savory fillings.
- ½ cup Rice flour — Lightens the texture so the crust isn’t too dense; helps with a crisp crumb.
- ½ cup Tapioca starch — Adds chew and binding power, improving elasticity in a gluten-free dough.
- 2 Tbsp Cane sugar or coconut sugar — Balances buckwheat’s bitterness and helps with light browning; use cane for neutral sweetness, coconut for a deeper note.
- ½ tsp Salt — Enhances all the flavors; don’t skip it even for sweet pies.
- 4 oz Dairy-free butter — The fat that creates flakiness and flavor; must be cold and firm for proper texture.
- 1–3 Tbsp Cold water depending on texture — Hydrates the dough; add sparingly so you don’t overwork it.
Step-by-Step: Buckwheat Flour Pie Crust
- Add the buckwheat flour, rice flour, tapioca starch, cane sugar (or coconut sugar), and salt to a food processor. Pulse briefly to combine the dry ingredients.
- Cut the cold dairy-free butter into small cubes, add to the processor, and pulse until the mixture resembles coarse crumbs (small pea-sized pieces).
- With the processor running briefly or using a spatula, add cold water 1 tablespoon at a time, up to 3 tablespoons total, until the dough just comes together. The dough is ready when you can form it into a ball without crumbling, it is soft to the touch but not sticky, and it can be scraped cleanly from the bowl.
- Turn the dough out onto a piece of plastic wrap, cling film, or parchment, shape into a disc, wrap or cover, and chill in the refrigerator for at least 15 minutes.
- Preheat the oven to 350°F (180°C) while the dough chills.
- Lightly flour two sheets of parchment paper or two pieces of cling film/foil. Place the chilled dough between them and roll it out to an even thickness no thinner than 1/2 inch.
- Remove the top sheet of parchment or cling film. Slide your hands under the bottom sheet, lift the rolled dough, flip it over, and position it over a pie dish.
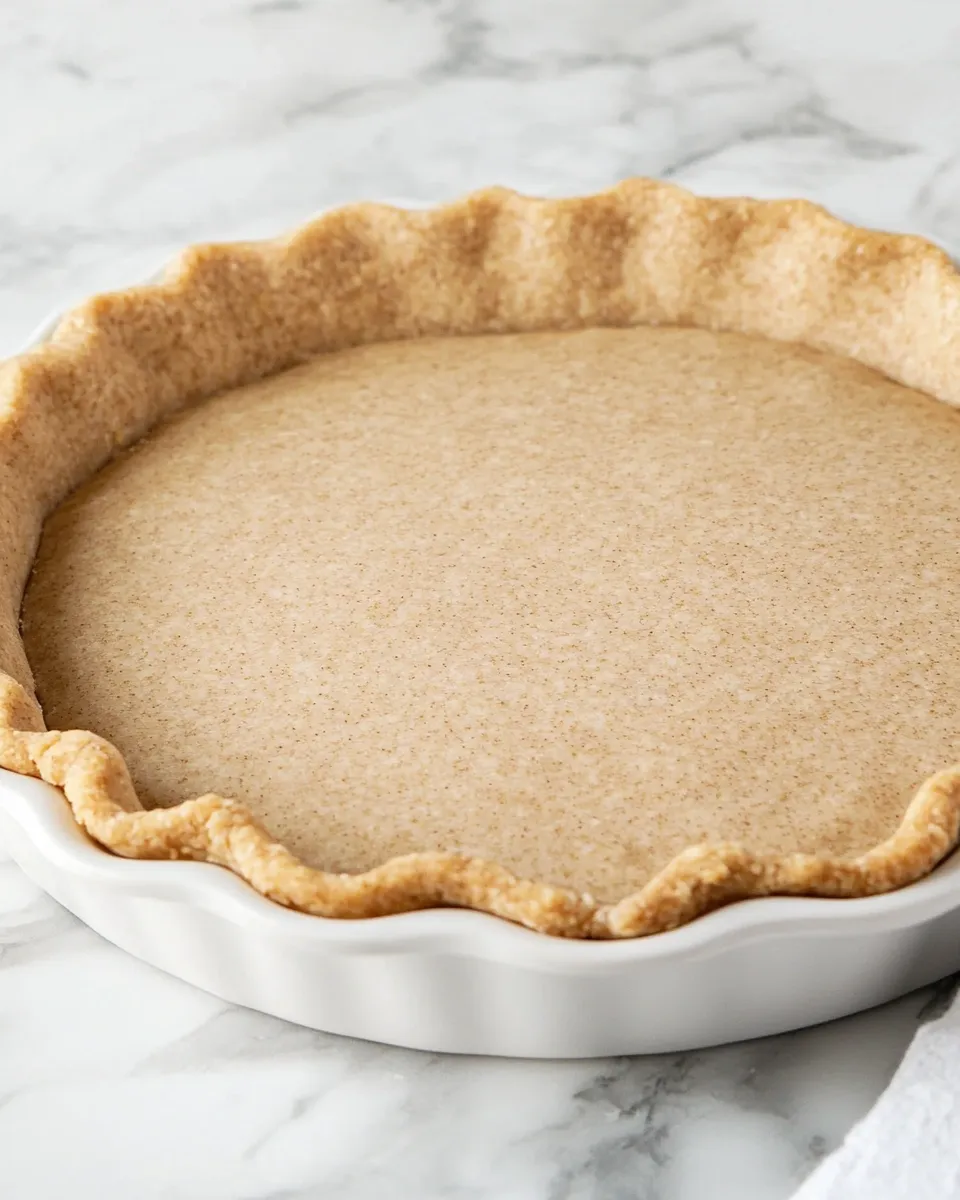
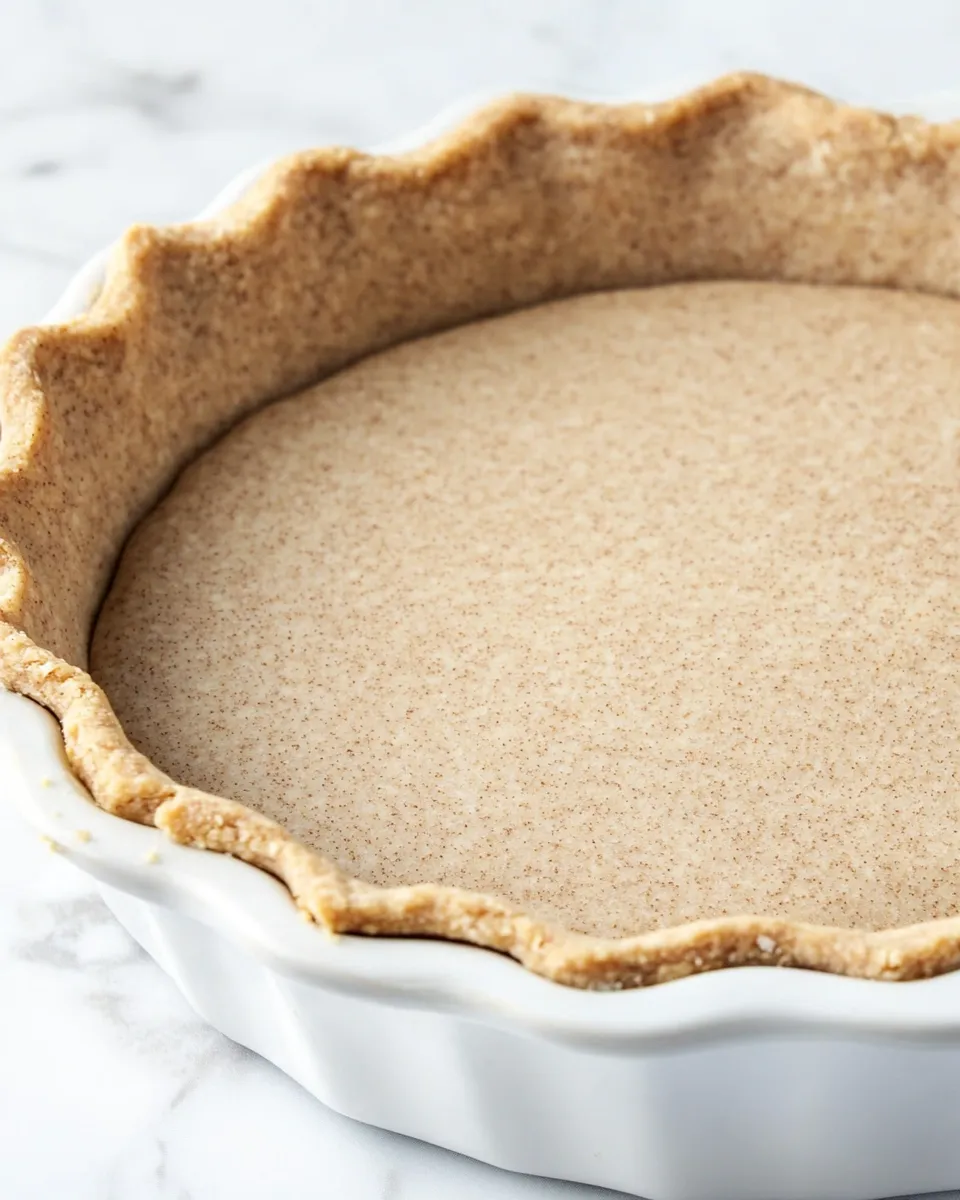
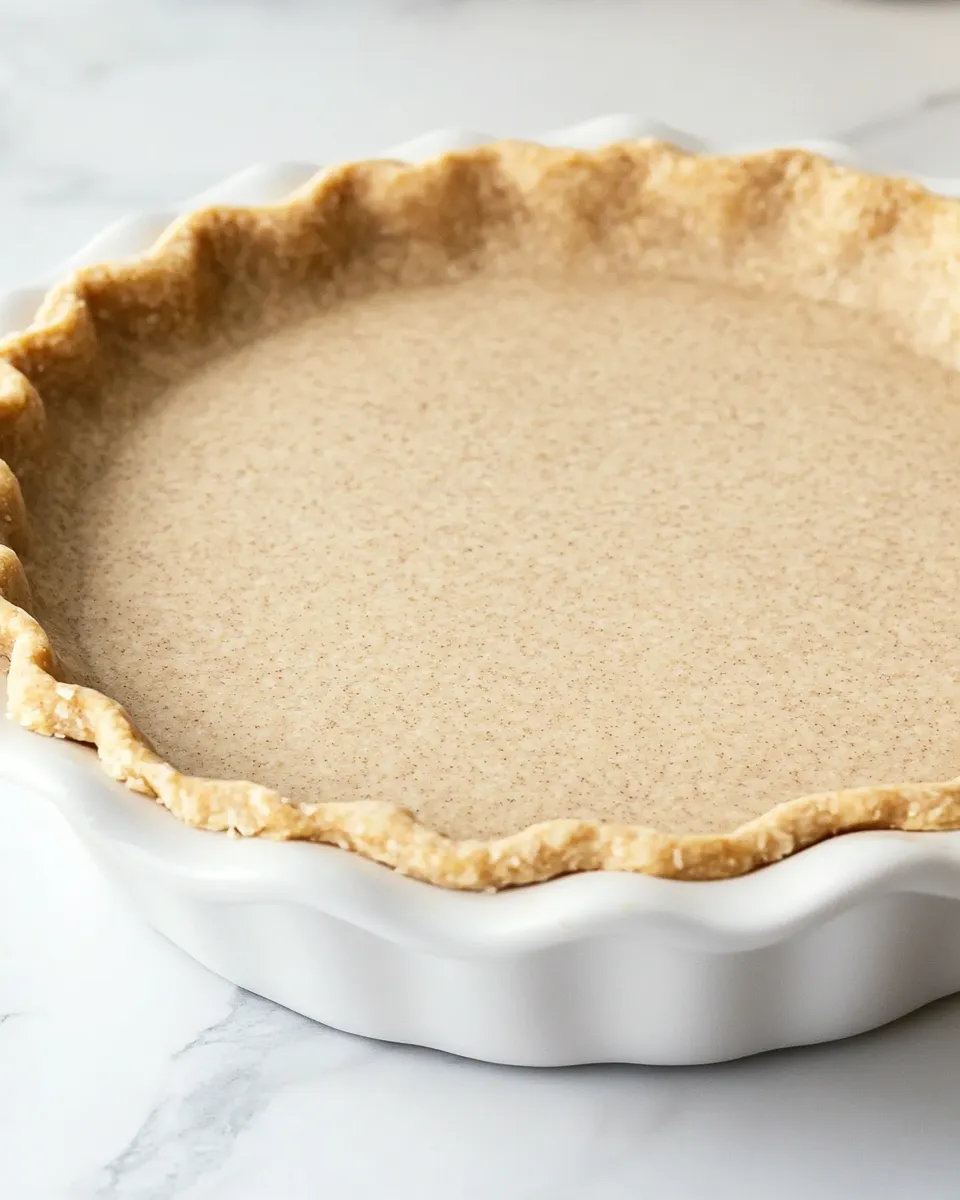
- Gently press the dough into the bottom and up the sides of the dish. Peel away the bottom sheet. Trim excess dough from the edges with a knife and press the trimmed edge to tidy the rim.
- If the crust tears or develops holes, patch with a small piece of reserved dough and smooth with your fingers.
- Place a round piece of parchment paper inside the crust and fill with pie weights, dried rice, or beans to hold the shape of the bottom and sides.
- Blind bake the crust with the weights for 15 minutes at 350°F (180°C).
- For a pre-baked crust used in no-bake pies or cheesecakes: remove the parchment and weights, then return the crust to the oven and bake an additional 10–15 minutes, until crisp.
- For a crust that will be baked with a filling: remove the parchment and weights, add your prepared filling, and bake according to your filling’s instructions (approximately 15–30 minutes, depending on the filling).
- Let the crust cool before filling or serving.
Why Cooks Rave About It
There are a few reasons this crust gets repeated in home kitchens. First, the flavor: buckwheat isn’t shy. It brings a toasty, slightly earthy note that elevates simple fillings. Second, the texture. When you combine buckwheat with rice flour and tapioca, you get a crust that’s sturdy but not heavy—crisp on the outside, tender where it meets the filling.
Third, it’s adaptable. The dairy-free butter makes it accessible for people avoiding dairy. It’s also a natural fit for gluten-free baking when you want something beyond the neutral crumb of all-purpose gluten-free mixes. Finally, it’s reliable. The process is short, and the result is consistent once you follow the cold-fat and chill cues.
Budget & Availability Swaps
- Buckwheat flour: If you can’t find it, sorghum or millet flour will give a different but pleasant flavor; note texture will change. If you don’t need gluten-free, 1:1 whole wheat or spelt will work though the taste shifts.
- Rice flour: Substitute with oat flour (gluten-free certified if needed) for a bit more chew and a milder grain flavor.
- Tapioca starch: Arrowroot is a fine swap for binding and glossy texture; cornstarch can work in a pinch but may affect crispness.
- Cane/coconut sugar: Brown sugar will introduce more moisture and a caramel note; granulated sugar is fine though it won’t add depth.
- Dairy-free butter: If dairy isn’t an issue, use cold unsalted butter at the same weight (4 oz) for a classic flavor.
- Pie weights: Use dried rice or beans you already have; they perform just as well as purchased weights for blind baking.
Must-Have Equipment
- Food processor — Speeds up making a consistent crumb; small hand-chopping will work but is more labor-intensive.
- Rolling pin — For even rolling; a small or medium pin works since the dough is sturdy.
- Parchment paper or cling film — For rolling and transferring the dough without sticking or tearing.
- Pie dish — 8- or 9-inch dishes work well; ceramic or metal both okay.
- Pie weights, dried rice, or beans — To keep the crust from puffing while blind baking.
- Sharp knife or bench scraper — For trimming edges and tidying the rim.
Avoid These Mistakes
- Working the dough when the butter is warm — it will lose flakiness and become greasy. Keep everything cold.
- Adding too much water — add 1 tablespoon at a time and stop as soon as it holds together. Overhydration makes a gluey crust.
- Rolling thinner than 1/2 inch — the recipe specifically calls for no thinner than 1/2 inch; thinner results in tears and uneven baking.
- Skipping the blind bake for wet fillings — if the filling releases moisture, it can make the bottom soggy unless pre-baked.
- Not chilling the dough — chilling relaxes the flours and firms the fat so the dough rolls and holds shape better.
Season-by-Season Upgrades
- Spring: A lemon custard or rhubarb filling brightens the buckwheat flavor—add a touch of vanilla to mellow the earthiness.
- Summer: Fresh berry pies or a no-bake mascarpone and berry tart showcase the crust’s crispness against juicy fruit.
- Fall: Apple or pear with warming spices (cinnamon, a hint of allspice) partners beautifully with buckwheat’s toastiness.
- Winter: Savory quiches—caramelized onions, mushrooms, and gruyère-like dairy-free alternatives—benefit from the crust’s sturdy texture.
Chef’s Notes
Keep the butter and water cold. Cold fat creates pockets that melt during baking and give you flakiness; warm fat will integrate too smoothly and make a dense crust. The dough should be easy to form into a ball but not sticky—if it sticks, add a whisper more flour; if it crumbles, add another teaspoon of cold water.
Rolling between parchment makes transfer effortless and reduces the chance of tearing. If you do tear the dough, patching with a small piece is the fastest fix—press it gently and smooth the seam with your fingers.
Blind baking with weights for 15 minutes sets the structure. For fillings that won’t be baked long, returning the crust to the oven for an extra 10–15 minutes after removing weights ensures a crisp base.
Storing Tips & Timelines
- Unbaked dough disc: Refrigerate up to 48 hours wrapped tightly in plastic or parchment.
- Frozen dough: Freeze the wrapped disc up to 2 months. Thaw overnight in the fridge before rolling.
- Baked crust: Store at room temperature, loosely covered, for up to 2 days. For longer storage, wrap and freeze up to 1 month.
- Partially baked crusts: If you blind-bake and then cool, you can store them airtight in the fridge for 24 hours before finishing the pie.
Popular Questions
- Is buckwheat flour gluten-free? Yes, buckwheat itself is gluten-free. If gluten-free baking is essential, ensure the flour is certified gluten-free to avoid cross-contamination.
- Can I make this without a food processor? Yes. Cut the cold dairy-free butter into the dry ingredients with a pastry cutter or two knives until pea-sized crumbs form, then proceed with water additions by hand.
- Why is my crust crumbly? Likely not enough water or not enough fat cold pockets. Add water 1 teaspoon at a time and chill to let the flours hydrate before rolling.
- Can I use salted butter instead of dairy-free? If you don’t need dairy-free, you can substitute cold unsalted butter (4 oz)—reduce added salt slightly if using salted butter.
- How thin can I roll this crust? The recipe recommends no thinner than 1/2 inch. Rolling thinner increases the risk of tearing and reduces structural integrity.
Final Bite
This Buckwheat Flour Pie Crust is a reliable, flavorful base that deserves a spot in your baking rotation. It’s surprisingly simple: measure, pulse, chill, roll, and blind bake. The small steps—keeping things cold, rolling between parchment, and blind baking—make the biggest difference. Once you’ve got the rhythm, you’ll find yourself reaching for it whenever you want a crust with character.
Pair it with ripe fruit, savory fillings, or a silky no-bake cheesecake. Make a double batch of dough when you have time and freeze one disc—ready-made crusts are a lovely shortcut for weeknight baking wins. Happy baking, and enjoy that nutty, toasty crust.
Buckwheat Flour Pie Crust
Ingredients
Equipment
Method
- Add the buckwheat flour, rice flour, tapioca starch, cane sugar (or coconut sugar), and salt to a food processor. Pulse briefly to combine the dry ingredients.
- Cut the cold dairy-free butter into small cubes, add to the processor, and pulse until the mixture resembles coarse crumbs (small pea-sized pieces).
- With the processor running briefly or using a spatula, add cold water 1 tablespoon at a time, up to 3 tablespoons total, until the dough just comes together. The dough is ready when you can form it into a ball without crumbling, it is soft to the touch but not sticky, and it can be scraped cleanly from the bowl.
- Turn the dough out onto a piece of plastic wrap, cling film, or parchment, shape into a disc, wrap or cover, and chill in the refrigerator for at least 15 minutes.
- Preheat the oven to 350°F (180°C) while the dough chills.
- Lightly flour two sheets of parchment paper or two pieces of cling film/foil. Place the chilled dough between them and roll it out to an even thickness no thinner than 1/2 inch.
- Remove the top sheet of parchment or cling film. Slide your hands under the bottom sheet, lift the rolled dough, flip it over, and position it over a pie dish.
- Gently press the dough into the bottom and up the sides of the dish. Peel away the bottom sheet. Trim excess dough from the edges with a knife and press the trimmed edge to tidy the rim.
- If the crust tears or develops holes, patch with a small piece of reserved dough and smooth with your fingers.
- Place a round piece of parchment paper inside the crust and fill with pie weights, dried rice, or beans to hold the shape of the bottom and sides.
- Blind bake the crust with the weights for 15 minutes at 350°F (180°C).
- For a pre-baked crust used in no-bake pies or cheesecakes: remove the parchment and weights, then return the crust to the oven and bake an additional 10–15 minutes, until crisp.
- For a crust that will be baked with a filling: remove the parchment and weights, add your prepared filling, and bake according to your filling’s instructions (approximately 15–30 minutes, depending on the filling).
- Let the crust cool before filling or serving.
Notes
Add the butter to the food processor at last in 1×1 inch cubes so that it doesn’t stick to the sides.
Use a silicone / non-stick parchment paper. If you don’t have one, sprinkle it with a little bit of rice flour before rolling.
If the dough sticks to your rolling pin, use a cling foil or another silicone / non-stick parchment paper on top.
You can leave the dough in the fridge overnight and roll out the next day. No problem.
Cane sugar can be substituted for any dry sugar like coconut sugar. Liquid sugar like maple syrup will make the dough too wet to roll out, so might need to add more flour to get to the same consistency.