Cherry Scones
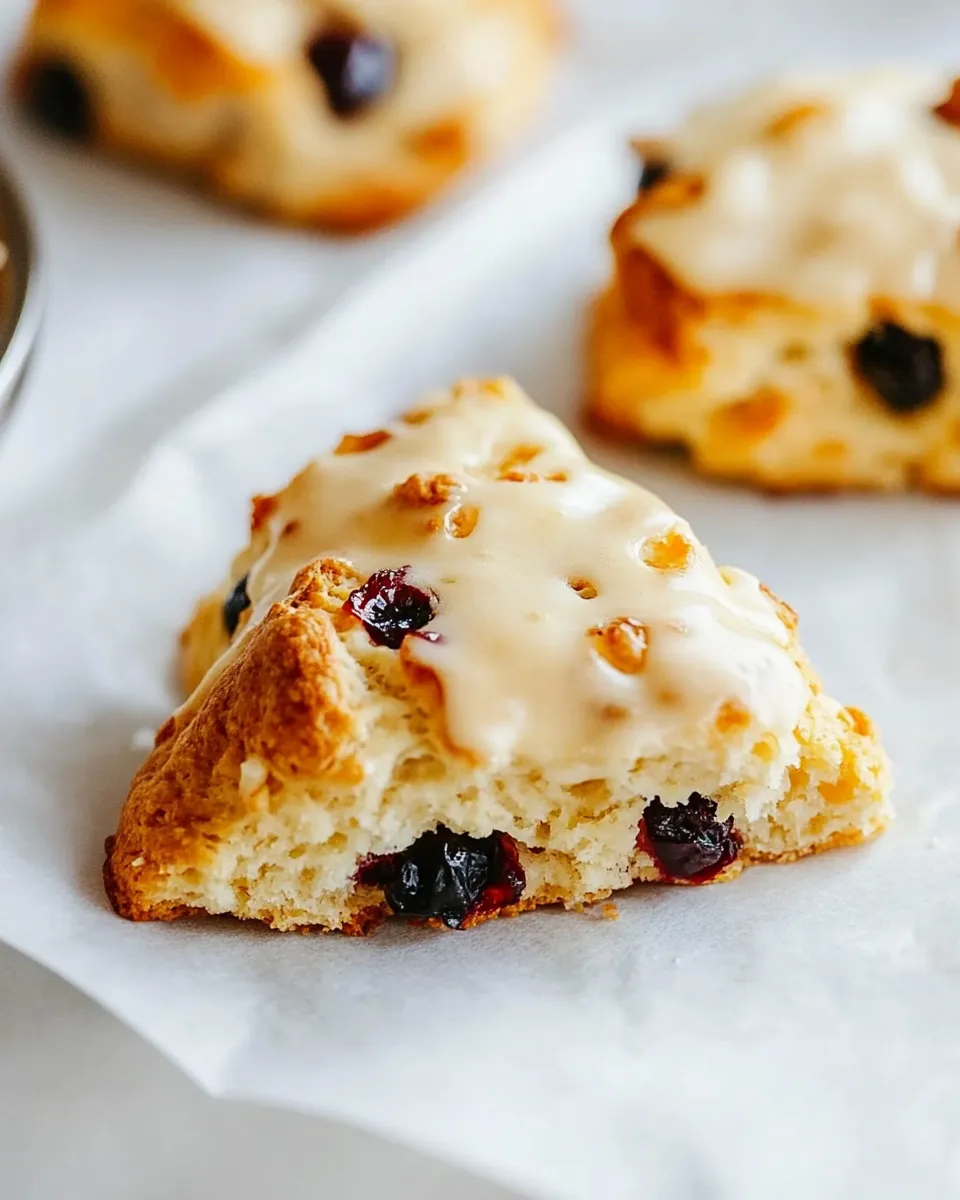
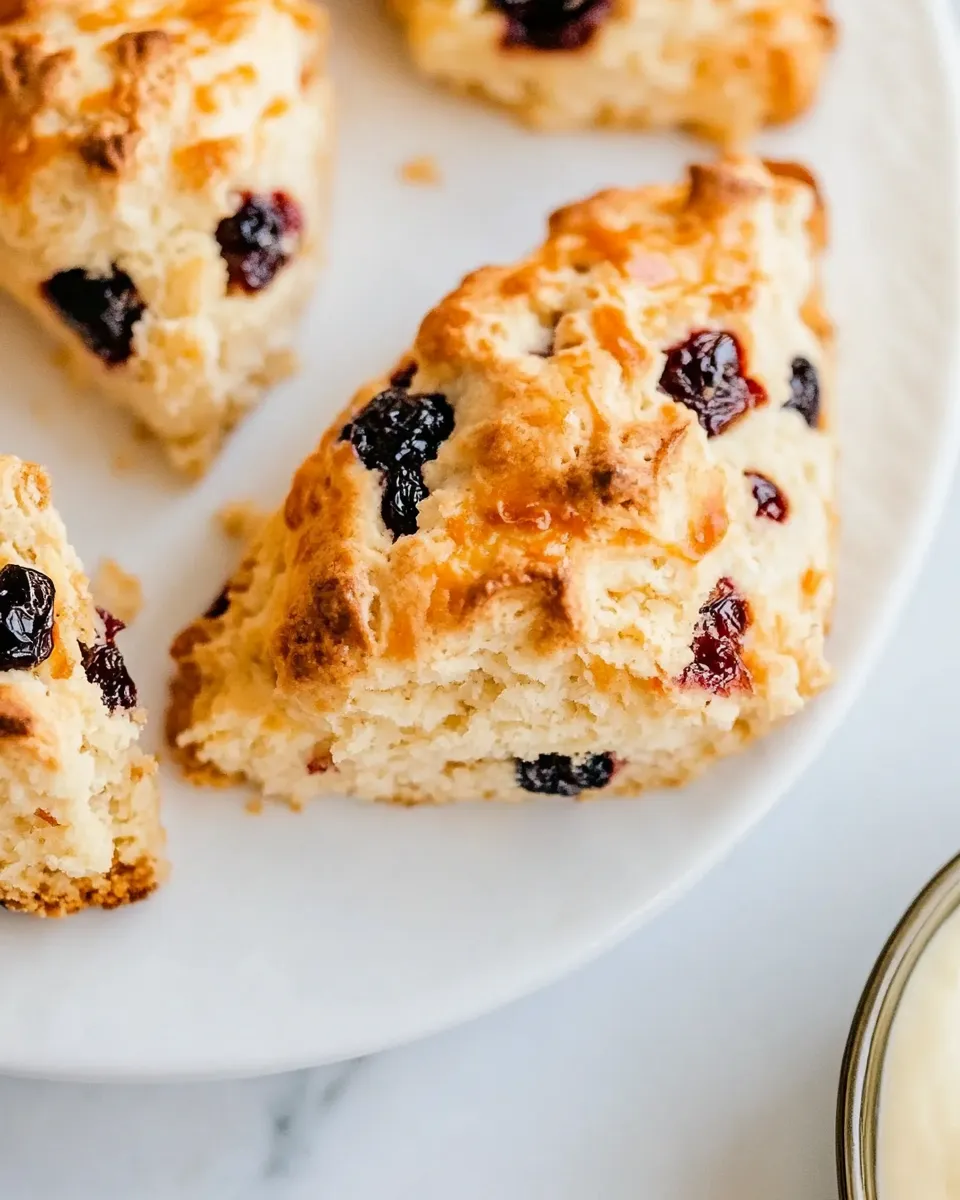
These cherry scones are my go-to when I want something that feels special but doesn’t demand extra fuss. Cold butter, bright orange, and tart dried cherries come together into flaky wedges that bake up with a golden top and a tender crumb. They’re straightforward, forgiving, and work brilliantly for breakfast, a tea-time treat, or a quick dessert when friends drop by.
I test recipes until they behave predictably in a busy home kitchen. This one taught me how vital temperature is: keep everything cold, and you’ll get layers and lift. The orange sugar and a simple powdered sugar glaze finish the scones with a clean, citrus-sweet note that pairs with coffee or a crisp afternoon.
Below you’ll find exactly what I used, the step-by-step method I followed, swap ideas, troubleshooting, and practical notes from testing. No fluff—just the reliable instructions you can follow and adapt.
Ingredients
- 8 tablespoons unsalted butter, cubed and frozen — cold, cubed butter gives flakiness by creating steam pockets while baking.
- 2 large oranges — you’ll use both the zest and the juice; zest adds aroma, juice flavors the dough and the glaze.
- 1/2 cup granulated sugar — sweetens and carries the orange zest when rubbed together.
- 2 teaspoons baking powder — the leavening that lifts these scones; make sure it’s fresh.
- 1/2 teaspoon salt — balances sweetness and enhances flavor.
- 2 cups flour, spooned and leveled — all-purpose flour is assumed; spoon and level for accurate texture.
- 11 tablespoons heavy cream, divided — most goes into the dough; a little is reserved to brush the tops for browning.
- 1 large egg — enriches and helps bind the dough.
- 1 teaspoon vanilla bean paste or vanilla extract — adds depth; paste will give little flecks if you like that look.
- 1/4 teaspoon almond extract, optional — optional, but a small amount brightens cherry flavor if you choose to include it.
- 3/4 cup dried tart cherries — the star fruit here; distribute them evenly so every wedge has pieces.
- White sparkling sugar, optional — for sprinkling on top if you want extra sparkle and crunch.
- 1 cup powdered sugar — for the glaze; mixed with reserved orange juice to finish the scones.
What Goes Into Cherry Scones
This section summarizes why each category of ingredient matters. Fat in the form of frozen, cubed unsalted butter creates lift and layers. The combination of granulated sugar rubbed with orange zest infuses citrus throughout the dough at a molecular level that you can really smell. Baking powder and a touch of salt do the heavy-lifting for texture and balance. Flour forms the structure—measured spooned-and-leveled to avoid a dry or dense result. The wet ingredients—heavy cream, egg, and vanilla—bring moisture and richness. Dried tart cherries add concentrated fruit tang, and a powdered sugar glaze brightened with orange juice ties the flavors together.
Temperature and handling are practically ingredients, too: everything cold and minimal handling preserves texture. Follow the steps closely and keep the butter frozen until it hits the flour, and you’ll get the scones you expect.
Cherry Scones in Steps
- Put the cubed unsalted butter in the freezer. If possible, chill the flour in the refrigerator for 10–20 minutes and keep all other ingredients as cold as you can while you work.
- Zest both oranges into a small bowl (you should have about 2 tablespoons zest). Juice the oranges into a separate small bowl. Use 2 tablespoons of the orange juice for the dough and reserve the remaining juice for the glaze.
- In a large bowl, combine the orange zest and the granulated sugar. Rub the zest into the sugar with your fingers until the sugar is evenly infused and aromatic.
- Add the baking powder, salt, and the spooned-and-leveled flour to the sugar mixture. Whisk together until well combined.
- In a small bowl, whisk together most of the heavy cream, the egg, the vanilla, and the almond extract (if using). Use about 8 tablespoons (approximately 1/2 cup) of the heavy cream in this mixture and set aside the remaining heavy cream to brush the scones later.
- Add the frozen cubed butter to the dry ingredients. Using a pastry cutter (or two knives), cut the butter into the flour mixture until the pieces are about pea-sized and evenly distributed.
- Make a well in the center of the dry mixture and pour in the wet mixture. Gently fold with a wooden spoon or rubber spatula just until a shaggy dough begins to form.
- Add the dried tart cherries and mix only until they are evenly incorporated and the dough is mostly moistened. Do not overmix.
- Lightly flour a work surface and turn the dough out onto it. With lightly floured hands, bring the dough together into a cohesive mass, handling it as little as possible. Pat or press the dough into a disc about 1 inch thick. Cut the disc in half, then shape each half into a smaller disc about 5 inches wide.
- Wrap each disc tightly in plastic wrap and chill in the refrigerator for 10 minutes.
- Remove the chilled discs, place on a parchment-lined baking sheet, and cut each disc into 8 equal wedges (16 total). Arrange wedges about 2 inches apart on the sheet. Brush the tops with the reserved heavy cream and sprinkle with white sparkling sugar if desired.
- Refrigerate the prepared scones on the baking sheet for 20 minutes while you preheat the oven to 400°F (200°C).
- Bake the chilled scones at 400°F for 17–25 minutes, until the edges are lightly golden and the tops are just browned (about 19–20 minutes is typical). Watch closely to avoid overbaking.
- Remove the pan from the oven and let the scones cool on the baking sheet for a few minutes, then transfer them to a cooling rack to cool completely.
- When the scones are completely cool, make the glaze by whisking the 1 cup powdered sugar with the reserved orange juice until smooth; add more juice a little at a time if you want a thinner glaze. Drizzle or spread the glaze over the cooled scones and let it set before serving.
The Upside of Cherry Scones
These scones are fast to assemble and generous in flavor. Because most of the work happens in the mixing bowl and with a little chilling, they fit easily into a morning routine or an afternoon baking slot. The dried tart cherries give a concentrated fruit note without adding extra moisture, so the texture remains pleasantly crumbly rather than soggy.
They also travel well. Wrapped in parchment, they make a great bakery-style item to pack for brunch, picnics, or to share with neighbors. The glaze is optional; it stores separately if you want to drizzle right before serving.
Ingredient Swaps & Substitutions

Substitutions can be handy when you’re missing one thing. A few notes that won’t require recalculating amounts:
- Vanilla bean paste or vanilla extract: the recipe lists either—use whichever you have on hand.
- Almond extract: optional. If you skip it, the scones will still taste bright from the orange and cherries.
- Heavy cream: if you don’t have heavy cream, a heavy milk like half-and-half can work, though the crumb will be slightly less rich. Keep the total liquid similar and handle the dough gently.
- Dried cherries: swap for dried cranberries if you prefer a different tart note; texture and moisture behavior will be similar.
- White sparkling sugar: optional. Granulated sugar or coarse sugar on top will brown more and give less sparkle.
Cook’s Kit
Tools that make this easier and help you get consistent results:
- Pastry cutter (or two knives) — for cutting frozen butter into flour.
- Microplane or fine grater — for zesting oranges cleanly.
- Bench scraper — helps lift and cut discs cleanly into wedges.
- Parchment-lined baking sheet — for even baking and easy cleanup.
- Cooling rack — lets scones cool without soggy bottoms.
Watch Outs & How to Fix
Too dry or crumbly
If your dough feels dry and won’t come together, it likely needs the tiniest bit more liquid. Add a teaspoon of heavy cream at a time, gently folding until the dough holds. Avoid adding too much—overly wet dough will spread and lose its shape.
Dense or flat scones
This usually comes from overmixing or stale baking powder. Mix just until the dough comes together; visible streaks of flour are fine. If your baking powder is older than a year, replace it—fresh leavening gives the best lift.
Buttery pockets don’t form
If the butter warms while you’re working, the steam pockets that create flaky layers won’t develop. Keep butter cubed and very cold; chill the dough discs before cutting and bake while they’re still cold. If it’s warm in the kitchen, pop the tray in the fridge for the full chilling time.
Glaze too thin or too thick
Add the orange juice by small amounts to reach desired consistency for drizzling. If it’s too thin, add a couple teaspoons of powdered sugar to thicken. Let the scones cool fully before glazing—warm scones will melt the glaze and make it runny.
Make It Your Way
Want a different flavor profile? Here are practical, no-surprise adjustments:
- Cheddar-cherry twist: omit the glaze, fold in 3/4 cup shredded sharp cheddar with the cherries for a savory-sweet riff. (No quantities changed for the base ingredients.)
- Lemon-scented: swap orange zest and juice for the zest and 2 tablespoons juice of a lemon for a brighter citrus punch.
- Chocolate chips: replace half the cherries with dark chocolate chips for something more indulgent.
What I Learned Testing
Testing is where the recipe earns its trust. I learned that chilling the discs for at least 10 minutes is non-negotiable—skipping that step yields flatter scones. Using frozen, cubed butter produced noticeably flakier results than cold-but-not-frozen butter. I also confirmed the orange sugar step matters: rubbing zest into granulated sugar releases oils and spreads that flavor more evenly than just tossing zest into the flour.
Finally, baking time is variable with ovens. I used the mid-range time (about 19–20 minutes) as the target and watched for color—golden edges and just-browned tops are your cue. Take them out and let them finish on the sheet for a few minutes before moving to a rack.
Keep-It-Fresh Plan
Store cooled, unglazed scones in an airtight container at room temperature for up to 2 days. If glazed, store in a single layer to protect the icing or separate layers with parchment. For longer storage, freeze unglazed scones in a sealed bag for up to 3 months. Rewarm from frozen at 350°F (175°C) for 8–12 minutes, or thaw and refresh in a 300°F oven for 6–8 minutes.
Quick Questions
- Can I make the dough ahead? Yes. After shaping the discs and wrapping them, refrigerate up to 24 hours or freeze for longer. Thaw if frozen, then cut and bake as directed.
- Do I have to glaze? No. The glaze is optional; the scones are excellent plain or brushed with cream and sprinkled with coarse sugar.
- Can I use fresh cherries? Fresh cherries add moisture and will change texture—pat them dry, pit, and chop, and reduce other wet elements slightly if using fresh.
Wrap-Up
These Cherry Scones balance citrus brightness with tart fruit and a flaky texture that comes from cold butter and minimal handling. The recipe is reliable: measure flour spooned-and-leveled, keep things cold, and watch the oven. Follow the steps above and you’ll have bakery-style scones from your oven with a straightforward method and a tasty finish.
Make a batch, share a few, and keep a couple tucked away for mornings when a simple, homemade treat is exactly what you need.

Cherry Scones
Ingredients
Equipment
Method
- Put the cubed unsalted butter in the freezer. If possible, chill the flour in the refrigerator for 10–20 minutes and keep all other ingredients as cold as you can while you work.
- Zest both oranges into a small bowl (you should have about 2 tablespoons zest). Juice the oranges into a separate small bowl. Use 2 tablespoons of the orange juice for the dough and reserve the remaining juice for the glaze.
- In a large bowl, combine the orange zest and the granulated sugar. Rub the zest into the sugar with your fingers until the sugar is evenly infused and aromatic.
- Add the baking powder, salt, and the spooned-and-leveled flour to the sugar mixture. Whisk together until well combined.
- In a small bowl, whisk together most of the heavy cream, the egg, the vanilla, and the almond extract (if using). Use about 8 tablespoons (approximately 1/2 cup) of the heavy cream in this mixture and set aside the remaining heavy cream to brush the scones later.
- Add the frozen cubed butter to the dry ingredients. Using a pastry cutter (or two knives), cut the butter into the flour mixture until the pieces are about pea-sized and evenly distributed.
- Make a well in the center of the dry mixture and pour in the wet mixture. Gently fold with a wooden spoon or rubber spatula just until a shaggy dough begins to form.
- Add the dried tart cherries and mix only until they are evenly incorporated and the dough is mostly moistened. Do not overmix.
- Lightly flour a work surface and turn the dough out onto it. With lightly floured hands, bring the dough together into a cohesive mass, handling it as little as possible. Pat or press the dough into a disc about 1 inch thick. Cut the disc in half, then shape each half into a smaller disc about 5 inches wide.
- Wrap each disc tightly in plastic wrap and chill in the refrigerator for 10 minutes.
- Remove the chilled discs, place on a parchment-lined baking sheet, and cut each disc into 8 equal wedges (16 total). Arrange wedges about 2 inches apart on the sheet. Brush the tops with the reserved heavy cream and sprinkle with white sparkling sugar if desired.
- Refrigerate the prepared scones on the baking sheet for 20 minutes while you preheat the oven to 400°F (200°C).
- Bake the chilled scones at 400°F for 17–25 minutes, until the edges are lightly golden and the tops are just browned (about 19–20 minutes is typical). Watch closely to avoid overbaking.
- Remove the pan from the oven and let the scones cool on the baking sheet for a few minutes, then transfer them to a cooling rack to cool completely.
- When the scones are completely cool, make the glaze by whisking the 1 cup powdered sugar with the reserved orange juice until smooth; add more juice a little at a time if you want a thinner glaze. Drizzle or spread the glaze over the cooled scones and let it set before serving.
Notes
Storage
: Keep scones in an airtight container at room temperature for up to 2 days, or in the fridge for up to 1 week. Individually wrap scones, place in an airtight container, and freeze for up to 3 months, thaw at room temperature.