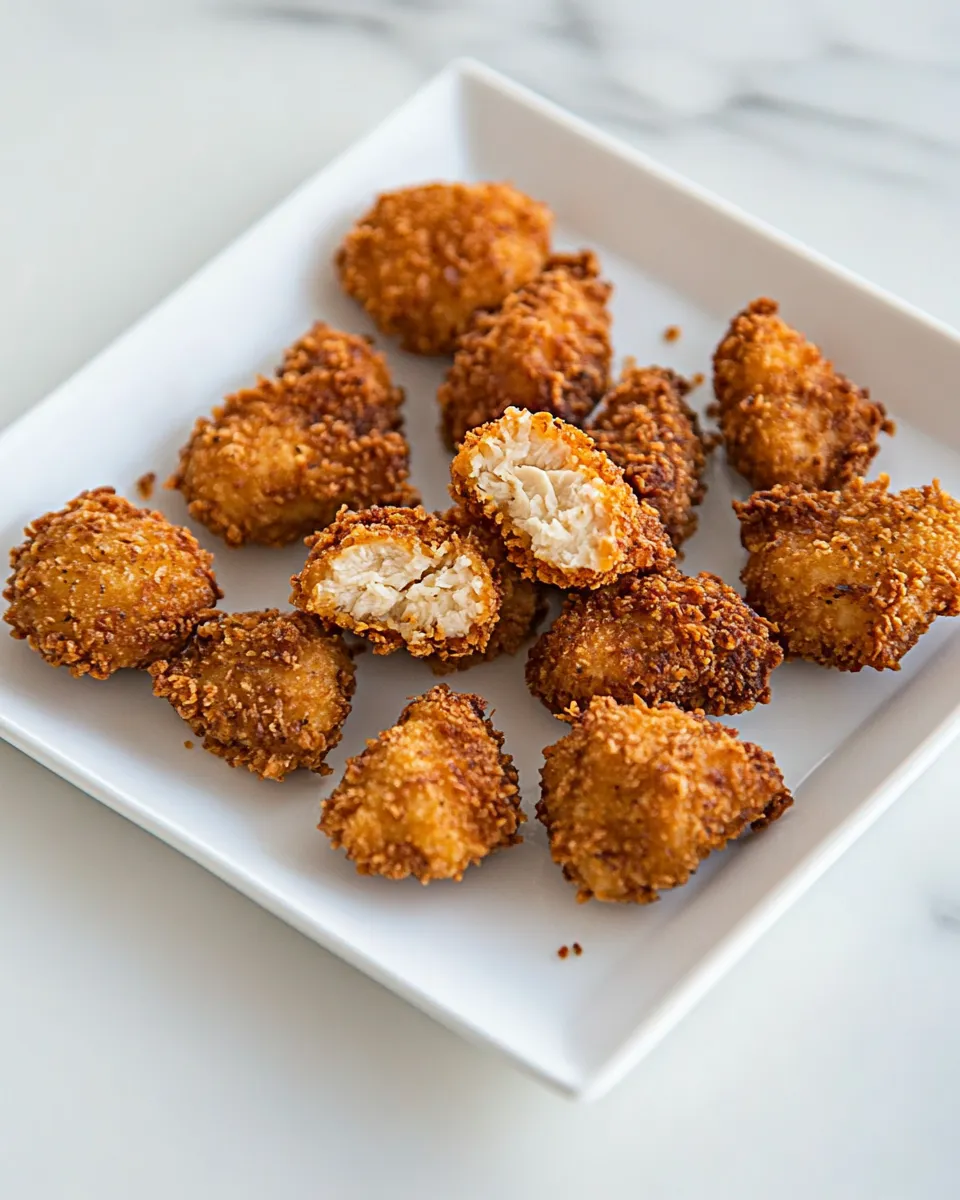
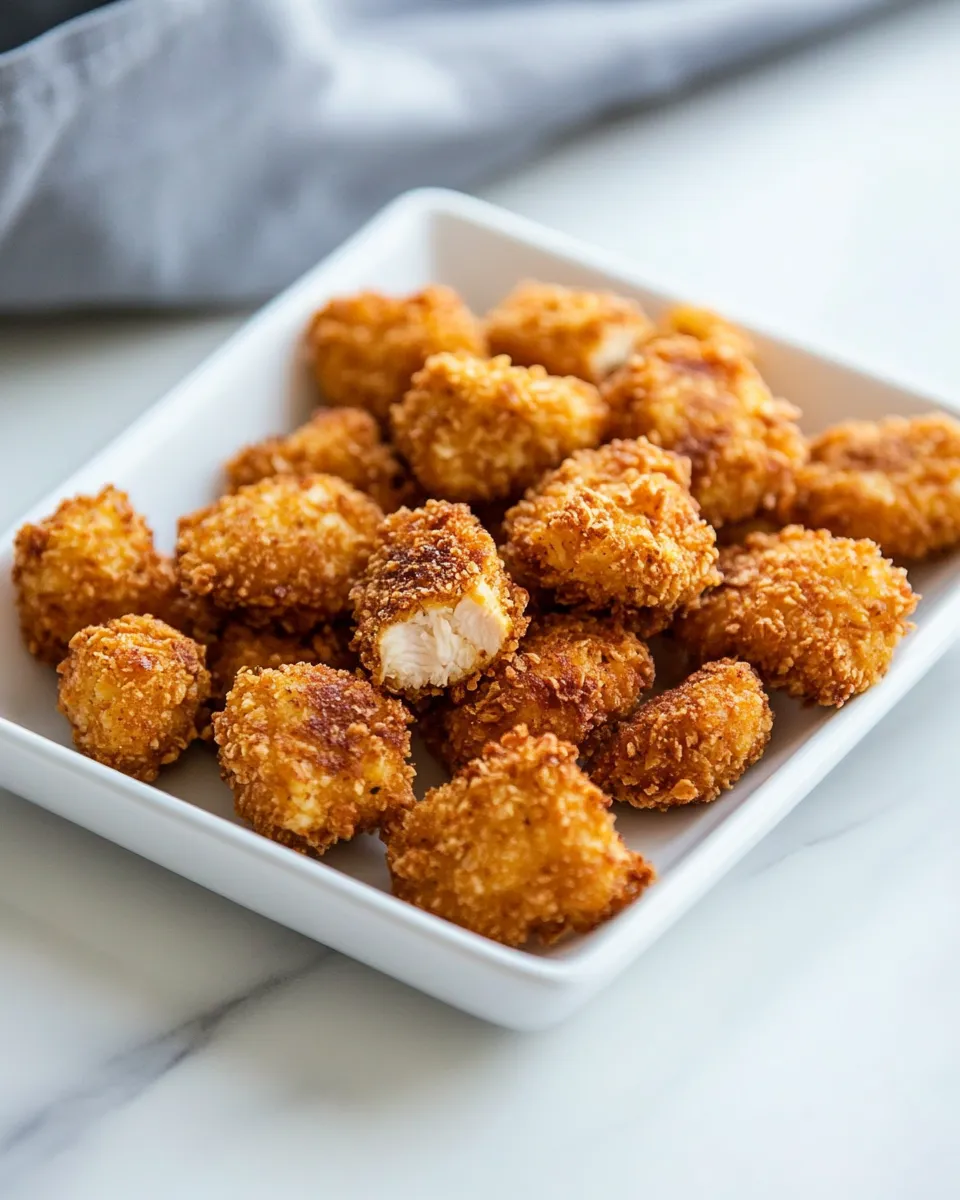
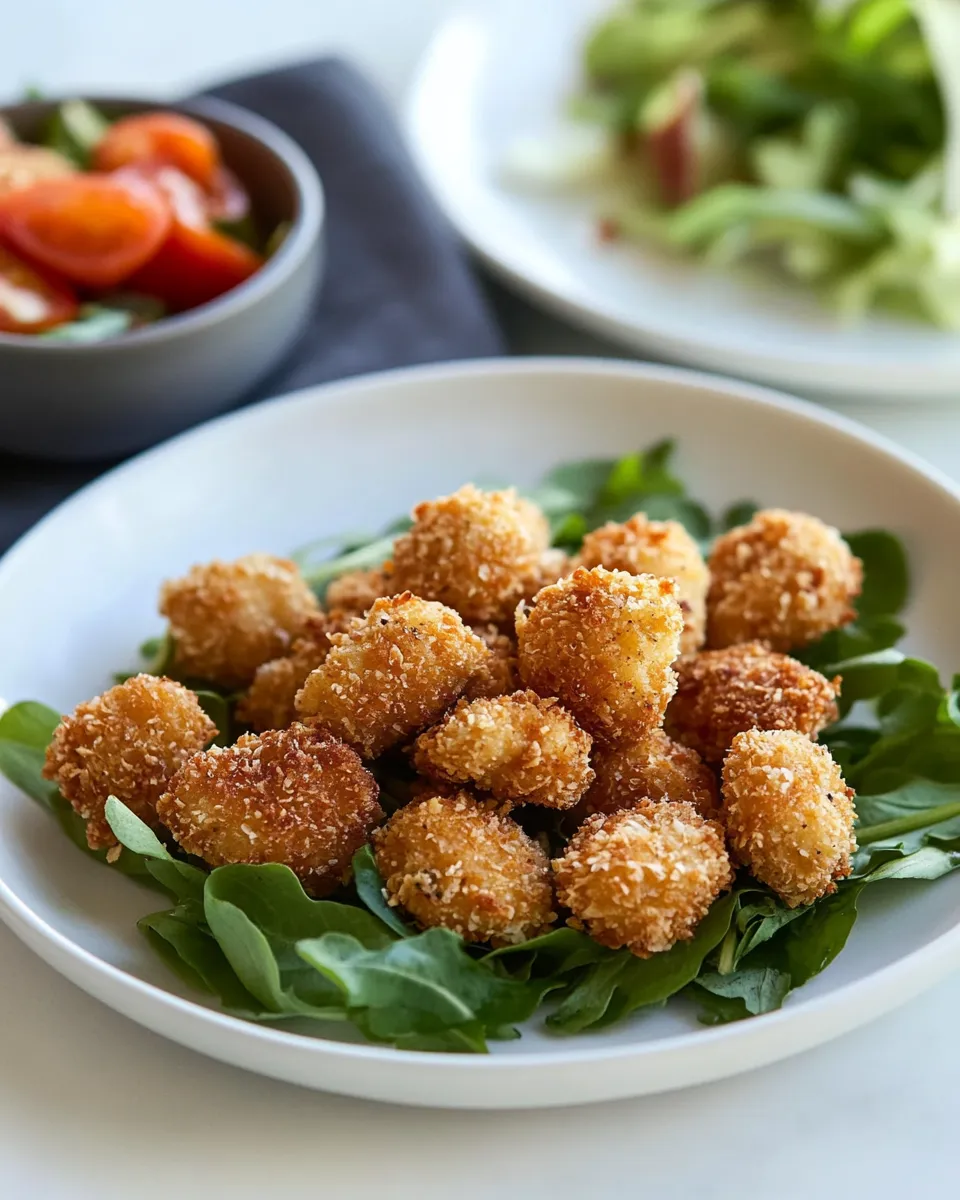
Chicken Nuggets
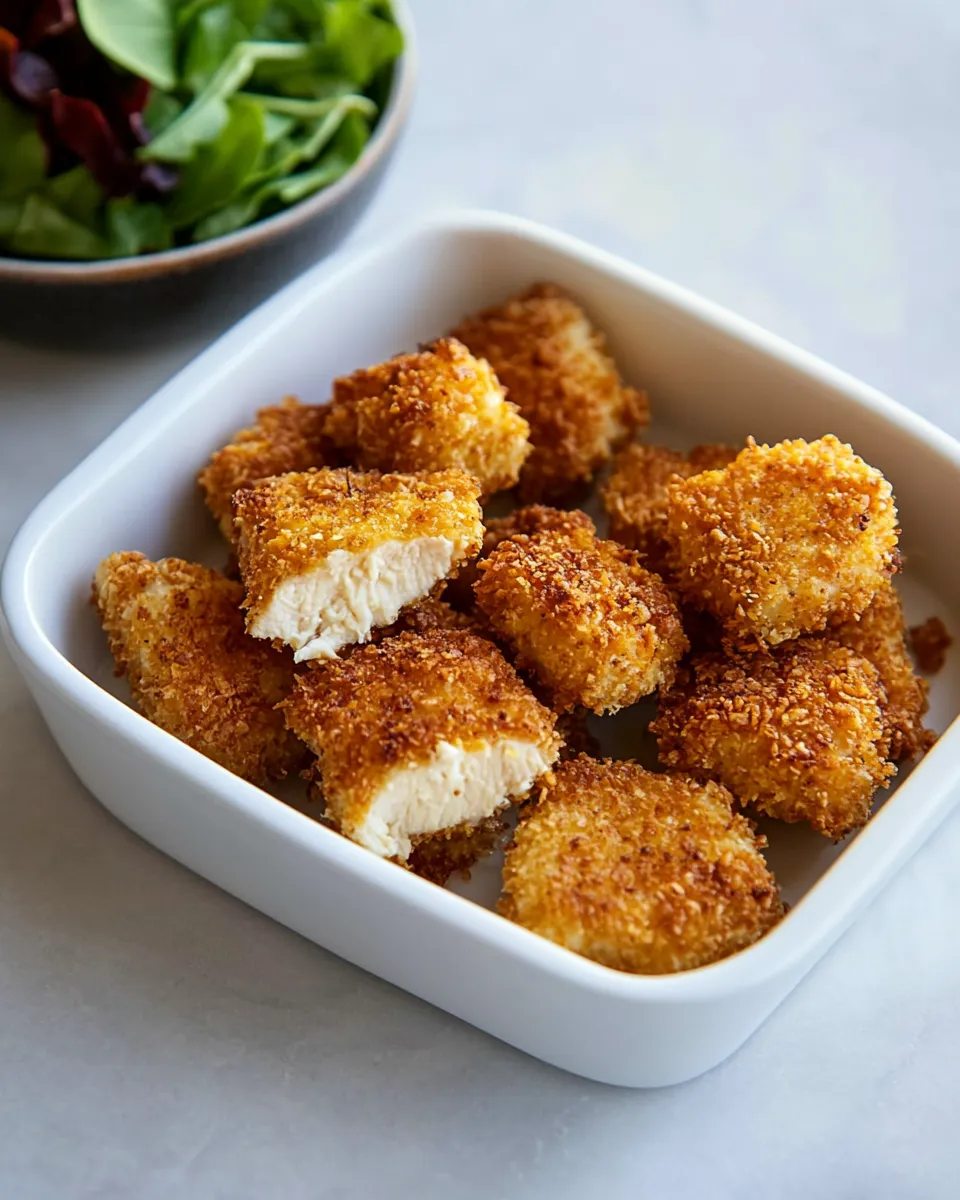
I make these baked chicken nuggets all the time when I want something fast, crispy, and reliably kid-pleasing. They hit the texture sweet spot: crunchy outside, tender and juicy inside. The method is straightforward and mostly hands-off once the pieces are on the rack.
This recipe uses panko toasted briefly in the oven so the crumbs get extra crunch and a light golden color before they ever meet the chicken. A seasoned egg wash helps the breadcrumbs adhere and the result is a stable crust that stands up to dipping. You don’t need a fryer, and you don’t compromise on texture.
Below I’ll walk you through exactly what you need and why each step matters, plus swaps and troubleshooting so you can make these tonight without drama. Keep an instant-read thermometer close — perfect doneness is just a quick probe away.
Ingredients at a Glance
- 1 1/2lbs boneless skinless chicken breasts, cut into even 1-inch cubes — the base protein; cut evenly so pieces cook at the same rate.
- 2 cups panko bread crumbs — gives the nuggets their signature light, flaky crunch; toasting enhances flavor and texture.
- 2 Tbsp olive oil — moistens the panko so it browns and crisps in the oven.
- 1 tsp paprika — adds mild color and a warm background note.
- 1 tsp garlic powder — provides savory depth without needing fresh garlic.
- 3/4 tsp dried thyme — introduces an herbal note that complements chicken.
- 1/4 tsp cayenne pepper (optional) — for gentle heat; omit if serving kids or spice-averse guests.
- Salt and freshly ground black pepper — essential for seasoning; adjust to taste.
- 2 large eggs — the binding liquid that helps crumbs adhere to the chicken.
Chicken Nuggets Cooking Guide
- Preheat oven to 400°F (200°C). Place a large wire rack on an 18×13-inch baking sheet and spray the rack lightly with nonstick cooking spray.
- Pour the 2 cups panko breadcrumbs onto a second baking sheet in a loose mound. Drizzle the 2 Tbsp olive oil over the panko and use your fingertips or a fork to toss until the crumbs are evenly moistened. Spread the panko into an even single layer on that sheet.
- Bake the panko in the preheated oven 3–5 minutes, until slightly toasted and golden, tossing once halfway through to promote even toasting. Watch closely so it does not burn.
- Remove the toasted panko from the oven. Gather the crumbs into a mound in the center of the baking sheet and add 1 tsp paprika, 1 tsp garlic powder, 3/4 tsp dried thyme, and 1/4 tsp cayenne pepper (optional). Season with salt and freshly ground black pepper to taste. Mix thoroughly with a spatula so the spices are evenly distributed.
- In a medium bowl, crack and whisk the 2 large eggs. Season the eggs with salt and freshly ground black pepper to taste and whisk until blended.
- Working in batches (about 8–10 pieces at a time), dip the 1-inch chicken cubes into the seasoned egg, letting any excess egg drip off, then transfer the pieces into the seasoned panko. Toss and press the breadcrumbs onto the chicken so they adhere well.
- Arrange the coated chicken pieces in a single layer on the prepared wire rack, leaving a little space between pieces for air circulation. Repeat dipping, coating, and arranging with the remaining chicken, scooping the panko back together between batches as needed.
- Bake the chicken in the preheated oven until the internal temperature of the largest pieces reaches 165°F (74°C) on an instant-read thermometer, about 15–19 minutes total.
- Remove from the oven and serve warm. Offer a dipping sauce if desired.
Why This Chicken Nuggets Stands Out
These nuggets stand out because the crunch is intentional. Toasting the panko first and moistening it with a bit of olive oil before coating gives you a crisp exterior that doesn’t go soggy the moment it meets sauce. The egg wash creates a secure bond between chicken and crumbs so you don’t lose half the coating in the pan.
The baking method keeps cleanup simple and trims excess oil without sacrificing texture. You still get an even, golden crust because the wire rack allows hot air to circulate around each piece. Finally, a small but balanced spice mix—paprika, garlic powder, thyme, and optional cayenne—gives flavor without masking the chicken.
Swap Guide
- Panko bread crumbs — swap for regular breadcrumbs if needed; expect a slightly denser crust.
- Olive oil — use a neutral oil (like vegetable or canola) if you prefer a cleaner flavor.
- Eggs — if you can’t use eggs, try a light batter of flour and water or a commercial egg replacer, but results and adhesion will differ.
- Chicken breasts — chicken thighs can be used for richer flavor and a bit more forgiveness against overcooking; cut into similar 1-inch pieces.
- Spices — trade thyme for Italian seasoning or oregano if that’s what you have on hand.
Setup & Equipment
Prep the workspace before you start: two baking sheets, a wire rack, a medium mixing bowl, and an instant-read thermometer make the process smooth. The wire rack is non-negotiable if you want a fully crisp exterior — it lifts the nuggets so hot air reaches all sides.
Other helpful items: nonstick cooking spray to prevent sticking, a fork or whisk for the eggs, and a spatula to mix and scoop the panko. If you want to streamline cleanup, line the bottom baking sheet with foil; it won’t affect cooking.
Avoid These Traps
- Overcrowding the rack — pack them too tightly and steam replaces crisping. Leave space between pieces for airflow.
- Skipping the panko toast — un-toasted panko browns less evenly and yields a softer crust.
- Not pressing the crumbs — flicky crumbs fall off during baking; press the panko onto the chicken so it adheres.
- Ignoring internal temperature — visual cues can lie. Use an instant-read thermometer and pull nuggets at 165°F (74°C).
- Letting the panko burn — watch the toasting step; panko goes from golden to burnt quickly.
Dietary Swaps & Alternatives
If you need a gluten-free option, use gluten-free panko or crushed gluten-free cereal that mimics flaky crumbs. For egg-free diets, an aquafaba (chickpea-brine) whip can sometimes substitute, though adhesion will be slightly different and you may need to work more quickly when coating.
To lower oil use further, reduce the olive oil slightly and rely on the oven’s dry heat, but expect a modest change in color and crunch. For a crispier finish, an air fryer will work: cook at 400°F (200°C) in a single layer, checking at 8–10 minutes depending on your machine.
Pro Tips & Notes
Timing and temperature
Preheat the oven fully. The panko toasting and the chicken bake both rely on accurate oven temperature. If your oven runs cool, add a minute or two to the baking times and double-check with a thermometer.
Coating technique
Work in small batches (about 8–10 pieces) so the egg wash stays clean and the panko doesn’t become saturated. Use gentle pressure to press crumbs onto the chicken — enough to adhere, not so much that you crush the texture.
Serving
Serve immediately for the best textural contrast. If you need to hold them for a short time, keep them on the wire rack in a warm (200°F/95°C) oven for up to 10 minutes; this preserves crispness better than stacking on a plate.
Best Ways to Store
Refrigerate: cool completely, then store in an airtight container for up to 3 days. Reheat in a 375°F (190°C) oven on a wire rack for 6–8 minutes, or until heated through and crunchy again.
Freeze: you can freeze raw, breaded nuggets by arranging them in a single layer on a baking sheet until solid, then transferring to a freezer bag for up to 3 months. Bake from frozen, adding a few extra minutes to the bake time and always confirming 165°F (74°C) internal temperature before serving.
Quick Q&A
- Can I make these in an air fryer? — Yes. Arrange in a single layer, cook at 400°F (200°C), and check around 8–10 minutes depending on your model.
- How do I know they’re done? — The largest pieces should reach 165°F (74°C) on an instant-read thermometer.
- Can I skip toasting the panko? — You can, but toasting gives better color and crunch. If you skip it, watch the bake closely for browning.
- Do I need to flip during baking? — No; the wire rack promotes even browning without flipping.
Make It Tonight
Plan 25–35 minutes total: 5 minutes to prep the chicken and panko, 3–5 minutes to toast the panko, then about 15–19 minutes to bake. Start by preheating the oven and toasting the panko—those two steps set up the texture. While the crumbs cool and get seasoned, whisk the eggs and cube the chicken. Coat in small batches, arrange on the rack, and bake until each piece hits 165°F (74°C).
Keep dinner simple: a green salad, roasted veggies, or some oven fries pair well. Offer a small bowl of your favorite dipping sauce on the side, and you’ve got a quick weeknight meal that’s crunchy, flavorful, and easy to clean up.
Chicken Nuggets
Ingredients
Equipment
Method
- Preheat oven to 400°F (200°C). Place a large wire rack on an 18x13-inch baking sheet and spray the rack lightly with nonstick cooking spray.
- Pour the 2 cups panko breadcrumbs onto a second baking sheet in a loose mound. Drizzle the 2 Tbsp olive oil over the panko and use your fingertips or a fork to toss until the crumbs are evenly moistened. Spread the panko into an even single layer on that sheet.
- Bake the panko in the preheated oven 3–5 minutes, until slightly toasted and golden, tossing once halfway through to promote even toasting. Watch closely so it does not burn.
- Remove the toasted panko from the oven. Gather the crumbs into a mound in the center of the baking sheet and add 1 tsp paprika, 1 tsp garlic powder, 3/4 tsp dried thyme, and 1/4 tsp cayenne pepper (optional). Season with salt and freshly ground black pepper to taste. Mix thoroughly with a spatula so the spices are evenly distributed.
- In a medium bowl, crack and whisk the 2 large eggs. Season the eggs with salt and freshly ground black pepper to taste and whisk until blended.
- Working in batches (about 8–10 pieces at a time), dip the 1-inch chicken cubes into the seasoned egg, letting any excess egg drip off, then transfer the pieces into the seasoned panko. Toss and press the breadcrumbs onto the chicken so they adhere well.
- Arrange the coated chicken pieces in a single layer on the prepared wire rack, leaving a little space between pieces for air circulation. Repeat dipping, coating, and arranging with the remaining chicken, scooping the panko back together between batches as needed.
- Bake the chicken in the preheated oven until the internal temperature of the largest pieces reaches 165°F (74°C) on an instant-read thermometer, about 15–19 minutes total.
- Remove from the oven and serve warm. Offer a dipping sauce if desired.
Notes
For a healthier honey mustard whisk together 1/2 cup plain Greek yogurt, 2 1/2 Tbsp honey, 3 Tbsp light mayonnaise, 1 1/2 Tbsp dijon mustard, 1 1/2 Tbsp prepared yellow mustard, 1 tsp lemon juice and season with salt to taste.