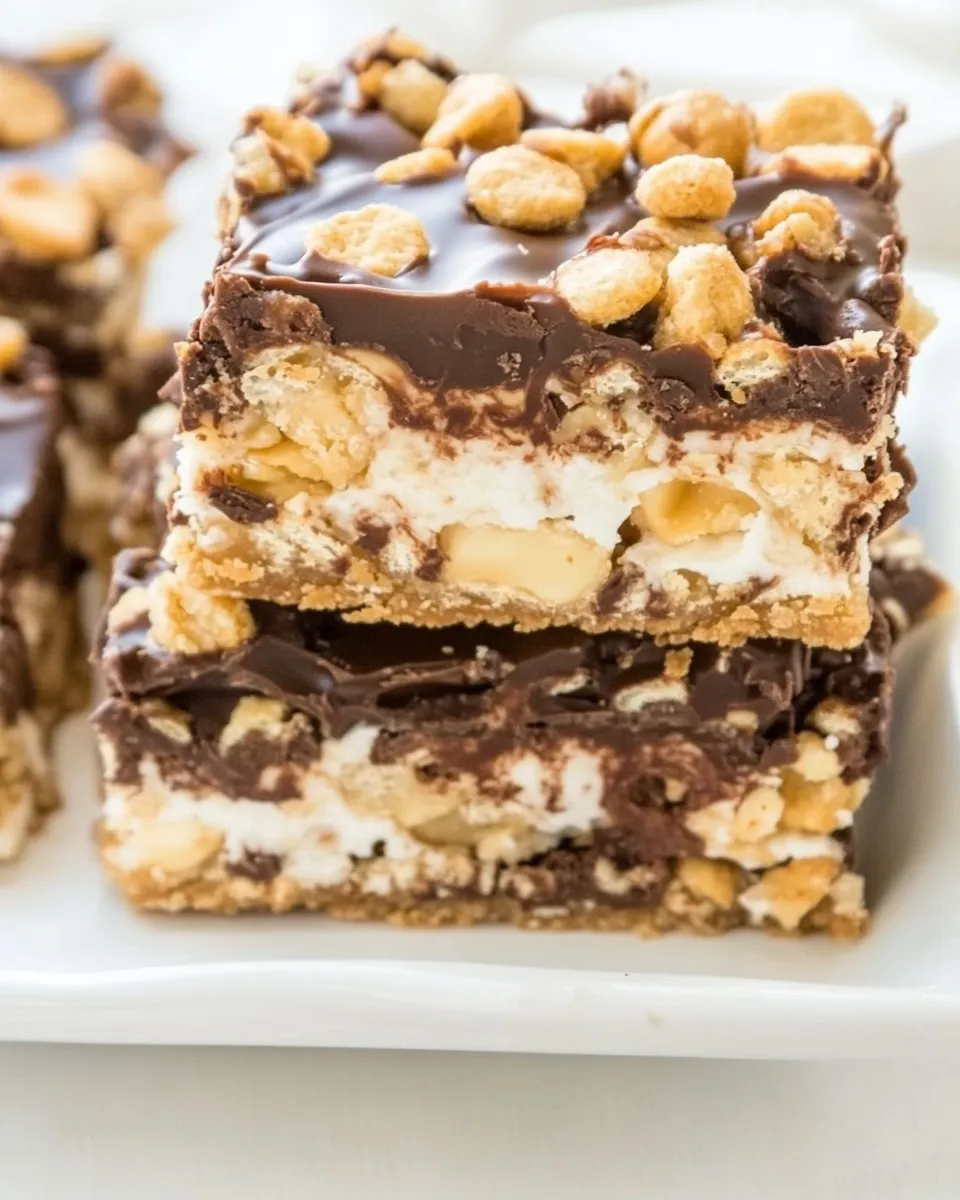
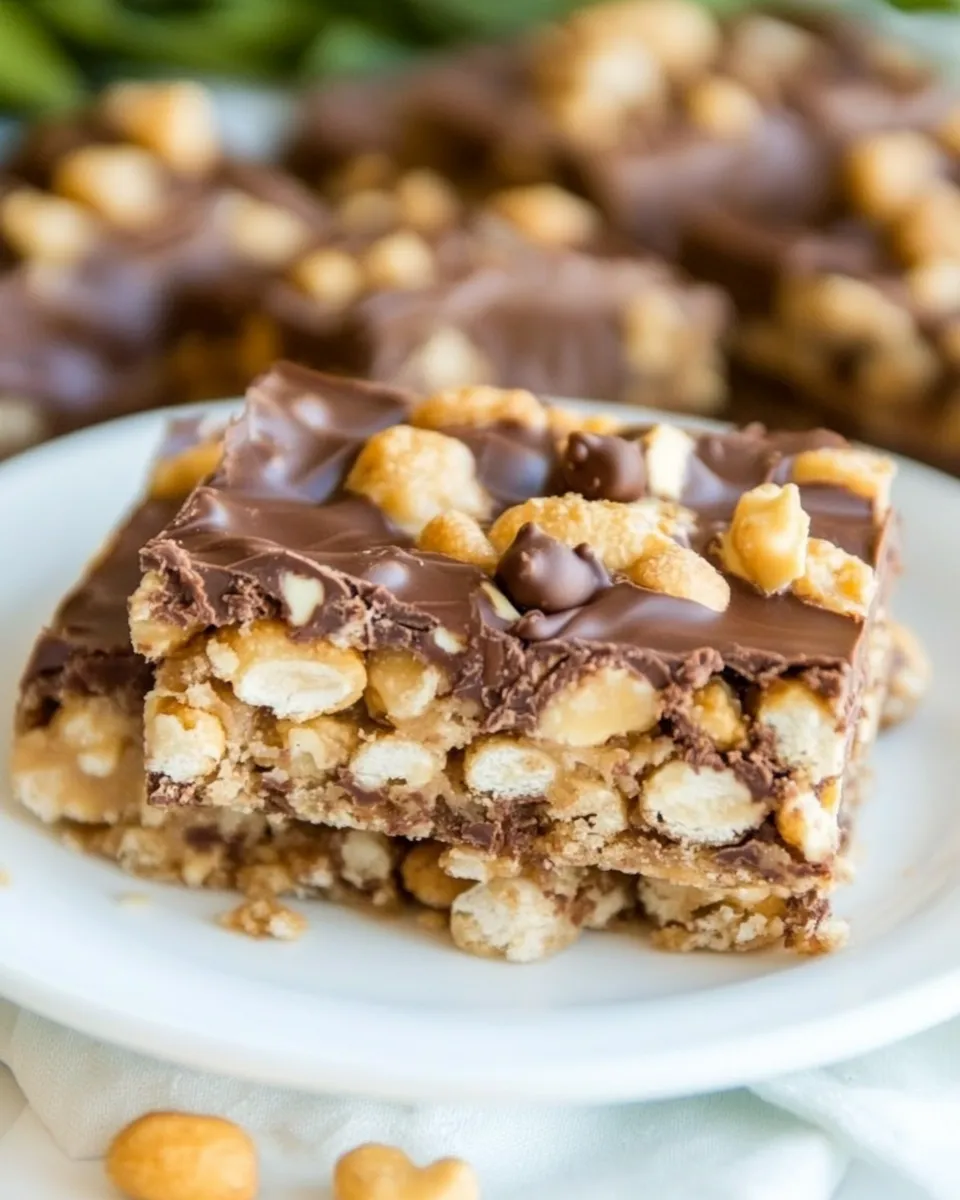
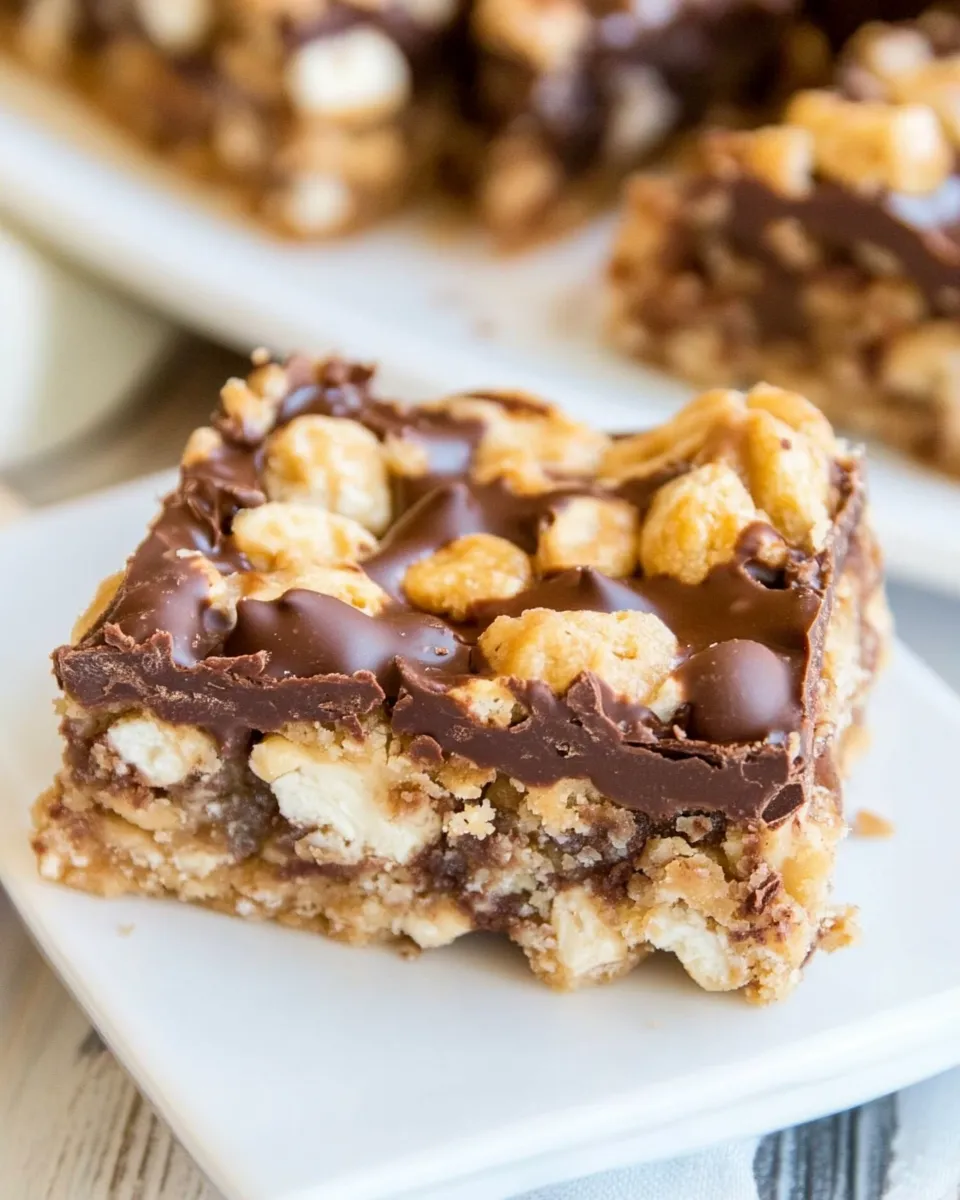
Chocolate and Peanut Graham Bars
These bars are the kind of dessert that shows up at potlucks and disappears first. Crunchy, sweet, salty and rich all at once — they’re simple to make but feel indulgent. I love that they don’t require tempering chocolate or a long chill time. You press, layer, pour, and bake. That straightforwardness is why I keep this recipe in my mental go-to for last-minute gatherings.
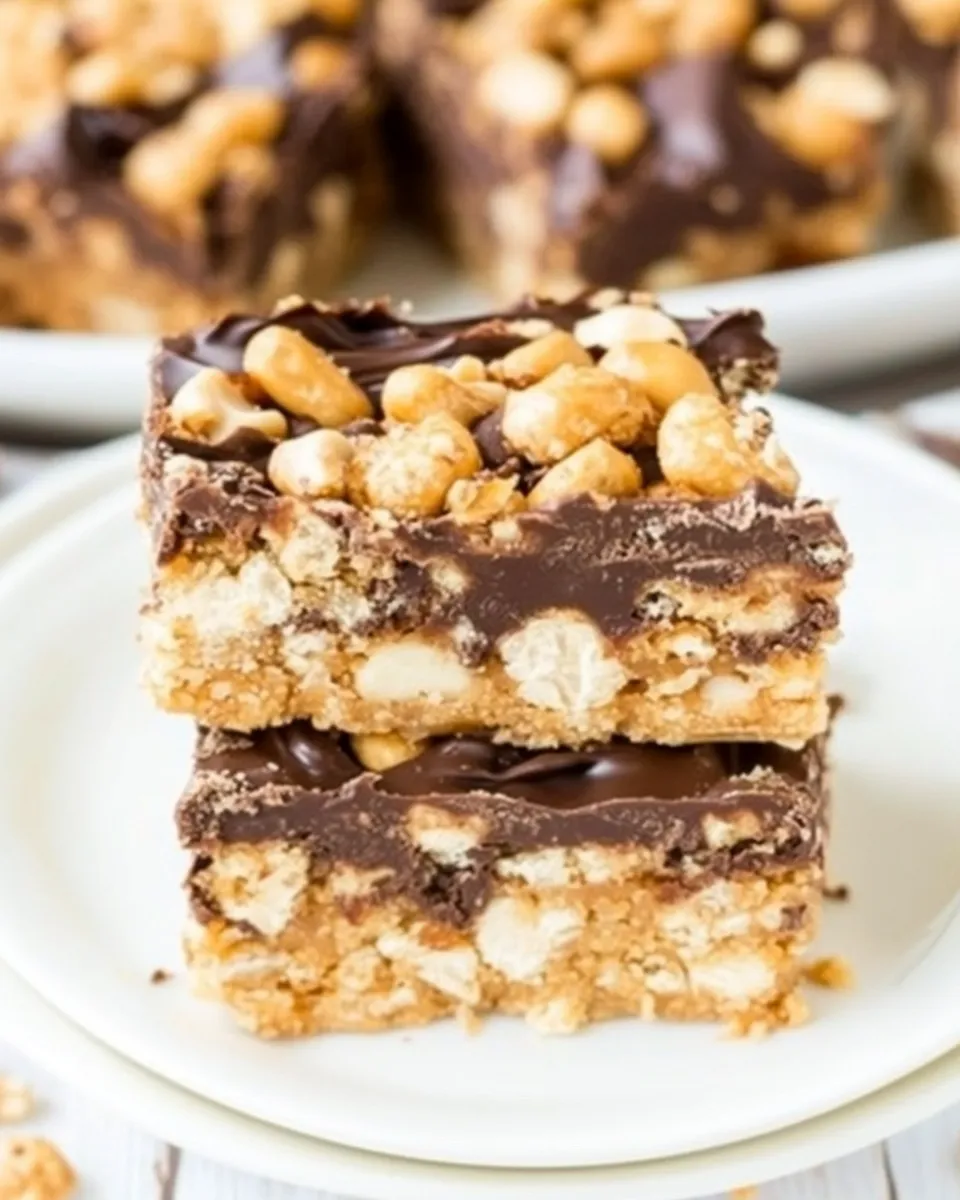
They rely on pantry-friendly ingredients: graham crumbs for a crisp base, melted butter and vanilla to bind and flavor, shredded coconut for texture, a scatter of chocolate chips and peanuts for the main flavor hits, and sweetened condensed milk to glue everything and create a golden, chewy top. The process takes under an hour from start to finish, and most of that is hands-off while the oven does its work.
Below I’ll walk through the ingredients, the exact step-by-step directions, common pitfalls I’ve learned to avoid, and options for tweaking the bars based on season, equipment, or dietary needs. Practical tips throughout will help you get consistent results every time.
Ingredient Notes
Each ingredient here plays a specific role. I’ll call out what to expect from each — texture, flavor contribution, and small tips that make the final bars work better.
Ingredients
- 8 tablespoons salted butter, melted — binds and holds the graham-cracker crust together; the salt rounds out the sweetness.
- 1/2 teaspoon vanilla extract — adds depth and lifts the flavors throughout the bars.
- 1 2/3 cups graham cracker crumbs — creates the crunchy, buttery base; press firmly for a stable crust.
- 1 1/4 cups sweetened shredded coconut — adds chew and a toasty note; it also helps create separation between crust and chips.
- 1 1/2 cups semi-sweet chocolate chips — the primary chocolate flavor; semi-sweet balances the condensed milk’s sweetness.
- 1 1/4 cups salted peanuts — provide crunch and a salty contrast; salted peanuts help balance the sweetness.
- 1 (14 ounce) can sweetened condensed milk — the binder and the source of caramelized, gooey top once baked.
Step-by-Step: Chocolate and Peanut Graham Bars
- Preheat the oven to 350°F (175°C). Spray a 9-inch square baking dish with cooking spray.
- In a small bowl, stir together 8 tablespoons salted butter (melted) and 1/2 teaspoon vanilla extract.
- Pour the butter-vanilla mixture into the prepared baking dish.
- Evenly scatter 1 2/3 cups graham cracker crumbs over the butter mixture, then use a rubber spatula (or the bottom of a measuring cup) to press the crumbs firmly and evenly into the butter to form a crust.
- Sprinkle 1 1/4 cups sweetened shredded coconut evenly over the graham-cracker crust.
- In a separate bowl, combine 1 1/2 cups semi-sweet chocolate chips and 1 1/4 cups salted peanuts, then sprinkle that mixture evenly over the coconut layer.
- Evenly drizzle the contents of 1 (14 ounce) can sweetened condensed milk over the chocolate chips and peanuts so the top is covered as uniformly as possible.
- Bake in the preheated oven for 30 minutes.
- Remove from the oven and let the bars cool completely in the pan before slicing and serving.
Why Chocolate and Peanut Graham Bars is Worth Your Time
First, the payoff is immediate: the total hands-on time is minimal and the technique is forgiving. You don’t need tempering, precise timing beyond the 30-minute bake, or complicated tools. Pressing a crumb crust by hand and pouring condensed milk are both low-skill steps that still deliver big flavor.
Second, the flavor balance is excellent for a broad range of eaters. Graham crackers and coconut bring a subtly toasted sweetness, while the peanuts and salted butter add savory counterpoints. Semi-sweet chocolate keeps the bars from being cloying. That mix of textures and flavors makes these bars satisfying in small portions — a little goes a long way.
Lastly, they travel well. Because the structure is dense and the condensed milk sets during cooling, the bars hold together for potlucks, picnics, and lunchboxes. They also look more impressive than the time invested would suggest, which is always a win.
Low-Carb/Keto Alternatives
This recipe is built on sweetened ingredients, so converting it to low-carb or keto requires a few substitutions and an acceptance of texture changes.
– Swap graham cracker crumbs for a mix of finely ground almond flour and crushed low-carb biscuits or crushed pork rinds for a more structured crust. Add a tablespoon of coconut flour if you need dry binder.
– Replace sweetened shredded coconut with unsweetened shredded coconut to cut sugar, but be aware the bars will be less sweet overall.
– Use sugar-free chocolate chips (erythritol- or stevia-sweetened) in place of semi-sweet chips; flavor can be slightly different and chips may melt differently.
– Sweetened condensed milk is the biggest challenge. You can make a condensed-milk-style binder by simmering heavy cream with a liquid sweetener designed for baking (erythritol blends) until thickened, or use a commercial sugar-free condensed milk alternative if you can find one. Texture and browning will be different.
These swaps will change taste and texture; test a small batch first to dial in ratios and oven time.
Appliances & Accessories
You don’t need a lot of specialty gear to make these bars. Here are what I use and why each is helpful.
- 9-inch square baking dish — gives the bars the right depth and baking time. Glass or metal are both fine; metal will brown edges a touch more.
- Cooking spray — prevents sticking so bars lift cleanly from the pan.
- Measuring cups and spoons — the recipe uses straightforward measures, so accuracy helps with consistency.
- Small bowl and rubber spatula — for mixing melted butter and pressing the crust evenly. A flat-bottomed measuring cup is a great pressing tool.
- Oven — a conventional oven set to 350°F (175°C) is required for the specified bake time.
Pitfalls & How to Prevent Them
Crumb crust that falls apart
If the graham crumb layer isn’t pressed firmly, the bars can crumble when sliced. Press the crumbs firmly and evenly into the butter-vanilla mixture; using the bottom of a measuring cup gives a uniform compact crust.
Unevenly covered condensed milk
Drizzling condensed milk unevenly can leave dry pockets or thin spots that under-brown. Pour in a slow, steady stream and then use the back of a spoon to nudge it toward any gaps so the surface is uniformly covered.
Overbaked or underbaked center
The specified 30 minutes gives a set, golden top. Ovens vary; start checking at 28 minutes. The bars should be set with a lightly golden top but not burnt. If edges brown too quickly, tent loosely with foil for the final 5–7 minutes.
Bars too sticky after cooling
These are sticky by nature due to the condensed milk. Let the pan cool completely at room temperature before slicing — chilling briefly in the refrigerator for a firmer cut is okay if you prefer.
Seasonal Adaptations
These bars translate well across seasons with a few small ingredient swaps.
– Winter: Stir a pinch of ground cinnamon or ginger into the graham crumbs for a warming note. Swap salted peanuts for roasted chestnuts in a pinch, or add a scattering of chopped candied ginger if you like a spicy-sweet contrast.
– Spring: Fold in chopped dried strawberries (lightly rehydrated) or swap half the peanuts for pistachios to brighten flavor and color.
– Summer: Add a thin layer of fresh berries on top after the bars cool for a fresh contrast, or use toasted coconut for a deeper coconut flavor.
– Fall: Substitute a handful of chopped pecans for peanuts and add 1/2 teaspoon ground nutmeg to the crust for cozy notes.
Cook’s Notes
– Whether you use salted peanuts or unsalted is a personal choice; the recipe calls for salted peanuts to balance sweetness. If you use unsalted, consider finishing with a light sprinkle of flaky sea salt after baking.
– Use freshly made graham crumbs (pulse graham crackers in a food processor) or store-bought crumbs — both work. If your crumbs are very fine, you may need to press a little more firmly to achieve a stable crust.
– If you prefer a thinner top layer, use slightly less sweetened condensed milk, but note the top will be less gooey and may bake to a lighter color. Follow the recipe for reliable results.
– To test doneness, look for a lightly golden surface and a set texture; the center should no longer look wet.
Cooling, Storing & Rewarming
Cooling: Allow the bars to cool completely in the pan at room temperature. This lets the condensed milk set and makes slicing cleaner. If you’re in a hurry, place the pan in the refrigerator after it reaches room temperature for 30–60 minutes to firm up further.
Storing: Store bars in an airtight container at room temperature for up to 2 days. For longer storage, refrigerate for up to a week. When refrigerated, allow bars to come to room temperature for 20–30 minutes before serving for the best texture.
Freezing: Individually wrap bars in plastic wrap and freeze in a sealed bag for up to 2 months. Thaw in the refrigerator overnight, then bring to room temperature before serving.
Rewarming: If you want a slightly melty bite, rewarm a single portion in the microwave for 8–10 seconds on medium power. Avoid overheating; the chocolate can seize and the condensed milk will get very hot.
Common Questions
- Can I use different nuts? — Yes. Almonds, pecans, or cashews will work; adjust roasting and chopping to keep pieces uniform.
- Do I have to use sweetened coconut? — The recipe calls for sweetened shredded coconut; unsweetened will reduce overall sweetness and slightly change texture.
- Can I make these ahead? — Yes. They keep well for several days and transport easily, making them a good make-ahead dessert.
- My top browned too fast. What now? — Cover loosely with foil and continue baking until set, or reduce oven temperature by 25°F if you notice excessive browning early in the bake.
- Do I need to chill before slicing? — It’s not required, but chilling for 30–60 minutes makes cleaner slices, especially if you want neat bars for serving.
Hungry for More?
If you liked these bars, try swapping chocolate chips for white chocolate and adding macadamia nuts for a tropical twist, or use crushed peppermint around the edges for a holiday version. Bookmark this recipe — it’s one of those dependable, crowd-pleasing bakes that scales easily and handles substitutions well. If you make them, tell me how you adapted the recipe and whether you kept the classic combo or tried a seasonal twist.
Chocolate and Peanut Graham Bars
Ingredients
Equipment
Method
- Preheat the oven to 350°F (175°C). Spray a 9-inch square baking dish with cooking spray.
- In a small bowl, stir together 8 tablespoons salted butter (melted) and 1/2 teaspoon vanilla extract.
- Pour the butter-vanilla mixture into the prepared baking dish.
- Evenly scatter 1 2/3 cups graham cracker crumbs over the butter mixture, then use a rubber spatula (or the bottom of a measuring cup) to press the crumbs firmly and evenly into the butter to form a crust.
- Sprinkle 1 1/4 cups sweetened shredded coconut evenly over the graham-cracker crust.
- In a separate bowl, combine 1 1/2 cups semi-sweet chocolate chips and 1 1/4 cups salted peanuts, then sprinkle that mixture evenly over the coconut layer.
- Evenly drizzle the contents of 1 (14 ounce) can sweetened condensed milk over the chocolate chips and peanuts so the top is covered as uniformly as possible.
- Bake in the preheated oven for 30 minutes.
- Remove from the oven and let the bars cool completely in the pan before slicing and serving.
Notes
Store leftovers in an airtight container for 3 to 5 days.