Chocolate Chip Brownies
These brownies are the kind I make when I want something chocolatey, slightly fudgy, and reliably simple. They come together with pantry essentials and a small trick: melted coconut oil for a tender crumb and a subtle, clean flavor that plays well with chocolate. No complicated techniques, no long ingredient lists—just honest brownies that hit the spot.
I test this recipe at home, in the tiny kitchen where I do most of my recipe thinking. The batter is forgiving and the chocolate chips add pockets of melty richness whether you cut them warm or wait until they cool. I’ll walk you through the exact ingredients and steps, explain what each ingredient does, and share tips so your batch turns out the way you want it every time.
Below you’ll find the ingredient list, the step-by-step method, and thoughtful notes—storage, substitutions, troubleshooting, and seasonal variations. Read through once, then follow the method. These brownies are straightforward, and with a few small adjustments you can tailor them to your preferred level of fudginess or chew.
What We’re Using

We keep the ingredient list short and focused: flour, sugar, cocoa, leavening, salt, an egg, a splash of milk, vanilla, melted coconut oil, and semi-sweet chocolate chips. Each ingredient plays a role: structure, tenderness, sweetness, or chocolate intensity. The equipment is minimal—an 8×8-inch pan, parchment, bowls, and a spatula.
I like this combination because it balances convenience and texture. Coconut oil replaces butter or neutral oil, giving a light mouthfeel. The sugar provides both sweetness and some chew. Baking powder gives a gentle lift so the brownies aren’t flat and cakey, while the chocolate chips provide those beloved molten pockets.
Ingredients
- 1/2 cup coconut oil, melted — fat for tenderness and shine; melted makes it easy to combine with the wet ingredients.
- 2 tbsp milk — adds a little moisture and helps dissolve the dry mix; use any milk you prefer.
- 1 large egg — binds the batter and contributes to structure and richness.
- 1 tsp vanilla extract — flavor enhancer; don’t skip it, it rounds out the chocolate.
- 1 cup flour — provides structure; measure accurately for reliable texture.
- 1 1/4 cup granulated sugar — sweetness and tenderness; it also affects browning and texture.
- 1/3 cup cocoa powder — chocolate flavor base; use unsweetened cocoa for best results.
- 1 1/2 tsp baking powder — gives a gentle lift so the brownies aren’t too dense.
- 1/4 tsp salt — balances sweetness and enhances chocolate flavor.
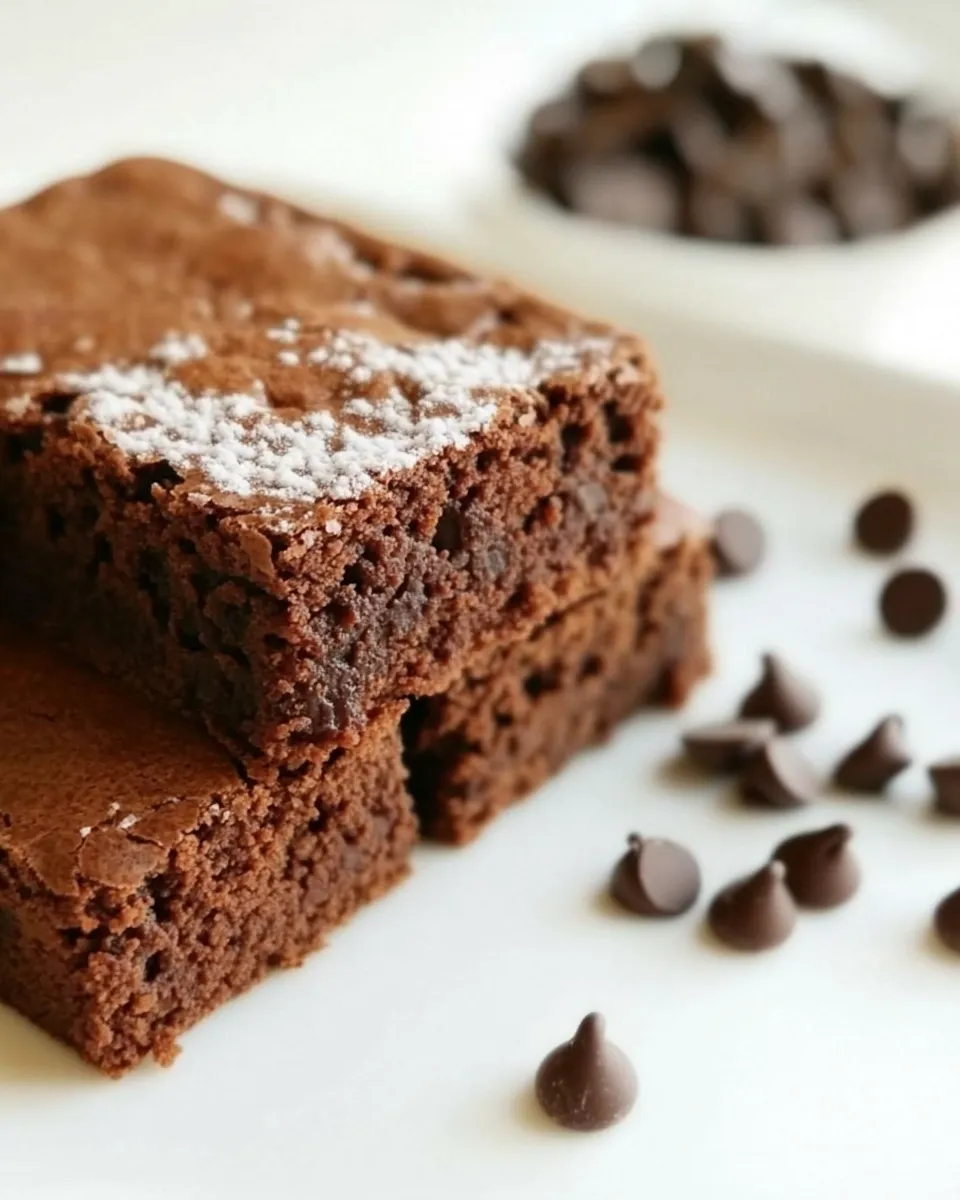
- 3/4 cup semi-sweet chocolate chips — chocolate pockets; 1/2 cup goes in the batter, 1/4 cup is for the top.
How to Prepare Chocolate Chip Brownies
- Preheat the oven to 350°F and line an 8×8-inch pan with parchment paper.
- In a medium bowl, whisk together the dry ingredients: 1 cup flour, 1 1/4 cup granulated sugar, 1/3 cup cocoa powder, 1 1/2 tsp baking powder, and 1/4 tsp salt.
- In a separate bowl, combine the wet ingredients: 1/2 cup melted coconut oil, 2 tbsp milk, 1 large egg, and 1 tsp vanilla extract. Whisk until evenly mixed.
- Pour the wet mixture into the bowl with the dry ingredients and stir with a spatula or spoon until just combined, scraping the bottom and sides of the bowl.
- Stir 1/2 cup semi-sweet chocolate chips into the batter and reserve the remaining 1/4 cup for the top.
- Transfer the batter to the prepared pan, spreading it evenly, then sprinkle the reserved 1/4 cup semi-sweet chocolate chips over the top.
- Bake for 40–45 minutes, or until the brownies are set and a toothpick inserted near the center comes out with a few moist crumbs.
- Allow the brownies to cool in the pan for at least 5 minutes before lifting out using the parchment and cutting.
Note: Follow the steps in order and don’t overmix once you combine wet and dry—stir until just combined to keep the texture tender.
What You’ll Love About This Recipe
First, it’s predictable. The ingredient list is short and the method is straightforward, so this becomes a quick go-to when you want reliable brownies without fuss. The coconut oil keeps them soft and slightly glossy on top; the balance of sugar and cocoa makes them satisfyingly chocolatey without being cloying.
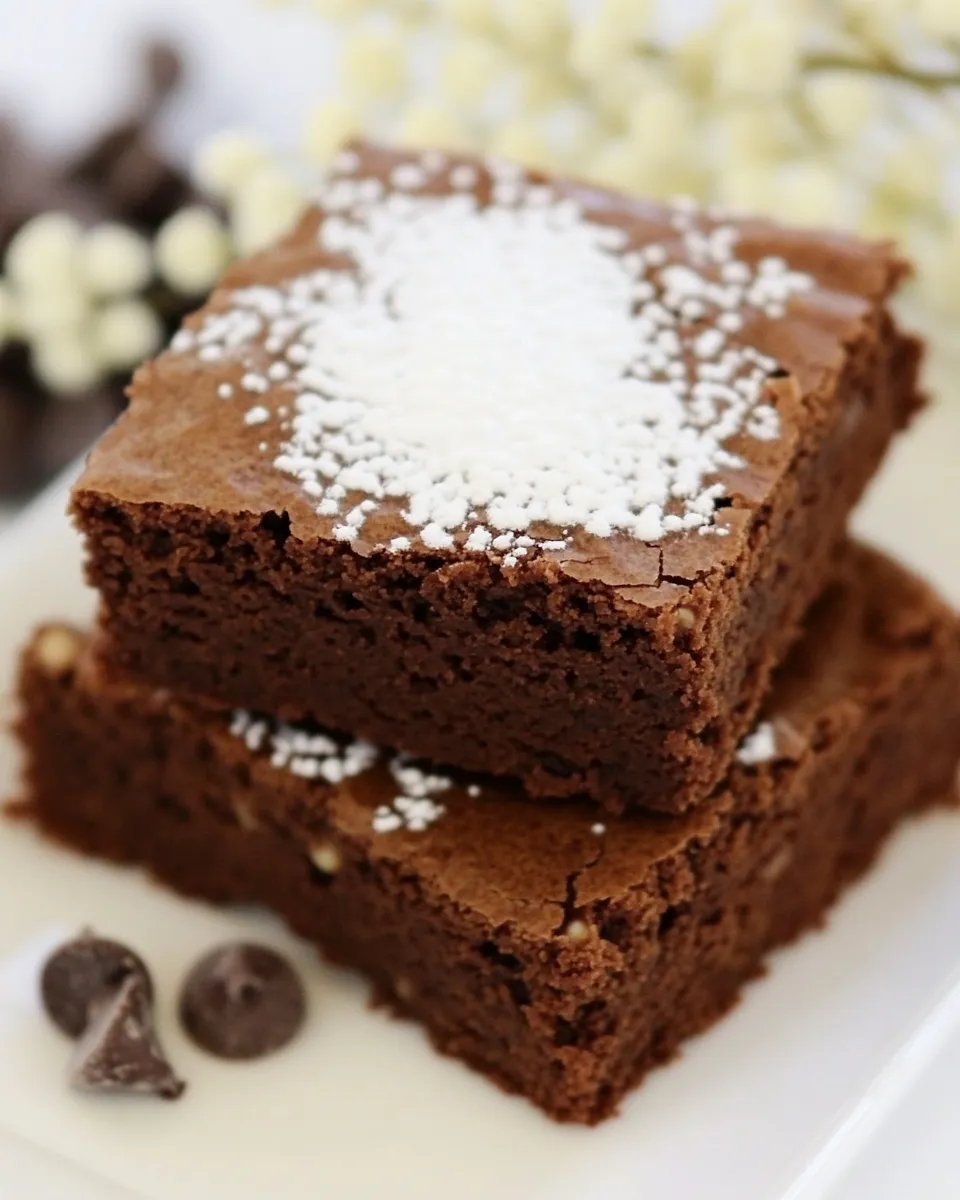
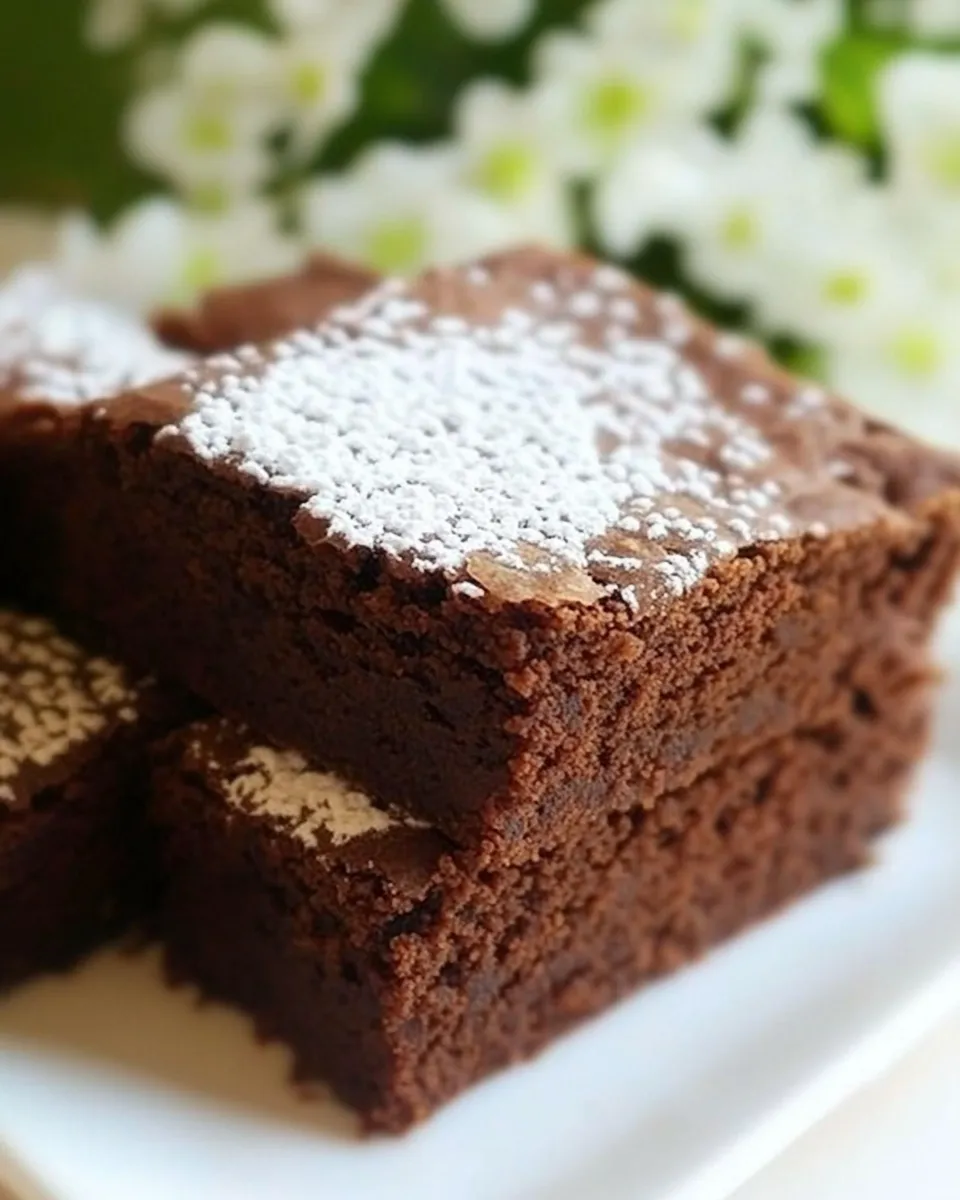
Second, texture. These brownies fall into the “slightly fudgy with a tender crumb” category. They aren’t a flourless fudgy brownie nor a spongy cake—they land in a happy middle that pleases most people. The sprinkled chocolate chips on top give you those perfect chocolate pockets in every bite.
Third, accessibility. No special equipment or obscure ingredients required. If you keep the pantry staples listed above, you can make these on short notice, and they adapt well to small tweaks if you want to customize the flavor.
Healthier Substitutions
If you want to lighten these brownies a little, there are a few simple swaps that keep the spirit of the recipe intact:
- Use a lower-sugar substitute in place of some granulated sugar—but note this will change texture and browning.
- Swap part of the all-purpose flour for whole wheat pastry flour (start with replacing up to 1/3) for a slightly nuttier flavor and more fiber.
- Use dark chocolate chips with a higher cacao percentage to reduce added sugar per serving while intensifying chocolate flavor.
- Replace milk with a lower-fat milk or unsweetened plant milk if you want a lighter profile; this won’t dramatically affect the final texture when it’s only 2 tablespoons.
Keep in mind that fat and sugar do more than add flavor—they affect texture. Any swap beyond the mild adjustments above may require changes in baking time or produce a different crumb.
Cook’s Kit
- 8×8-inch baking pan lined with parchment — makes unmolding and cutting clean and easy.
- Mixing bowls (one medium for dry, one for wet) — keeps ingredients organized and prevents overmixing.
- Whisk and spatula — whisk the dry mix, and use the spatula to fold batter and scrape the bowl.
- Measuring cups and spoons — accurate measuring keeps texture consistent.
- Toothpick or cake tester — for checking doneness at the center.
- Wire rack — cool the brownies evenly after baking.
Problems & Prevention
Here are typical issues and how to avoid them:
- Dry, cakey brownies — measure flour correctly (spoon and level), don’t overbake, and avoid overmixing the batter once liquids meet dry ingredients.
- Undercooked center — check oven temperature with a thermometer. If the edges are done but the center is too wet, loosely tent with foil and bake a few additional minutes.
- Brittle or greasy texture — ensure coconut oil is measured while melted, not excessively hot. Too much fat or a very thin batter can make brownies greasy.
- Flat brownies — make sure baking powder is fresh; it’s the leavening that gives a touch of lift.
- Chips sinking — fold the chips gently and reserve some for the top so you still get visible pockets even if a few sink.
Fresh Takes Through the Year
These brownies are a great canvas for seasonal twists:
- Fall — stir in 1/2 tsp cinnamon and top with a sprinkle of chopped toasted pecans for warmth and crunch.
- Winter — add 1/4 tsp orange zest to the batter and use dark chocolate chips for a chocolate-orange riff.
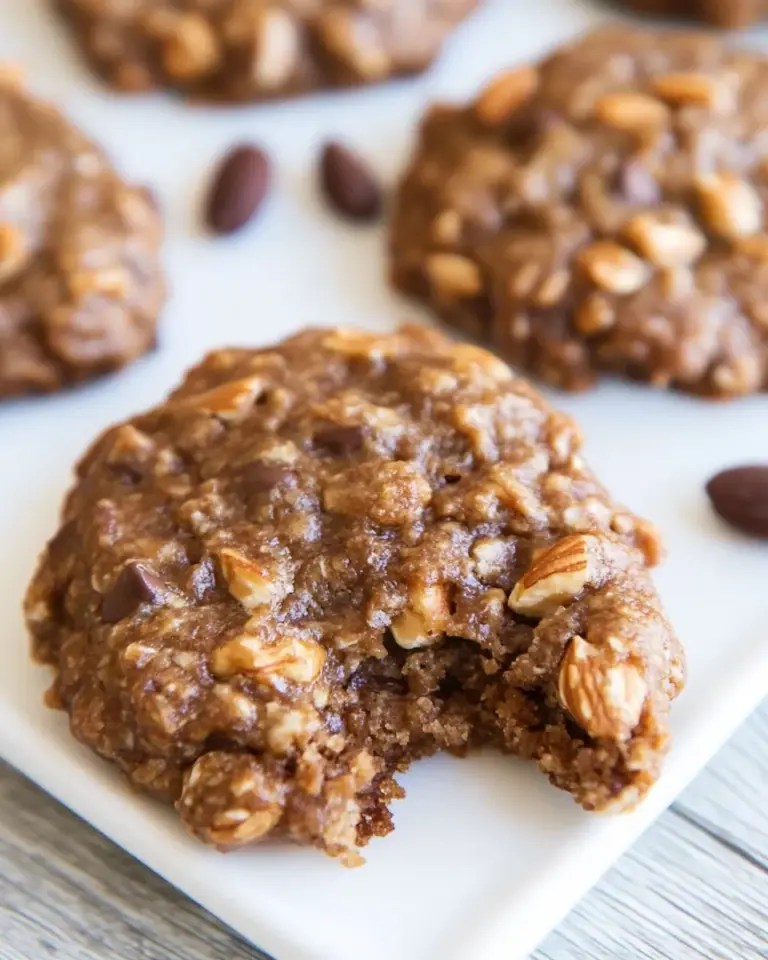
- Spring — fold in a handful of chopped toasted almonds and a pinch of sea salt on top for contrast.
- Summer — serve warm with a scoop of vanilla ice cream and a drizzle of salted caramel.
Small finishing touches—sea salt flakes, crushed nuts, or a dusting of powdered sugar—can change the presentation and flavor without altering the method.
Cook’s Commentary
I keep this recipe in rotation because it’s dependable and forgiving. One detail I pay attention to is the cooling time: cutting warm brownies can be satisfying, but they often fall apart a little. I usually wait at least 15–20 minutes after pulling them from the oven before slicing. If you want clean lines, cool completely in the pan, chill briefly, then cut with a sharp knife warmed under hot water and dried between cuts.
The coconut oil is a subtle choice—it won’t make the brownies taste coconutty unless you use unrefined coconut oil. For a neutral flavor, use refined coconut oil. If you prefer butter, you can substitute an equal melted amount, but know that butter will brown a bit and change the flavor slightly.
Save It for Later
Storage is simple. Keep cooled brownies in an airtight container at room temperature for up to 3 days. If you want to keep them longer, wrap individual squares tightly in plastic wrap and freeze in a zip-top bag for up to 2 months. To serve from frozen, thaw at room temperature for about 30–60 minutes or warm gently in a low oven for a fresh-baked feel.
Common Questions
Q: Can I make this recipe in a larger pan? A: You can, but the thickness and bake time will change. An 9×9 pan will yield thinner brownies and a shorter bake time; start checking 5–8 minutes earlier. For deeper brownies, use the specified 8×8 pan.
Q: Can I omit the egg? A: The egg contributes structure and moisture. If you need an egg-free version, try an egg substitute (like a flax egg), but texture will be different—often denser and less tender.
Q: How do I get fudgier brownies? A: Reduce the flour slightly (try 2–3 tablespoons less) and shorten the bake time; pull them when a toothpick has moist crumbs. Be cautious—too little flour can make them unstable.
Q: Why use baking powder and not baking soda? A: The recipe balances acidity and leavening for a controlled rise. Baking powder gives a gentle lift; baking soda would require additional acidic components to work properly.
Time to Try It
These Chocolate Chip Brownies are a practical, crowd-pleasing recipe that delivers chocolate satisfaction without drama. Read the ingredients once, follow the eight steps, and have parchment and a pan ready. If this is your first time, set a timer for 40 minutes but check at 40 to see how the center looks—ovens vary. Once you’ve made them, feel free to tweak small elements (a different chip, a sprinkle of sea salt, or a nutty topping) and make them your own.
When you slice into a warm brownie and see chocolate pooling around the chips, you’ll know it was worth the few simple steps. Enjoy the process—and the brownies.
Chocolate Chip Brownies
Ingredients
Equipment
Method
- Preheat the oven to 350°F and line an 8×8-inch pan with parchment paper.
- In a medium bowl, whisk together the dry ingredients: 1 cup flour, 1 1/4 cup granulated sugar, 1/3 cup cocoa powder, 1 1/2 tsp baking powder, and 1/4 tsp salt.
- In a separate bowl, combine the wet ingredients: 1/2 cup melted coconut oil, 2 tbsp milk, 1 large egg, and 1 tsp vanilla extract. Whisk until evenly mixed.
- Pour the wet mixture into the bowl with the dry ingredients and stir with a spatula or spoon until just combined, scraping the bottom and sides of the bowl.
- Stir 1/2 cup semi-sweet chocolate chips into the batter and reserve the remaining 1/4 cup for the top.
- Transfer the batter to the prepared pan, spreading it evenly, then sprinkle the reserved 1/4 cup semi-sweet chocolate chips over the top.
- Bake for 40–45 minutes, or until the brownies are set and a toothpick inserted near the center comes out with a few moist crumbs.
- Allow the brownies to cool in the pan for at least 5 minutes before lifting out using the parchment and cutting.
Notes
This recipe will give you fudgy, not cake-like brownies.
These brownies will keep in an air-tight container at room temperature for 4-5 days.