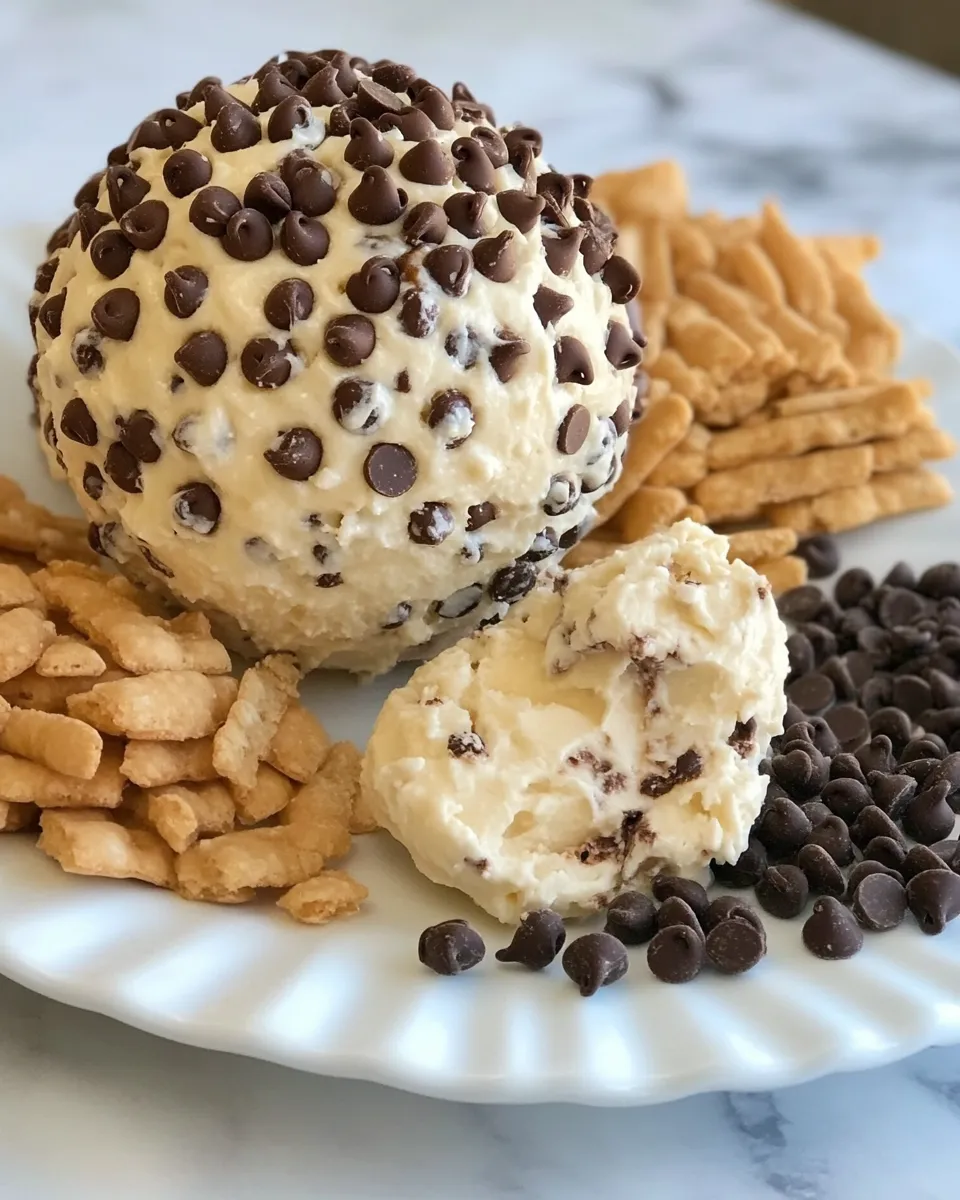
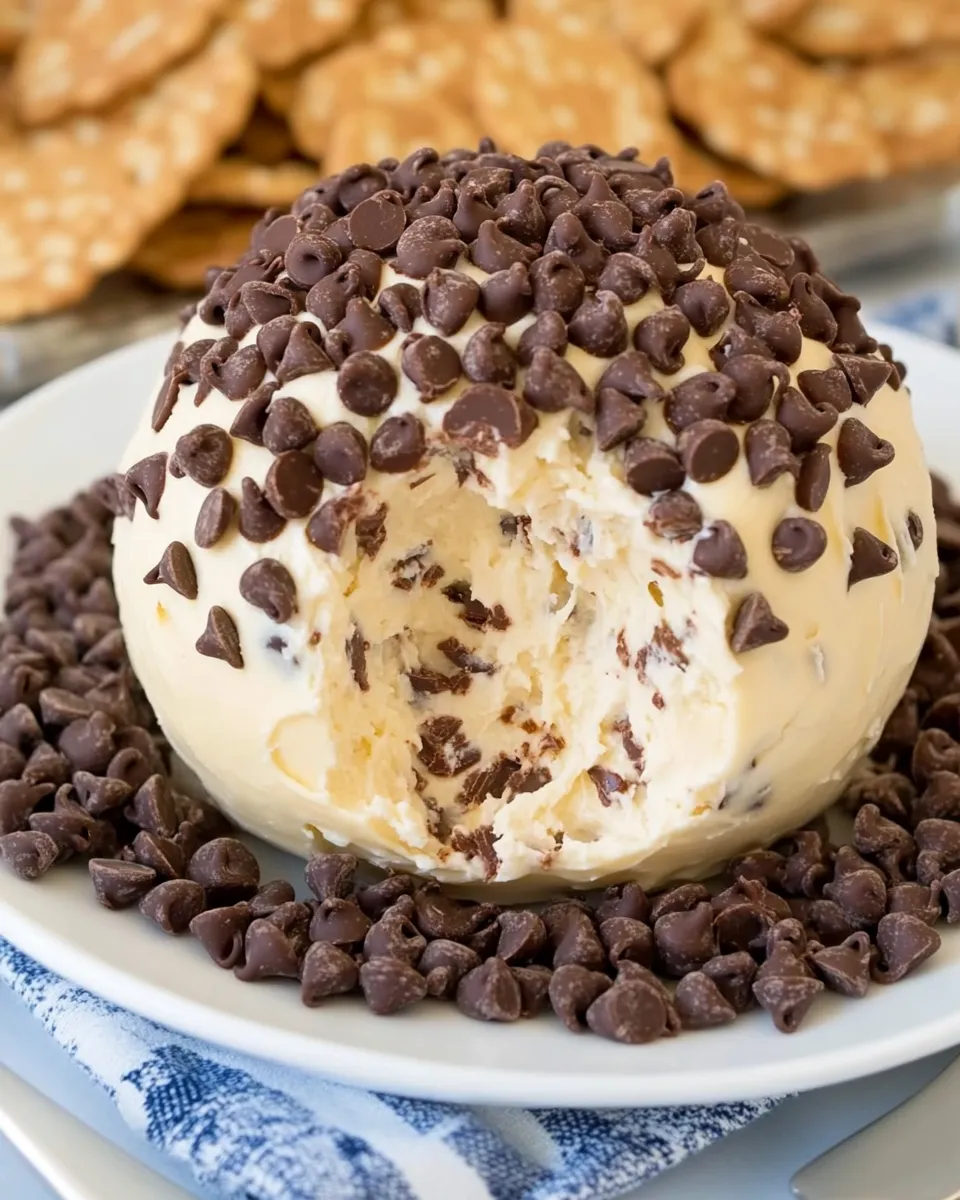
Chocolate Chip Cheese Ball
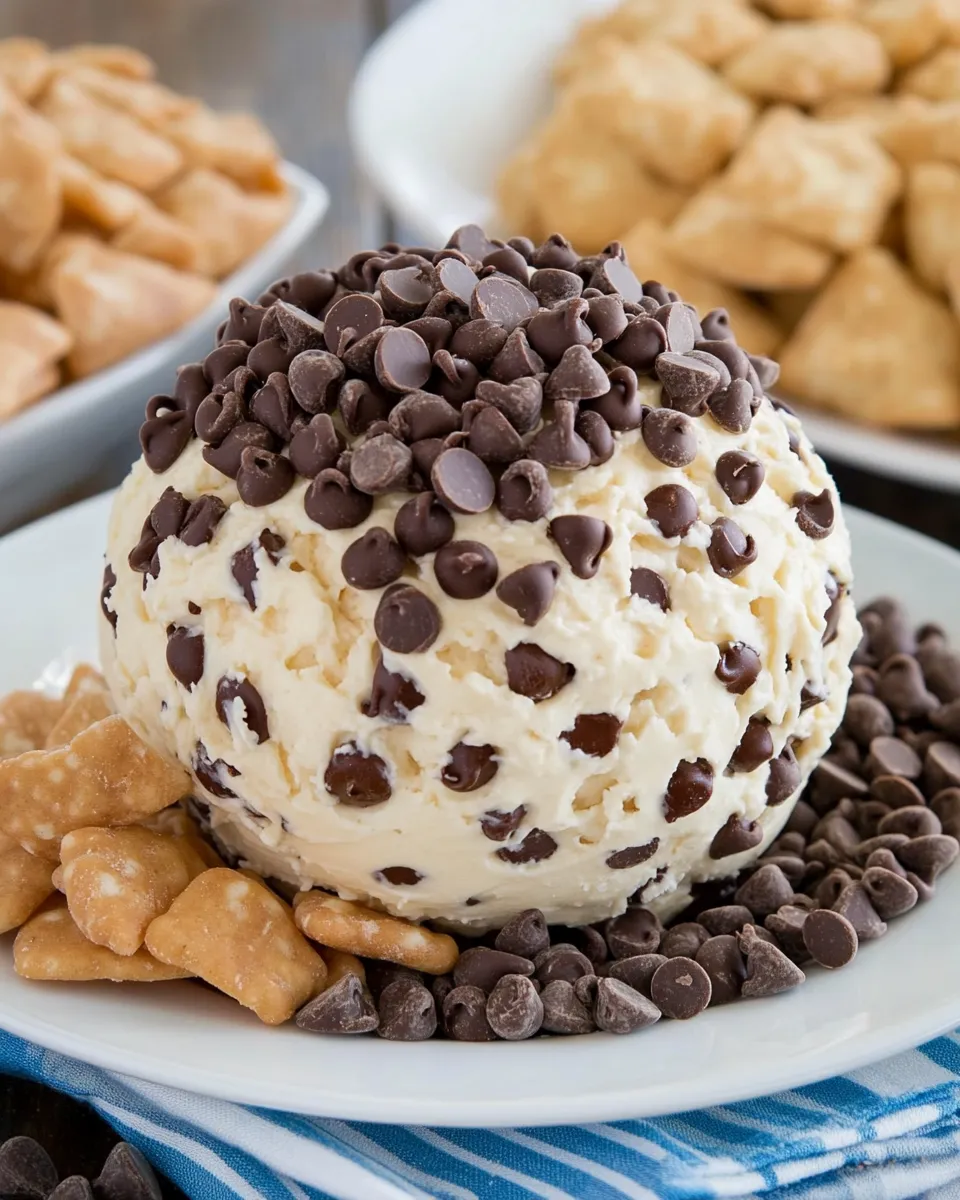
This chocolate chip cheese ball is one of those recipes that looks playful but behaves like a champion on any dessert table. It’s creamy, mildly sweet, and portable, and the crunchy pecan and chocolate chip exterior gives every bite a little celebration. I keep a version of this in my refrigerator for last-minute guests and casual weeknight dessert cravings.
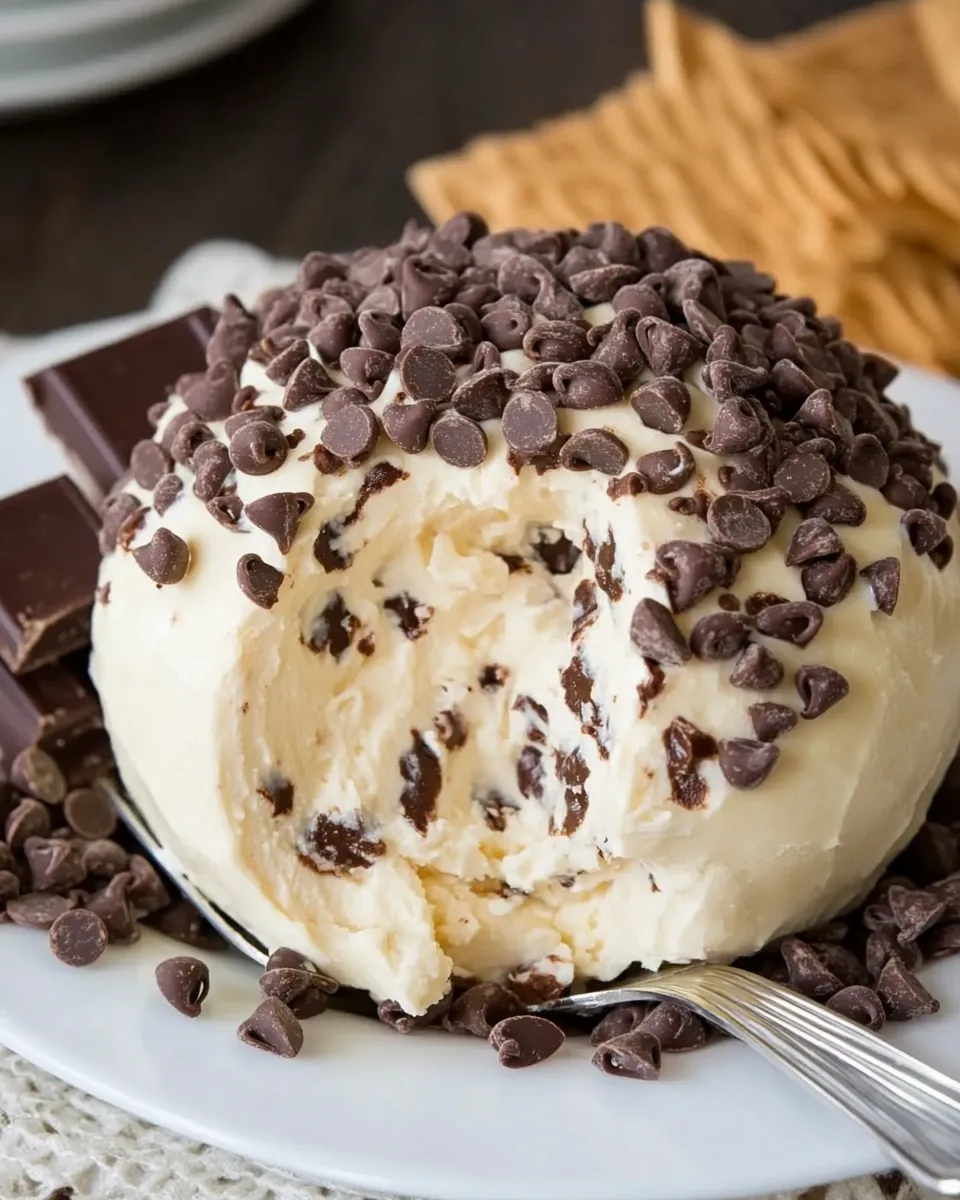
The method is straightforward: mix, chill, shape, and coat. The chilling steps are where patience pays off — they firm the mixture so you get a smooth, sliceable ball that holds together nicely. The result is a nostalgic cross between a cookie and a cheesecake, served with crackers or cookies for scooping.
Below I’ll walk you through exactly what goes into it, the full step-by-step directions, what equipment matters, common missteps, and ways to adapt the recipe to different needs. Read through the tips before you start; a few small choices make a big difference in texture and presentation.
What Goes Into Chocolate Chip Cheese Ball
Ingredients
- 28-oz packages cream cheese softened — provides the creamy base and structure; should be soft enough to beat.
- ¼ cup (1 stick) unsalted butter softened — adds richness and helps the ball hold its shape.
- ½ teaspoon pure vanilla extract — lifts the flavors and complements the chocolate.
- ¾ cup powdered sugar — gives smooth, even sweetness and a clean texture.
- ¼ cup light brown sugar — adds depth and a hint of caramel flavor.
- 1 ½ cups semi sweet chocolate chips — split in half: some go inside the ball, some coat the outside for texture and chocolate bursts.
- 1 ½ cups pecans chopped — also split: some into the ball, some for the exterior crunch and a toasty flavor.
Build Chocolate Chip Cheese Ball Step by Step
- In a large bowl, beat all of the cream cheese with the 1/4 cup (1 stick) unsalted butter and 1/2 teaspoon pure vanilla extract until smooth and well combined (use an electric mixer on medium speed or a sturdy spatula).
- Add the 3/4 cup powdered sugar and 1/4 cup light brown sugar to the bowl; beat on low speed (or mix thoroughly) until the sugars are fully incorporated and the mixture is smooth, scraping down the bowl as needed.
- Measure out and set aside 3/4 cup of the semi-sweet chocolate chips and 3/4 cup of the chopped pecans for the coating (this is half of each 1 1/2‑cup amount). Stir the remaining 3/4 cup chocolate chips and 3/4 cup chopped pecans into the cream cheese mixture until evenly distributed.
- Cover the bowl and refrigerate the mixture for at least 2 hours, or until firm enough to shape.
- Remove the chilled mixture, shape it into a ball using your hands or plastic wrap to help form a smooth surface, then wrap the ball tightly in plastic wrap and refrigerate for 1 more hour.
- Unwrap the cheese ball and place it on a serving plate. Carefully roll or press the outside of the cheese ball into the reserved 3/4 cup chocolate chips and 3/4 cup chopped pecans so it is evenly coated. Serve with Nilla wafers, graham crackers, or other cookies.
Why Chocolate Chip Cheese Ball is Worth Your Time
This recipe is worth the short investment of time because it transforms pantry staples into something unexpectedly festive. A single mixing bowl, a little chilling, and a handful of surface garnish turn softened cream cheese into a showpiece that’s easy to portion and hard to put down.
It’s versatile for gatherings. Place it on a board with a variety of cookies and crackers and it immediately becomes interactive — guests scoop, spread, and nibble. The mix of smooth interior and crunchy exterior gives texture contrast that lifts it above a plain spread or simple cookie tray.
Finally, it’s forgiving. The steps are clear and mistakes are usually recoverable. Over-sweet? Add a bit more cream cheese next time. Too soft? Chill it longer. That makes it a reliable choice for cooks of every level.
If You’re Out Of…
- Semi-sweet chocolate chips — try darker chocolate chips if you like a slightly bitter edge, or milk chocolate for a sweeter result. If you only have chocolate bars, chop them coarsely.
- Pecans — walnuts or almonds work well. Toast them briefly in a dry pan to boost flavor before chopping.
- Light brown sugar — a simple swap is to use the same amount of granulated sugar, but the final flavor will be slightly less caramel-like.
- Powdered sugar — not easily substituted without changing texture. If you must, pulse granulated sugar in a blender to make superfine sugar, but beat thoroughly to dissolve.
Must-Have Equipment
- Large mixing bowl — gives room to beat the cream cheese and fold ingredients without a mess.
- Electric mixer (hand or stand) or a sturdy spatula — a mixer speeds things and ensures smooth texture; a spatula works if the cream cheese is well softened.
- Measuring cups and spoons — accurate ratios help the ball set properly.
- Plastic wrap — essential for shaping and an extra chill to firm the ball.
- Serving plate or small board — for presentation and easy scooping by guests.
Mistakes Even Pros Make
Under-chilling is the most common misstep. If you try to shape the mixture too soon it will be sticky and loose, and you’ll get an uneven surface. Let it firm up for the full 2 hours, and then another hour after shaping.
Another frequent issue is using cream cheese that’s too cold or not softened enough. That results in lumps when beating. Bring the cream cheese to a workable softness — not melted, just pliable — so it blends smooth without overworking.
Finally, don’t skip the coating step. It isn’t purely decorative. The chocolate and pecan crust hides any small imperfections and adds the nutty crunch that balances the soft center.
Adaptations for Special Diets
While this recipe is dairy-forward, here are reasonable adaptations:
- Lower-sugar option: Reduce powdered sugar slightly and choose a lower-sugar chocolate chip. Texture will remain creamy; sweetness will be milder.
- Nut-free: Omit pecans entirely and substitute the outer coating with toasted oats, crushed pretzels, or extra chocolate chips for crunch.
- Gluten-free: The cheese ball itself is naturally gluten-free; just serve with certified gluten-free crackers or cookies.
- Dairy-free: This one is tricky. Use a high-quality dairy-free cream cheese and plant-based butter equivalent with good firmness. Results will vary; chilling time may need to be adjusted to allow firming.
Testing Timeline
Here’s a practical timeline for making this cheese ball with minimal downtime:
- 0:00–0:10 — Beat cream cheese, butter, and vanilla until smooth; add sugars and mix.
- 0:10–0:15 — Fold in half the chocolate chips and pecans; measure and set aside the coating pieces.
- 0:15–2:15 — Cover and chill the mixture for at least 2 hours (this can be extended to overnight if you prefer).
- 2:15–2:25 — Shape into a ball, wrap tightly, and chill for 1 hour.
- 3:25 — Unwrap and coat with reserved chocolate chips and pecans; plate and serve.
If you’re prepping for a party, I recommend doing the first chill the night before and shaping/coating on the day of. It reduces last-minute stress and actually improves flavor melding.
Make-Ahead & Storage
This cheese ball is very make-ahead friendly. Prepare it fully through the final coating, then wrap tightly in plastic wrap and refrigerate. It keeps well for 3–4 days chilled, and it holds its shape for convenient transport.
For longer storage, freeze the uncoated shaped ball (wrap it tightly, then place in a freezer bag). Freeze up to 1 month. Thaw overnight in the refrigerator before coating and serving; do not refreeze after thawing. Note: freezing can slightly change the texture of the cream cheese, so for best creaminess, refrigerate rather than freeze when you can.
Handy Q&A
Q: Can I double the recipe?
A: Yes. Keep the ratios the same and mix in a bowl large enough to accommodate the increased volume. You may need to form two balls or one very large one; plan chilling space accordingly.
Q: My finish is greasy or soft on the outside. What happened?
A: That usually indicates the mixture was too warm when you shaped it. Chill longer before shaping, and press the coating on gently but firmly so it adheres rather than sliding off.
Q: Can I make smaller individual portions?
A: Absolutely. Form the mixture into smaller balls and chill. They’ll set faster and make cute single-serve bites that are easy for parties.
Q: What else can I serve with it besides Nilla wafers or graham crackers?
A: Thin cookies, shortbread, pretzel sticks, fruit slices like apple or pear (for a contrast), or buttery crackers all pair well. Choose sturdy dippers to avoid tearing the ball apart.
Final Bite
This Chocolate Chip Cheese Ball is a low-effort, high-return dessert that shows up beautifully at gatherings and rewards a little planning. Follow the chilling times, split your chips and nuts as directed, and you’ll have a reliable hit: creamy interior, crunchy, chocolatey exterior, and plenty of nostalgic charm.
Make it ahead, bring it out when guests arrive, and enjoy watching forks dive in. It’s simple comfort with a festive edge — a small recipe with a big smile factor.
Chocolate Chip Cheese Ball
Ingredients
Equipment
Method
- In a large bowl, beat all of the cream cheese with the 1/4 cup (1 stick) unsalted butter and 1/2 teaspoon pure vanilla extract until smooth and well combined (use an electric mixer on medium speed or a sturdy spatula).
- Add the 3/4 cup powdered sugar and 1/4 cup light brown sugar to the bowl; beat on low speed (or mix thoroughly) until the sugars are fully incorporated and the mixture is smooth, scraping down the bowl as needed.
- Measure out and set aside 3/4 cup of the semi-sweet chocolate chips and 3/4 cup of the chopped pecans for the coating (this is half of each 1 1/2‑cup amount). Stir the remaining 3/4 cup chocolate chips and 3/4 cup chopped pecans into the cream cheese mixture until evenly distributed.
- Cover the bowl and refrigerate the mixture for at least 2 hours, or until firm enough to shape.
- Remove the chilled mixture, shape it into a ball using your hands or plastic wrap to help form a smooth surface, then wrap the ball tightly in plastic wrap and refrigerate for 1 more hour.
- Unwrap the cheese ball and place it on a serving plate. Carefully roll or press the outside of the cheese ball into the reserved 3/4 cup chocolate chips and 3/4 cup chopped pecans so it is evenly coated. Serve with Nilla wafers, graham crackers, or other cookies.
Notes
Decorate it:It can be fun to decorate this cheeseball to look like a turkey for Thanksgiving! You can also add festive-colored chocolate chips, sprinkles, or M&Ms to theme this dessert dip for any occasion.
To Make Ahead:You can store this dessert well wrapped, in the refrigerator for up to 5 days.
To Store:Leftovers can also be stored for up to 5 days from the time the cheese ball is made.
To Freeze:Cream cheese balls like this one can be frozen, very well wrapped, for up to 2 months. Allow it to thaw overnight in the fridge before decorating or serving.