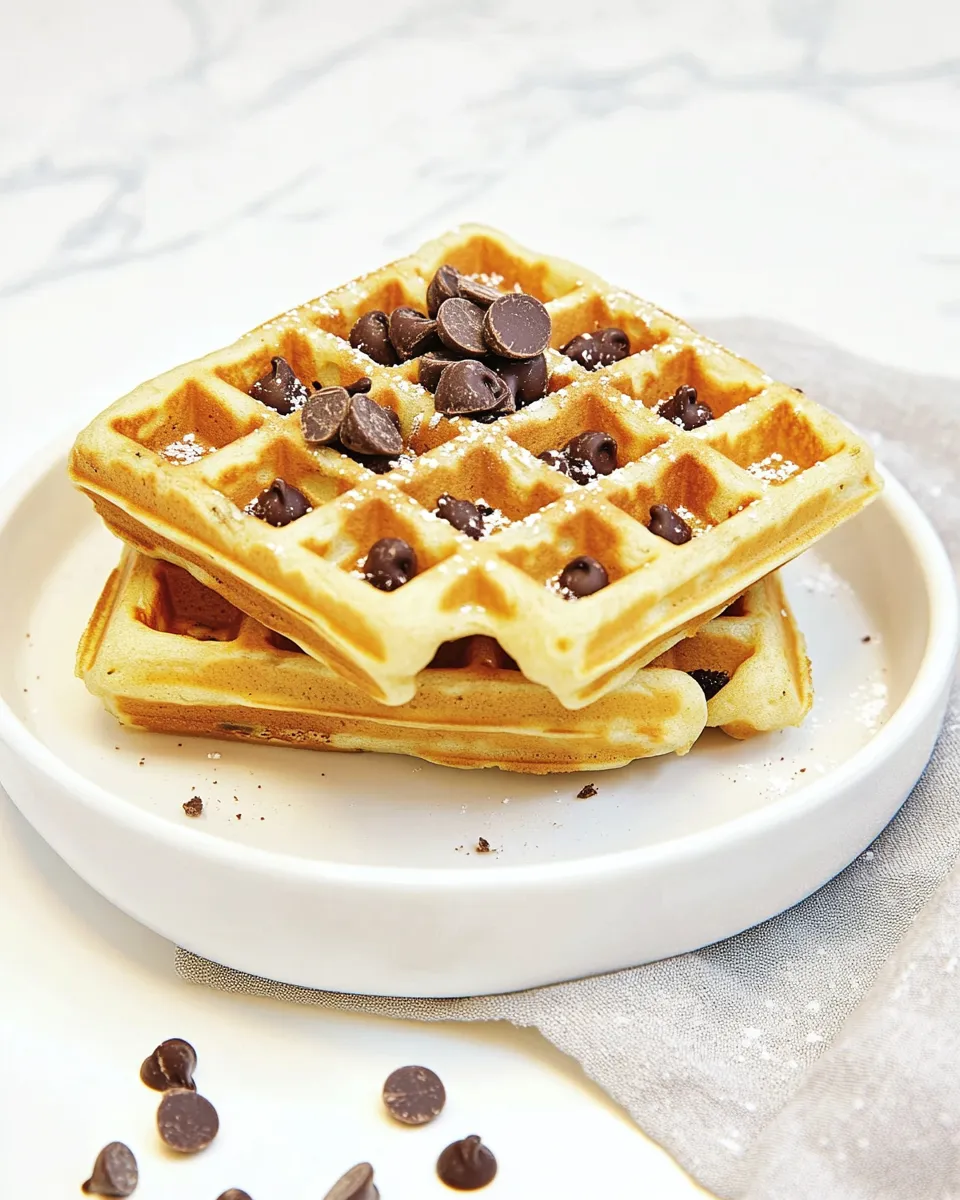
Chocolate Chip Waffles Recipe
These waffles are exactly what you want on a weekend morning: crisp outside, tender inside, and studded with melty mini chocolate chips. The batter is forgiving, comes together quickly, and the resting time is short but important. I test this version a lot because it hits that sweet spot between easy and wonderfully crisp.
I’ll walk you through the small steps that make a big difference — warming the milk with the butter, folding instead of overmixing, and keeping finished waffles on a wire rack in a low oven so they stay crisp. No gimmicks. Just straightforward technique so your first waffle is never the only good one.
Follow the ingredient list exactly and use the step-by-step instructions below. I also include practical troubleshooting, equipment notes, and rapid variations so you can adapt this into your regular breakfast rotation without guessing.
Gather These Ingredients

- 1/2 cup unsalted butter — cut into cubes; melts into the milk to add richness and help crisp the exterior.
- 1 3/4 cups milk — warmed with the butter; keeps the batter smooth and helps the waffles steam to tenderness.
- 1 teaspoon vanilla extract — adds aromatic sweetness; stir into the warm milk-and-butter so it disperses evenly.
- 2 large eggs — beaten with sugar to build lift and structure for light, fluffy waffles.
- 1 tablespoon granulated sugar — helps with browning and a subtle sweetness in the waffle batter.
- 2 cups all-purpose flour — the base of the batter; gives the waffles structure and a tender crumb.
- 4 teaspoons baking powder — the leavening agent; ensures the waffles rise and stay airy.
- 1/2 teaspoon salt — balances sweetness and strengthens flavor.
- 1 cup mini chocolate chips — folded into the batter for evenly distributed chocolate in every bite.
Mastering Chocolate Chip Waffles: How-To
- Place the butter and milk in a microwave-safe bowl. Heat in 15-second intervals, stirring between each, until the butter is fully melted and the mixture is warm but not hot (about 90 seconds total).
- Stir the mixture to combine, then whisk in the vanilla extract. Set aside briefly so it stays warm but not hot.
- In a large bowl, beat the eggs and granulated sugar with a hand mixer on high speed until pale, thick, and fluffy, about 1 to 2 minutes.
- With the mixer on low, slowly pour the warm milk-and-butter mixture into the beaten eggs and sugar, mixing only until just combined.
- Add the all-purpose flour, baking powder, and salt (sift them together first if you prefer). Using a spatula, gently fold the dry ingredients into the wet ingredients until no visible streaks of flour remain. Do not overmix.
- Let the batter rest for at least 10 minutes. While the batter rests, preheat your waffle iron and preheat the oven to 200°F (with a wire rack set over a baking sheet) to keep finished waffles warm and crisp.
- Lightly brush or spray the preheated waffle plates with oil or nonstick spray.
- Gently fold the mini chocolate chips into the rested batter so they distribute evenly and don’t sink.
- Pour about 1/2 to 3/4 cup of batter (depending on your waffle iron’s size) onto the center of the waffle iron. Spread slightly if needed, but avoid overfilling. Close the iron and cook about 3 to 4 minutes, or until the waffle is golden brown and crisp. If the waffle sticks when you lift the lid, close and cook another 30 seconds to 1 minute.
- Transfer each finished waffle to the wire rack in the preheated oven to keep warm and crisp. Repeat steps 7–10 with the remaining batter.
Why This Recipe Belongs in Your Rotation
This recipe balances convenience and control. It uses simple pantry staples and a small, repeatable technique that produces consistent results. The trick of warming the milk with butter gives you better browning and texture without complicated steps. Folding the dry ingredients and letting the batter rest reduces the risk of dense waffles while the process to keep finished waffles on a wire rack preserves crispness — no soggy stacks.
It’s also versatile. These waffles are sturdy enough for syrup, fruit, or nut butter, but delicate enough to pair with a scoop of ice cream for an indulgent dessert. Make a double batch and freeze extras for fast weekend breakfasts. The method scales well and the flavor is broadly crowd-pleasing: a slightly sweet batter studded with plenty of chocolate.
Healthier Substitutions

If you want to lighten this recipe without changing the method, focus on simple swaps rather than overhauling the process. Use lower-fat milk or a plant-based milk in place of whole milk; the batter will behave similarly though final crispness can be a touch different. You can reduce the sugar slightly if you prefer less sweetness; the chocolate chips provide much of the treat factor.
A smaller portion approach also works: make smaller waffles or use less batter per waffle so each serving has fewer calories. Keep in mind that altering the butter-to-milk ratio will change texture and browning, so if you cut back on butter, expect a slightly softer exterior.
Hardware & Gadgets

A reliable waffle iron matters more than a fancy one. A hot, evenly heating plate produces consistent browning. Nonstick plates are convenient but a well-seasoned cast-iron waffle maker gives excellent crust if you’re comfortable with a little extra maintenance. Use a small offset spatula or spoon to spread batter if your iron needs it, and a pastry brush or spray for oiling the plates.
Other helpful items: a wire cooling rack set over a baking sheet (for keeping waffles crisp), a microwave-safe bowl for warming the milk and butter, and a hand mixer for whipping the eggs and sugar quickly. A measuring cup that pours cleanly keeps batter portions consistent and prevents overfilling the iron.
Things That Go Wrong
Waffles are soggy
Common cause: stacking waffles straight off the iron. Steam builds up between stacked waffles and softens them. Solution: transfer each waffle to a wire rack in a low oven until you’re ready to serve. Also ensure your waffle iron is fully preheated; a too-cool iron produces underbrowned, softer waffles.
Waffles stick to the iron
If waffles stick when you lift the lid, the iron might need more time, or it wasn’t oiled properly. Close the iron and give the waffle 30 seconds to 1 minute more. For future batches, brush or spray the plates lightly before each waffle and allow the iron to reheat briefly between batches.
Dense or gummy texture
Overmixing the batter or skipping the rest can tighten gluten and yield dense waffles. Fold dry ingredients until just combined and let the batter rest for at least 10 minutes to hydrate the flour and relax gluten. Also check your baking powder — if it’s old, waffles won’t lift properly.
Variations by Season
In cooler months, add warm spices to the batter (a pinch of cinnamon or a little ground nutmeg) to echo seasonal breakfasts without changing quantities or technique. In warmer weather, serve the waffles with fresh berries and a light drizzle of citrus syrup to brighten the plate. The chocolate chips are a year-round favorite, but pairing choices shift with the season: roasted stone fruits in late summer, oranges and pears in winter.
For a brunch twist, use the waffles as the base for savory toppings: crisp bacon, a fried egg, and a drizzle of maple for a sweet-and-salty combo. The batter is neutral enough to support either direction.
Flavor Logic
Why this combination works: the warmed butter disperses fat evenly into the batter, helping with both flavor and crisping during cooking. Beating the eggs with the sugar traps air and builds volume; when you fold in the flour gently, you keep that lightness. Baking powder gives immediate lift, and the brief rest time relaxes the batter so it cooks evenly.
Mini chocolate chips are small enough to distribute through the batter and melt quickly, so you get pockets of chocolate without creating uneven hot spots. Salt and vanilla are small but essential flavor enhancers — they round out the sweetness and amplify the chocolate and butter notes.
Make Ahead Like a Pro
To freeze
Cool waffles completely on a wire rack, then freeze them in a single layer on a sheet pan until firm. Transfer to a freezer bag, separating layers with parchment if needed. Reheat from frozen in a toaster or toaster oven until hot and crisp.
To reheat
For best texture, reheat in a toaster oven or regular oven set to medium-high until hot and crisp. Avoid the microwave for reheating unless you’re in a hurry; it softens the waffles and ruins the crisp edge.
You can also prepare the batter several hours ahead and keep it covered in the refrigerator, but bring it to room temperature briefly before cooking if the milk-and-butter mixture has chilled completely.
Quick Q&A
Q: Can I make the batter in advance? A: Yes. You can mix the batter and refrigerate it for a few hours. Let it sit at room temperature briefly before cooking. Avoid letting it sit too long, as leavening power can diminish.
Q: Can I use large chocolate chips instead of mini? A: You can, but larger chips may sink more easily and create uneven melting. Mini chips distribute more evenly through the batter.
Q: Why does the recipe warm the milk and butter together? A: Warming melds fat into the milk, ensuring the butter incorporates smoothly without solidifying when it hits cold eggs. It also contributes to better browning and a more tender interior.
Let’s Eat
Serve these waffles hot from the oven rack with whatever feels best: a pat of butter and maple syrup, a scattering of fresh fruit, or simply a dusting of powdered sugar and a mug of coffee. If you made extra, freeze them and count on fast, excellent breakfasts for busy mornings.
The method here is small details adding up: warm the milk, beat the eggs, fold gently, let the batter rest, and give each waffle a warm wire-rack landing. Follow those steps and you’ll get a reliable, delicious stack every time. Enjoy.
Chocolate Chip Waffles Recipe
Ingredients
Equipment
Method
- Place the butter and milk in a microwave-safe bowl. Heat in 15-second intervals, stirring between each, until the butter is fully melted and the mixture is warm but not hot (about 90 seconds total).
- Stir the mixture to combine, then whisk in the vanilla extract. Set aside briefly so it stays warm but not hot.
- In a large bowl, beat the eggs and granulated sugar with a hand mixer on high speed until pale, thick, and fluffy, about 1 to 2 minutes.
- With the mixer on low, slowly pour the warm milk-and-butter mixture into the beaten eggs and sugar, mixing only until just combined.
- Add the all-purpose flour, baking powder, and salt (sift them together first if you prefer). Using a spatula, gently fold the dry ingredients into the wet ingredients until no visible streaks of flour remain. Do not overmix.
- Let the batter rest for at least 10 minutes. While the batter rests, preheat your waffle iron and preheat the oven to 200°F (with a wire rack set over a baking sheet) to keep finished waffles warm and crisp.
- Lightly brush or spray the preheated waffle plates with oil or nonstick spray.
- Gently fold the mini chocolate chips into the rested batter so they distribute evenly and don’t sink.
- Pour about 1/2 to 3/4 cup of batter (depending on your waffle iron’s size) onto the center of the waffle iron. Spread slightly if needed, but avoid overfilling. Close the iron and cook about 3 to 4 minutes, or until the waffle is golden brown and crisp. If the waffle sticks when you lift the lid, close and cook another 30 seconds to 1 minute.
- Transfer each finished waffle to the wire rack in the preheated oven to keep warm and crisp. Repeat steps 7–10 with the remaining batter.