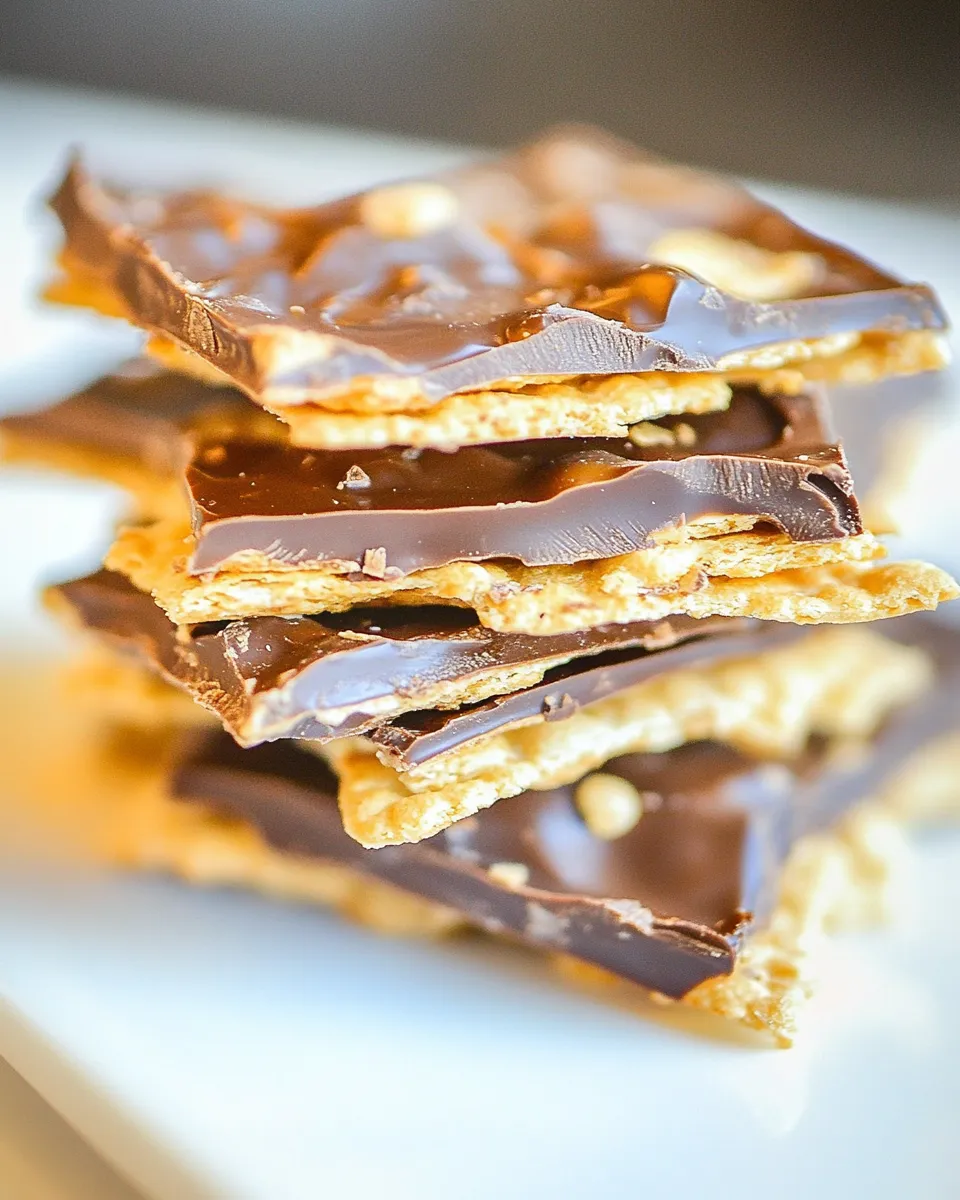
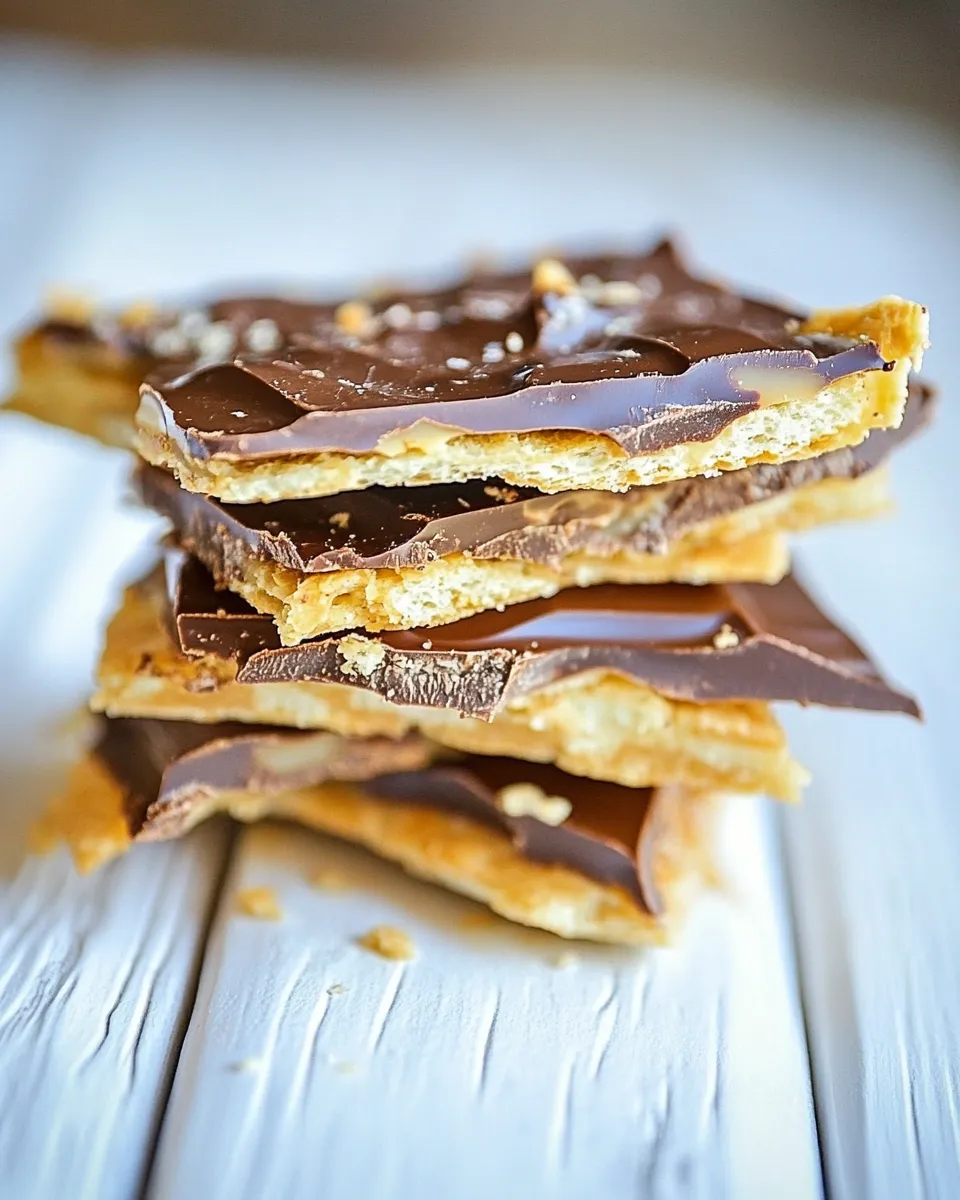
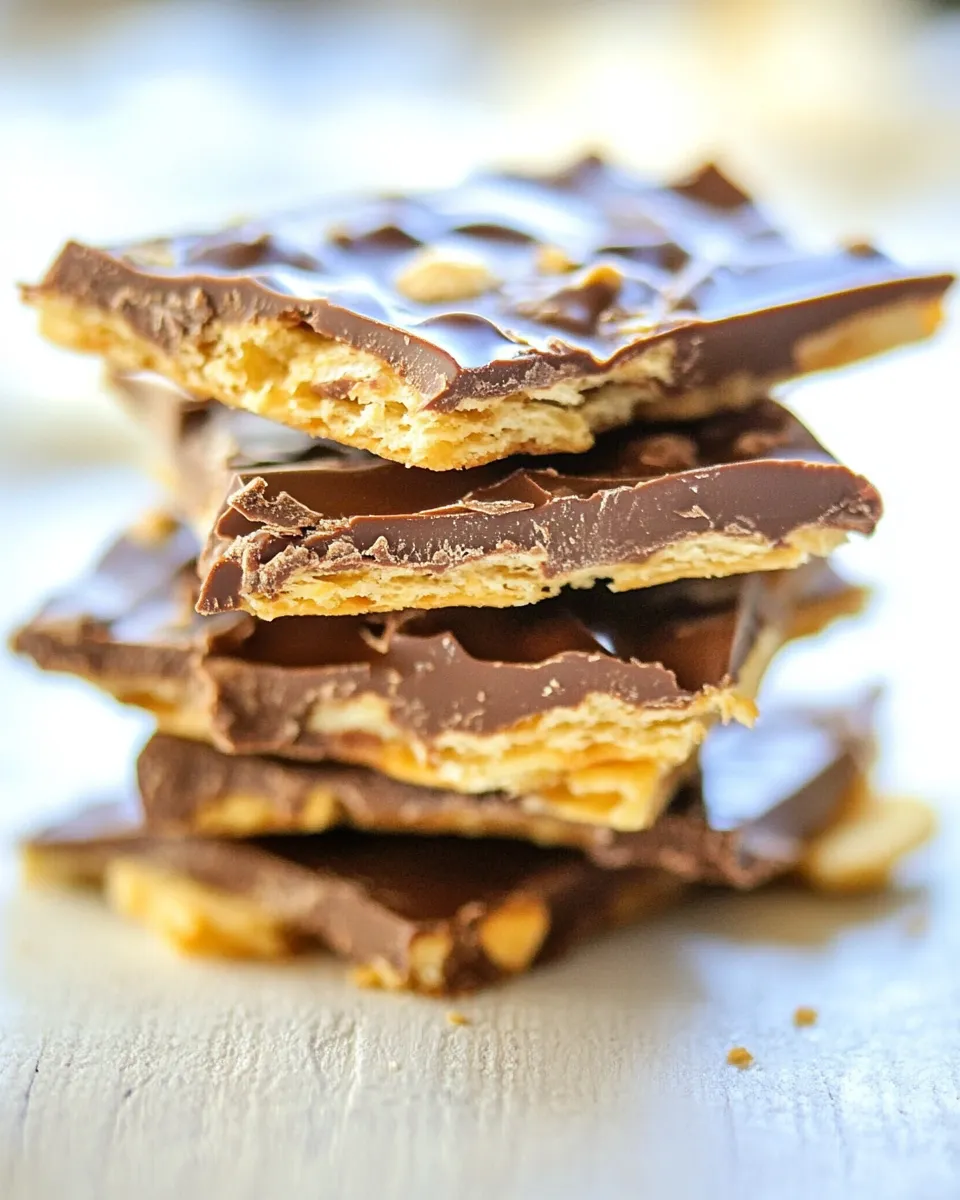
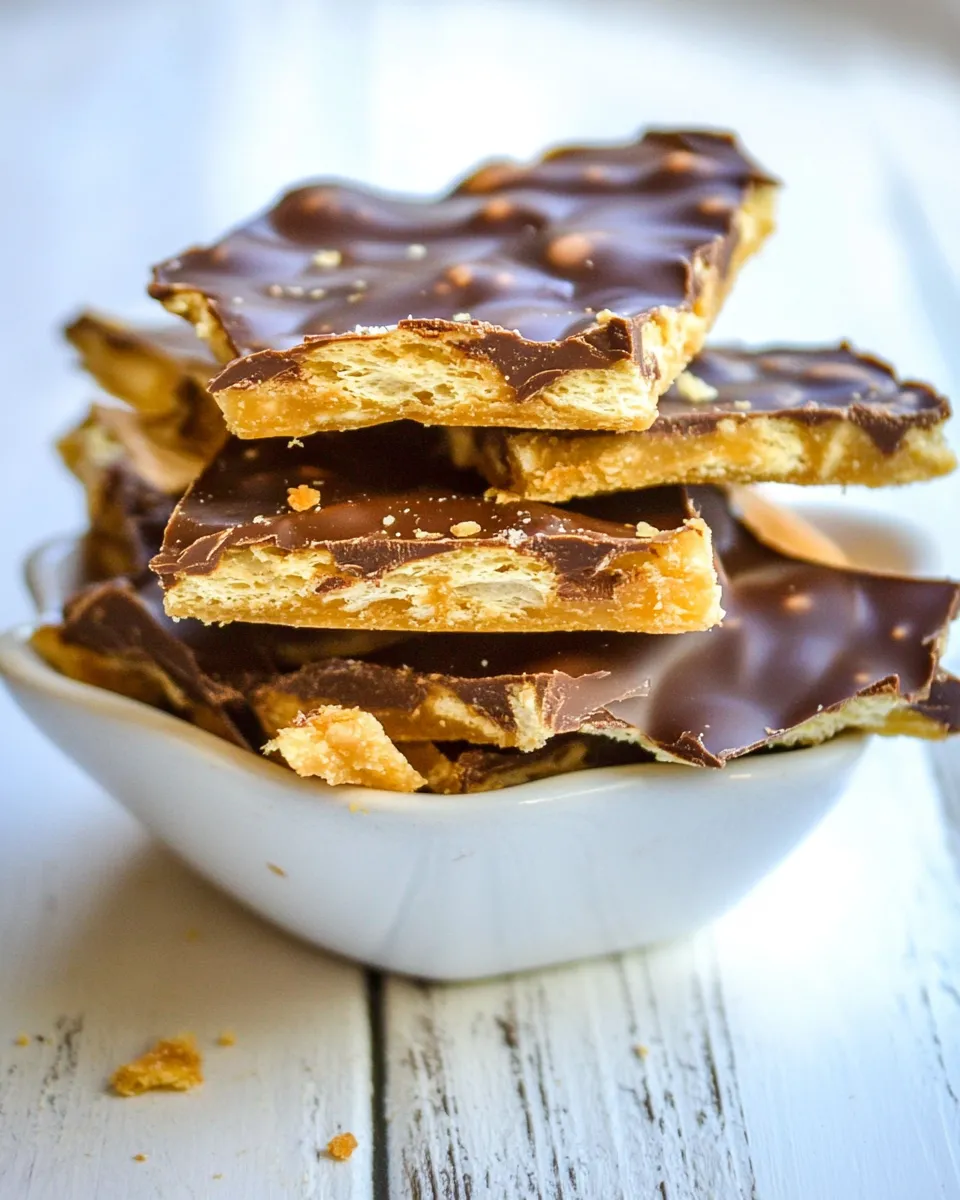
Chocolate Saltine Toffee
I make this Chocolate Saltine Toffee whenever I need an easy, buttery sweet with a crackle of salt and crunch. It’s one of those recipes that comes together almost too quickly: a salted cracker base, a hot brown-sugar butter syrup, and a glossy chocolate finish. You’re left with pieces that taste like buttery caramel bark with a salty snap.
What I love about it is how forgiving it is. You don’t need fancy equipment, and the steps are straightforward. Still, a few small timing details and the right amount of patience at the end make the difference between sticky bars and perfect shards you can stack and gift.
This post gives a clear ingredient checklist, exact step-by-step instructions, and practical tips to avoid the few pitfalls that can happen. Read through the notes and freezer guidance if you plan to make a double batch or send boxes to friends.
Ingredient Checklist
- 30 to 40 saltine crackers — forms the crunchy, salty base; I used about 32 crackers to cover a 9 x 13-inch pan.
- 1 cup unsalted butter — provides the fat for the toffee; that’s 2 sticks.
- 1 cup brown sugar, packed — sweetens and caramelizes into the toffee; I used half light and half dark because that’s what I had.
- ½ teaspoon vanilla extract — adds aroma and rounds the flavor.
- 1 ½ to 2 cups semi-sweet chocolate chips — melts to a glossy chocolate layer; I used one 12-ounce bag of TJ’s semi sweet morsels.
Step-by-Step: Chocolate Saltine Toffee
- Preheat oven to 350°F. Line a 9 x 13-inch baking pan with aluminum foil, leaving some overhang for easy lifting, and spray the foil well with cooking spray.
- Arrange 30 to 40 saltine crackers in a single layer to cover the bottom of the prepared pan.
- In a medium saucepan, combine 1 cup unsalted butter and 1 cup packed brown sugar. Cook over medium heat, stirring constantly, until the mixture comes to a boil.
- Once boiling, reduce the heat so the mixture maintains a gentle simmer. Continue to simmer uncovered for 3 to 5 minutes, stirring frequently, until the mixture thickens slightly and becomes syrupy. Take care to avoid a rapid boil or scorching.
- Remove the saucepan from the heat, wait 30 seconds, then stir in ½ teaspoon vanilla extract.
- Immediately pour the hot butter-sugar mixture evenly over the arranged saltine crackers. Use a spatula to spread the mixture so most crackers are coated.
- Bake the pan in the preheated 350°F oven for 5 to 7 minutes, or until the toffee mixture is bubbling across the surface.
- Remove the pan from the oven and let it rest on a heatproof surface for 3 to 5 minutes.
- Sprinkle 1½ to 2 cups semi-sweet chocolate chips evenly over the hot toffee. Wait 3 to 5 minutes for the chips to soften and begin to melt.
- Use an offset spatula or the back of a spoon to spread the melted chocolate into an even layer over the toffee.
- Allow the pan to cool completely at room temperature until the chocolate and toffee are set. To speed this, refrigerate or freeze until hardened. Once firm, lift the foil out of the pan and break into pieces of your desired size.
- Store pieces in an airtight container at room temperature for up to 2 weeks, or in the freezer for up to 4 months.
Top Reasons to Make Chocolate Saltine Toffee
- Speed: it comes together in a single pan and needs very little hands-on time. The most time-consuming part is waiting for it to cool.
- Contrast of flavors and textures: buttery, sweet toffee melts against crisp, salty crackers and a chocolate top for a satisfying bite.
- Minimal, pantry-friendly ingredients: most items are likely already in your kitchen — butter, brown sugar, crackers, vanilla, and chocolate.
- Great for gifting and parties: it stores well and can be broken into pieces that look rustic and homemade but taste indulgent and special.
- Easy to scale: the 9 x 13 pan yields a satisfying amount for a small gathering, and the method adapts to larger or smaller pans with minor adjustments in cracker count.
Ingredient Flex Options
Stick to the ingredients list for best results, but you can use the ranges and notes to adjust the final texture:
- Cracker count (30 to 40): use closer to 30 for a thicker toffee layer and fewer gaps; use closer to 40 for a thinner, more cracker-forward result. I used about 32 to cover the pan without too many overlaps.
- Chocolate chips (1½ to 2 cups): 1½ cups gives a thinner chocolate topping; 2 cups gives a rich, thicker chocolate layer that’s more pronounced in each bite. Use the amount that matches how chocolate-forward you like it.
- Brown sugar mix: the ingredient note mentions using half light and half dark brown sugar; that’s a practical way to balance molasses depth and brightness. Either all light or all dark will work, but the flavor will change subtly.
- Vanilla: the ½ teaspoon is small but noticeable. It brightens the caramel notes; you may omit it if you must, but I recommend keeping it.
Essential Tools for Success
- 9 x 13-inch baking pan — the recipe is written for this size; the cracker count corresponds to it.
- Aluminum foil with overhang — makes lifting and slicing the finished toffee far easier.
- Cooking spray — prevents sticking and helps the foil release cleanly.
- Medium saucepan — choose one with an even bottom so the sugar caramelizes uniformly.
- Spatula and/or offset spatula — a regular spatula spreads the hot toffee; an offset spatula smooths the chocolate layer nicely.
- Heatproof surface — for setting the pan after it comes out of the oven.
- Measuring cups and spoons — accuracy matters more for the sugar-to-butter ratio than it does for many baked goods.
- Oven thermometer (optional) — handy if your oven runs hot or cold, though this recipe is forgiving in short baking times.
Easy-to-Miss Gotchas
- Temperature control when boiling: the recipe asks to bring the butter and brown sugar to a boil, then simmer gently for 3 to 5 minutes. A too-rapid boil can cause scorching or overly thin toffee. Keep it at a gentle simmer and stir frequently.
- Timing between removing from heat and pouring: the directions call for removing the pan from heat and waiting 30 seconds before stirring in vanilla, then pouring immediately. Don’t linger — the syrup cools and thickens quickly.
- Evenness of spread: when you pour the hot syrup over the crackers, work fairly quickly to coax coverage with a spatula. Some overlap is fine; gaps will leave naked crackers that aren’t coated enough.
- Chocolate placement: sprinkle the chips evenly and wait 3 to 5 minutes for them to soften before spreading. If you attempt to push them while still firm, you’ll tear the cracker layer below or create uneven chocolate.
- Cooling is not optional: breaking into pieces before the chocolate and toffee fully set will make a sticky mess. If you’re impatient, refrigerate or freeze to firm up faster, but do not slice too early.
In-Season Flavor Ideas
Rather than changing the core recipe, think about how you serve the toffee alongside seasonal items. In colder months, offer it with hot coffee or spiced tea. In warmer months, box a few pieces with citrusy cookies or light shortbread for contrast. The toffee’s buttery sweetness pairs well with bright, acidic fruits and sharp cheeses if you’re building a small tasting tray for guests.
If you plan to give this as a holiday treat, wrap pieces in parchment and twine, and include a note about the two-week room-temperature storage or the option to freeze for longer keeping.
Cook’s Notes
Keep these practical notes handy on the day you make it:
- Line the pan with foil and leave overhang so you can lift the set toffee out cleanly. This makes breaking into pieces much easier and keeps the underside intact.
- Use a light touch when spreading the hot syrup and the melted chocolate. The crackers are brittle and can shift or break if you push too hard.
- If your chocolate doesn’t melt smoothly after the 3 to 5 minute softening window (room temperature and chip type affect this), return the pan to a warm (turned-off) oven for a minute or briefly microwave chips in a bowl and pour additional melted chocolate to fill gaps — but this is rarely necessary if you wait as directed.
- Let the pan cool fully at room temperature before lifting out and breaking. If you refrigerate to speed this, allow the pieces to return to cool room temperature before serving so the texture softens slightly.
Freezer-Friendly Notes
The recipe’s ending instruction says the toffee keeps in the freezer for up to 4 months. Here’s how I handle freezing so pieces stay crisp and avoid freezer burn:
- Layer pieces between sheets of parchment or wax paper inside an airtight container or heavy-duty freezer bag. This prevents sticking and preserves the glossy chocolate surface.
- Label the container with the date. Aim to use within 4 months for best flavor and texture.
- To serve, let frozen pieces sit at room temperature for 10 to 15 minutes. They thaw quickly because they’re thin, and you don’t want them fully soft if you’re shipping or gifting.
FAQ
- Q: Can I speed up cooling? A: Yes — refrigerating or placing the pan in the freezer will firm the chocolate and toffee faster. Keep an eye so condensation doesn’t form when you bring pieces back to room temperature.
- Q: Why did my toffee get grainy? A: Graininess usually means the sugar crystallized. Stirring constantly during the initial melt and maintaining a gentle simmer helps. Also avoid rapid cooling; give it the brief rest called for after removing from heat before adding vanilla and pouring.
- Q: What if my syrup scorches? A: If you smell or see burning, stop cooking. Scrape the pan clean and start over; scorched sugar will impart a bitter taste that carries through.
- Q: Can I make this ahead? A: Yes. Store at room temperature up to two weeks or freeze up to four months as noted. For gifting, make ahead and wrap securely.
Serve & Enjoy
Break the set toffee into whatever size pieces you prefer. Small shards are great for snacking and gifting; larger pieces are perfect for a plated dessert or to serve with coffee. Arrange pieces on parchment-lined trays, or package a dozen small shards in a small box with tissue for a quick homemade gift.
Keep it simple when serving: the texture and contrast are the stars here. Offer a small napkin or two; it can be a slightly sticky, wonderfully buttery treat. Store any extras in an airtight container and enjoy over the next days — or pop a container in the freezer and pull out a few when the craving hits.
Chocolate Saltine Toffee
Ingredients
Equipment
Method
- Preheat oven to 350°F. Line a 9 x 13-inch baking pan with aluminum foil, leaving some overhang for easy lifting, and spray the foil well with cooking spray.
- Arrange 30 to 40 saltine crackers in a single layer to cover the bottom of the prepared pan.
- In a medium saucepan, combine 1 cup unsalted butter and 1 cup packed brown sugar. Cook over medium heat, stirring constantly, until the mixture comes to a boil.
- Once boiling, reduce the heat so the mixture maintains a gentle simmer. Continue to simmer uncovered for 3 to 5 minutes, stirring frequently, until the mixture thickens slightly and becomes syrupy. Take care to avoid a rapid boil or scorching.
- Remove the saucepan from the heat, wait 30 seconds, then stir in ½ teaspoon vanilla extract.
- Immediately pour the hot butter-sugar mixture evenly over the arranged saltine crackers. Use a spatula to spread the mixture so most crackers are coated.
- Bake the pan in the preheated 350°F oven for 5 to 7 minutes, or until the toffee mixture is bubbling across the surface.
- Remove the pan from the oven and let it rest on a heatproof surface for 3 to 5 minutes.
- Sprinkle 1½ to 2 cups semi-sweet chocolate chips evenly over the hot toffee. Wait 3 to 5 minutes for the chips to soften and begin to melt.
- Use an offset spatula or the back of a spoon to spread the melted chocolate into an even layer over the toffee.
- Allow the pan to cool completely at room temperature until the chocolate and toffee are set. To speed this, refrigerate or freeze until hardened. Once firm, lift the foil out of the pan and break into pieces of your desired size.
- Store pieces in an airtight container at room temperature for up to 2 weeks, or in the freezer for up to 4 months.
Notes
To keep this recipe gluten-free, useGF crackersor make your ownGF saltine crackers. To keep vegan, use margarine/Earth Balance and use avegan cracker.