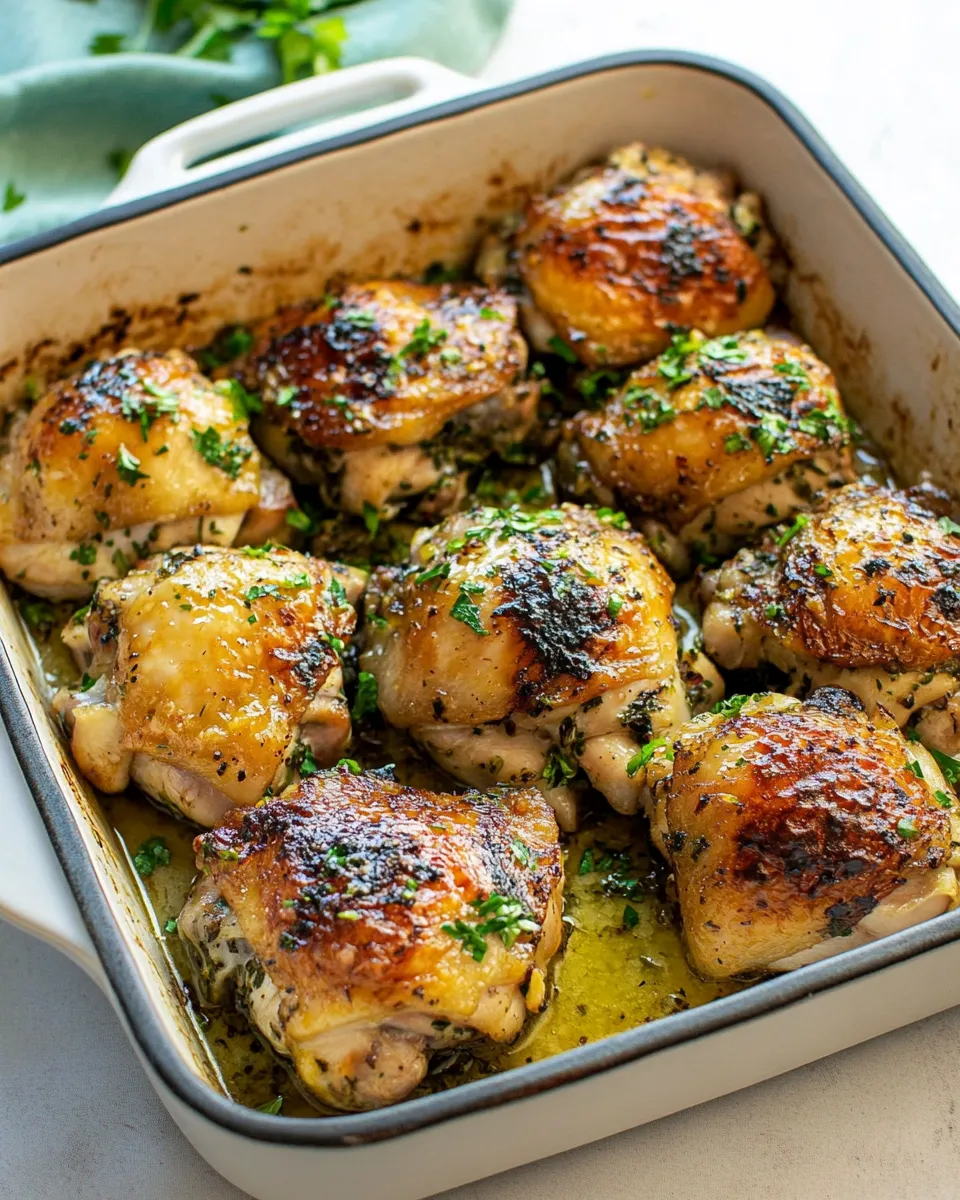
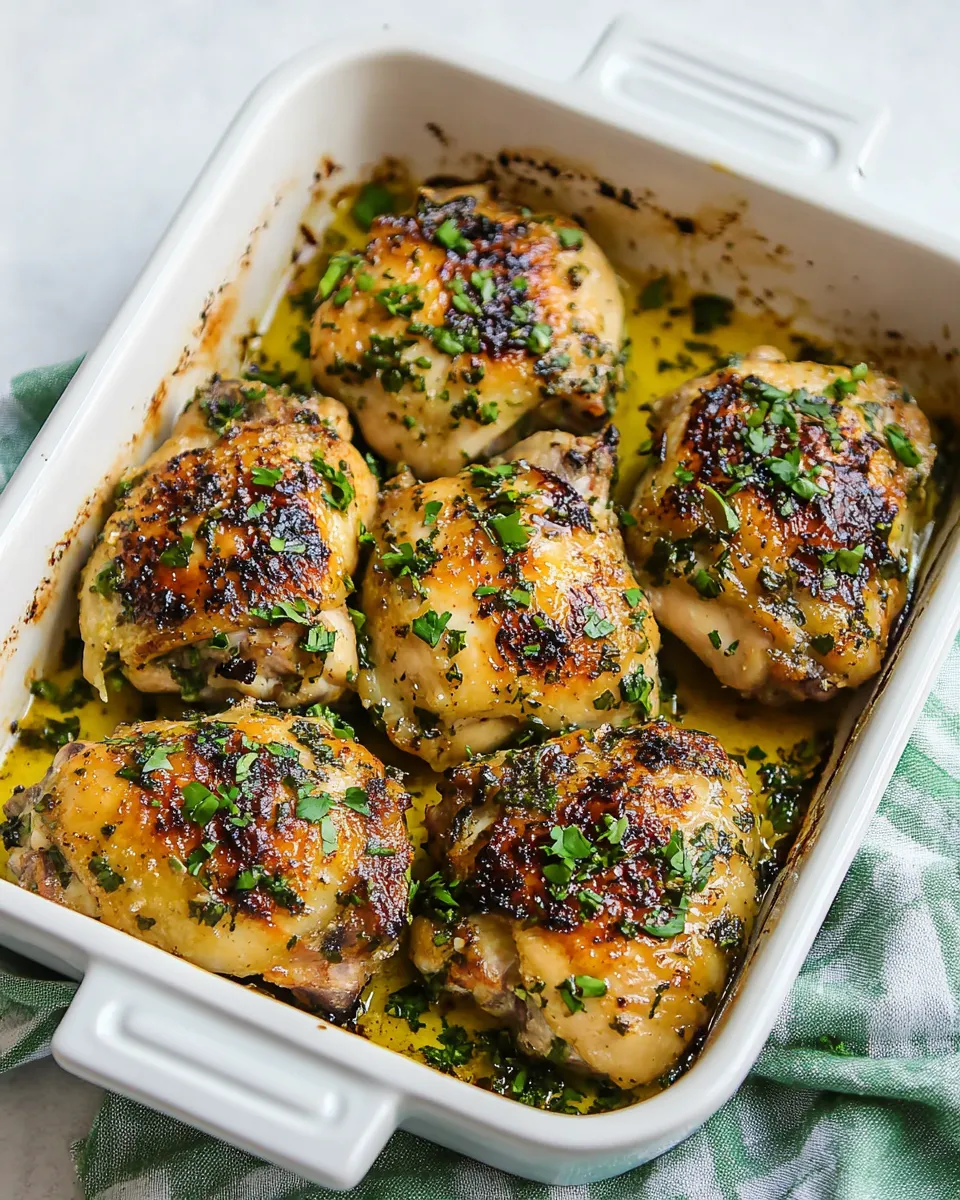
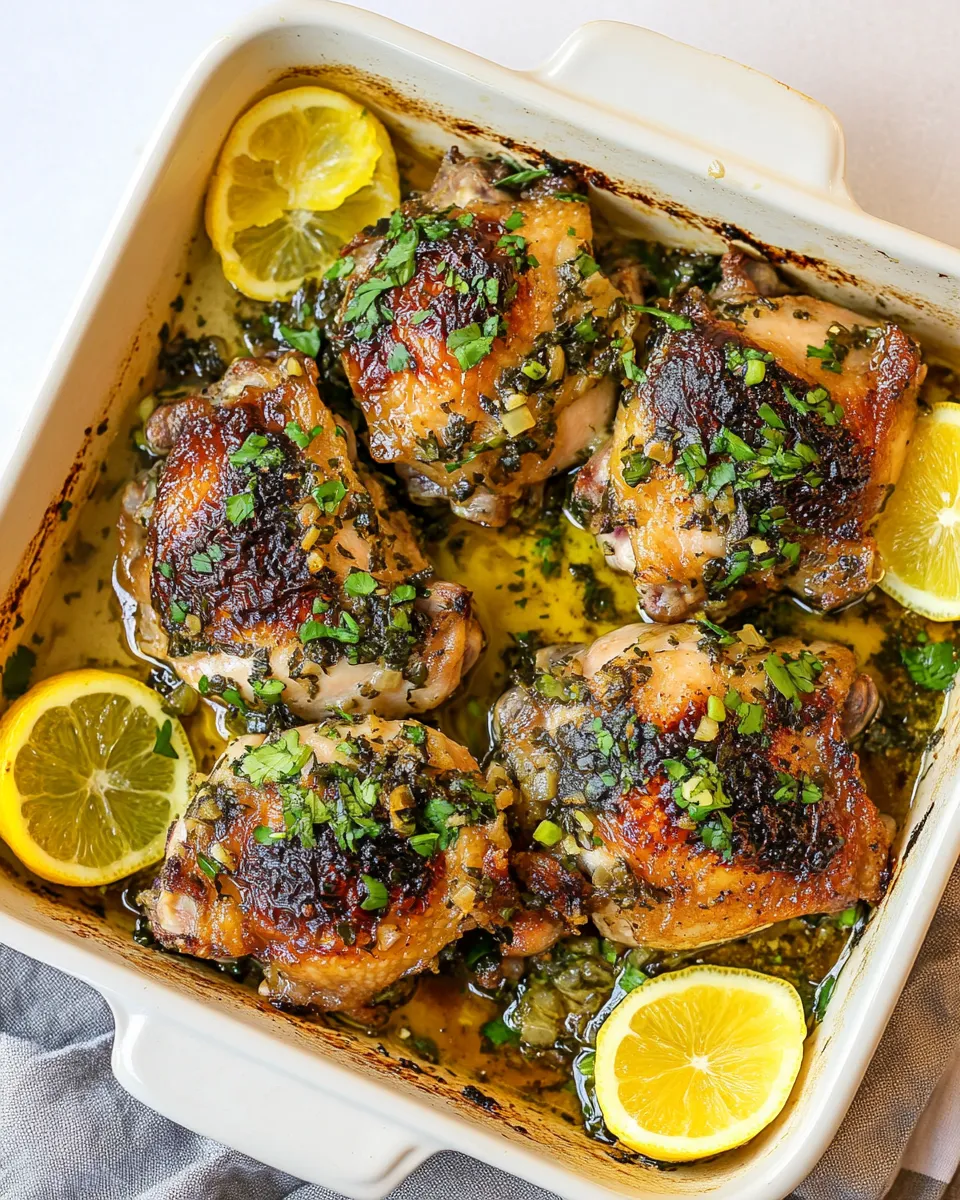
Crispy Garlic Butter Baked Chicken Thighs
I love a recipe that unlocks great texture and bold flavor without complicated steps. This one does exactly that: simple ingredients, a straightforward bake, and a finishing blast of heat to get the skin impossibly crisp. It’s the kind of dish you can make any night of the week and still feel proud of serving.
There are no gimmicks here. Bone-in, skin-on thighs deliver flavor and moisture. Butter and garlic create a savory crust that browns beautifully. Follow a few small technique notes in the recipe and you’ll get restaurant-level crispness from a home oven.
What You’ll Need
Ingredients
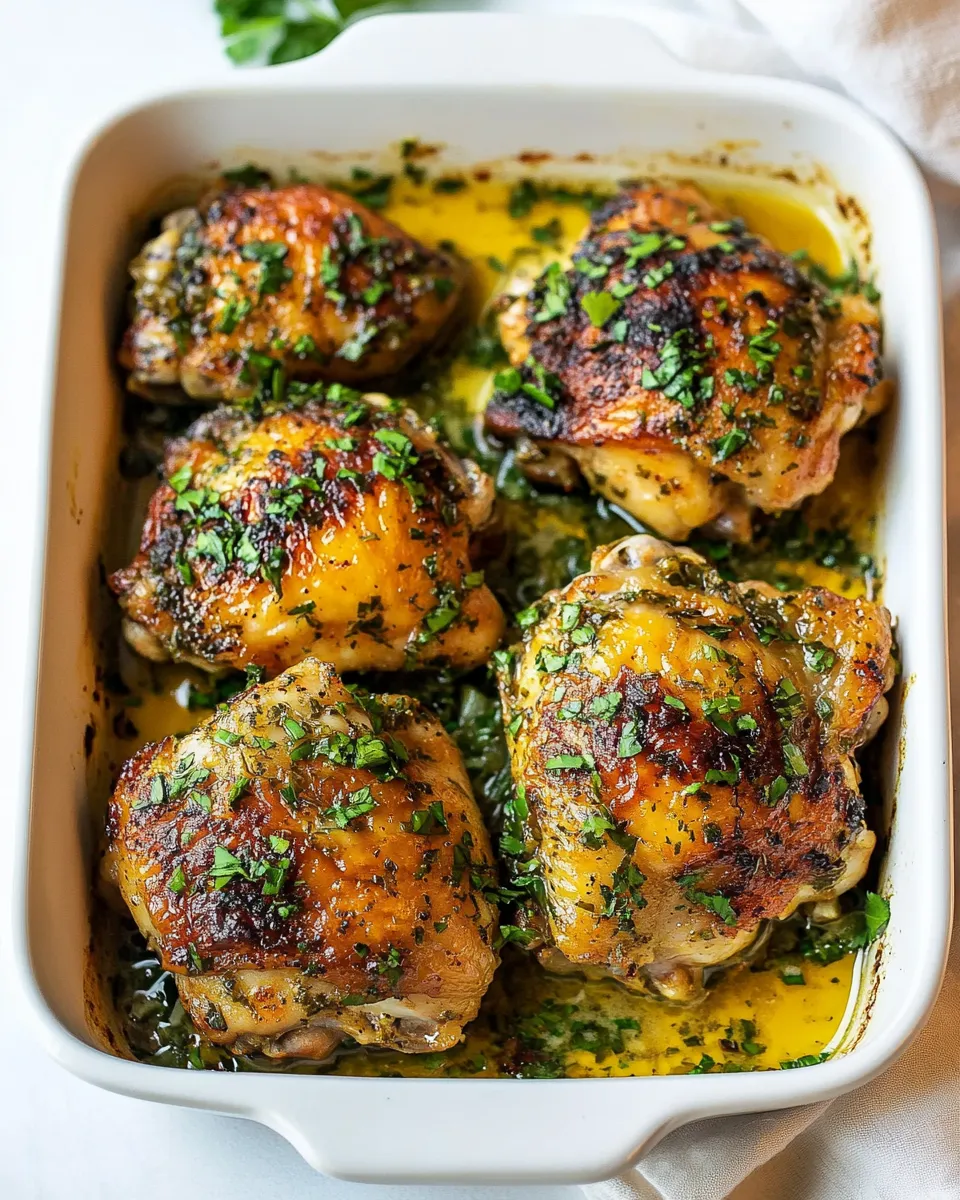
- 4 to 5 pounds bone-in, skin-on chicken thighs — the bone and skin lock in flavor and moisture; skin is essential for crisping.
- 1/2 cup (1 stick) unsalted butter — melts into a basting sauce that browns the skin; unsalted lets you control salt level.
- 4 cloves garlic, minced — fresh garlic gives that punchy, aromatic flavor; mince fine so it cooks into the butter.
- 2 Tbsp Italian seasoning — the herb blend lifts the butter with savory, Mediterranean notes.
- 1 tsp sea salt — seasons the meat and skin; adjust to taste if using salted butter.
- 1/2 tsp black pepper — for background heat and balance.
How to Prepare (Crispy Garlic Butter Baked Chicken Thighs)
- Preheat the oven to 375°F (190°C). Place an oven rack in the center position.
- In a microwave‑safe bowl, microwave 1/2 cup (1 stick) unsalted butter until melted, about 30–60 seconds. (If you prefer, melt the butter on the stovetop in a small saucepan over low heat.)
- Stir the melted butter together with 4 cloves minced garlic, 2 Tbsp Italian seasoning, 1 tsp sea salt, and 1/2 tsp black pepper until evenly combined to make the garlic butter sauce.
- Remove the 4 to 5 pounds of bone‑in, skin‑on chicken thighs from their packaging and pat them dry with paper towels. Dry skin helps achieve crispiness.
- Arrange the chicken thighs in a single layer in a large casserole dish or baking dish, skin side up. Do not overlap the thighs.
- Spoon and spread the garlic butter sauce evenly over the skin of each thigh so the full surface of the skin is coated.
- Bake on the center rack at 375°F for 40 minutes.
- Carefully remove the dish from the oven and use a spoon to baste the thighs with the pan juices.
- Increase the oven temperature to 425°F (220°C). Return the dish to the oven and bake an additional 5–10 minutes, until the skin is golden brown and reaches your desired level of crispness.
- For extra crispiness, move the oven rack to the shelf that is third from the top (if it is not already there) and broil on high for 3–5 minutes, watching closely to prevent burning.
- Check doneness by inserting a meat thermometer into the thickest part of a thigh without touching the bone. The chicken is safe at 165°F, but bone‑in thighs often taste and feel better when cooked to about 180°F; cook to your preferred doneness (not below 165°F).
- Let the thighs rest 3–5 minutes before serving. Spoon any pan juices over the chicken when serving.
Why Cooks Rave About It
This method combines tried-and-true techniques: dry the skin, fat for browning, and a two-stage bake that finishes at high heat. That results in skin that’s crisp and deeply golden while the meat stays tender and juicy. The garlic-butter bath flavors the skin directly and keeps the interiors buttery without drowning them.
Bone-in thighs are forgiving. They tolerate longer cooking without drying the meat, which is why many cooks prefer them for roast-style recipes. The small amount of salt and the Italian seasoning are understated; they let the butter and garlic lead while providing a balanced savory backdrop.
And finally, the technique is accessible. No searing on the stovetop, no special equipment. It’s approachable for beginners and efficient for confident cooks who want something reliable and delicious.
What to Use Instead
- If you don’t have bone‑in thighs: You can use boneless, skin-on thighs, but expect a shorter bake time; watch closely and check with a thermometer.
- If you only have salted butter: Use it, but reduce the added sea salt by about half and taste the pan juices before serving.
- If you lack Italian seasoning: Any mixed dried herb blend you already use will work—adjust to your preference.
- If you prefer less butter: You can reduce the butter slightly, but know that it helps both flavor and browning; keeping most of it preserves the intended texture.
Tools of the Trade
- Large casserole or baking dish — roomy enough to arrange thighs in a single layer for even roasting.
- Measuring spoons and cups — keep seasoning amounts accurate.
- Microwave-safe bowl or small saucepan — for melting the butter.
- Kitchen tongs or spoon — for arranging thighs and basting safely.
- Meat thermometer — the best way to guarantee safe and preferred doneness.
- Paper towels — for drying the chicken skin before seasoning.
Missteps & Fixes
Common Problems and How to Rescue Them
- Skin didn’t crisp: The skin was likely damp or the thighs were overcrowded. Next time pat them drier and give each piece space. When needed, finish under the broiler for 3–5 minutes, watching closely.
- Top is burning under broiler: Move the rack down a slot and reduce broil time. Broilers vary; 1–2 minutes can be enough depending on your oven.
- Meat tastes underseasoned: Taste the pan juices before serving; sprinkle a tiny pinch more salt if needed and spoon juices over each thigh.
- Outside done but center still cool: Give the thighs a few extra minutes at 425°F and check with a thermometer. If many thighs are too cold, let them rest covered loosely with foil for 5 minutes to even out temperatures.
Seasonal Twists
Seasonal add-ins let this recipe stretch across the year. In warmer months, a squeeze of citrus added to the pan juices brightens the plate. In colder weather, roast hearty vegetables in the same dish around the thighs—just cut them into even pieces so everything finishes together.
Herb-wise, you can accentuate the Italian seasoning with a fresh sprinkle of chopped parsley or chives right before serving. These quick, finishing touches lift the visual appeal and add freshness without changing the core recipe.
Notes from the Test Kitchen
We tested this with a few oven types and portion sizes. Key takeaways: always dry the skin; even a little moisture prevents crisping. The initial 375°F roast allows the thighs to cook through gently so the interior reaches a safe temperature without overbrowning the butter too soon. The high-temp finish is what creates that coveted crackly skin.
When broiling, stay within sight. Ovens differ in intensity. One of the most common kitchen regrets is letting things go a minute too long under high heat. Also, resting the thighs 3–5 minutes after pulling them from the oven redistributed the juices nicely and made slicing easier.
Make Ahead Like a Pro
- Prep the garlic butter ahead: Mix the melted butter with garlic, seasoning, salt, and pepper up to 24 hours in advance and refrigerate. Rewarm gently before spooning over the thighs.
- Dry and arrange the thighs early: You can pat the thighs dry and place them in the baking dish, cover, and refrigerate up to a few hours. Take them out of the fridge 20–30 minutes before baking to lose chill for even cooking.
- Fully assembled and refrigerated: If you spoon the butter over and refrigerate, plan for a couple extra minutes in the oven since everything will start colder.
Handy Q&A
- Q: Can I double the recipe? A: Yes, as long as you use a pan large enough to keep thighs in a single layer. Overcrowding prevents crisp skin.
- Q: Is 165°F enough? A: 165°F is safe. Many prefer bone‑in thighs a bit higher (around 175–180°F) for texture. Use your thermometer and personal preference.
- Q: Can I use chicken breasts? A: Breasts are leaner and will cook differently. They’ll need shorter bake times and won’t be as forgiving as thighs.
- Q: How long will leftovers keep? A: Store cooled thighs in an airtight container in the fridge for up to 3–4 days. Reheat gently to avoid drying.
- Q: Best way to reheat without losing crisp? A: Reheat in a 350°F oven until warmed through; finish briefly under the broiler if the skin needs crisping—watch closely.
Final Thoughts
This recipe delivers exactly what you want on a busy night: reliable technique, rich flavor, and a rewarding crunch. Follow the steps, pay attention to drying the skin, and use your thermometer. Small habits—like finishing at higher heat and letting the thighs rest—make a big difference.
Make it once and you’ll see why it becomes a go-to. It’s forgiving, fast, and endlessly adaptable. Serve it with simple sides—steamed greens, a grain, or roasted vegetables—and you’ve got a satisfying meal that looks and tastes like you spent more time on it than you did.
Crispy Garlic Butter Baked Chicken Thighs
Ingredients
Equipment
Method
- Preheat the oven to 375°F (190°C). Place an oven rack in the center position.
- In a microwave‑safe bowl, microwave 1/2 cup (1 stick) unsalted butter until melted, about 30–60 seconds. (If you prefer, melt the butter on the stovetop in a small saucepan over low heat.)
- Stir the melted butter together with 4 cloves minced garlic, 2 Tbsp Italian seasoning, 1 tsp sea salt, and 1/2 tsp black pepper until evenly combined to make the garlic butter sauce.
- Remove the 4 to 5 pounds of bone‑in, skin‑on chicken thighs from their packaging and pat them dry with paper towels. Dry skin helps achieve crispiness.
- Arrange the chicken thighs in a single layer in a large casserole dish or baking dish, skin side up. Do not overlap the thighs.
- Spoon and spread the garlic butter sauce evenly over the skin of each thigh so the full surface of the skin is coated.
- Bake on the center rack at 375°F for 40 minutes.
- Carefully remove the dish from the oven and use a spoon to baste the thighs with the pan juices.
- Increase the oven temperature to 425°F (220°C). Return the dish to the oven and bake an additional 5–10 minutes, until the skin is golden brown and reaches your desired level of crispness.
- For extra crispiness, move the oven rack to the shelf that is third from the top (if it is not already there) and broil on high for 3–5 minutes, watching closely to prevent burning.
- Check doneness by inserting a meat thermometer into the thickest part of a thigh without touching the bone. The chicken is safe at 165°F, but bone‑in thighs often taste and feel better when cooked to about 180°F; cook to your preferred doneness (not below 165°F).
- Let the thighs rest 3–5 minutes before serving. Spoon any pan juices over the chicken when serving.
Notes
*or dried herbs of choice. You can also use 1 cup of chopped fresh herbs like parsley, rosemary, and oregano.
Store leftover chicken in an airtight container in the refrigerator for up to 7 days.