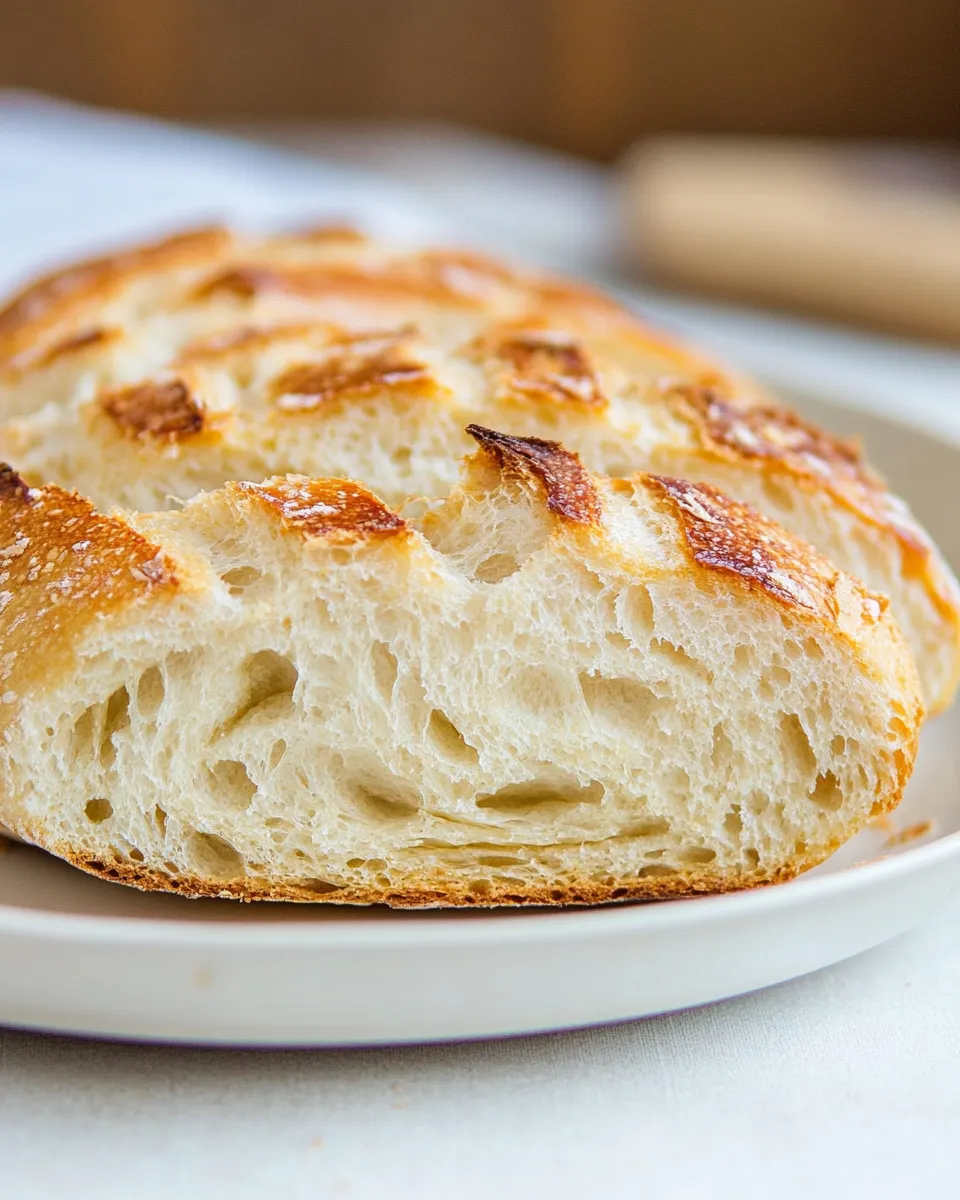
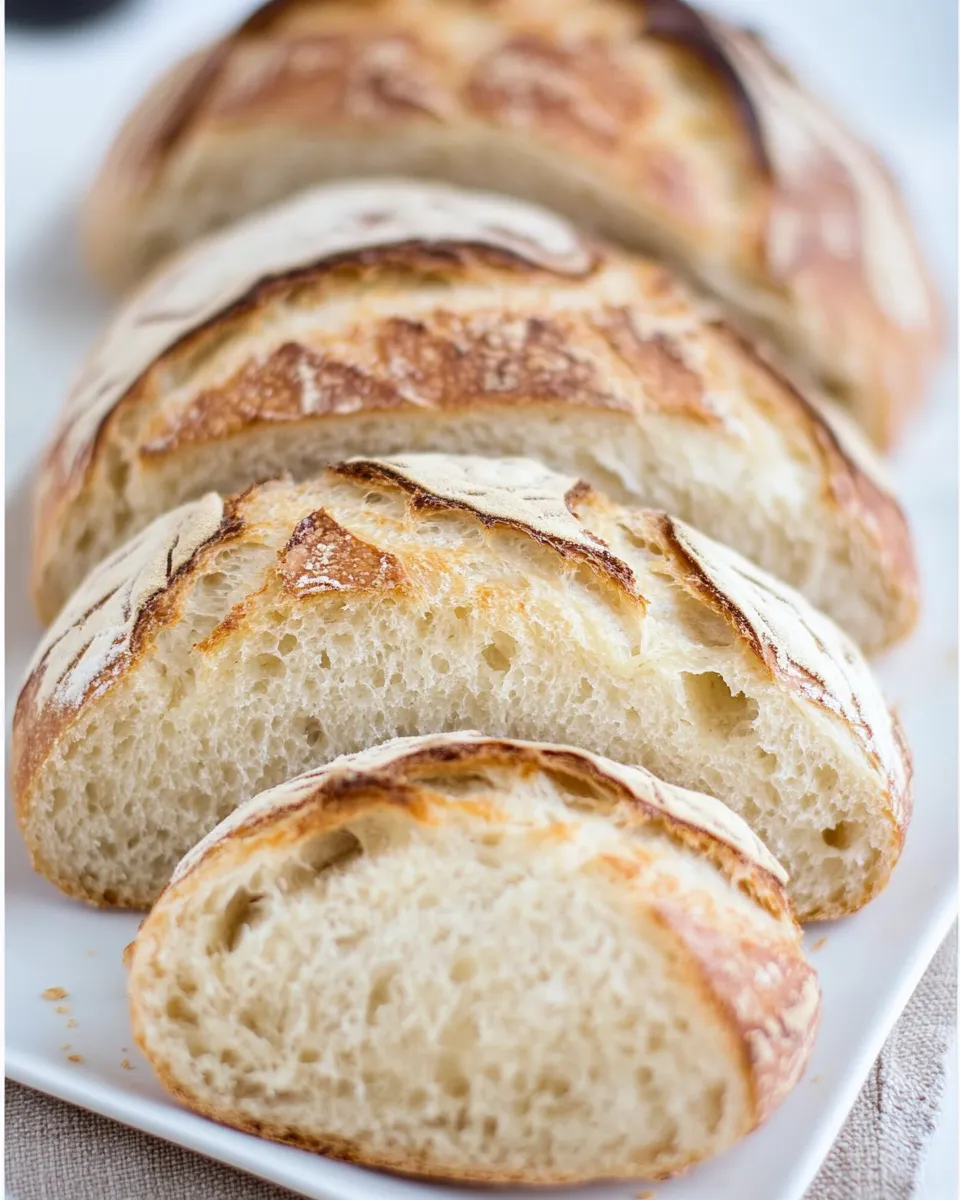
Crusty French Bread Recipe
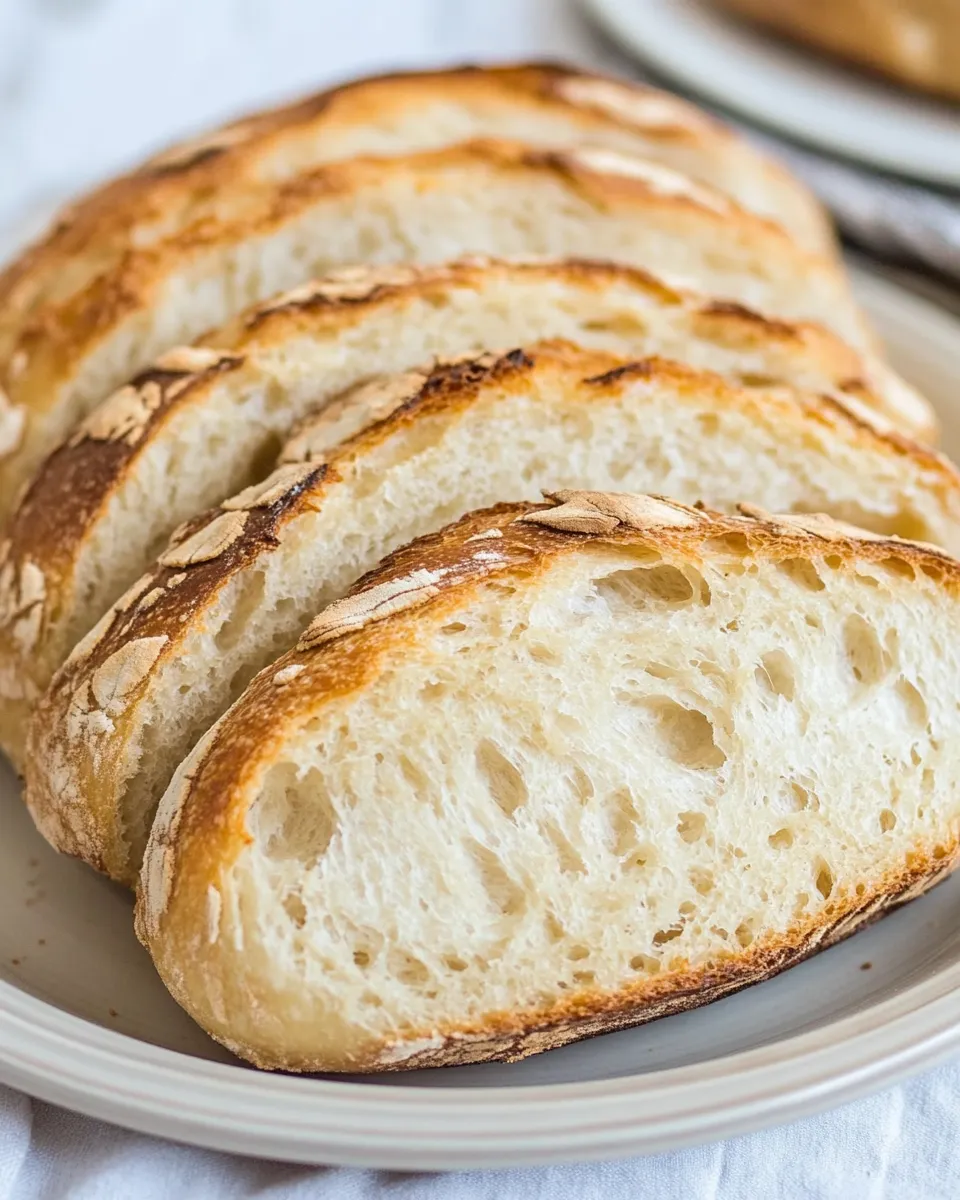
This loaf is the kind of bread you make when you want crisp, crackly crust and a chewy, open crumb without fussing with complicated techniques. It relies on time, a handful of simple ingredients and one reliable rhythm: a long bulk rise with a few gentle folds, a final shape and a blasting oven for great oven spring. The result rewards patience with a loaf that sings with texture.
I test recipes the way I test shoes—by using them until they’re comfortable. This method uses instant yeast, a little molasses for color and flavor, and a combination of bread and all-purpose flour to get the structure and tenderness just right. There’s nothing fancy here, only a clear sequence that leads to excellent bread.
Ingredient Breakdown
Ingredients
- 1 3/4 cups warm water, 90˚ to 100˚F — hydrates the flour and activates the yeast; keep temperature in range for best yeast activity.
- 1/2 tsp molasses — adds a touch of sweetness and deepens crust color; dissolves into the water first for even distribution.
- 2 1/3 cups unbleached bread flour, measured correctly*, (290 grams) — provides gluten strength for structure and chew.
- 2 1/2 cups unbleached all-purpose flour, measured correctly*, (315 grams) — balances tenderness with structure; measured correctly means spooning and leveling or using a scale.
- 1 1/4 tsp instant yeast (quick rise), (1/2 packet) — leavens the dough quickly; instant yeast works directly with the flour.
- 2 tsps salt, I used fine sea salt — seasons the dough and strengthens gluten; measure accurately for balanced flavor.
- All-purpose Flour and semolina flour for dusting — semolina helps the loaf slide and gives a nice base texture; all-purpose is fine for extra dusting.
Crusty French Bread — Do This Next
- In a small bowl or measuring cup, whisk together 1 3/4 cups warm water (90–100°F) and 1/2 tsp molasses until the molasses is dissolved.
- In a large mixing bowl, whisk together 2 1/3 cups unbleached bread flour (290 g), 2 1/2 cups unbleached all-purpose flour (315 g), 1 1/4 tsp instant yeast, and 2 tsp salt until evenly combined.
- Pour the water–molasses mixture into the dry ingredients. Mix with a wooden spoon, spatula, or low speed of a stand mixer until the ingredients come together into a single mass of dough.
- Knead the dough for 4 minutes using a dough hook on low speed or by hand on a lightly floured surface. The dough should be soft and slightly sticky but should not cling to clean, dry fingertips. If the dough is excessively sticky after kneading, add more all-purpose flour 1 tablespoon at a time until manageable.
- Lightly oil or dust a large bowl, place the dough inside, and cover loosely with plastic wrap. Let the dough rise at room temperature (about 69–75°F) for 4 hours.
- During that 4-hour rest, perform a set of folds every hour (three times total): wet one hand with water to prevent sticking, gently punch the dough down, then fold the dough over itself a few times. Re-cover after each fold.
- After the 4-hour bulk rise, shape the dough by drawing the edges into the center, then turn the dough over so the seam is on the bottom. Place the shaped dough seam-side down in a large bowl well dusted with all-purpose flour. Lightly sprinkle the top of the dough with flour, cover with a tea towel, and let rise at room temperature for 1 1/2 hours.
- About 45–60 minutes into the final rise, place a pizza stone or an inverted heavy baking sheet on the center oven rack and a cast-iron pan on the bottom rack. Preheat the oven to 500°F with both pieces inside until fully heated.
- When the dough has finished the final rise, prepare a work surface or the back of a baking sheet by dusting it generously with semolina flour (you may also use a little all-purpose flour as needed to prevent sticking). Invert the risen dough onto the semolina-dusted surface so the top (seam-side down) becomes the bottom.
- Using a sharp knife or lame, score the top of the dough several times (long slashes about 1/4–1/2 inch deep) to allow controlled expansion during baking.
- Slide the dough onto the preheated pizza stone or inverted baking sheet in the oven. (Use the semolina-dusted baking sheet or a peel to transfer the dough if needed.)
- Bake at 500°F for 10 minutes, then reduce the oven temperature to 400°F and continue baking for 30–35 minutes, or until the crust is a deep golden brown.
- Turn off the oven, crack the oven door open (use a wooden spoon or oven mitt to hold it slightly ajar), and leave the bread inside for 10 minutes to finish gently.
- Remove the bread from the oven and transfer it to a wire rack. Let it cool for at least 15 minutes before cutting.
What Sets This Recipe Apart
This loaf pairs a long, room-temperature bulk rise with periodic folds instead of one overnight cold ferment. The four-hour bulk rise builds flavor and gluten strength while staying very approachable—no retarding in the fridge required. The small addition of molasses deepens crust color and adds subtle caramel notes without making the bread sweet.
The high initial oven temperature and the cast-iron pan on the lower rack create a hot, humid environment for strong oven spring, then dropping the temperature finishes the crust-to-crumb ratio. Semolina under the dough prevents sticking and gives a pleasant bottom texture. All together, those elements produce a classic, bakery-style crust and a tender interior.
Ingredient Flex Options
- Flour balance: the recipe uses both bread and all-purpose flour to get chew and tenderness. If you only have all-purpose, the loaf will be softer; expect a tighter crumb.
- Semolina vs all-purpose for dusting: semolina is slightly coarse and helps sliding; if unavailable, use all-purpose flour for dusting but be mindful it can stick more.
- Yeast handling: the recipe calls for instant yeast measured precisely; if using a different yeast type, allow for adjustments in proofing time (see FAQs).
- Salt: the recipe specifies 2 tsps fine sea salt; adjust for low-sodium needs but know salt supports gluten structure and flavor.
Tools & Equipment Needed
- Large mixing bowl — for mixing and the bulk rise.
- Small bowl or measuring cup — to dissolve molasses in warm water.
- Wooden spoon or sturdy spatula — for initial mixing.
- Stand mixer with dough hook (optional) — speeds kneading; hand kneading works fine.
- Pizza stone or inverted heavy baking sheet — for even heat and a crisp bottom crust.
- Cast-iron pan — placed on bottom rack to help create steam/heat dynamics.
- Sharp knife or lame — for scoring the dough.
- Semolina flour and all-purpose flour — for dusting and handling the dough.
- Tea towel and plastic wrap — for covering during rises.
- Wire cooling rack — to cool the bread properly after baking.
Easy-to-Miss Gotchas
- Water temperature: 90–100°F is specific—too cool and yeast is sluggish; too hot and you risk killing it. Use a thermometer if unsure.
- Molasses first: dissolve it in the warm water before adding to flour to avoid clumping and ensure even flavor.
- Sticky dough expectations: the dough should be slightly sticky after kneading. Resist adding too much flour; add 1 tablespoon at a time only if it clings to clean fingertips.
- Preheat both stone and cast-iron: the oven needs to be fully heated with both pieces inside; underheated equipment reduces oven spring and crust development.
- Scoring depth: make long slashes about 1/4–1/2 inch deep; too shallow and the loaf tears unpredictably, too deep and it may collapse.
- Finishing in the oven: leaving the door cracked for 10 minutes post-bake finishes the loaf gently—don’t skip this step or the crust can set too quickly.
Adaptations for Special Diets
This recipe is built on wheat flours and isn’t suitable as written for gluten-free diets. For those reducing sodium, you can cut the salt slightly but know the flavor and gluten development will be affected. Vegetarians and most other common diets will find this recipe compatible as-is since it contains no animal fats or dairy.
Recipe Notes & Chef’s Commentary
Handling and feel
The dough’s feel is the real thermometer here. After the short knead the dough should be soft and slightly tacky. If it behaves like taffy, add flour cautiously. During the hourly folds, be gentle—your goal is to strengthen without degassing the mass completely.
Shaping
When you draw edges to the center and flip the seam down, you create surface tension that aids oven spring. Dust the bowl with enough flour so the loaf holds its shape during the final rise, but keep the top lightly floured to avoid a dull crust color.
Meal Prep & Storage Notes
Cool the loaf at least 15 minutes before cutting to let the crumb set. Store at room temperature in a paper bag or wrapped in a clean kitchen towel for up to two days to help preserve crust texture. For longer storage, slice and freeze in an airtight bag; refresh slices in a 350°F oven for 5–7 minutes to regain crust.
Common Qs About Crusty French Bread
- Why molasses? It’s there for color and a subtle depth of flavor; a small amount won’t make the bread sweet but will help a darker, more complex crust.
- Can I use active dry yeast instead of instant? Yes—proof active dry yeast first in the warm water with molasses and allow it to foam before adding to flours. You may need slightly longer rise times.
- How do I know the bread is done? A deep golden-brown crust is a good indicator; an internal temperature around 200–205°F (if you use an instant-read thermometer) confirms doneness.
- Why use semolina to dust? Semolina is coarse and prevents sticking while adding a pleasant texture to the bottom of the loaf; all-purpose flour can be used if needed.
- Can I bake without a pizza stone? Yes—an inverted heavy baking sheet works well and is specified as an option in the method.
Ready, Set, Cook
Gather the ingredients, set a timer for the folds, and preheat the oven early so your stone and pan are screaming hot. This method rewards patience: simple steps done in the right order create more reliable results than gimmicks. Make the dough one afternoon, enjoy the aroma that fills the kitchen, and slice into a warm loaf that crisps, crackles and eats beautifully.
Crusty French Bread Recipe
Ingredients
Equipment
Method
- In a small bowl or measuring cup, whisk together 1 3/4 cups warm water (90–100°F) and 1/2 tsp molasses until the molasses is dissolved.
- In a large mixing bowl, whisk together 2 1/3 cups unbleached bread flour (290 g), 2 1/2 cups unbleached all-purpose flour (315 g), 1 1/4 tsp instant yeast, and 2 tsp salt until evenly combined.
- Pour the water–molasses mixture into the dry ingredients. Mix with a wooden spoon, spatula, or low speed of a stand mixer until the ingredients come together into a single mass of dough.
- Knead the dough for 4 minutes using a dough hook on low speed or by hand on a lightly floured surface. The dough should be soft and slightly sticky but should not cling to clean, dry fingertips. If the dough is excessively sticky after kneading, add more all-purpose flour 1 tablespoon at a time until manageable.
- Lightly oil or dust a large bowl, place the dough inside, and cover loosely with plastic wrap. Let the dough rise at room temperature (about 69–75°F) for 4 hours.
- During that 4-hour rest, perform a set of folds every hour (three times total): wet one hand with water to prevent sticking, gently punch the dough down, then fold the dough over itself a few times. Re-cover after each fold.
- After the 4-hour bulk rise, shape the dough by drawing the edges into the center, then turn the dough over so the seam is on the bottom. Place the shaped dough seam-side down in a large bowl well dusted with all-purpose flour. Lightly sprinkle the top of the dough with flour, cover with a tea towel, and let rise at room temperature for 1 1/2 hours.
- About 45–60 minutes into the final rise, place a pizza stone or an inverted heavy baking sheet on the center oven rack and a cast-iron pan on the bottom rack. Preheat the oven to 500°F with both pieces inside until fully heated.
- When the dough has finished the final rise, prepare a work surface or the back of a baking sheet by dusting it generously with semolina flour (you may also use a little all-purpose flour as needed to prevent sticking). Invert the risen dough onto the semolina-dusted surface so the top (seam-side down) becomes the bottom.
- Using a sharp knife or lame, score the top of the dough several times (long slashes about 1/4–1/2 inch deep) to allow controlled expansion during baking.
- Slide the dough onto the preheated pizza stone or inverted baking sheet in the oven. (Use the semolina-dusted baking sheet or a peel to transfer the dough if needed.)
- Bake at 500°F for 10 minutes, then reduce the oven temperature to 400°F and continue baking for 30–35 minutes, or until the crust is a deep golden brown.
- Turn off the oven, crack the oven door open (use a wooden spoon or oven mitt to hold it slightly ajar), and leave the bread inside for 10 minutes to finish gently.
- Remove the bread from the oven and transfer it to a wire rack. Let it cool for at least 15 minutes before cutting.
Notes
*To measure flour correctly, fluff it up then spoon it into measuring cups and scrape off the top for an exact measure.