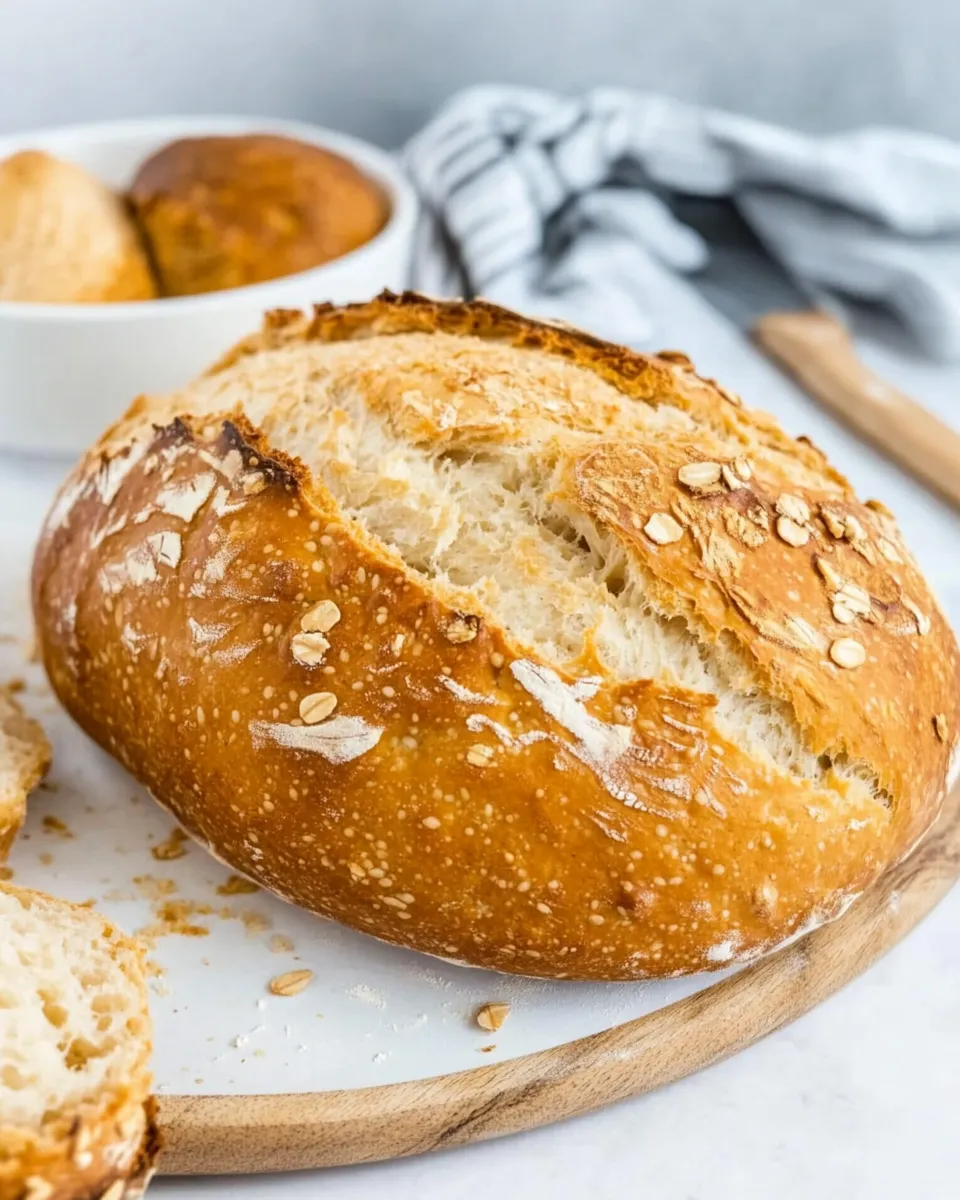
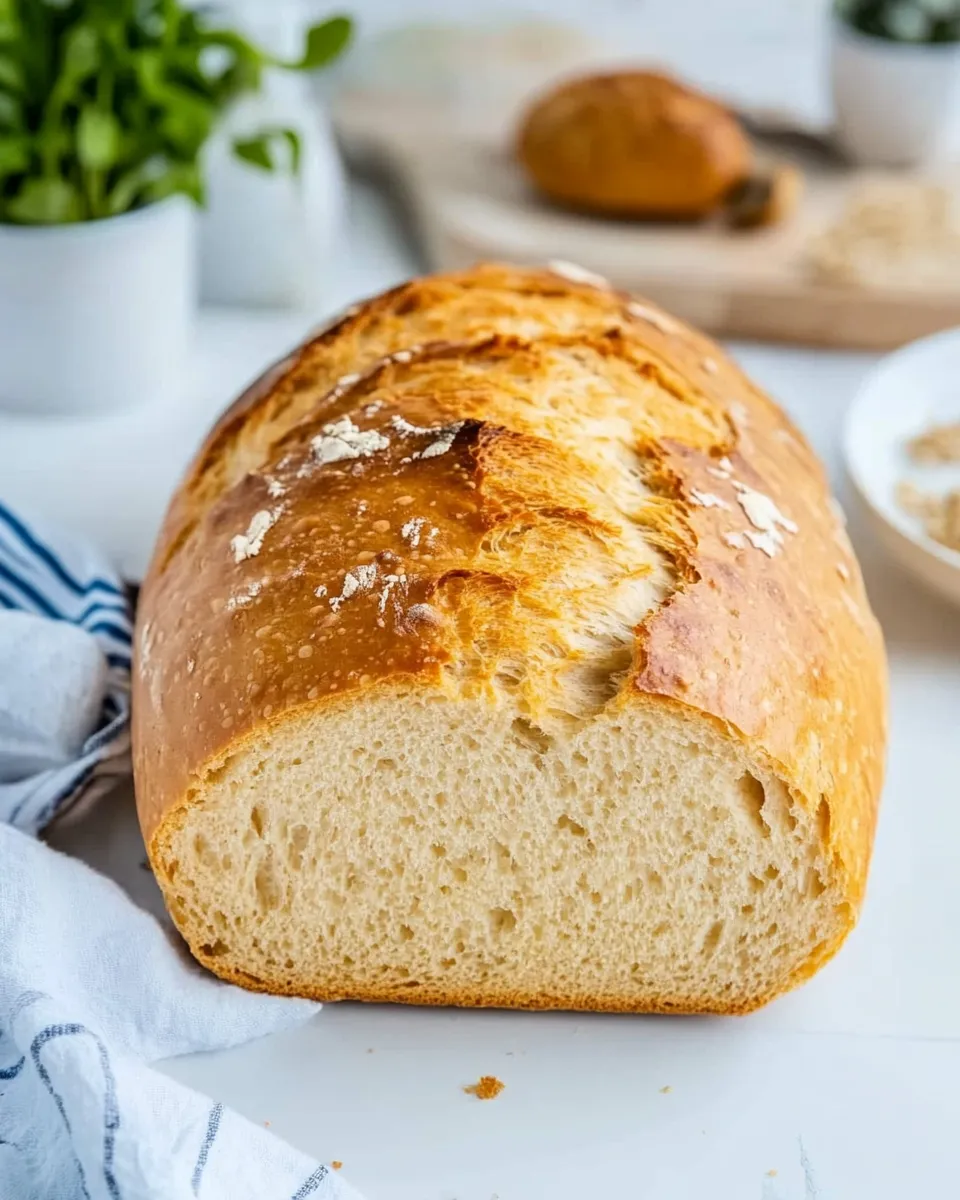
Dairy Free Bread
This recipe is the kind I turn to when I want warm, homemade bread without the fuss — and without dairy. It uses pantry basics and a simple vinegar-and-plant-milk trick to mimic buttermilk, giving the crumb a tender, slightly tangy lift. No yeast, no proofing, no long waits: you mix, shape, slash, and bake.
I’ve tested this on busy mornings and slow weekends. It tolerates a little impatience, forgiving slightly sticky dough and quick hands at the oven. The result is a golden, rustic loaf that toasts beautifully and plays well with both sweet jams and savory spreads.
What’s in the Bowl
- 1 cup milk of choice — I used oat milk; this is the dairy-free base that will be curdled by vinegar to approximate buttermilk.
- 2 tablespoons white vinegar — acid to curdle the milk and create the tangy liquid that reacts with the baking soda.
- 2 cups all-purpose flour — the structure of the bread; you can use a gluten-free all-purpose blend if needed.
- 1/2 teaspoon baking soda — the leavening that reacts with the curdled milk for lift.
- 1/2 teaspoon salt — balances flavor and strengthens the dough.
- 1 tablespoon sugar — a touch of sweetness that helps browning and balances the tang.
Dairy Free Bread, Made Easy
- Preheat the oven to 200°C / 400°F. Line a large baking tray with parchment paper and set aside.
- In a small bowl, combine 1 cup milk of choice and 2 tablespoons white vinegar. Let sit about 10 minutes, until the milk curdles.
- In a large mixing bowl, stir together 2 cups all-purpose flour, 1/2 teaspoon baking soda, 1/2 teaspoon salt, and 1 tablespoon sugar until evenly mixed.
- Add the curdled milk to the dry ingredients in two additions, stirring gently after each addition until the dough is just combined. The dough should be stickier than bread dough.
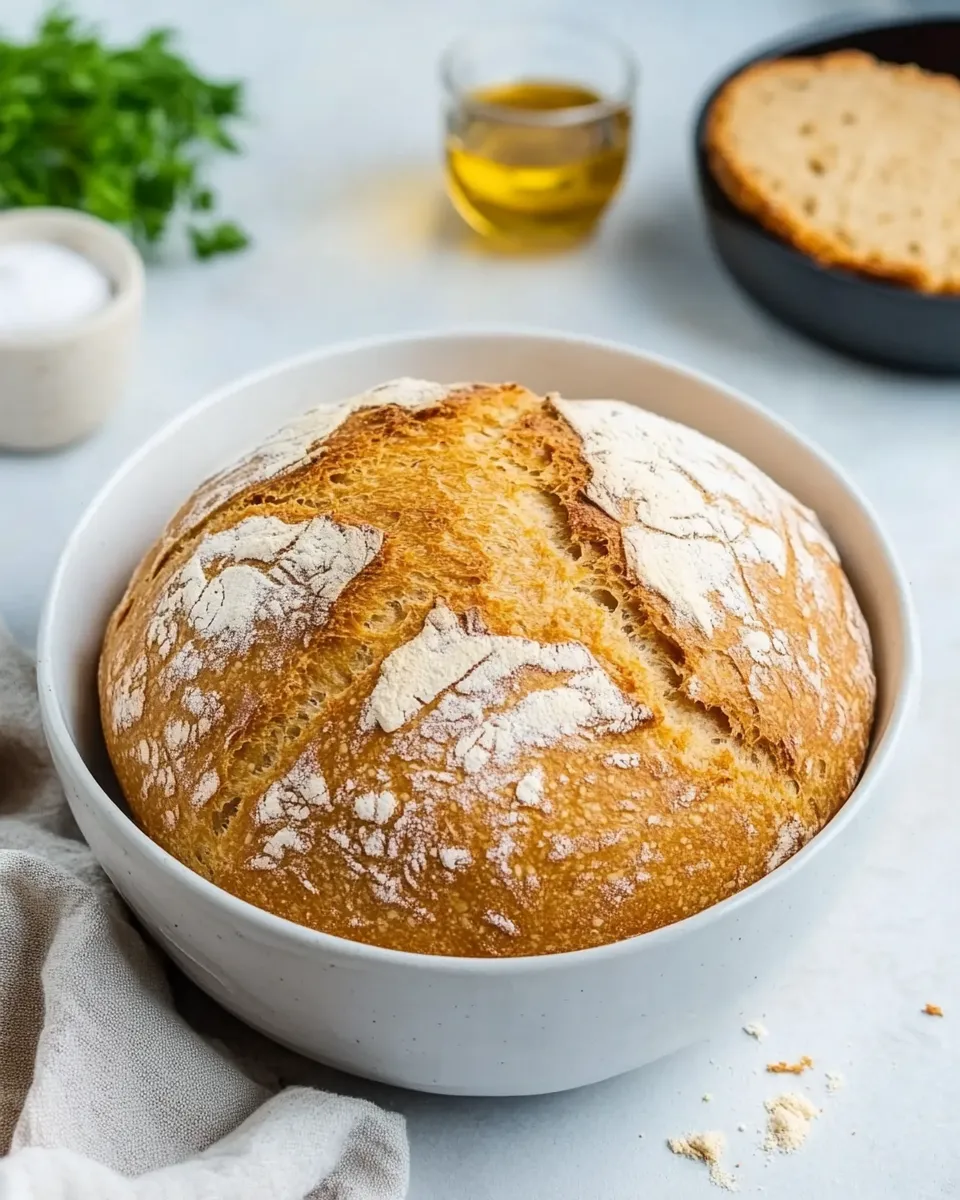
- Lightly flour your work surface, dust the top of the dough with a little flour, and turn the dough out onto the surface. Gently knead the dough about 8–10 times and shape it into a round dome; it should remain slightly sticky.
- Using a sharp knife, make two cuts across the top of the dough to form a cross, cutting about 1/2 inch deep.
- Transfer the shaped dough to the prepared baking tray. Bake for 20–25 minutes, checking at the 20-minute mark. The bread is done when the top is golden brown and the base sounds hollow when tapped.
- Remove the bread from the oven and allow it to cool completely on the tray before slicing and toasting.
Why You’ll Keep Making It
This loaf is quick to pull together and forgiving in execution. It doesn’t require proofing time or active yeast management, which means you can go from empty stomach to warm toast in under an hour. The texture is satisfying — soft inside with a crisp, golden crust — and the mild tang from the curdled milk keeps it interesting without overpowering.
It’s also adaptable. Use whatever plant milk you prefer and the flour you have on hand. The recipe plays happily with add-ins (see Seasonal Twists) and makes an excellent base for sandwiches, quick croutons, or a simple afternoon slice with nut butter. For everyday baking, nothing beats a recipe that reliably produces good bread with minimal equipment and minimal babysitting.
If You’re Out Of…
Milk: Any plant milk will work — almond, soy, oat, cashew. If you only have regular dairy milk, it will work the same way; the vinegar will swiftly curdle it.
White vinegar: Apple cider vinegar or lemon juice are viable alternatives. The key is an acid to curdle the milk and create the mildly tangy liquid for the baking soda to react with.
All-purpose flour: You can substitute a gluten-free all-purpose blend in a one-to-one swap, but watch texture — gluten-free doughs may feel denser. Bread will still bake, though crumb and chew may vary.
Tools & Equipment Needed

- Oven — preheat to 200°C / 400°F for consistent results.
- Large baking tray — for baking the shaped dough; a rimmed tray prevents spills.
- Parchment paper — prevents sticking and makes clean-up easy.
- Large mixing bowl — to combine your dry ingredients and fold in the curdled milk.
- Small bowl — to curdle the milk with vinegar.
- Measuring cups and spoons — accuracy helps with texture, especially for flour and leavening.
- Sharp knife — for scoring the top of the loaf cleanly.
- Flour for dusting — keeps the dough manageable while shaping and kneading.
Problems & Prevention
Dough too sticky or too dry
If the dough feels extremely sticky, flour your hands and work surface lightly and avoid adding large amounts of flour during kneading. The dough should remain slightly sticky; that’s normal for this quick bread. If it’s crumbly or dry, you likely added too much flour — wet your hands with a little water and gently fold until the dough holds.
Browning too quickly or not enough
If the top browns too fast, reduce oven temperature by 10–20°C and extend baking time slightly; rotate the tray halfway through. If it’s not browning after the recommended time, check that the oven is at the correct temperature and bake until golden and the base sounds hollow when tapped.
Dense or undercooked center
A dense center usually means the dough needed a touch more leavening action. Make sure your baking soda is fresh. Also, ensure you make the cross cuts to help the loaf expand properly. If the center feels underbaked after the time window, tent the loaf with foil and return it to the oven for a few minutes rather than turning up the heat drastically.
Seasonal Twists
Small additions turn this basic loaf into something seasonal and special. In spring and summer, fold in a tablespoon of finely chopped fresh herbs like rosemary or thyme and brush the crust lightly with olive oil before baking. In autumn, stir in a handful of chopped toasted nuts and a pinch of warm spice like cinnamon or nutmeg (keep additions modest so the dough still holds together).
For a sweeter variant in winter, add a handful of dried fruit and a sprinkle of orange zest. Seeds like sesame, sunflower, or poppy applied to the top before baking give the crust extra texture year-round. These variations don’t alter the core method — just fold them in gently during shaping.
If You’re Curious
Why does this work? The vinegar curdles the plant milk, creating a tangy, curdled liquid that mimics buttermilk. Baking soda (a base) then reacts with that acidity to produce carbon dioxide, which helps the dough rise during baking. The result is a quick loaf that benefits from both the acid-created flavor and the leavening lift without yeast.
The gentle kneading and the cross cut on top influence texture and oven spring: the kneading develops just enough gluten to hold structure, and the cuts allow controlled expansion so the loaf opens neatly rather than splitting unpredictably.
Save for Later: Storage Tips
Cool the loaf completely before storing — warm bread traps steam and turns soggy. For short-term storage, keep the loaf in a bread bag or airtight container at room temperature for up to two days. For longer storage, slice and freeze in an airtight bag for up to three months. Toast slices straight from frozen or thaw at room temperature and re-crisp under the broiler or in a toaster.
If you plan to toast frequently, freeze single slices separated by parchment so you can pull out just what you need. This bread toasts exceptionally well from frozen and makes a reliable, quick breakfast base.
Common Questions
Can I make this gluten-free? Yes. Use a one-to-one gluten-free all-purpose flour blend. Texture will vary slightly, but the method stays the same.
Can I use a different acid than white vinegar? Absolutely — apple cider vinegar or lemon juice will curdle the milk and work fine.
How do I know when it’s done? Look for a golden-brown top and a hollow sound when you tap the base. The recommended bake time is a guide; ovens vary, so use those visual and sound cues.
Can I double the recipe? You can, but bake in two loaves or on two trays rather than one very large loaf to maintain proper baking and crust development.
Before You Go
This Dairy Free Bread is exactly what I reach for when I want something homemade without the extra steps. It’s simple, honest, and flexible — and once you make it a couple of times, you’ll find the rhythm. If you try it, leave a note about which plant milk you used and any twists you loved. I read every comment and love hearing how a recipe fits into your kitchen rhythm.
Happy baking — and don’t forget to let the loaf cool fully before slicing. That little pause makes the texture so much better.
Dairy Free Bread
Ingredients
Equipment
Method
- Preheat the oven to 200°C / 400°F. Line a large baking tray with parchment paper and set aside.
- In a small bowl, combine 1 cup milk of choice and 2 tablespoons white vinegar. Let sit about 10 minutes, until the milk curdles.
- In a large mixing bowl, stir together 2 cups all-purpose flour, 1/2 teaspoon baking soda, 1/2 teaspoon salt, and 1 tablespoon sugar until evenly mixed.
- Add the curdled milk to the dry ingredients in two additions, stirring gently after each addition until the dough is just combined. The dough should be stickier than bread dough.
- Lightly flour your work surface, dust the top of the dough with a little flour, and turn the dough out onto the surface. Gently knead the dough about 8–10 times and shape it into a round dome; it should remain slightly sticky.
- Using a sharp knife, make two cuts across the top of the dough to form a cross, cutting about 1/2 inch deep.
- Transfer the shaped dough to the prepared baking tray. Bake for 20–25 minutes, checking at the 20-minute mark. The bread is done when the top is golden brown and the base sounds hollow when tapped.
- Remove the bread from the oven and allow it to cool completely on the tray before slicing and toasting.
Notes
Raisin bread.Fold through ¼-½ cup of raisins into the dough. For a sweeter bread, add ¼ cup of sugar.
Walnut currant bread.Fold through ¼ cup of chopped walnuts and ¼ cup of dried currants (or cranberries).
Whole grain bread.Use whole wheat flour and add ¼ cup of mixed seeds into the dough, and sprinkle some on top before baking.
Rosemary bread.Add 1 tablespoon of rosemary and ½ teaspoon of extra salt, and sprinkle coarse sea salt on top before baking.