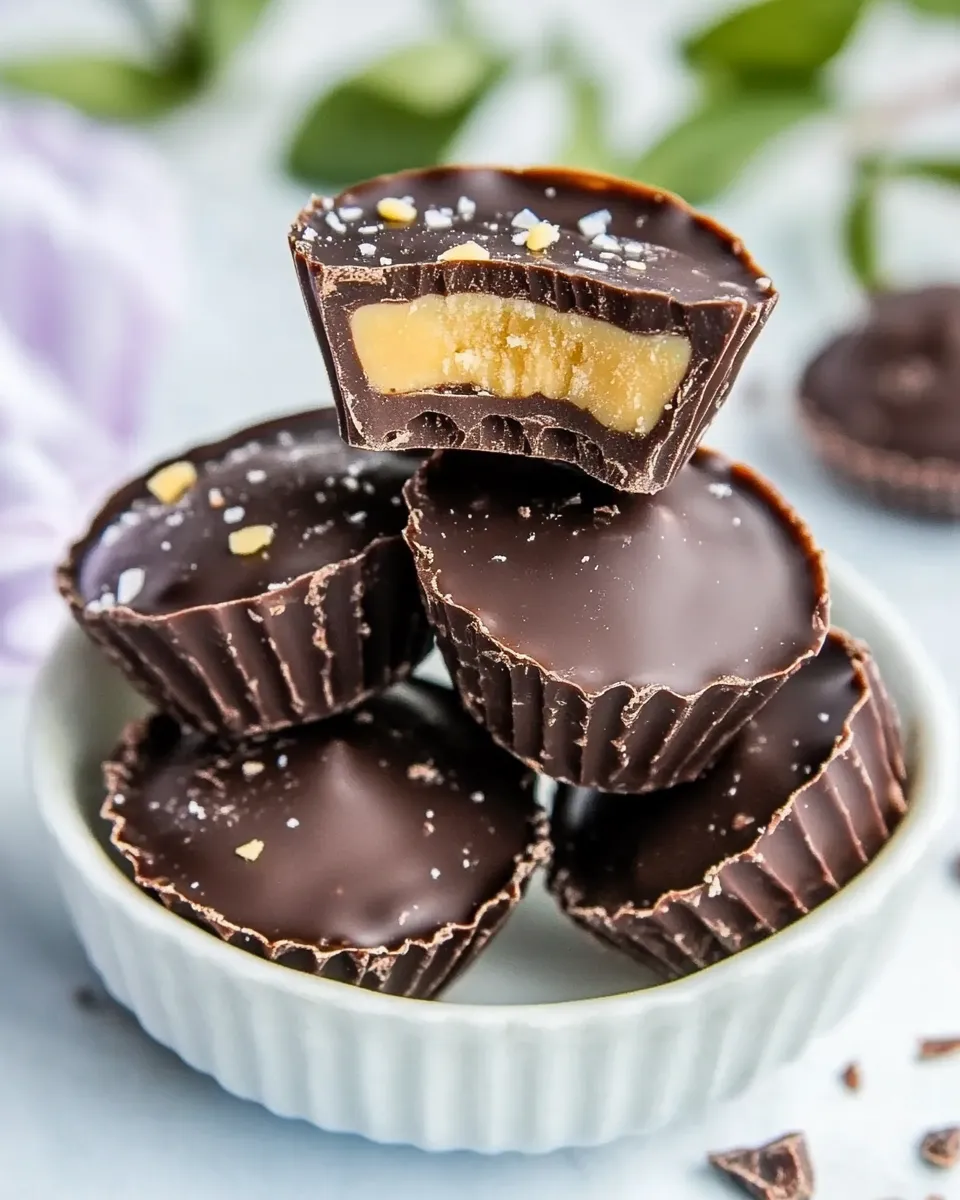
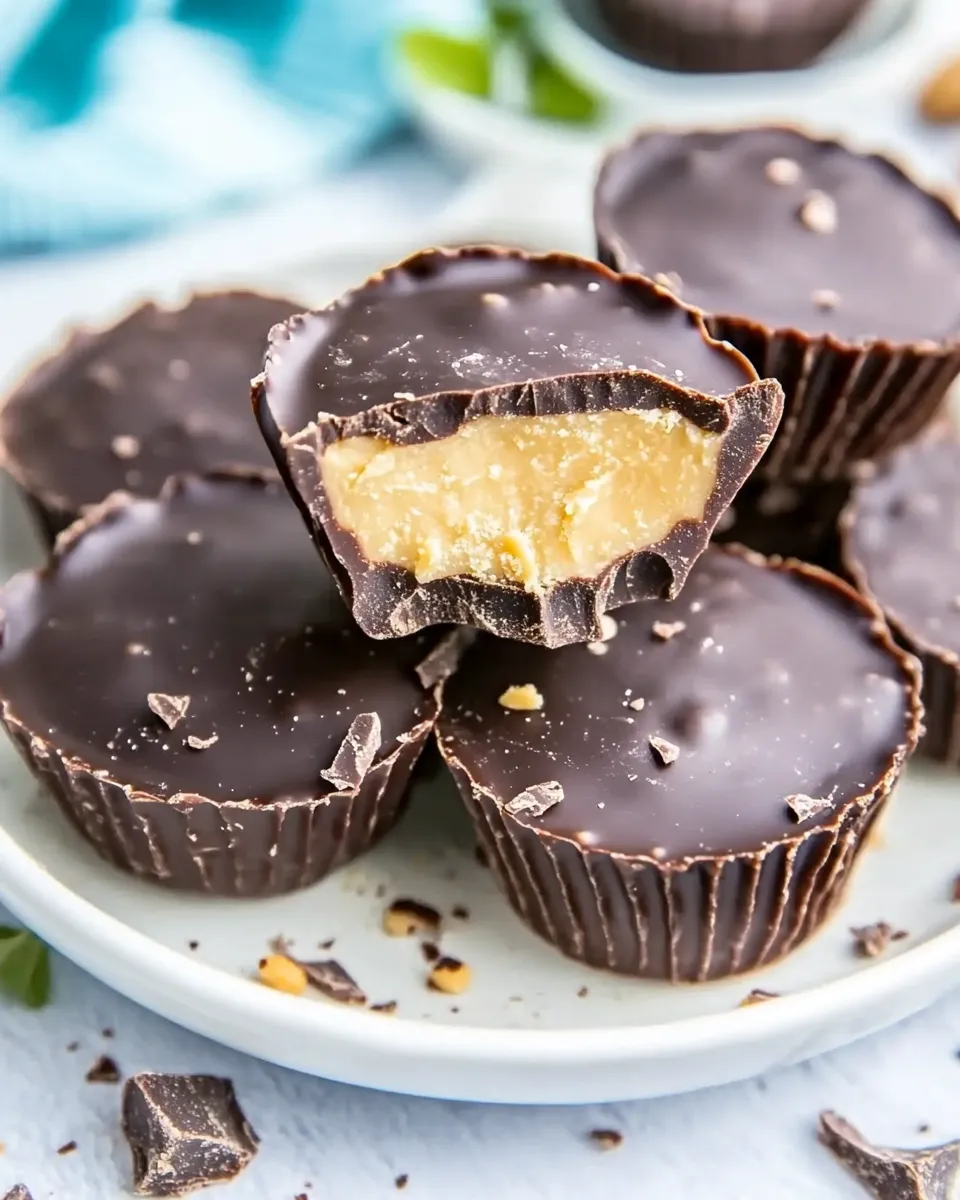
Dark Chocolate Peanut Butter Cups
These dark chocolate peanut butter cups are the kind of treat I make when I want something small, satisfying, and reliably good. They’re simple to assemble, forgiving to technique, and they travel well — which means they disappear fast at potlucks and after-school snack tables. No complicated tempering, no odd ingredients, just rich dark chocolate and creamy peanut butter with an optional sprinkle on top.
I like to keep a batch in the fridge for a grab-and-go sweet that actually feels a little indulgent without being over the top. The recipe works with silicone molds or mini foil wrappers, and it scales easily if you want to double or halve it. Pay attention to the chilling steps and the chocolate-handling tips, and you’ll have shiny, neat cups every time.
Below you’ll find a clear ingredient list, step-by-step directions straight from the recipe’s source, practical substitutions, equipment recommendations, and troubleshooting notes from my test kitchen. Read through once, line up your molds, and let’s get to making cups that taste like the good parts of a candy store — but better because you made them.
The Ingredient Lineup
Ingredients
- 1 cup natural peanut butter, homemade or storebought — Creamy filling; “natural” gives the best flavor and mouthfeel but may be a little oilier to work with.
- 2 pounds dark chocolate candy melts — The shell and top; candy melts are easy because they melt smoothly and reset quickly.
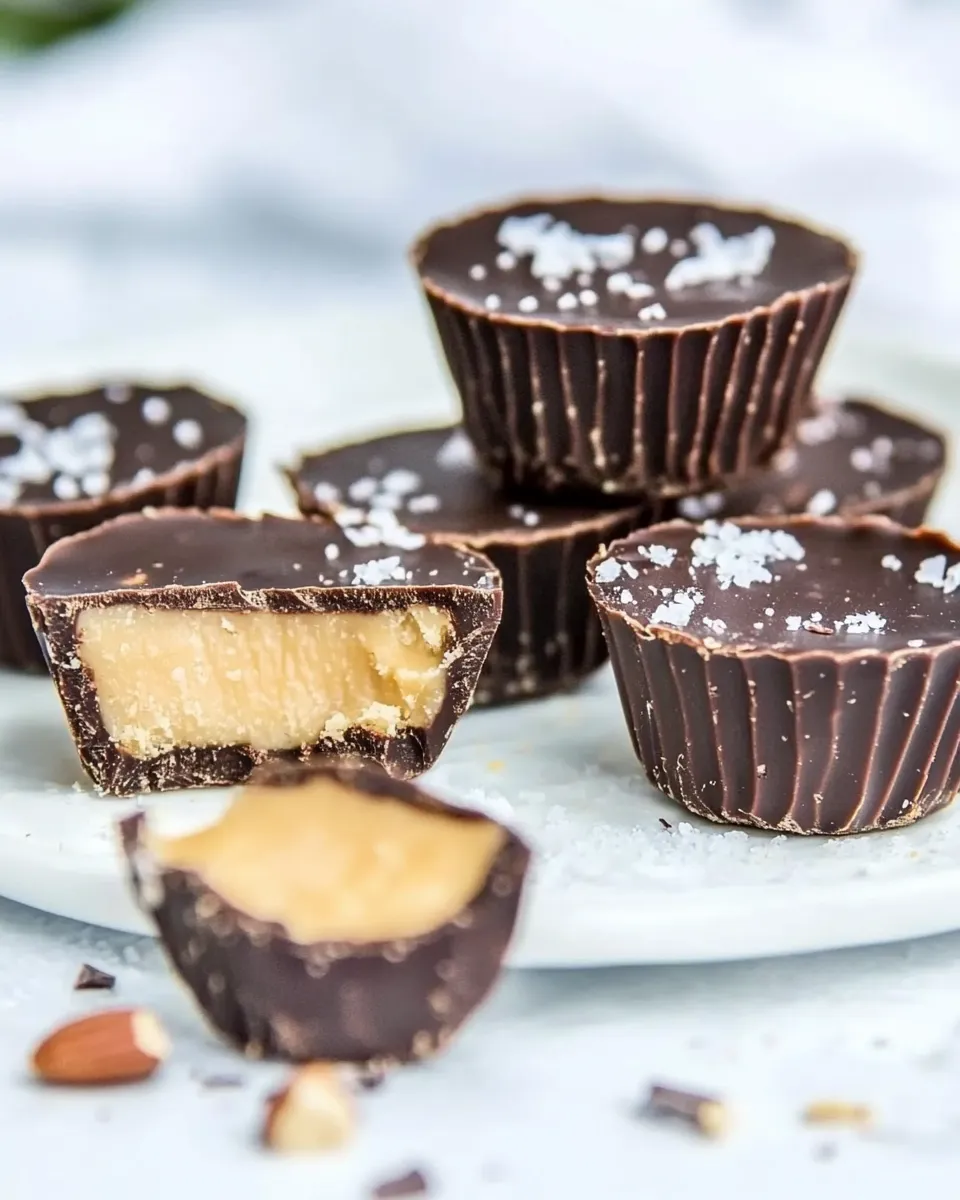
- Coarse sea salt, chocolate sprinkles, or mini chocolate chips, for sprinkling on top — Optional garnishes that add texture and a flavor contrast to the rich chocolate and peanut butter.
Dark Chocolate Peanut Butter Cups: How It’s Done
- Arrange your molds or wrappers: place silicone peanut-butter-cup molds on a flat tray or spread about 30–32 mini foil cupcake wrappers on a baking sheet or in a shallow pan.
- Melt about half of the dark chocolate candy melts (about 1 pound of the 2 pounds) using the package instructions or one of these methods: (a) double boiler — place a heatproof bowl over a pan of simmering water and stir until smooth, or (b) microwave — heat at 50% power, stirring every 15–30 seconds until melted and smooth.
- Spoon or transfer the melted chocolate into a squeeze bottle or piping bag (or use a spoon). Fill each mold or wrapper about halfway with chocolate. Use a small brush or the back of a spoon to spread chocolate partway up the sides so each cup has a chocolate shell.
- Chill the filled molds in the refrigerator until the chocolate is set and firm, about 10–20 minutes.
- Portion the peanut butter: dollop peanut butter into the center of each chocolate shell. Use approximately 1/2 teaspoon for small peanut butter cups, about 1 teaspoon for large cups, or about 1 tablespoon for the mini foil wrappers. (You can also divide the full 1 cup of peanut butter evenly among your cups.)
- Melt the remaining chocolate melts using the same method as Step 2.
- Use a spoon, squeeze bottle, or piping bag to cover each peanut butter dollop with the remaining melted chocolate, sealing the edges so no peanut butter is exposed. Tap the tray gently on the counter to level the tops and release air bubbles.
- Let the tops set slightly (a few minutes), then sprinkle with coarse sea salt, chocolate sprinkles, or mini chocolate chips as desired.
- Refrigerate until fully firm, about 15–30 minutes. Remove the cups from the molds or wrappers and serve or store.
Why It’s Crowd-Pleasing
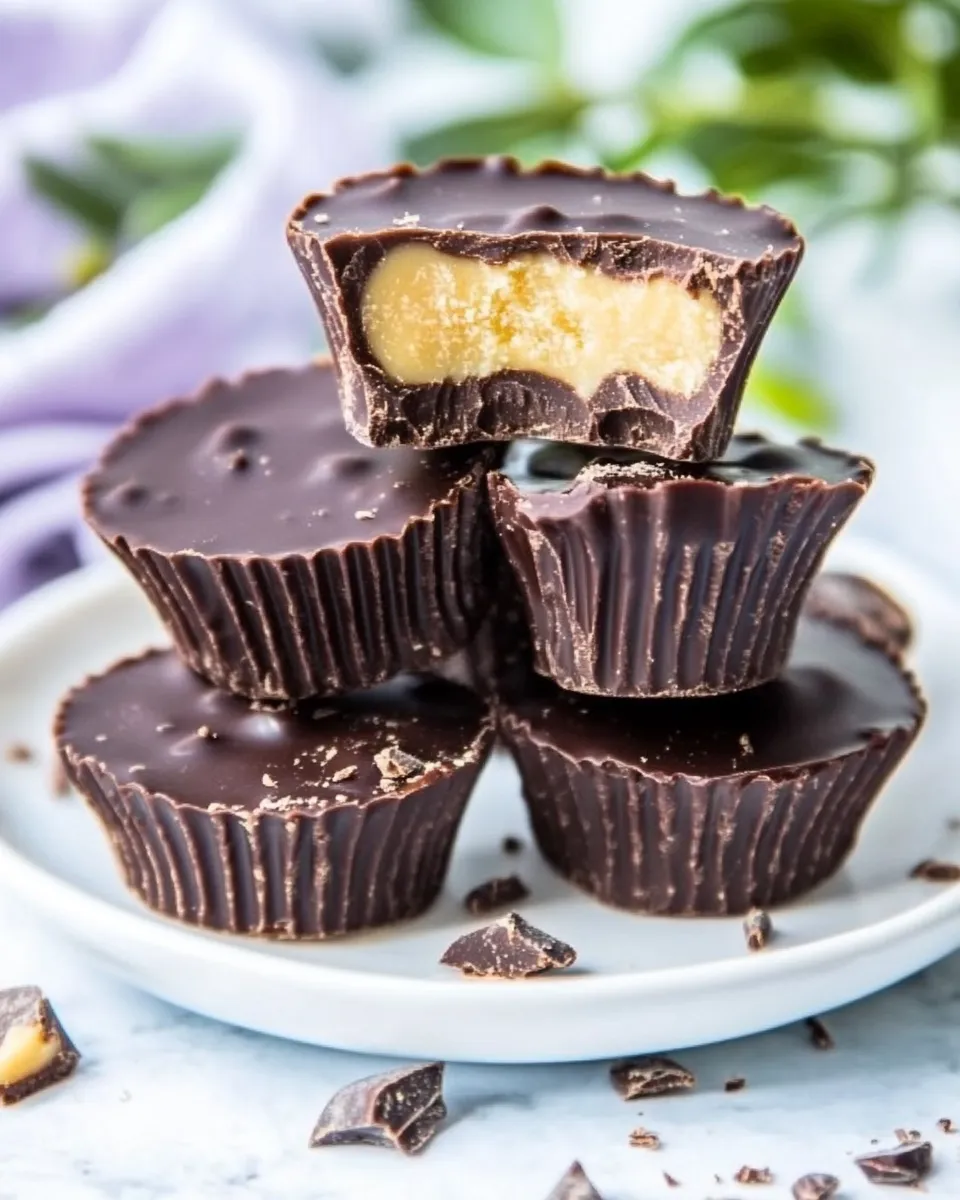
There’s a reason peanut butter and chocolate are a go-to pair: they balance each other. The fat and salt in the peanut butter play off the bitter-sweetness of the dark chocolate. Texture matters too — a crisp chocolate shell with a soft, creamy center feels indulgent without being cloying.
These cups are portable, portion-controlled, and familiar. They fit every crowd from kids to adults because they hit classic flavor notes and can be dressed up with sprinkles or sea salt for a grown-up finish. Also, the recipe is forgiving: small timing differences or slightly warmer peanut butter won’t ruin the end result.
Smart Substitutions
- Nut butter swap: Use almond butter, cashew butter, or sunflower-seed butter if you need a nut-free version or prefer a different flavor profile. Note that textures and oil separation can vary.
- Chocolate options: If you don’t have candy melts, use high-quality dark chocolate chips or chopped couverture chocolate. Expect slightly longer melting and setting times, and consider tempering if you need the chunkiest shine and snap.
- Sweetness and salt: If your peanut butter is unsalted and you want more contrast, add a tiny pinch of fine sea salt to the peanut butter before portioning.
Must-Have Equipment
- Silicone peanut-butter-cup molds or about 30–32 mini foil cupcake wrappers and a baking sheet
- Squeeze bottle, piping bag, or a set of spoons for filling and topping
- Microwave-safe bowl or a heatproof bowl for a double boiler setup
- Small brush or the back of a spoon for spreading chocolate up the sides
- Refrigerator with flat shelf space to chill molds while setting
- Measuring spoons and a small scoop or teaspoon for consistent peanut butter portions
Slip-Ups to Skip
- Overheating the chocolate — Candy melts and chocolate scorch easily. Melt gently at reduced power and stir frequently.
- Skipping the chill — If you don’t set the initial shells first, the peanut butter will melt into the chocolate and the cups will look messy and leak.
- Filling the cups too full before sealing — Leave enough room to add the top layer of chocolate and to tap the tray so the tops level cleanly.
- Using wet utensils or molds — Any moisture will seize the chocolate. Keep everything dry.
- Not sealing edges completely — Exposed peanut butter can dry out or weep. Make sure the top chocolate overlaps the shell and seals the peanut butter in.
Smart Substitutions
- Lower-sugar option: Choose a lower-sugar dark chocolate or use a natural peanut butter with no added sugar. The texture remains similar though flavor will be less sweet.
- Vegan version: Use a plant-based or dairy-free dark chocolate and a vegan peanut butter. Ensure the candy melts or chocolate you choose are certified dairy-free.
- Crunch preference: Stir in a spoonful of finely chopped toasted peanuts to the peanut butter before portioning for a crunchy center.
Notes from the Test Kitchen
I tested these with both silicone molds and mini foil wrappers. Silicone is easier to unmold cleanly, especially if you chill thoroughly. The wrappers are fine for gifting or when you want the classic foil look, but they can be fiddly when trying to pop a set of tiny cups out.
About yields: the directions reference different portion sizes. If you make small peanut butter cups (about 1/2 teaspoon PB each), you’ll get more cups than if you go with 1 tablespoon per wrapper. I find dividing the full 1 cup of peanut butter evenly across the molds gives consistent results and uses the full jar exactly as directed.
Chocolate behavior: candy melts are forgiving and melt smoothly, which is why the recipe calls for them. If you use chopped dark chocolate, melt carefully and consider a short temper if you want a glossy finish that won’t bloom or soften at room temperature.
Storing, Freezing & Reheating
Store the finished cups in an airtight container in the refrigerator for up to two weeks. Layer parchment or wax paper between layers to prevent sticking.
To freeze: place the cups on a baking sheet and freeze until solid, then transfer to a freezer-safe container or bag for up to 3 months. Thaw in the refrigerator for a few hours before serving to avoid condensation forming on the chocolate.
Do not microwave to reheat. If the chocolate softens too much at room temperature, pop them back in the refrigerator for 10–20 minutes to firm up.
FAQ
- Can I use crunchy peanut butter? — Yes. Crunchy peanut butter adds texture but may make the filling a bit chunkier and slightly harder to seal smoothly.
- Do I have to refrigerate the cups? — Refrigeration helps the chocolate set fast and keeps the peanut butter stable. If your home is cool and dry, you can store them at room temperature for short periods, but refrigeration prevents melting and preserves shape.
- Why did my chocolate bloom or look dull? — Chocolate can bloom if it isn’t tempered or if it experiences temperature shifts. Candy melts are less prone to bloom, but for glossy chocolate with a crisp snap, use tempered couverture chocolate.
- Can I skip the salt or toppings? — Absolutely. Toppings are optional but recommended for a flavor contrast. Coarse sea salt lifts the chocolate and peanut butter beautifully.
- How do I get the cleanest bottoms on silicone molds? — Chill until fully firm, then gently press from the bottom of the mold or pop the mold inside out slowly. Wiping a small amount of melted chocolate on the base before chilling can create a smoother bottom.
The Takeaway
Dark chocolate peanut butter cups are straightforward to make and rewarding to share. Keep the core steps in mind: form a sturdy shell, chill, add your peanut butter portion, and top with the remaining chocolate to seal. Use gentle heat for the chocolate and don’t rush the chilling stages — that’s where most problems show up.
With a reliable set of tools and a little patience, you’ll have a batch of glossy, rich cups that taste homemade in the best way. Make them for parties, tuck a few in lunchboxes, or package them as small gifts — they travel well and they disappear quickly. Enjoy the process and the results.
Dark Chocolate Peanut Butter Cups
Ingredients
Equipment
Method
- Arrange your molds or wrappers: place silicone peanut-butter-cup molds on a flat tray or spread about 30–32 mini foil cupcake wrappers on a baking sheet or in a shallow pan.
- Melt about half of the dark chocolate candy melts (about 1 pound of the 2 pounds) using the package instructions or one of these methods: (a) double boiler — place a heatproof bowl over a pan of simmering water and stir until smooth, or (b) microwave — heat at 50% power, stirring every 15–30 seconds until melted and smooth.
- Spoon or transfer the melted chocolate into a squeeze bottle or piping bag (or use a spoon). Fill each mold or wrapper about halfway with chocolate. Use a small brush or the back of a spoon to spread chocolate partway up the sides so each cup has a chocolate shell.
- Chill the filled molds in the refrigerator until the chocolate is set and firm, about 10–20 minutes.
- Portion the peanut butter: dollop peanut butter into the center of each chocolate shell. Use approximately 1/2 teaspoon for small peanut butter cups, about 1 teaspoon for large cups, or about 1 tablespoon for the mini foil wrappers. (You can also divide the full 1 cup of peanut butter evenly among your cups.)
- Melt the remaining chocolate melts using the same method as Step 2.
- Use a spoon, squeeze bottle, or piping bag to cover each peanut butter dollop with the remaining melted chocolate, sealing the edges so no peanut butter is exposed. Tap the tray gently on the counter to level the tops and release air bubbles.
- Let the tops set slightly (a few minutes), then sprinkle with coarse sea salt, chocolate sprinkles, or mini chocolate chips as desired.
- Refrigerate until fully firm, about 15–30 minutes. Remove the cups from the molds or wrappers and serve or store.