Easy No-Bake Tiramisu
I love desserts that look special but are actually fast and forgiving. This no-bake tiramisu fits that bill: it layers a soft pound cake with a boozy coffee soak and a whipped mascarpone cream, then chills until everything becomes silky and sliceable. It takes patience only for the chill time — the assembly itself moves quickly.
I’ve tested this version with a fresh loaf from the bakery and with frozen pound cake you thaw. Both work. The trick is letting the coffee mixture soak in evenly and whipping the cream to stiff peaks so the filling holds its shape.
If you want an impressive finish without fuss, this is your dessert. I’ll walk you through the ingredients, the exact step-by-step build, the common mistakes to avoid, and a handful of small swaps so you can adapt it to your pantry and the season.
The Ingredient Lineup

- one 13.5 to 16-ounce pound cake, halved lengthwise — I used a fresh cake from my grocery store’s bakery but a frozen cake from the freezer case that you thaw is okay, halved lengthwise.
- 3/4 cup brewed espresso — the concentrated coffee that soaks the cake and gives that classic tiramisu flavor.
- 1/2 cup coffee liquor — such as Kahlua; adds warmth and depth to the coffee soak.
- 8 ounces mascarpone cheese, softened — the rich, slightly tangy backbone of the filling.
- 1.25 cups confectioners’ sugar — sweetens and helps stabilize the mascarpone mixture.
- 1 pint (16 ounces) heavy whipping cream — whipped into stiff peaks to lighten and stabilize the filling.
- about 1/4 cup sifted unsweetened natural cocoa powder — for dusting the top just before serving.
Build No-Bake Tiramisu Step by Step
- Line a 9×5-inch loaf pan with foil (leave some foil overhang to lift the tiramisu out later) and spray the foil with cooking spray; set the pan aside.
- Slice the 13.5–16 ounce pound cake in half lengthwise into two large slabs. Place the bottom slab in the prepared pan and set the top slab aside.
- In a large glass measuring cup, combine 3/4 cup brewed espresso and 1/2 cup coffee liqueur; stir to combine. Drizzle about half of this coffee mixture evenly over the cake layer in the pan and set the remaining coffee mixture aside.
- In a large bowl, add 8 ounces softened mascarpone cheese, 1.25 cups confectioners’ sugar, and 1 pint (16 ounces) heavy whipping cream. Using a handheld electric mixer on high speed, beat the mixture about 4 to 5 minutes, or until it is quite stiff and holds peaks.
- Evenly spread about half of the cream mixture (about 1 1/2 cups) over the soaked cake layer in the pan.
- Take the reserved top cake slab and poke about 30 holes in its top surface with a fork to help the coffee mixture soak in.
- Place the top cake slab over the cream layer in the pan. Slowly and evenly drizzle the remaining coffee mixture over the top layer; allow it to absorb (some liquid may pool or run down the sides).
- Evenly spread the remaining cream mixture (about 1 1/2 cups) over the top of the assembled cake.
- Cover the pan and chill the tiramisu in the refrigerator for about 3 hours to set.
- Just prior to slicing and serving, sift about 1/4 cup unsweetened natural cocoa powder evenly over the top, remove from the pan using the foil overhang, slice, and serve.
Reasons to Love No-Bake Tiramisu
This rendition delivers classic tiramisu vibes without ladyfingers or several bowls of custard. It’s faster and less fussy, but it keeps the textural contrast: moist cake, airy cream, and that last dusting of cocoa. You get an elegant-looking dessert with minimal hands-on time.
It’s forgiving. The pound cake soaks differently than ladyfingers, which means you don’t have to obsess over timing as the cake takes on liquid slowly and predictably. The whipped mascarpone filling sets firmly after a few hours, so slices stay neat for serving.
Finally, it’s flexible if you cook for a crowd. The loaf-pan format is simple to scale and easy to transport. Make it the night before and you’re freed up on the day of the event.
Flavor-Forward Alternatives

Want to change the profile without rewriting the recipe? Replace or layer flavors without changing quantities.
- Swap the coffee liqueur for dark rum or almond liqueur for a different warmth and aroma.
- Stir a teaspoon or two of orange zest into the mascarpone mixture for a bright citrus note that plays nicely with coffee.
- Use a chocolate or marble pound cake for a deeper cocoa interplay; the cocoa dusting still finishes the dessert beautifully.
- Fold a few tablespoons of finely chopped toasted hazelnuts into the top cream layer just before chilling for crunch (no extra liquid needed).
- For a nonalcoholic route, replace the liqueur in the coffee mixture with an equal amount of cooled, strong brewed coffee or espresso.
Cook’s Kit

- 9×5-inch loaf pan (or similar-sized dish).
- Aluminum foil with a bit of overhang to help lift the finished block out.
- Cooking spray to prevent sticking.
- Large glass measuring cup for mixing the coffee and liqueur.
- Large bowl and handheld electric mixer (or stand mixer) for whipping.
- Fork for poking holes and an offset spatula or spoon for spreading the cream.
- Sifter or fine mesh strainer for the cocoa dusting.
What Not to Do
Don’t skip softening the mascarpone. Cold mascarpone resists blending and can lead to lumps in the cream. Let it sit at room temperature until it’s easily spreadable.
Don’t under-whip the cream. The recipe relies on stiff peaks to support the mascarpone and maintain structure. If the cream is too loose, the filling will be runny and the cake will slump.
Don’t over-soak the bottom layer. Add the coffee mixture slowly and evenly; soaking too much in one spot makes the cake soggy and compromises texture. The pound cake is tolerant, but even it has limits.
Seasonal Adaptations
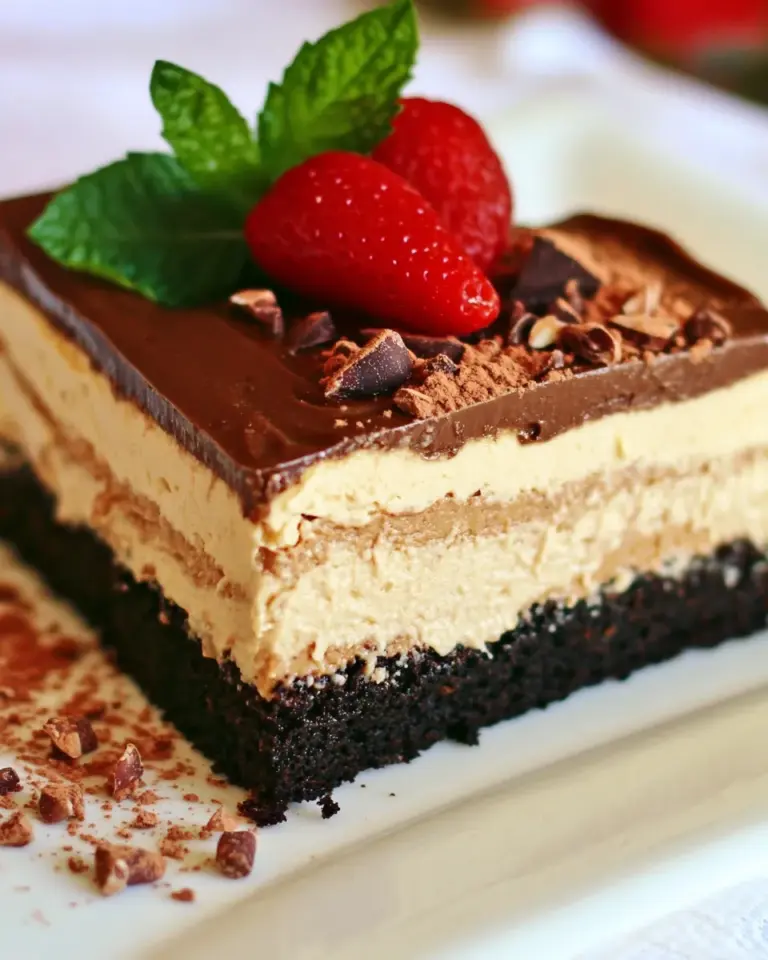
Spring and summer: add bright-fruit accents. Serve sliced tiramisu with a spoonful of macerated raspberries or thinly sliced strawberries on the plate. The tartness cuts through the richness.
Fall and winter: warm spices complement the coffee and cocoa. Mix a pinch of cinnamon or a light dusting of nutmeg into the cocoa before dusting the top. Alternatively, use a spiced pound cake for cozy notes.
Holiday twist: fold a tablespoon of finely chopped candied orange peel into the top layer of cream to add a festive lift without changing the basic build.
Cook’s Notes
Mascarpone and Whipping
Bring mascarpone to room temperature for a few minutes so it blends smoothly with the sugar and cream. When you beat the mixture, start slowly to combine and then increase speed. Watch the cream: 4–5 minutes on high with a handheld mixer usually gives stiff peaks with the quantities here.
Soaking Technique
Measure your coffee and liqueur and drizzle with a steady hand. If liquid pools at the edges, give it a minute; the cake will absorb. If you see large puddles after several minutes, use a spatula to press gently on the top layer so that it makes better contact with the liquid. Those fork pricks in the top slab help speed absorption.
Serving Tips
For clean slices, lift the block out using the foil overhang and transfer to a cutting board. Use a sharp knife warmed briefly under hot water and wiped dry between slices — this keeps edges smooth.
Keep-It-Fresh Plan

Keep the tiramisu refrigerated. It holds well for 2–3 days in an airtight container or wrapped tightly on the cutting board. The flavors meld over the first 24 hours and it often tastes even better the next day.
Freezing: you can freeze slices wrapped tightly in plastic wrap and a layer of foil, but texture softens slightly upon thawing. If you plan to freeze, dust with cocoa only after thawing and before serving.
Handy Q&A
Q: Can I skip the alcohol?
A: Yes. Replace the 1/2 cup coffee liqueur with 1/2 cup additional brewed espresso or strong coffee. You’ll still get robust coffee flavor without the boozy note.
Q: How long should I chill it?
A: The recipe calls for about 3 hours to set. Overnight incubation is fine and often improves texture and flavor melding.
Q: My cream didn’t stiffen — what happened?
A: Make sure the heavy whipping cream is cold before you start. If your kitchen is warm, chill the bowl and beaters for 10–15 minutes first. Also confirm you whipped long enough; it can take several minutes to reach stiff peaks at higher speeds.
Q: Can I use ladyfingers instead of pound cake?
A: You can, but quantities and soaking behavior differ. Ladyfingers absorb quickly, so you’ll need to reduce the soak amount and work faster. This recipe is tuned for a halved pound cake.
Bring It Home
This no-bake tiramisu is the kind of dessert you can make on a weeknight and proudly serve to guests the next day. It’s straightforward, resilient, and scales well. Keep your coffee strong, your mascarpone soft, and your cream stiff. The rest is assembly and patience while the fridge does the final work.
I serve it with a small bowl of extra cocoa for anyone who wants a heavier dusting. It’s simple, forgiving, and delicious — and that’s a trio I return to again and again.

Easy No-Bake Tiramisu
Ingredients
Equipment
Method
- Line a 9×5-inch loaf pan with foil (leave some foil overhang to lift the tiramisu out later) and spray the foil with cooking spray; set the pan aside.
- Slice the 13.5–16 ounce pound cake in half lengthwise into two large slabs. Place the bottom slab in the prepared pan and set the top slab aside.
- In a large glass measuring cup, combine 3/4 cup brewed espresso and 1/2 cup coffee liqueur; stir to combine. Drizzle about half of this coffee mixture evenly over the cake layer in the pan and set the remaining coffee mixture aside.
- In a large bowl, add 8 ounces softened mascarpone cheese, 1.25 cups confectioners’ sugar, and 1 pint (16 ounces) heavy whipping cream. Using a handheld electric mixer on high speed, beat the mixture about 4 to 5 minutes, or until it is quite stiff and holds peaks.
- Evenly spread about half of the cream mixture (about 1 1/2 cups) over the soaked cake layer in the pan.
- Take the reserved top cake slab and poke about 30 holes in its top surface with a fork to help the coffee mixture soak in.
- Place the top cake slab over the cream layer in the pan. Slowly and evenly drizzle the remaining coffee mixture over the top layer; allow it to absorb (some liquid may pool or run down the sides).
- Evenly spread the remaining cream mixture (about 1 1/2 cups) over the top of the assembled cake.
- Cover the pan and chill the tiramisu in the refrigerator for about 3 hours to set.
- Just prior to slicing and serving, sift about 1/4 cup unsweetened natural cocoa powder evenly over the top, remove from the pan using the foil overhang, slice, and serve.
Notes
Tiramisu will keep airtight in the fridge for up to 4 days, noting it will soften as time passes and the cocoa powder will ‘absorb’ into the cake.