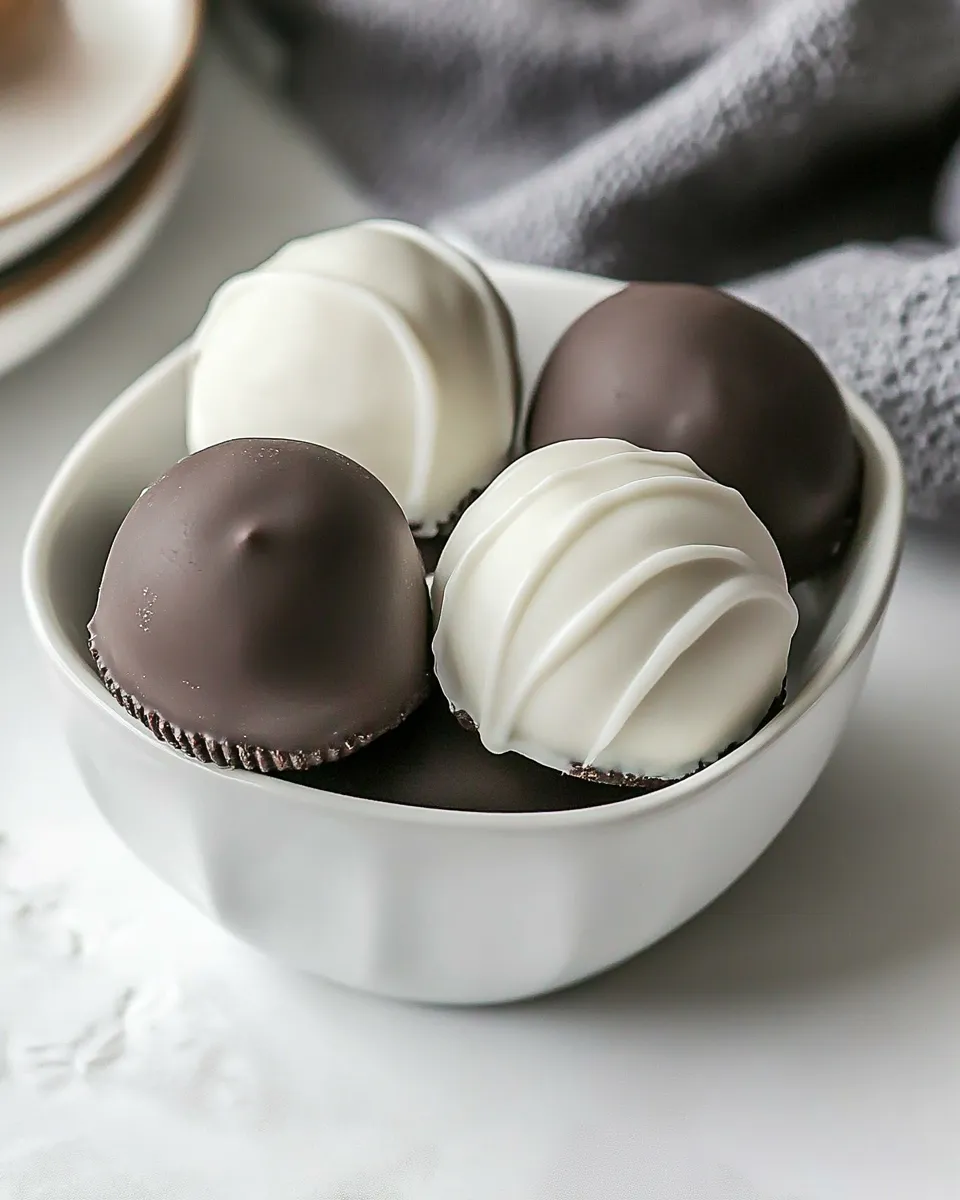
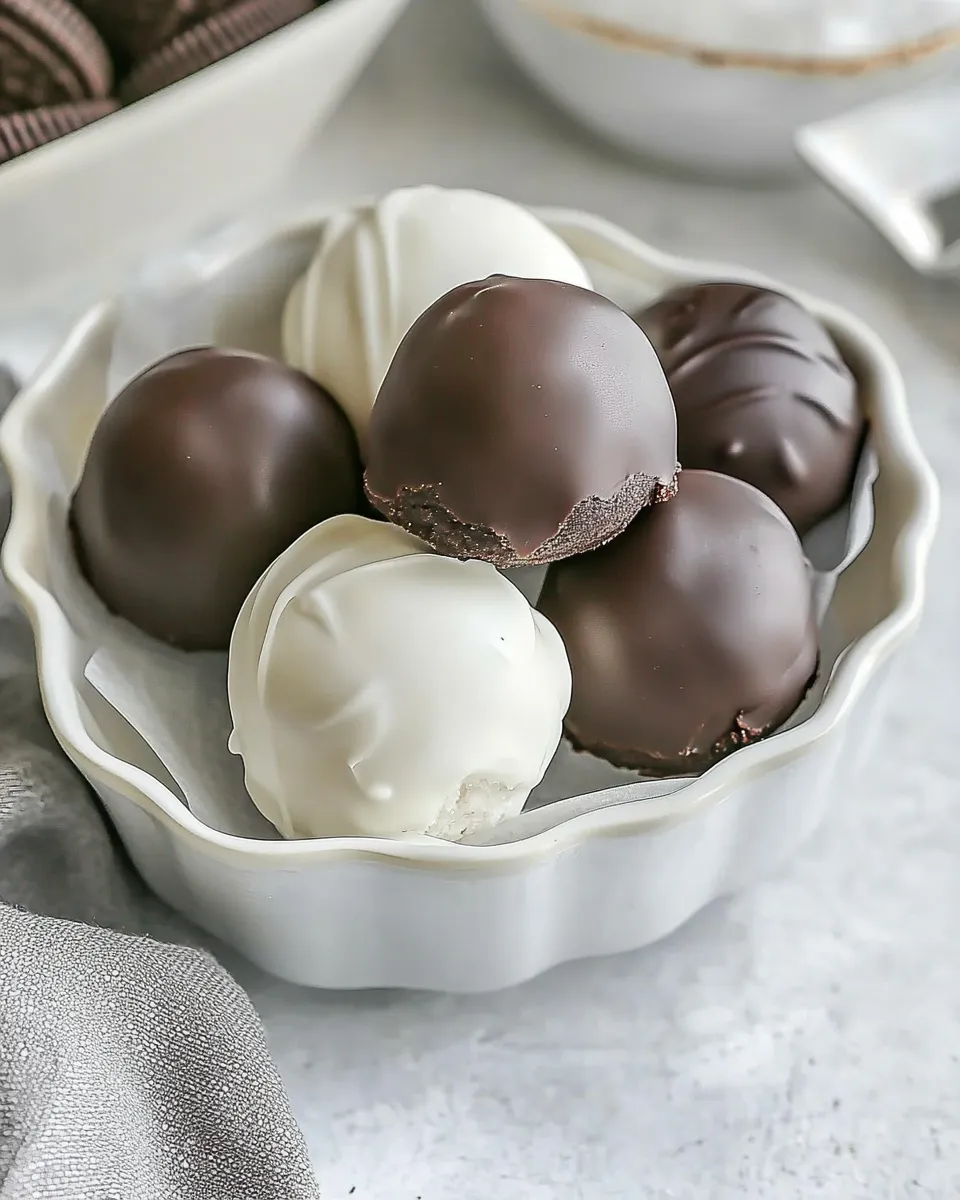
Easy Oreo Truffles
These Oreo truffles are one of my go-to treats when I need something impressive with almost no effort. They come together with three main components: crushed Oreos, cream cheese, and melting wafers. The results are dense, chocolatey little bites that hold up well for parties, gifts, or a quick dessert to satisfy a craving.
I like them because the steps are straightforward and the math is simple: combine, chill, dip, and you’re done. The process is forgiving, and you don’t need pastry skills to make them look polished. A handful of sprinkles or a neat drizzle of extra melted wafer is all it takes to finish them.
Below I give a clear ingredient checklist, exact step-by-step instructions, troubleshooting tips, and ideas for serving across seasons. If you follow the process, the reward is consistent: perfectly firm, smooth centers and a crisp chocolate shell.
Ingredient Checklist
- 15-ounce package original Oreos — the cookie base: gives structure, flavor, and the classic Oreo taste.
- 8 ounces cream cheese, at room temperature — binds the crumbs into a truffle dough; room temperature ensures smooth blending.
- 12 ounce packages Ghirardelli White or Dark Melting Wafers (may need a backup bag) — used for coating; melting wafers melt smoothly and set with a shiny finish.
- Sprinkes, optional, for garnish — adds color and texture; apply immediately after dipping so they adhere.
Cooking (Oreo Truffles): The Process
- Line a cookie sheet with parchment paper. Place the entire 15-ounce package of Oreos in a food processor and process until fine crumbs form.
- Cut the 8 ounces of room-temperature cream cheese into 6–8 pieces and add them to the Oreo crumbs.
- Process the crumbs and cream cheese together until the mixture is smooth and well combined, about 1–2 minutes. Scrape down the bowl as needed. The mixture should hold together when pressed.
- Use a small scoop or a tablespoon to portion and shape the mixture into tightly packed 1-inch balls. Roll between your palms to smooth, then place the balls on the prepared parchment-lined cookie sheet.
- Chill the truffle balls in the refrigerator for at least 1 hour (or overnight) until firm.
- Melt the Ghirardelli White or Dark Melting Wafers (from the 12-ounce package[s] listed in the ingredients) according to the package directions. If needed, melt additional wafers so you have enough coating.
- Working with a few chilled truffles at a time, dip each ball into the melted wafers using a fork or dipping tool, letting excess coating drip back into the bowl. Return the coated truffle to a parchment-lined sheet.
- If using sprinkles, add them immediately after dipping, before the coating hardens.
- Refrigerate the coated truffles for about 1 hour to set. Store covered in the refrigerator until serving.
Why This Recipe Belongs in Your Rotation
Make these once and you’ll understand why they’re a staple. They require minimal hands-on time, scale easily, and are forgiving. The Oreo-cream cheese combo creates a reliably smooth, no-fail center; the melting wafers provide a clean shell without tempering chocolate.
They travel well and keep in the fridge, which makes them ideal for potlucks, bake sales, or last-minute houseguests. You can dress them up quickly with seasonal sprinkles or a contrasting drizzle and they look custom-made. For a baker who wants maximum payoff with minimal fuss, these are a win.
International Equivalents
Not every country has the exact “Original Oreo” or the same brand of melting wafers, but the technique translates easily. Use a sandwich-style chocolate cookie available locally instead of Oreos; the key is a chocolate cookie with a cream center that can be crushed into fine crumbs.
For coating, look for local “melting chocolates,” candy coating, or compound chocolate that’s meant to melt and set without tempering. They’ll behave similarly to the Ghirardelli wafers called for here. If your shopping choices differ, read labels to find products designed for dipping and coating rather than eating as bars.
Setup & Equipment
Successful truffle making is part gear and part timing. Set up everything before you begin: the cookies, cream cheese at room temperature, parchment-lined sheet, and the tool you’ll use for dipping.
Must-have
- Food processor — for quick, even crumbs.
- Cookie sheet lined with parchment — keeps truffles from sticking and collects drips.
- Small scoop or tablespoon — ensures uniform truffles for even chilling and coating.
- Fork or dipping tool — to lift truffles from melted coating and let excess drip back.
- Refrigerator space — you’ll need a shelf for chilling both before and after dipping.
Helpful additions
- Microwave-safe bowl or double boiler — for melting wafers per package directions.
- Cooling rack over parchment — for quick transfer if you prefer an elevated drip station.
- Small piping bag or spoon — for decorative drizzles if you want a finished look.
Avoid These Traps
Several simple missteps can make the process slower or the results less tidy. Here are the traps I see most often, and how to avoid them.
- Soft cream cheese: If it’s too cool, you’ll get clumps; if it’s too warm, the mixture becomes oily. Bring cream cheese to room temperature but not melted.
- Underprocessed cookies: If crumbs aren’t fine, the mixture will be grainy and won’t hold together well. Process until the texture is uniformly fine.
- Skipping the chill: Don’t dip warm or soft centers. Chilling for at least an hour firms them so the coating won’t sink in or crack.
- Overcrowding the bath: Dip a few truffles at a time and give each one room. Working with too many increases breaks and drips.
- Using a thin coating: If melted wafers are too thin, the shell won’t set with good snap. Follow the package melting directions and add wafers as needed to maintain a coating that clings cleanly.
Spring–Summer–Fall–Winter Ideas
These truffles are neutral enough to dress for the season without changing the core recipe. Use sprinkles, serving temperature, and pairings to make them feel seasonal.
- Spring: Light pastel sprinkles, mini paper liners, and serve alongside a floral tea. Presentation in pastel plates makes them feel fresh.
- Summer: Keep them chilled and serve with iced coffee or cold brew. Use bright, fun sprinkles for pool parties and picnics.
- Fall: Dark wafer coating and gold or copper sprinkles make these feel autumnal. Plate them with spiced nuts or a hot cup of coffee.
- Winter: White-coat a few and top with red and green sprinkles for holidays. Chilled truffles offset richer holiday desserts, so they’re great on cookie trays.
What Could Go Wrong
Even with a very simple recipe, small issues can occur. Here’s what to watch for and how to fix it if something goes off.
- Mixture too wet: If the mixture feels sticky and won’t hold as 1-inch balls, chill it longer and handle with slightly damp palms when rolling. If it’s still too wet, you can press the balls tighter or add a little extra finely crushed cookie (from an extra Oreo) to firm it.
- Coating cracks after setting: This often happens if the coating is too thick or the centers aren’t fully chilled. Chill longer before dipping and avoid large temperature swings when moving truffles from fridge to room temperature.
- Coating not setting: Check that you used melting wafers or compound chocolate; real chocolate that hasn’t been tempered can fail to set properly. Follow the wafer package directions carefully.
- Uneven dip coverage: Work methodically — pick up the truffle with a fork, tap it gently on the bowl edge to remove drips, and return it to parchment. A second quick rotation with a fork and spoon can help tidy the finish before it sets.
Refrigerate, Freeze, Reheat
Storage is one of the strengths of these truffles. After coating, refrigerate the truffles for about 1 hour to set, then keep them covered in the refrigerator until serving. They stay good in the fridge for several days, and cold keeps them firm and fresh-tasting.
For longer-term storage, these truffles freeze well. Place them in a single layer on parchment to flash-freeze, then transfer to an airtight container or freezer bag with parchment between layers. Thaw in the refrigerator before serving to avoid condensation on the coating.
Do not attempt to reheat truffles. The coating can melt and the texture will suffer. If you need a glossy finish after thawing, a quick, precise drizzle of slightly warmed wafer can refresh the look; keep that drizzle minimal and allow it to set in the fridge.
Your Top Questions
Can I use reduced-fat or flavored cream cheese? You can, but reduced-fat varieties may be softer and slightly less stable. Flavored cream cheese will change the taste; that’s fine if you want a twist, but expect a different flavor profile.
Do I have to use Ghirardelli wafers? No. Ghirardelli wafers are named in the ingredient list, but any melting wafers or compound coating designed for dipping will work similarly. The important part is the product’s melting and setting behavior.
Can I make these ahead? Yes. You can shape the centers and chill them overnight before dipping, or fully coat them and refrigerate for several days. For longer storage, freeze as described above.
How do I keep the coating shiny? Use fresh, well-melted wafers and avoid overheating. Follow the package directions and stir gently. A smooth, even dip and quick setting in the fridge preserves a glossy finish.
Time to Try It
Make the dough, roll the balls, and chill. The rest is just dipping and a little patience. Follow the exact steps above and you’ll have consistent results that look and taste like you spent way more time. Share a batch, tuck a few into gift boxes, or keep them in the fridge for midnight cravings. When you try them, come back and tell me which coating you used and whether you added festive sprinkles — I love hearing small variations that worked for you.
Easy Oreo Truffles
Ingredients
Equipment
Method
- Line a cookie sheet with parchment paper. Place the entire 15-ounce package of Oreos in a food processor and process until fine crumbs form.
- Cut the 8 ounces of room-temperature cream cheese into 6–8 pieces and add them to the Oreo crumbs.
- Process the crumbs and cream cheese together until the mixture is smooth and well combined, about 1–2 minutes. Scrape down the bowl as needed. The mixture should hold together when pressed.
- Use a small scoop or a tablespoon to portion and shape the mixture into tightly packed 1-inch balls. Roll between your palms to smooth, then place the balls on the prepared parchment-lined cookie sheet.
- Chill the truffle balls in the refrigerator for at least 1 hour (or overnight) until firm.
- Melt the Ghirardelli White or Dark Melting Wafers (from the 12-ounce package[s] listed in the ingredients) according to the package directions. If needed, melt additional wafers so you have enough coating.
- Working with a few chilled truffles at a time, dip each ball into the melted wafers using a fork or dipping tool, letting excess coating drip back into the bowl. Return the coated truffle to a parchment-lined sheet.
- If using sprinkles, add them immediately after dipping, before the coating hardens.
- Refrigerate the coated truffles for about 1 hour to set. Store covered in the refrigerator until serving.