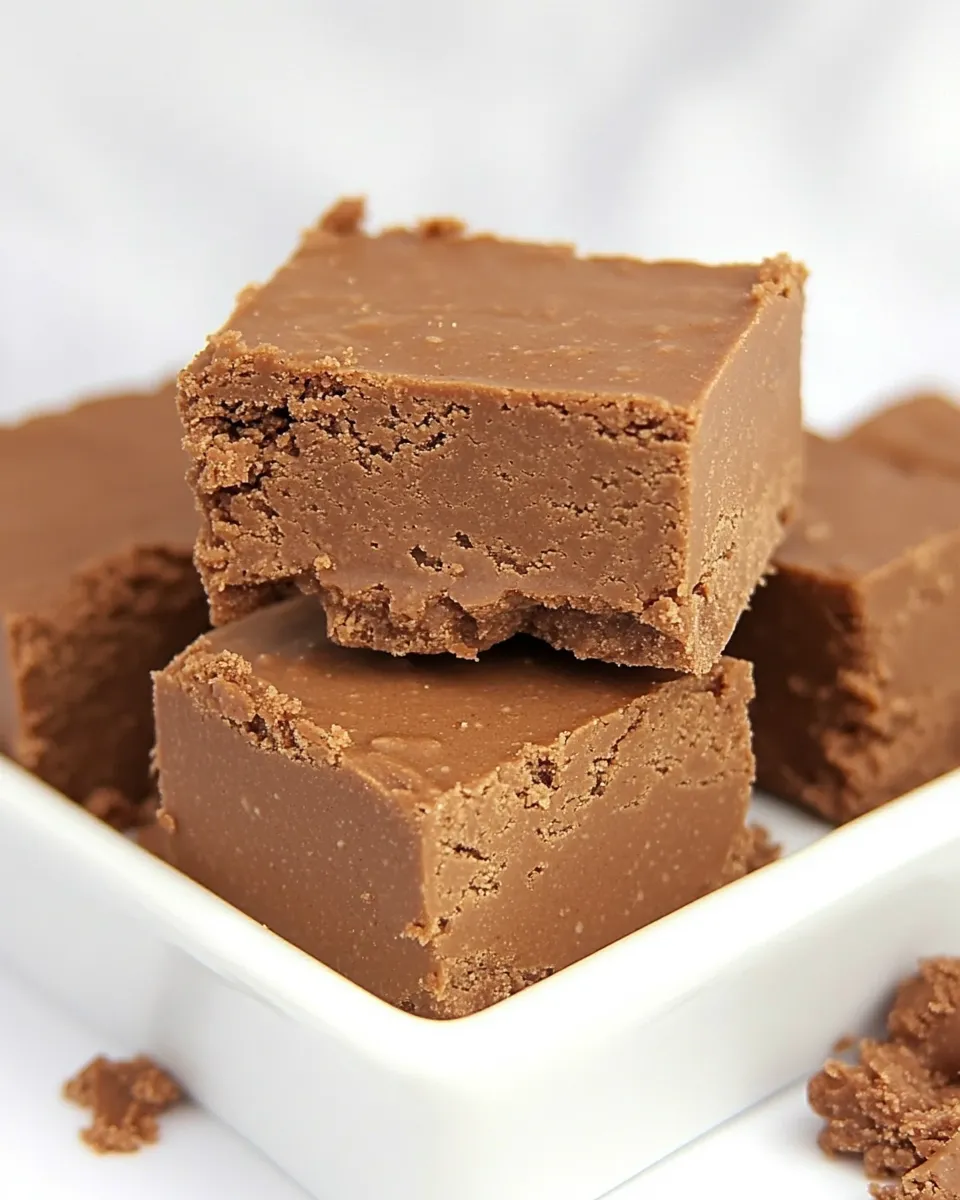
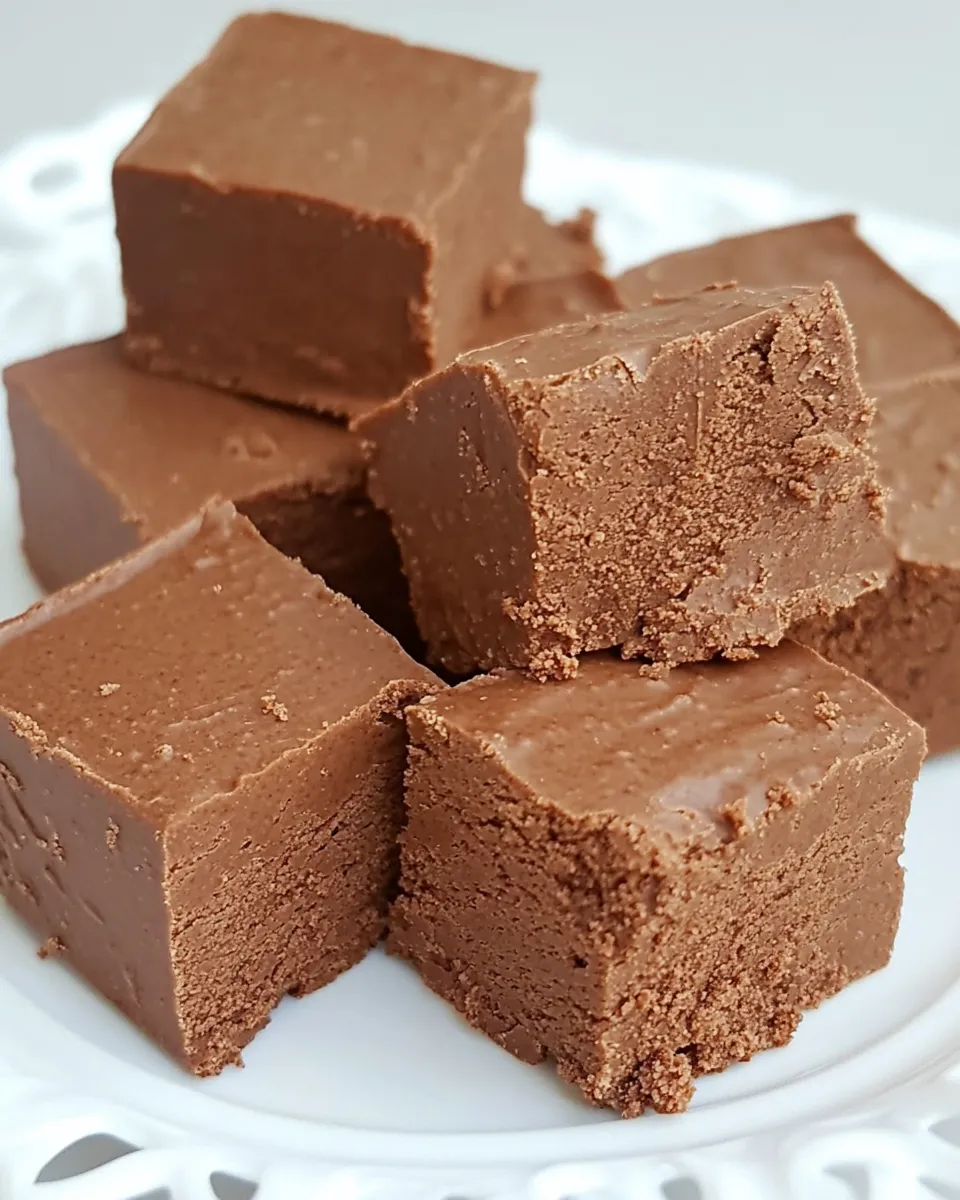
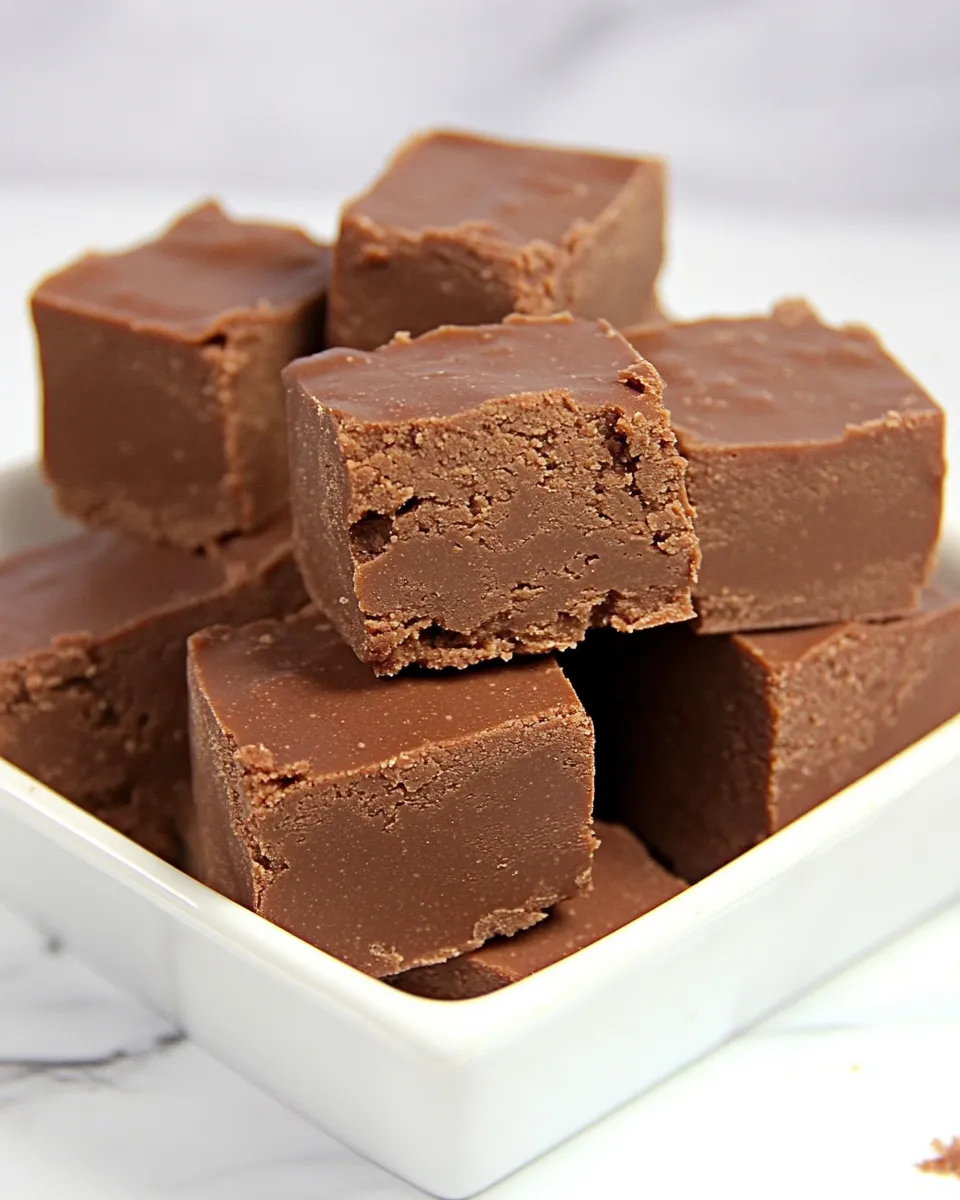
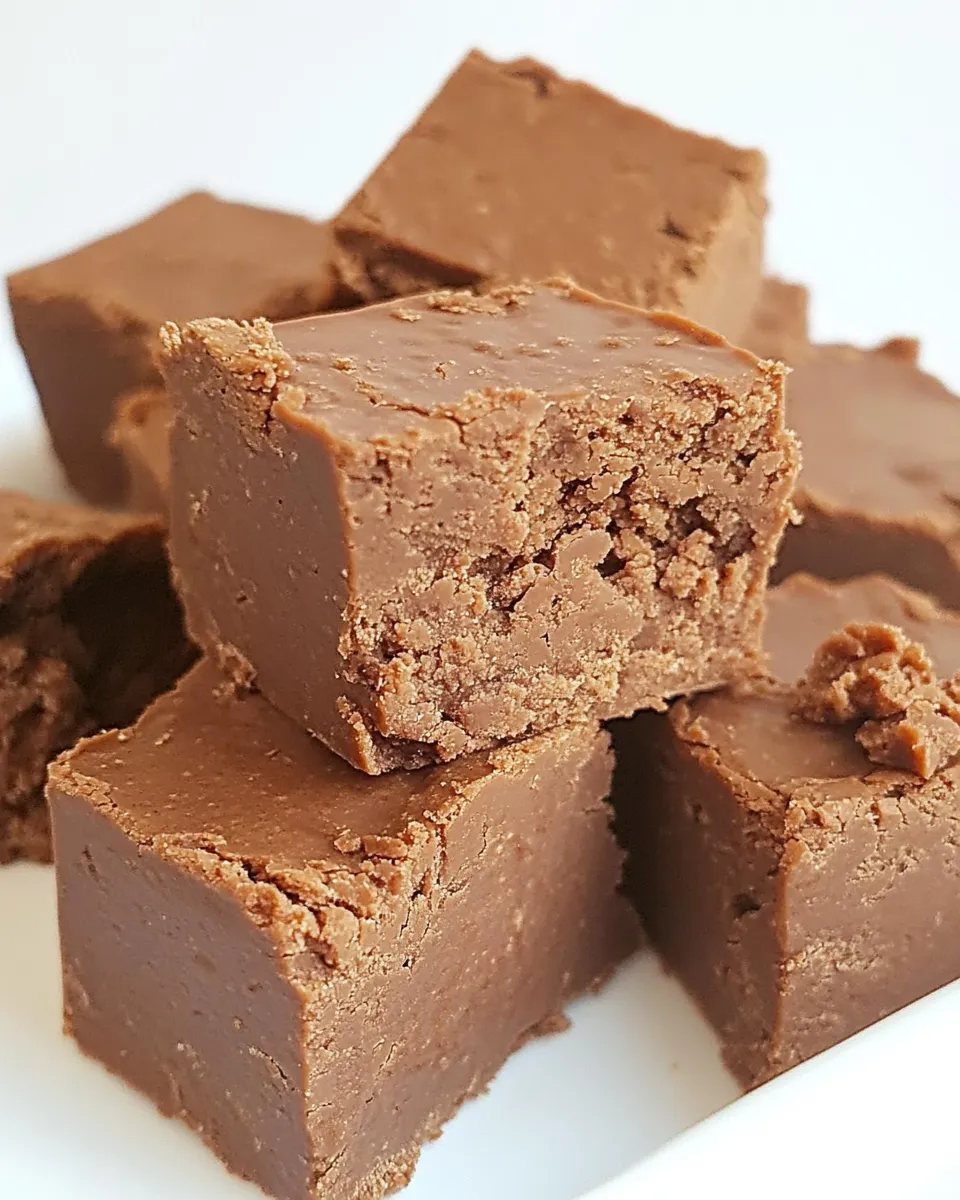
Fantasy Fudge
Fantasy Fudge is the kind of recipe that feels like a small kitchen miracle: a few pantry staples, a microwave, and about twenty minutes of hands-on time give you glossy, sliceable fudge. It’s straightforward but forgiving, which makes it perfect for last-minute gift trays, bake sales, or a quick weekend treat. I keep a pan in the fridge for friends and family who drop by unexpectedly; it disappears fast.
This version leans on convenience without sacrificing texture. The marshmallow creme gives it chew and sheen, while the chocolate chips and evaporated milk build that classic fudgy body. You don’t need a candy thermometer, and the steps are repeatable—follow them, and you’ll get consistent results.
Below I lay out everything you need to shop for, the exact microwave steps to follow, and practical notes I wish someone had told me the first time I made this. Read the method closely, prep your gear, and you’ll be slicing neat squares in no time.
Shopping List
- 3/4 cup butter — provides fat and richness; use unsalted if you want precise control over salt.
- 3 cups granulated sugar — creates the structure and chew; measure carefully for texture.
- 2/3 cup evaporated milk — equivalent to a small can, or measure out from a larger can; adds creaminess and stability.
- 12 oz. semi-sweet chocolate chips — the primary chocolate flavor; semi-sweet balances sweetness with depth.
- 7 oz. Jet-Puffed marshmallow creme — gives shine and a soft chew; it melts into the warm chocolate for a smooth finish.
Method: Fantasy Fudge
- Line an 8×8-inch baking pan with foil, leaving an overhang on two sides; set the pan aside.
- Put 3/4 cup butter in a large microwave-safe bowl. Microwave on HIGH for 1 minute, then stir until the butter is completely melted.
- Add 3 cups granulated sugar and 2/3 cup evaporated milk to the bowl and stir until combined.
- Microwave the mixture on HIGH for 3 minutes. Carefully remove the bowl and stir.
- Microwave on HIGH for 2 minutes. Carefully remove and stir.
- Microwave on HIGH for 3 minutes. Carefully remove and stir. (The mixture will begin to bubble and expand.)
- Microwave on HIGH for 2 1/2 minutes. Carefully remove and stir. Be careful—the bowl and mixture will be very hot, and the mixture can bubble and rise to twice its original volume; use a large microwave-safe bowl.
- Let the hot mixture sit for 2 minutes to settle slightly.
- Stir in 12 oz semi-sweet chocolate chips until they are fully melted and the mixture is smooth.
- Add 7 oz marshmallow creme and stir until the fudge is fully combined and smooth.
- Pour the fudge into the prepared foil-lined pan and spread it evenly.
- Let the fudge cool completely at room temperature until set.
- Use the foil overhang to lift the set fudge from the pan, peel off the foil, and cut into squares. Store at room temperature.
Why Cooks Rave About It
People love this fudge because it delivers classic, nostalgic flavor with minimal fuss. Unlike stove-top fudge that requires precise boiling and a candy thermometer, this method lets you rely on timed microwave bursts and attentive stirring. That makes it accessible to bakers who don’t want to babysit sugar stages.
Texture plays a big role. The evaporated milk contributes density without watering down the chocolate, and the marshmallow creme smooths out the finish and prevents a grainy outcome if you stir thoroughly. The result is a glossy, slightly chewy fudge that cuts cleanly when fully cooled.
Finally, it’s fast and forgiving. If you need a last-minute dessert or edible gift, you can have a pan cooling on the counter within half an hour. That convenience is a big reason this recipe shows up in my rotation for potlucks and holidays.
Dairy-Free/Gluten-Free Swaps
Gluten: This recipe is naturally gluten-free as written. Check your chocolate chips and marshmallow creme labels if you need to avoid cross-contamination—some brands label for shared equipment.
Dairy-free options are possible but require care. Replace the butter with a solid dairy-free spread or coconut oil (use one with a neutral flavor). Swap evaporated milk for canned full-fat coconut milk reduced slightly on the stove until creamy, or use a commercial evaporated plant milk if available. Use dairy-free chocolate chips and a marshmallow creme alternative that is labeled vegan—texture will vary, and you may need to adjust cooling times. When testing swaps, make a small batch first to confirm the texture before gifting or serving.
Gear Up: What to Grab
- 8×8-inch baking pan — for correct thickness and set time.
- Aluminum foil — lines the pan and creates a clean lift for easy slicing.
- Large microwave-safe bowl — very important; the mixture expands and can bubble vigorously.
- Heat-resistant spatula or wooden spoon — for stirring hot, thick sugar mixtures.
- Measuring cups — especially for the 3 cups sugar and 2/3 cup evaporated milk to keep texture consistent.
- Knife or bench scraper — for slicing squares once set.
Pitfalls & How to Prevent Them
Overboiling and Hot Bubbles
The biggest hazard here is using a bowl that’s too small. The recipe’s heated mixture expands and can surge over the rim. Always use a bowl several times larger than the mixture volume. When removing the bowl, use oven mitts—the sugar mixture retains heat and can splatter.
Grainy Texture
Graininess usually comes from inadequate stirring or sugar not fully dissolved before the final heat cycles. Stir thoroughly after each microwave interval, and let the mixture settle for the 2-minute rest before adding chocolate. The marshmallow creme also helps smooth the texture if fully incorporated.
Chocolate Seizing
If chocolate clumps or seizes when added, it often means the chocolate encountered moisture or the mixture was too hot. Let the mixture cool slightly (the recipe calls for a short rest) before adding chips, and stir gently until smooth. If it still seizes, a small splash of warm evaporated milk can sometimes loosen it—add sparingly.
Holiday-Friendly Variations
This fudge base is a great canvas for seasonal riffs. Keep the core measurements the same and fold in mix-ins after the chocolate melts but before you add the marshmallow creme—this keeps mix-ins distributed without disrupting the final sheen.
- Chocolate Peppermint: Fold in 1/2 cup crushed candy canes and sprinkle a little on top before it sets for a festive crunch and a peppermint-chocolate pairing.
- Nutty Holiday: Stir in 1/2 cup toasted pecans or walnuts for texture and a toasty note.
- Spiced Ginger: Add 1/2 teaspoon ground ginger and a pinch of cinnamon to the melted chocolate for warm spice; top with crystallized ginger pieces.
- Decorative Finish: Press festive sprinkles onto the surface while the fudge is warm for an eye-catching gift.
Cook’s Notes
Pan size matters. An 8×8-inch pan yields medium-thick squares; a larger pan will give thinner pieces. Lining with foil makes lifting and cutting much easier—be sure to leave enough overhang on two sides so you can lift the whole slab out cleanly.
When spreading the fudge, work quickly but gently. A lightly oiled offset spatula or the back of a spoon works well. If the surface cools before spreading, warm the bottom of the pan slightly or reheat gently in the microwave for a few seconds to regain spreadability.
Timing in the microwave can vary with wattage. If your microwave is significantly weaker or stronger than average, adjust sensible: shorter intervals and frequent stirring reduce the risk of overheating. The recipe’s multiple short cycles are designed to be forgiving—follow them and use caution.
Make-Ahead & Storage
This recipe stores well at room temperature. Keep the fudge in an airtight container at room temp for up to a week. For longer storage, freeze in a single layer on a tray until firm, then stack between parchment with airtight wrapping; thaw at room temperature before serving. Avoid the refrigerator unless your kitchen is very warm—refrigeration can make the fudge firmer and change the mouthfeel.
If you’re making these as gifts, cut the squares and layer them between sheets of wax paper in a box or tin. They travel well at room temperature for short periods, but avoid leaving them in hot cars or direct sun.
Troubleshooting Q&A
- Q: My fudge didn’t set—why?
A: If the mixture was undercooked or too much liquid was used, it can stay soft. Ensure you follow the microwave times and measure the evaporated milk accurately. Cooling completely at room temperature is essential before cutting. - Q: The mixture foamed up and spilled—what now?
A: Turn off the microwave immediately and let everything cool before attempting to clean. For next time, use a larger bowl and reduce microwave intervals; stir between each to release steam. - Q: Chocolate looks dull or streaky after stirring—help?
A: Melted chocolate can dull if it cools unevenly. Keep stirring until smooth and add the marshmallow creme while the chocolate is still warm to restore gloss. If it’s too cool, a few seconds in the microwave can help, but heat in short bursts.
Bring It to the Table
Slice the fudge into 1-inch squares for a classic look, or cut larger for an indulgent bite. Arrange on a simple white plate or stack in a small box wrapped with a ribbon for gifting. Pair with strong coffee or a glass of cold milk—the fudge’s richness loves a simple counterpoint.
For parties, place small squares on festive picks or serve alongside other bite-sized sweets for a varied dessert tray. Because the recipe is quick to scale, you can double the batch in a 9×13 pan or make multiple 8×8 pans to create a spread of flavors using the holiday variations above.
Make a batch, and you’ll see why this Fantasy Fudge disappears faster than most desserts. It’s reliably delicious, quick to execute, and flexible enough for seasonal creativity. Happy cooking—and enjoy the easy luxury of homemade fudge.
Fantasy Fudge
Ingredients
Equipment
Method
- Line an 8×8-inch baking pan with foil, leaving an overhang on two sides; set the pan aside.
- Put 3/4 cup butter in a large microwave-safe bowl. Microwave on HIGH for 1 minute, then stir until the butter is completely melted.
- Add 3 cups granulated sugar and 2/3 cup evaporated milk to the bowl and stir until combined.
- Microwave the mixture on HIGH for 3 minutes. Carefully remove the bowl and stir.
- Microwave on HIGH for 2 minutes. Carefully remove and stir.
- Microwave on HIGH for 3 minutes. Carefully remove and stir. (The mixture will begin to bubble and expand.)
- Microwave on HIGH for 2 1/2 minutes. Carefully remove and stir. Be careful—the bowl and mixture will be very hot, and the mixture can bubble and rise to twice its original volume; use a large microwave-safe bowl.
- Let the hot mixture sit for 2 minutes to settle slightly.
- Stir in 12 oz semi-sweet chocolate chips until they are fully melted and the mixture is smooth.
- Add 7 oz marshmallow creme and stir until the fudge is fully combined and smooth.
- Pour the fudge into the prepared foil-lined pan and spread it evenly.
- Let the fudge cool completely at room temperature until set.
- Use the foil overhang to lift the set fudge from the pan, peel off the foil, and cut into squares. Store at room temperature.
Notes
Microwave Wattage Matters
:
My microwave is 1,000 watts, and this recipe works best in microwaves between 900-1,050 watts. If yours differs, consider using a
microwave conversion chart
to adjust the timing.