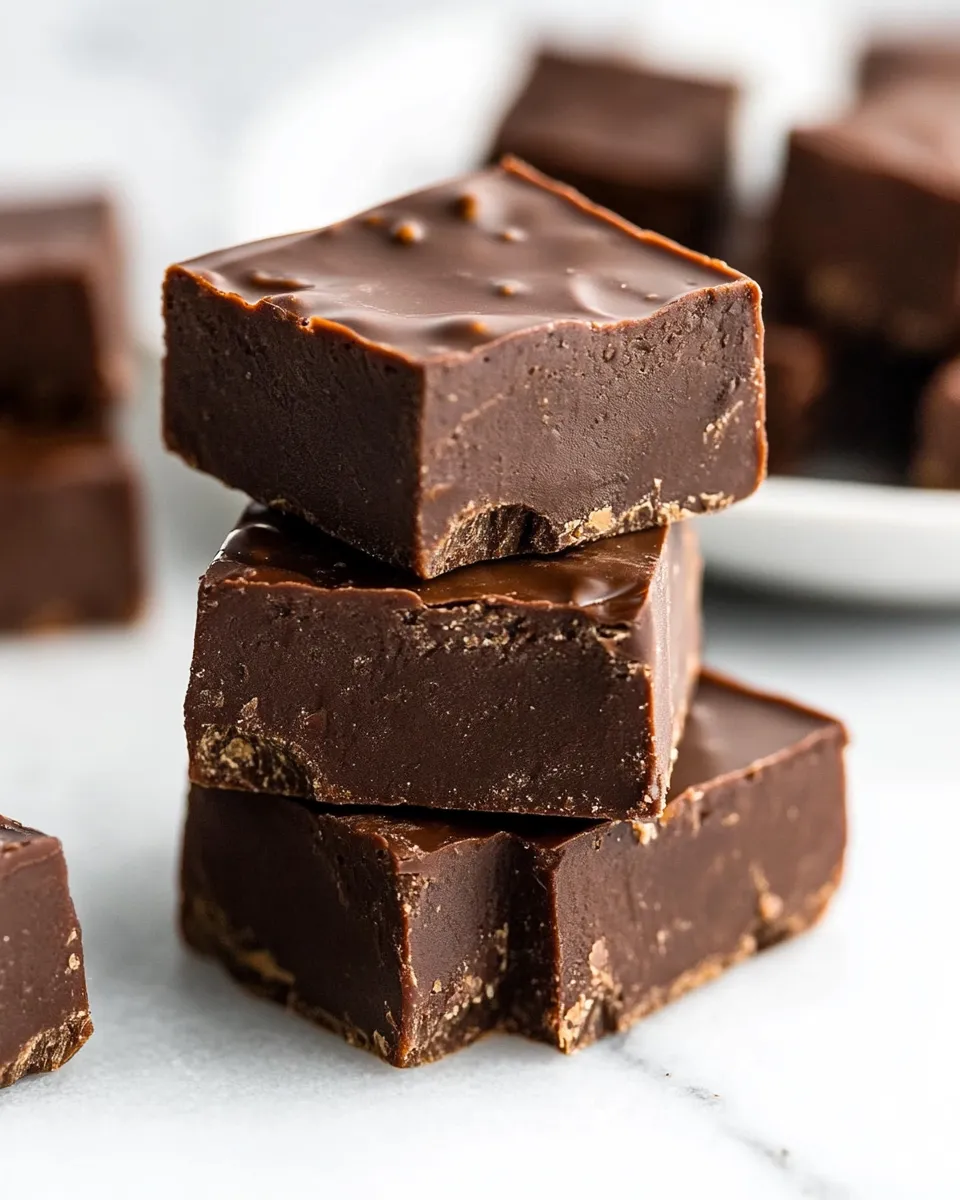
Foolproof Chocolate Fudge
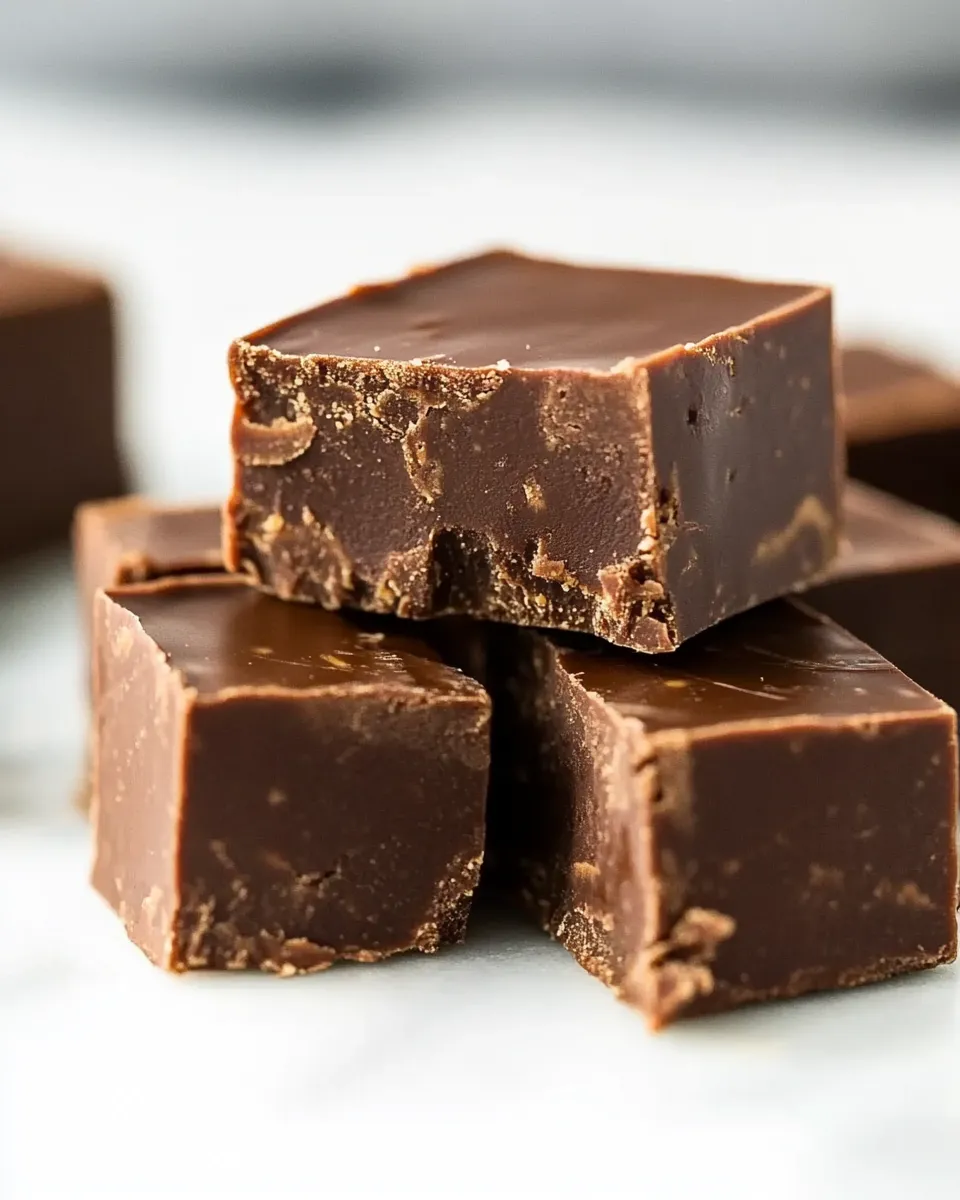
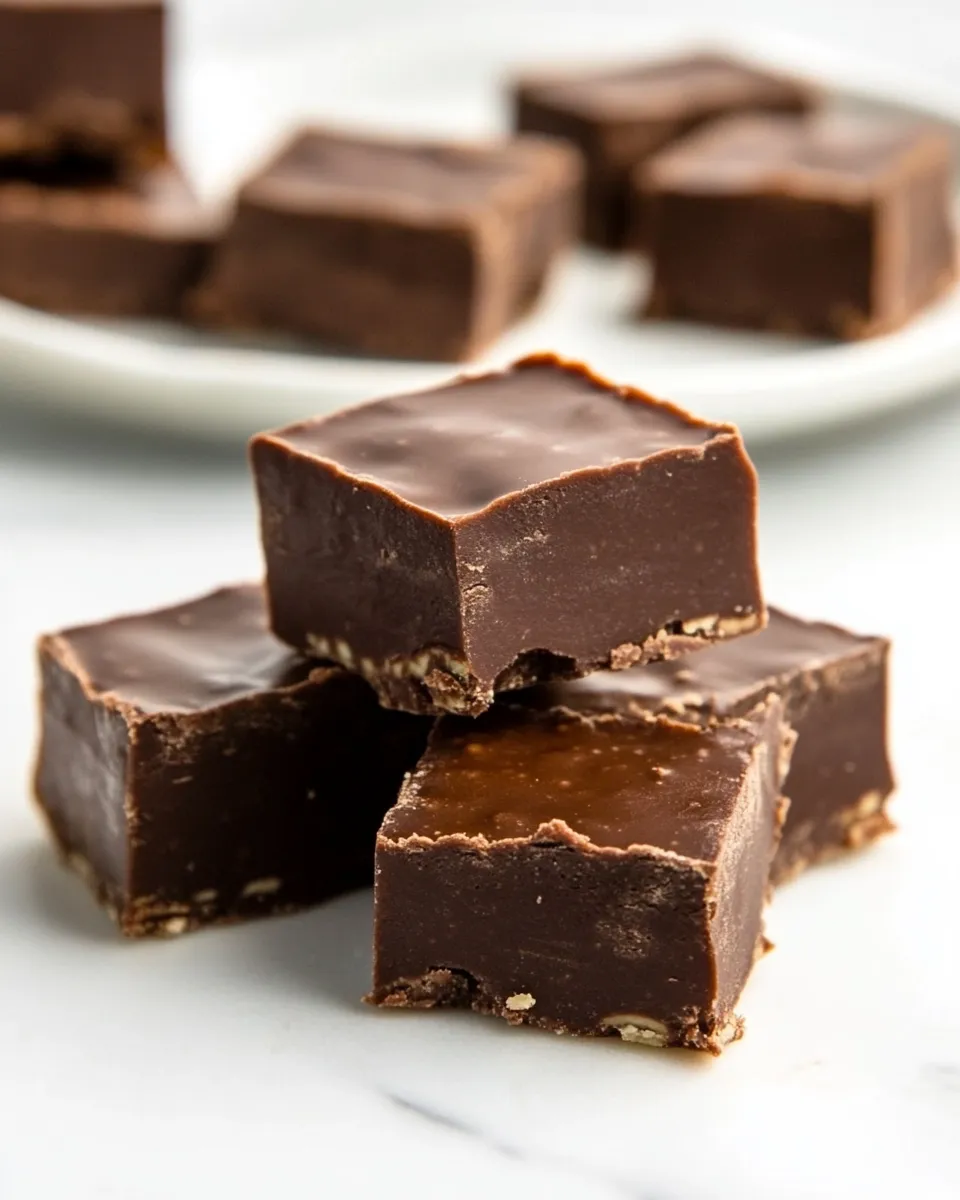
This fudge is the kind I make when I want chocolate that behaves—rich, glossy, and forgiving. No candy thermometer, no tempering, no guesswork. It relies on one simple trick: sweetened condensed milk and gentle, indirect heat. You melt everything together until glossy, chill it until set, and cut clean squares that hold their shine.
I call it “foolproof” because the method is intentionally hands-off and predictable. Little changes in timing won’t ruin it, and you can customize the texture with nuts or crushed canes. Whether you need a last-minute tray for neighbors or a homemade gift, this recipe delivers every time.
Ingredient List
- 1 14-ounce can sweetened condensed milk (NOT evaporated milk) — The sugary, milky base that gives fudge its set and chew; don’t substitute evaporated milk.
- 1 teaspoon pure vanilla extract — Adds depth and rounds the chocolate flavor; use good-quality vanilla.
- 20 ounces semi-sweet chocolate, roughly chopped — The main flavor and structure; chop it so it melts evenly.
- 3 tablespoons unsalted butter, cut into 1/2-inch pieces, at room temperature — Adds shine and a silky mouthfeel; room temp pieces melt uniformly.
- Flaky sea salt, for sprinkling, optional — A finishing touch; a little brightens the chocolate.
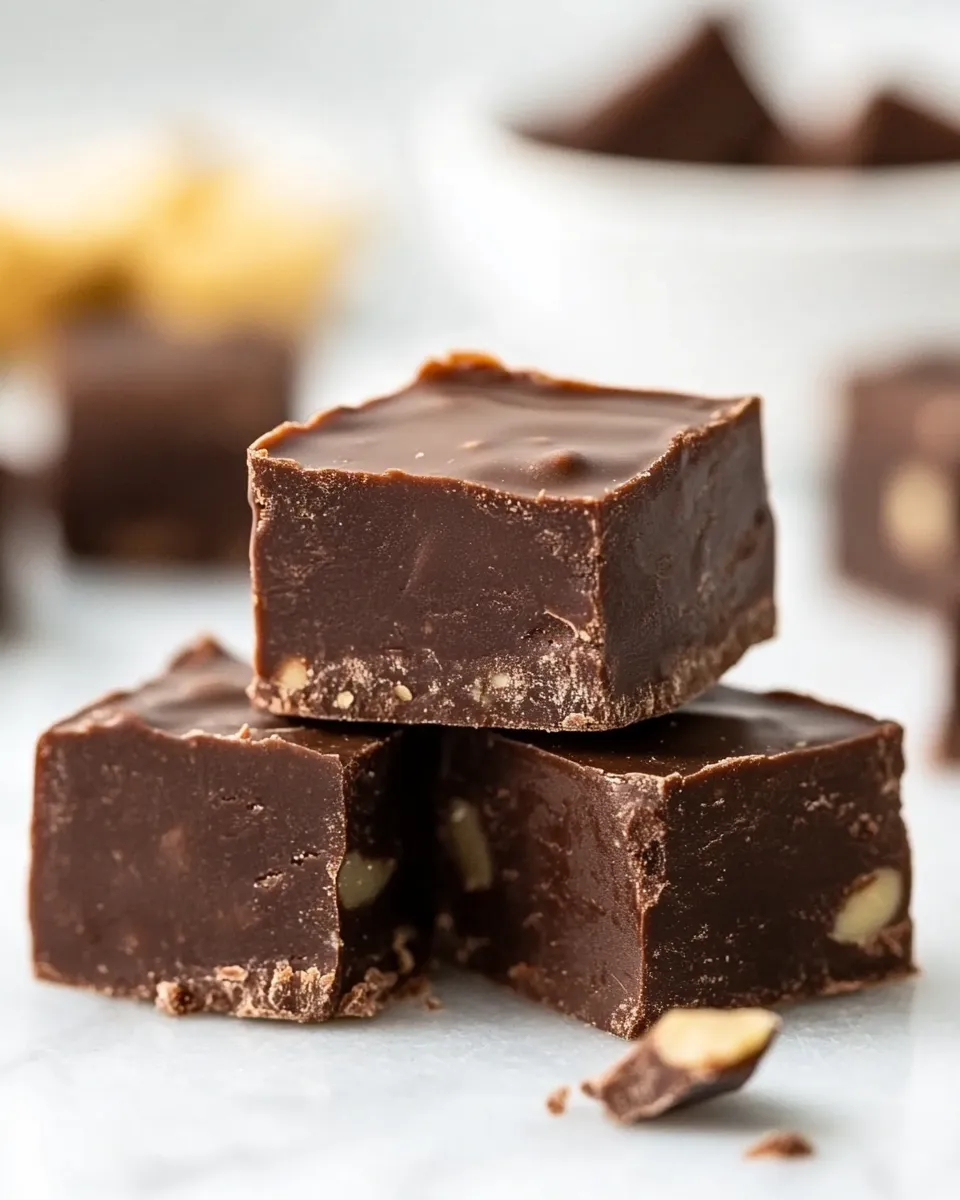
- 1/2 cup chopped nuts or crushed canes, optional — Stirred in for texture or pressed on top; use your favorite crunchy add-in.
From Start to Finish: Foolproof Chocolate Fudge
- Lightly grease an 8×8-inch baking pan. Line the pan with parchment paper or aluminum foil, allowing excess to overhang two opposite sides; set the pan aside.
- In a large heatproof bowl, combine the sweetened condensed milk, vanilla extract, chopped semi-sweet chocolate, and butter pieces; set the bowl aside.
- Place a medium saucepan on the stove and add cold water to reach about 1/4 of the pan’s depth. Bring the water to a boil, then reduce the heat so it is barely simmering.
- Set the heatproof bowl on top of the saucepan (the bottom of the bowl should not touch the simmering water). Stir the mixture continuously with a rubber spatula until the chocolate is almost fully melted and only a few small pieces remain, about 4 minutes. Remove the bowl from the heat before the chocolate is completely melted to help prevent the chocolate from separating.
- Off the heat, continue stirring the mixture until the chocolate is fully melted and the mixture is smooth, about 2 minutes.
- Stir in the chopped nuts or crushed canes if using. Scrape the fudge mixture into the prepared pan and spread it into an even layer with a spatula. Sprinkle flaky sea salt on top if desired.
- Refrigerate the pan until the fudge is firm and set, about 2 hours.
- To remove, gently run a butter knife around the edge of the pan if needed, then lift the fudge from the pan using the parchment or foil overhang. Transfer to a cutting board, peel off the parchment or foil, and cut into squares.
- Serve at once or store the fudge in the refrigerator for up to 1 month. To freeze, place in an airtight, freezer-safe container for up to 2 months.
Reasons to Love Foolproof Chocolate Fudge
It’s reliable. Using sweetened condensed milk removes the guesswork of sugar crystallization and gives a consistent set every time. There’s no candy thermometer, no boiling sugar, and no need to worry about soft balls or firm balls—just gentle melting and a short chill.
It’s fast. Active hands-on time is under ten minutes. The rest is passive chilling. That makes this recipe perfect for busy weeknights when you want a homemade treat without a big time commitment.
It’s flexible. Semi-sweet chocolate keeps the flavor balanced, but the texture is a neutral canvas. Add nuts, pressed salt, or crushed canes for crunch; drizzle with extra melted chocolate or leave it classic. The results are always rich and chocolate-forward.
Substitutions by Category
- Chocolate — Swap semi-sweet for dark (more intense) or milk (sweeter) chocolate. If you change chocolate type, expect small texture and flavor shifts but similar set.
- Fat — Unsalted butter gives shine and mouthfeel; if needed, use salted butter and reduce or skip the finishing salt. Margarine can work in a pinch but will alter flavor slightly.
- Sweetener/Base — This method depends on sweetened condensed milk; there’s no direct one-to-one replacement. Vegan condensed milk alternatives exist, but results will vary—test once before gifting lots.
- Add-ins — Chopped nuts, crushed canes, toasted seeds, or cookie pieces work well. Add no more than about 1/2 cup to avoid undermining the set.
- Flavors — Swap vanilla for a splash of almond or orange extract very lightly—these are stronger, so use sparingly (start with half the amount).
Gear Checklist
- 8×8-inch baking pan (lightly greased)
- Parchment paper or aluminum foil for easy removal
- Large heatproof bowl that sits securely over a saucepan
- Medium saucepan (for the simmering water)
- Rubber spatula for stirring and spreading
- Butter knife and cutting board for release and slicing
- Measuring spoons and a can opener for the condensed milk
Troubles You Can Avoid
Separation or Grainy Texture
Cause: Overheating chocolate or boiling the water too hard. Fix: Keep the water barely simmering and remove the bowl while a few small pieces remain—carryover heat finishes the job. Gentle, continuous stirring off heat helps smooth the mixture.
Fudge Too Soft or Won’t Set
Cause: Using evaporated milk instead of sweetened condensed milk, or adding too many wet add-ins. Fix: Use only sweetened condensed milk as listed. If a batch is soft, chill it longer; for very soft results, place in the freezer briefly to firm up before cutting.
Dry, Chalky Fudge
Cause: Over-stirring after the chocolate has cooled, or melting at too high a temperature. Fix: Stir just until smooth and glossy; stop once the chocolate is fully melted and mixed. Keep heat gentle.
Messy Slicing
Tip: Warm a large chef’s knife under hot water, dry it, then cut with a single smooth motion. Wipe the blade between cuts for clean squares.
Seasonal Ingredient Swaps
- Winter holidays: Stir in crushed canes (as listed) or press them on top for a peppermint finish. A few drops of peppermint extract paired with the candy adds a classic flavor.
- Fall: Fold in toasted pecans and a pinch of ground cinnamon for a cozy twist. Toasting nuts first deepens their flavor.
- Spring/Summer: Add finely grated orange zest to the melted mixture for bright citrus notes. Zest pairs especially well with dark chocolate.
- Gift-ready: Press whole toasted almonds or pistachios on top, then wrap squares individually for a pretty presentation.
Behind the Recipe
This recipe is built around the reliable chemistry of sweetened condensed milk. It’s pre-sugared and reduced, which lets chocolate and butter emulsify into a stable, glossy matrix without a complex sugar boil. The double-boiler method (bowl over simmering water) supplies gentle, even heat so chocolate melts smoothly and doesn’t seize or split.
I developed this because I wanted homemade fudge that didn’t require a thermomet—something friends could make at home with normal kitchen tools. The small butter addition and the brief off-heat stirring are subtle but crucial. They keep the finish shiny and the texture silky.
Storage & Reheat Guide
Storage: Refrigerate the fudge in an airtight container for up to 1 month. Layer pieces between parchment to prevent sticking. If you prefer a firmer bite, keep it chilled; for slightly softer squares, bring them to room temperature for 15–20 minutes before serving.
Freezing: Place squares in an airtight, freezer-safe container, separating layers with parchment. Freeze up to 2 months. Thaw overnight in the refrigerator or for a few hours at room temperature.
Reheat: Fudge is best served without reheating. If you want to soften it briefly for scooping or drizzling, microwave individual pieces at 5–7 second intervals, testing between bursts so the chocolate doesn’t melt entirely.
Reader Q&A
Q: Can I use evaporated milk instead of sweetened condensed milk?
A: No. The recipe depends on sweetened condensed milk for sweetness and set. Evaporated milk lacks the sugar concentration and will not produce the same texture.
Q: My chocolate seized while melting—what did I do wrong?
A: Seizing usually happens when chocolate meets water or is overheated. Make sure the bowl and spatula are completely dry, keep the water at a bare simmer, and remove the bowl while a few pieces remain—finish melting off the heat by stirring.
Q: Can I make this without dairy?
A: There are plant-based condensed milks on the market; results vary. If you try one, expect small differences in flavor and firmness. I recommend testing a single small batch before making a larger quantity for gifting.
Q: Can I double the recipe?
A: You can double ingredients, but use a larger pan and a larger heatproof bowl so the water bath remains effective. Keep the same gentle heating approach; stirring time may be slightly longer.
Make It Tonight
If you want fudge tonight, you can be eating it in about 2 hours and 15 minutes. Active prep is under 10 minutes, then pop it into the fridge for about 2 hours to set. Line your pan first, gather the chopped chocolate and butter, and get comfortable stirring—the rest is simple and satisfying.
Follow the steps exactly, keep the heat low, and trust the chill. You’ll end up with glossy, cuttable squares that feel like a little triumph every time. Enjoy—and if you try a variation, tell me how it turned out.
Foolproof Chocolate Fudge
Ingredients
Equipment
Method
- Lightly grease an 8×8-inch baking pan. Line the pan with parchment paper or aluminum foil, allowing excess to overhang two opposite sides; set the pan aside.
- In a large heatproof bowl, combine the sweetened condensed milk, vanilla extract, chopped semi-sweet chocolate, and butter pieces; set the bowl aside.
- Place a medium saucepan on the stove and add cold water to reach about 1/4 of the pan’s depth. Bring the water to a boil, then reduce the heat so it is barely simmering.
- Set the heatproof bowl on top of the saucepan (the bottom of the bowl should not touch the simmering water). Stir the mixture continuously with a rubber spatula until the chocolate is almost fully melted and only a few small pieces remain, about 4 minutes. Remove the bowl from the heat before the chocolate is completely melted to help prevent the chocolate from separating.
- Off the heat, continue stirring the mixture until the chocolate is fully melted and the mixture is smooth, about 2 minutes.
- Stir in the chopped nuts or crushed canes if using. Scrape the fudge mixture into the prepared pan and spread it into an even layer with a spatula. Sprinkle flaky sea salt on top if desired.
- Refrigerate the pan until the fudge is firm and set, about 2 hours.
- To remove, gently run a butter knife around the edge of the pan if needed, then lift the fudge from the pan using the parchment or foil overhang. Transfer to a cutting board, peel off the parchment or foil, and cut into squares.
- Serve at once or store the fudge in the refrigerator for up to 1 month. To freeze, place in an airtight, freezer-safe container for up to 2 months.