Fudgy Oreo Brownies
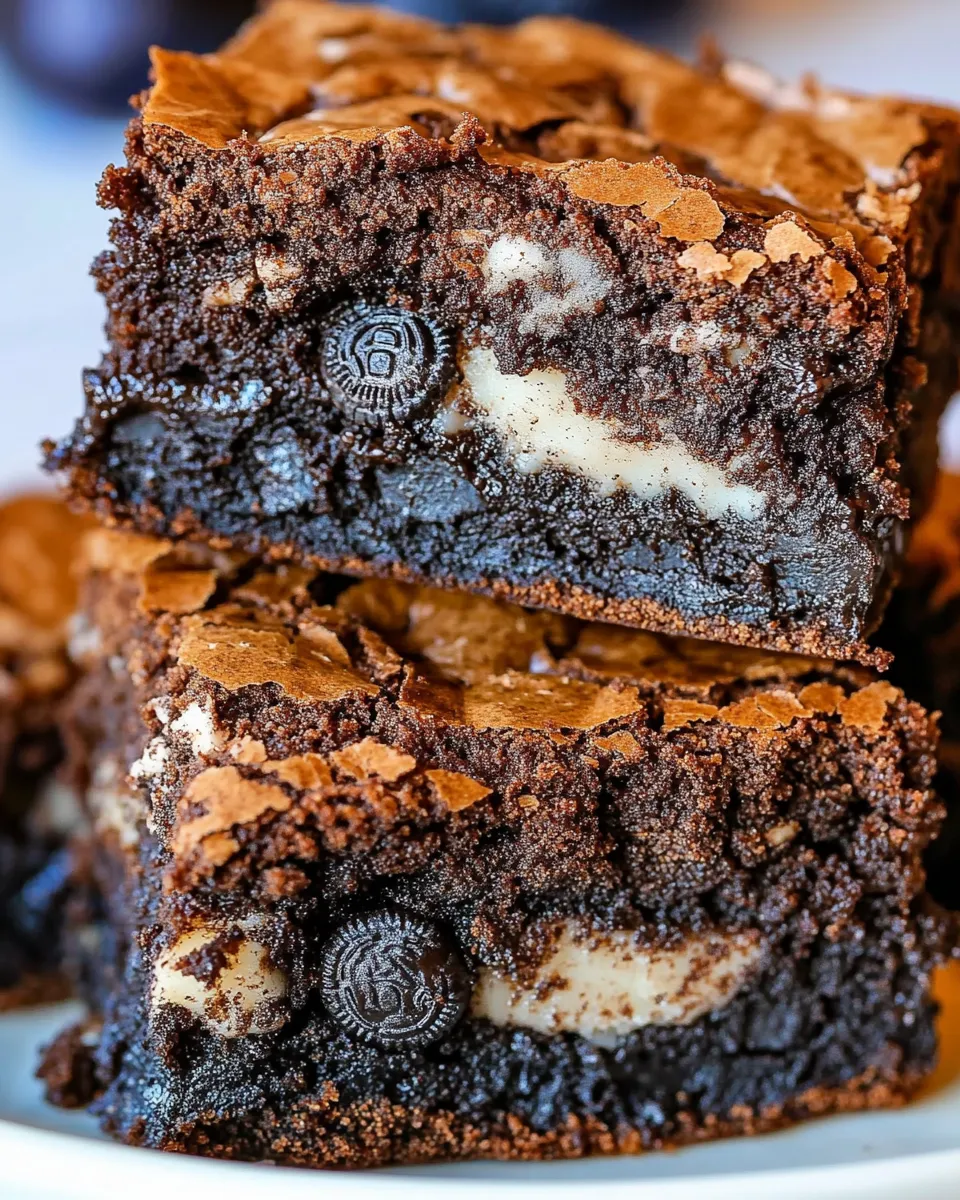
These fudgy Oreo brownies are the kind of dessert I make when I want something dramatic with minimal fuss. Deep chocolate, a layer of whole cookies, and a glossy, slightly crackled top — they look like they took all day, but they come together quickly on a weeknight. They travel well, feed a crowd, and almost always spark a “who made these?” chorus at parties.
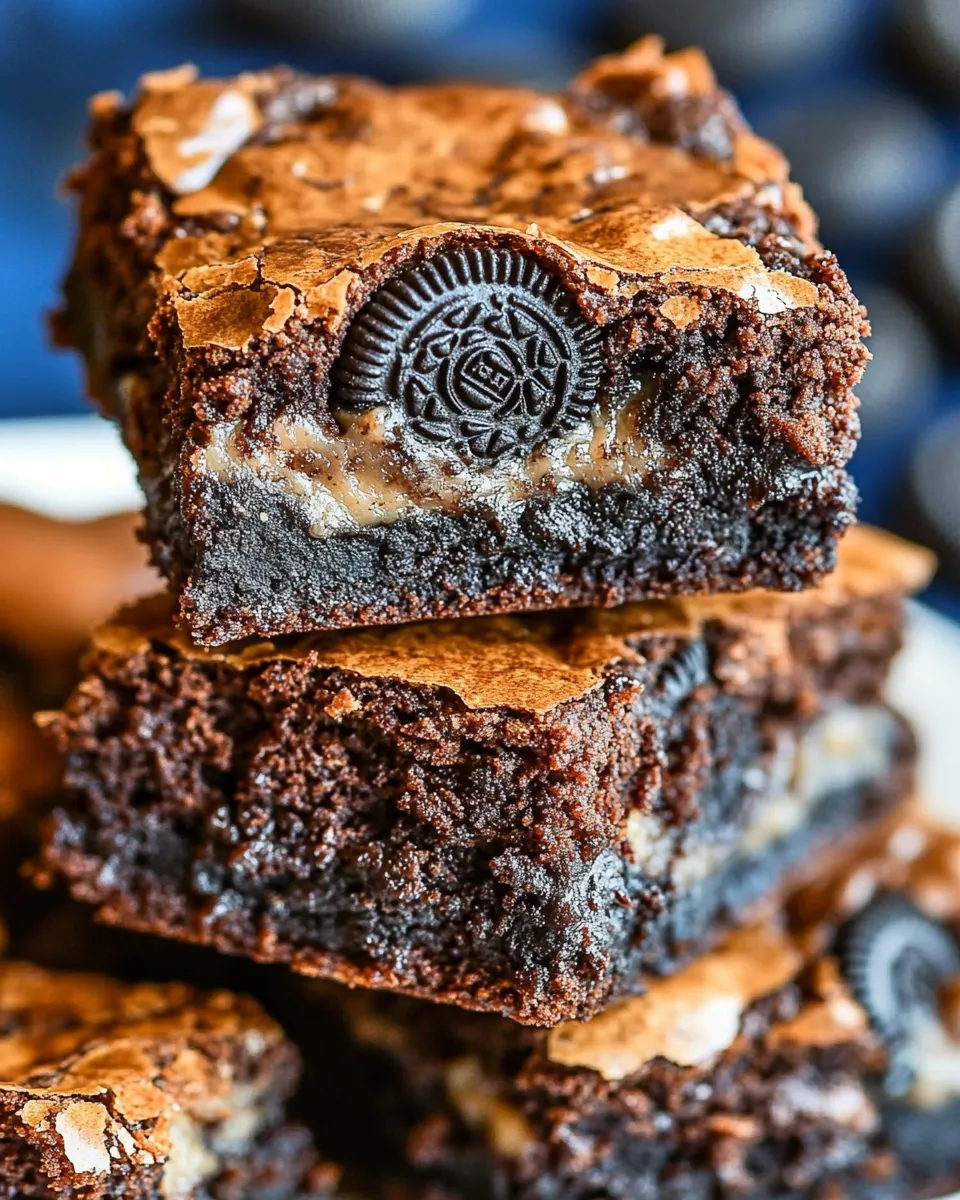
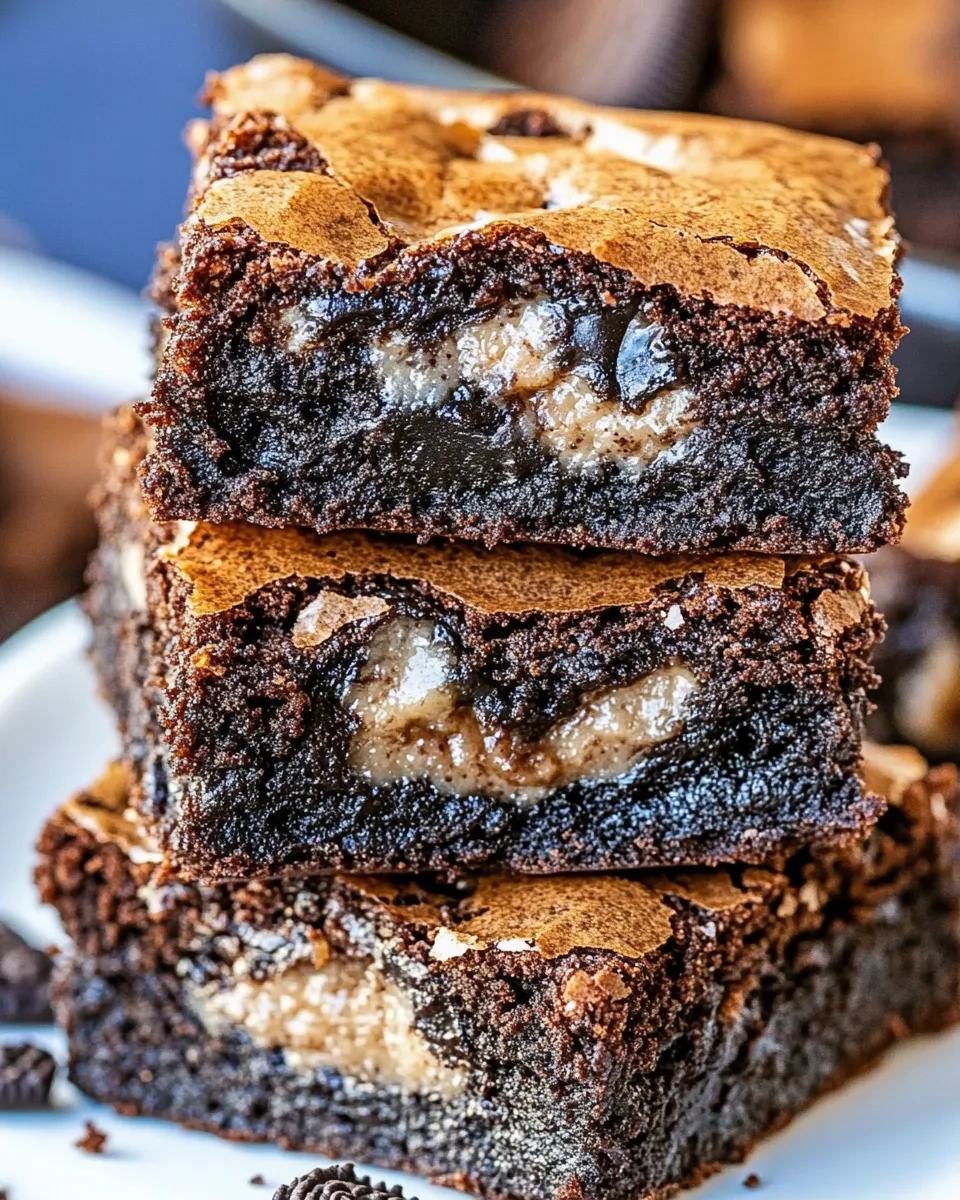
I like to keep the process straightforward: melt chocolate and butter, mix in the dry and wet bits, layer half the batter, add Oreos, then top with the rest. The result is a dense, chewy brownie with pockets where the cookies soften into creamy, chocolatey surprises. No frosting required.
This post gives you everything I wish someone had told me the first dozen times I baked these: what to buy, where to be careful, swap ideas for allergies, and how to store them so they stay as decadent as the day you baked them. Read the Ingredients and Directions closely — those are the source-of-truth steps and amounts — then use the rest of the guide to troubleshoot, plan, and personalize.
Ingredients
- 4ounces (113g)unsweetened baking chocolate, chopped — provides the primary chocolate flavor and body; chop into small pieces so it melts evenly.
- 1cup (226g)unsalted butter, sliced — adds richness and helps create a fudgy texture; slice so it melts uniformly with the chocolate.
- 2cups (400g)granulated sugar — sweetens and contributes to the slightly crackly top; measure by spooning into the cup for accuracy.
- ¼cup (20g)unsweetened cocoa powder — deepens the chocolate profile without adding sweetness; sift if lumpy.
- 4large eggs — structure and shine; room temperature eggs incorporate more easily into warm chocolate.
- 1teaspoon (5ml)vanilla extract — rounds and brightens the chocolate flavor; pure vanilla gives the best aroma.
- ½teaspoonsalt — balances sweetness and intensifies chocolate; use table or fine sea salt.
- 1 ⅓cups (162g)all-purpose flour — provides just enough structure to keep brownies fudgy rather than cakey; whisk before measuring to avoid clumps.
- 24Oreo cookies — the surprise element: a layer of sandwich cookies that soften but keep some bite after baking; use standard Oreos (not mini).
Your Shopping Guide
When shopping for these brownies, focus on quality in a couple of places that make a big difference: the unsweetened baking chocolate and the Oreos. Unsweetened chocolate gives control over sweetness and provides the intense cocoa backbone this recipe needs. If you prefer a milder chocolate note, pair the unsweetened baking chocolate with a slightly higher-quality cocoa powder.
Buy the butter you use for most baking; unsalted is called for so you can control the salt level precisely. If your butter has a very high water content or a marginal flavor, the end brownie can feel flat, so a reliable brand matters.
Measure sugar and flour carefully. The recipe gives gram weights for several items — if you have a kitchen scale, use it. It reduces variability, especially with flour. For the Oreos, standard sandwich cookies are perfect; if your local supermarket offers generics, they’re fine as long as they’re the regular size. Avoid minis — they change the cookie distribution and can make the middle overly dense.
Directions: Fudgy Oreo Brownies
- Preheat the oven to 350°F (175°C). Line a 9×13-inch baking pan with foil or parchment paper and lightly spray the lining with nonstick cooking spray.
- Place the chopped unsweetened baking chocolate and the sliced unsalted butter in a large microwave-safe bowl.
- Microwave on high in 30-second increments, stirring between each increment, until the chocolate and butter are fully melted and the mixture is smooth (about 2 minutes total, depending on your microwave).
- Stir the granulated sugar and the unsweetened cocoa powder into the melted chocolate and butter until combined.
- Add the eggs (one at a time if you prefer) and the vanilla extract, stirring after each addition until incorporated. Stir in the ½ teaspoon salt. The batter may look slightly grainy but should be smooth overall.
- Gently fold in the all-purpose flour until just combined and no streaks of flour remain. Do not overmix.
- Pour half of the batter into the prepared pan and spread it into an even layer using a spatula.
- Arrange all 24 Oreo cookies in a single even layer over the batter. Space them so they cover the batter as uniformly as possible.
- Spoon the remaining batter over the Oreos and gently spread to cover them. It’s okay if some cookies remain partially visible; try to create an even top layer without forcing the batter too thin.
- Bake in the preheated oven for 25–35 minutes. The brownies are done when the top is no longer glossy and a toothpick inserted about 2 inches from the side comes out with just a few moist crumbs.
- Remove the pan from the oven and let the brownies cool completely in the pan. Use the foil or parchment to lift the brownies from the pan before slicing.
Why It Deserves a Spot
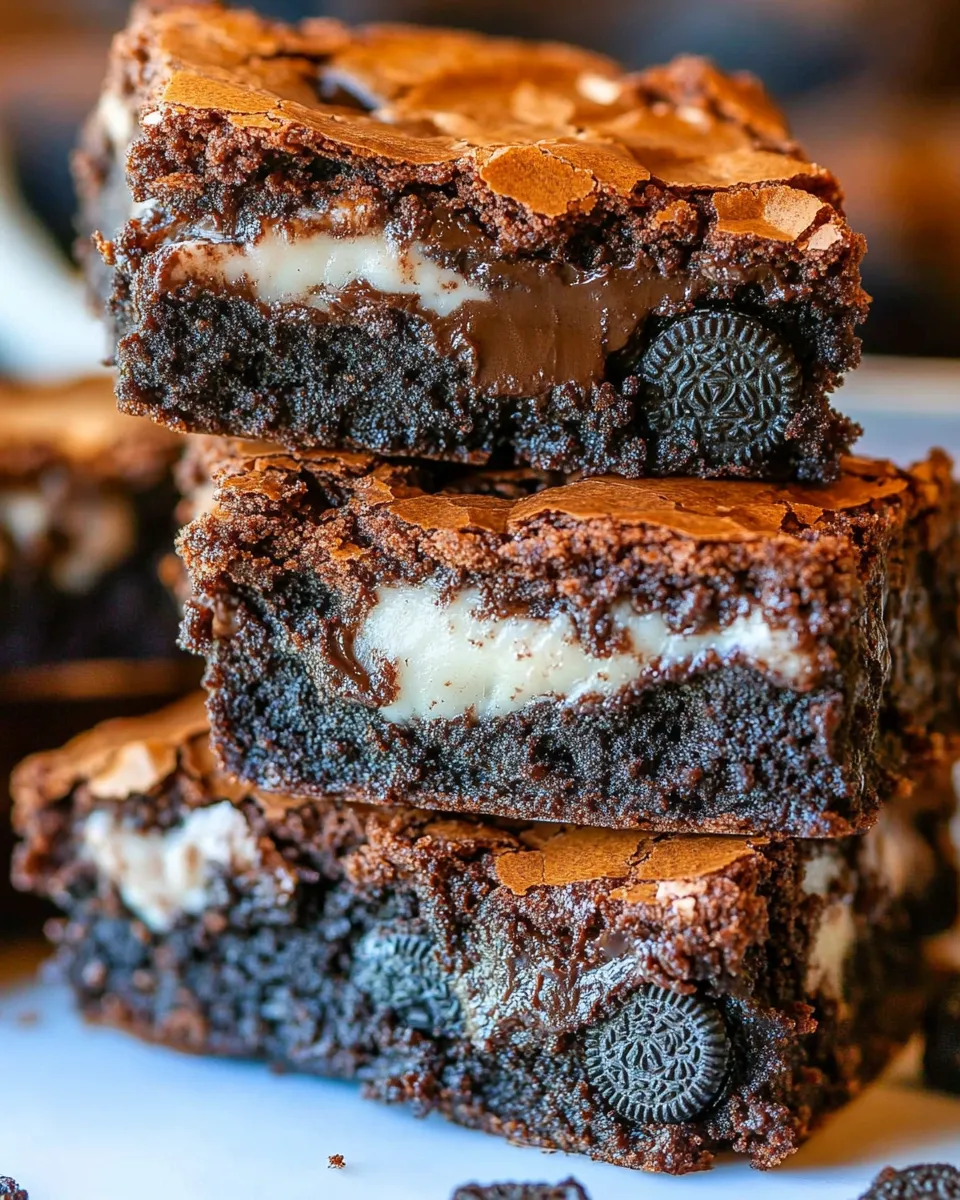
These brownies earn a permanent spot in my rotation because they deliver big chocolate impact with minimal effort. The unsweetened chocolate and cocoa create a rich, concentrated flavor, and the butter ensures the crumb stays dense and sumptuous. Adding a whole layer of Oreos is a clever way to introduce texture contrast and a nostalgic cookie flavor without separate mixing or frosting.
They are also versatile: served warm with ice cream, they’re an indulgent dessert; cut into small squares, they’re perfect for bake sales and school events. The one-pan method keeps cleanup simple, and because the Oreos do much of the work visually, you don’t need elaborate finishing. Structurally, these brownies slice well if cooled and even better after chilling slightly, so they’re great for transporting.
International Equivalents
The oven temperature is already given in Fahrenheit and Celsius (350°F / 175°C), which makes this recipe easy to follow regardless of where you live. Several ingredients include gram weights; when a weight is provided, use it for best results — scales reduce variance from how different people fill cups.
If your country uses different packaged cookie brands, look for a regular-size chocolate sandwich cookie with vanilla filling as the closest analog to an Oreo. In many places you’ll find locally produced sandwich cookies that match the size and sweetness well; check the texture — the cookie should be crisp rather than cakey so it softens during baking without dissolving.
If your flour is labeled differently (e.g., plain flour, wheat flour), use the local all-purpose equivalent. For butter, opt for a block-style butter you can slice; stick butters in many stores are simply wrapped differently but will perform the same. When in doubt, weigh ingredients where weights are provided — grams are universal.
Kitchen Gear Checklist
- 9×13-inch baking pan — the specified size ensures the correct batter depth and bake time.
- Foil or parchment paper — for lining and easy removal of the brownies.
- Nonstick cooking spray — a quick release aid for the liner.
- Large microwave-safe bowl — used for melting chocolate and butter together.
- Spatula — for spreading batter evenly and folding in flour gently.
- Measuring cups and spoons or a kitchen scale — the scale is preferred when gram amounts are provided.
- Toothpick — to test doneness toward the end of the bake time.
Pitfalls & How to Prevent Them
- Overbaking — this is the most common mistake. The brownies should be removed when the top loses its glossy sheen and a toothpick inboard shows a few moist crumbs. For a very fudgy center, err on the shorter side of the 25–35 minute range.
- Grainy batter after adding eggs — the recipe says the batter may look slightly grainy but should be smooth overall. Stir thoroughly after each egg; if the chocolate was too hot when you added eggs, it can cook them. Let the melted chocolate cool for 30–60 seconds off the heat before adding eggs if your bowl still feels very hot.
- Uneven cookie layer — pressing cookies into the batter will sink them and change bake time. Arrange them gently and evenly so the top batter can cover them without compressing the cookies.
- Dry, cakey brownies — overmixing after you add flour or using too much flour will create a cakey texture. Fold just until the streaks disappear.
- Chocolate seizing when melting — avoid adding cold liquid into hot chocolate. If using a double boiler instead of microwave, keep water from touching the bowl to prevent steam or water from seizing the chocolate.
Allergy-Friendly Swaps
- Dairy-free — replace unsalted butter with a firm dairy-free block (use the same weight) and choose dairy-free baking chocolate. Note: texture will be slightly different; test a small pan if you’re trying this for the first time.
- Egg-free / Vegan — use an egg replacer such as a commercial binder or a tested aquafaba or flax egg alternative. These change the crumb and may reduce richness, so expect a slightly different texture.
- Gluten-free — swap the all-purpose flour for a 1:1 gluten-free baking blend that contains xanthan gum, and use gluten-free chocolate sandwich cookies to replace Oreos. The bake time may vary slightly; watch for the same doneness cues.
- Nut allergies — this recipe contains no nuts, but always check labels for cross-contamination and pick certified nut-free chocolate and cookies if necessary.
Behind-the-Scenes Notes
I keep a few habit tricks that make this recipe more foolproof. First, I line the pan so the cooling and slicing are clean; I let the pan cool fully on the counter, then chill it briefly if I want neat squares. Second, I slice brownies with a sharp knife warmed briefly under hot water and wiped dry between cuts — the heat keeps the blade from dragging through sticky crumbs.
For make-ahead: you can bake them a day in advance and bring them to room temperature before serving, or chill and slice for sharper pieces. If you’re transporting, place a layer of parchment between stacked slices to prevent sticking. And if I want to turn these into an adult dessert, I spoon a little salted caramel on top of each square just before serving — but that’s optional and should be done sparingly to avoid overpowering the cookie layer.
Keep-It-Fresh Plan
Store cooled brownies in an airtight container at room temperature for 2–3 days. For longer storage, refrigerate for up to a week; chilling firms them and can make slicing tidier. Freeze for up to 2 months: wrap tightly in plastic then foil or place in a freezer-safe container. Thaw overnight in the refrigerator before bringing to room temperature and serving.
If you want to refresh slightly stale brownies, a quick 10–15 second zap in the microwave brings back a warm, gooey feeling without melting the Oreos completely. Serve with a scoop of ice cream for an easy upgrade.
Common Questions
- Can I use chocolate chips instead of chopped unsweetened baking chocolate? — Yes, but chocolate chips often contain stabilizers that change how they melt; choose a baking chocolate or chop a good-quality bar for the best texture.
- Do I have to use whole Oreos? — The recipe calls for 24 Oreos in a single layer. Using halves or minis changes distribution and bake time; if you must substitute, arrange pieces to mimic a single, even layer.
- Why does the batter look grainy sometimes? — Slight graininess is normal after adding sugar and eggs. Ensure the chocolate isn’t so hot it cooks the eggs; allow the melted mixture to cool briefly and stir well.
- How do I get clean slices? — Cool completely, then lift the slab using the foil or parchment and chill 30–60 minutes before slicing. Warm the knife between cuts for the cleanest edges.
Final Bite
Fudgy Oreo Brownies are an easy, show-stopping dessert that rewards simple technique and a little patience. Follow the ingredients and directions exactly for reliable results; then use the guidance here to adapt for allergies, transport, or party needs. They’re a dependable crowd-pleaser — rich, nostalgic, and gloriously messy in the best possible way. Bake once, and they’ll probably become someone else’s favorite too.
Fudgy Oreo Brownies
Ingredients
Equipment
Method
- Preheat the oven to 350°F (175°C). Line a 9×13-inch baking pan with foil or parchment paper and lightly spray the lining with nonstick cooking spray.
- Place the chopped unsweetened baking chocolate and the sliced unsalted butter in a large microwave-safe bowl.
- Microwave on high in 30-second increments, stirring between each increment, until the chocolate and butter are fully melted and the mixture is smooth (about 2 minutes total, depending on your microwave).
- Stir the granulated sugar and the unsweetened cocoa powder into the melted chocolate and butter until combined.
- Add the eggs (one at a time if you prefer) and the vanilla extract, stirring after each addition until incorporated. Stir in the ½ teaspoon salt. The batter may look slightly grainy but should be smooth overall.
- Gently fold in the all-purpose flour until just combined and no streaks of flour remain. Do not overmix.
- Pour half of the batter into the prepared pan and spread it into an even layer using a spatula.
- Arrange all 24 Oreo cookies in a single even layer over the batter. Space them so they cover the batter as uniformly as possible.
- Spoon the remaining batter over the Oreos and gently spread to cover them. It’s okay if some cookies remain partially visible; try to create an even top layer without forcing the batter too thin.
- Bake in the preheated oven for 25–35 minutes. The brownies are done when the top is no longer glossy and a toothpick inserted about 2 inches from the side comes out with just a few moist crumbs.
- Remove the pan from the oven and let the brownies cool completely in the pan. Use the foil or parchment to lift the brownies from the pan before slicing.
Notes
Use any flavor Oreo cookie. You can also substitute a box mix if you prefer.