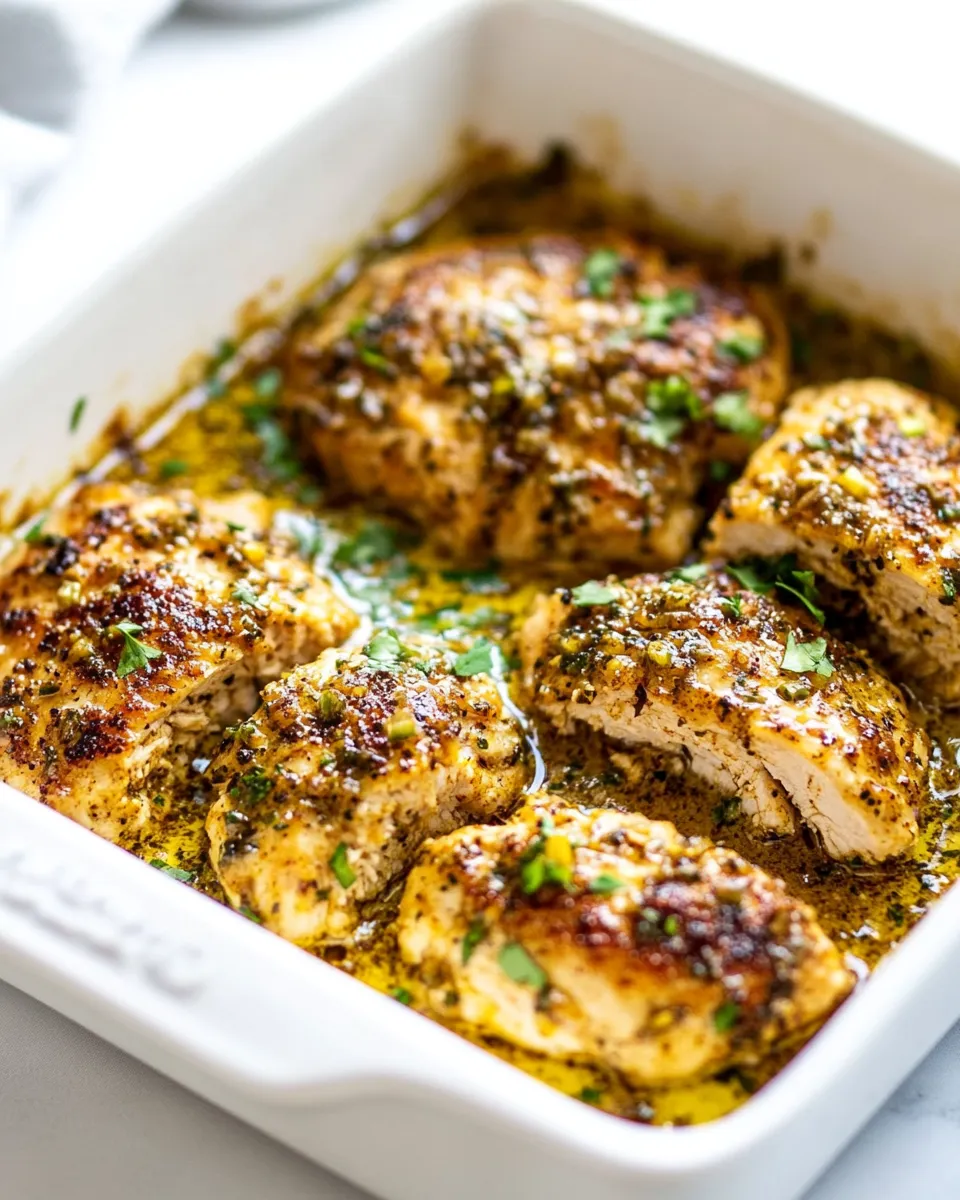
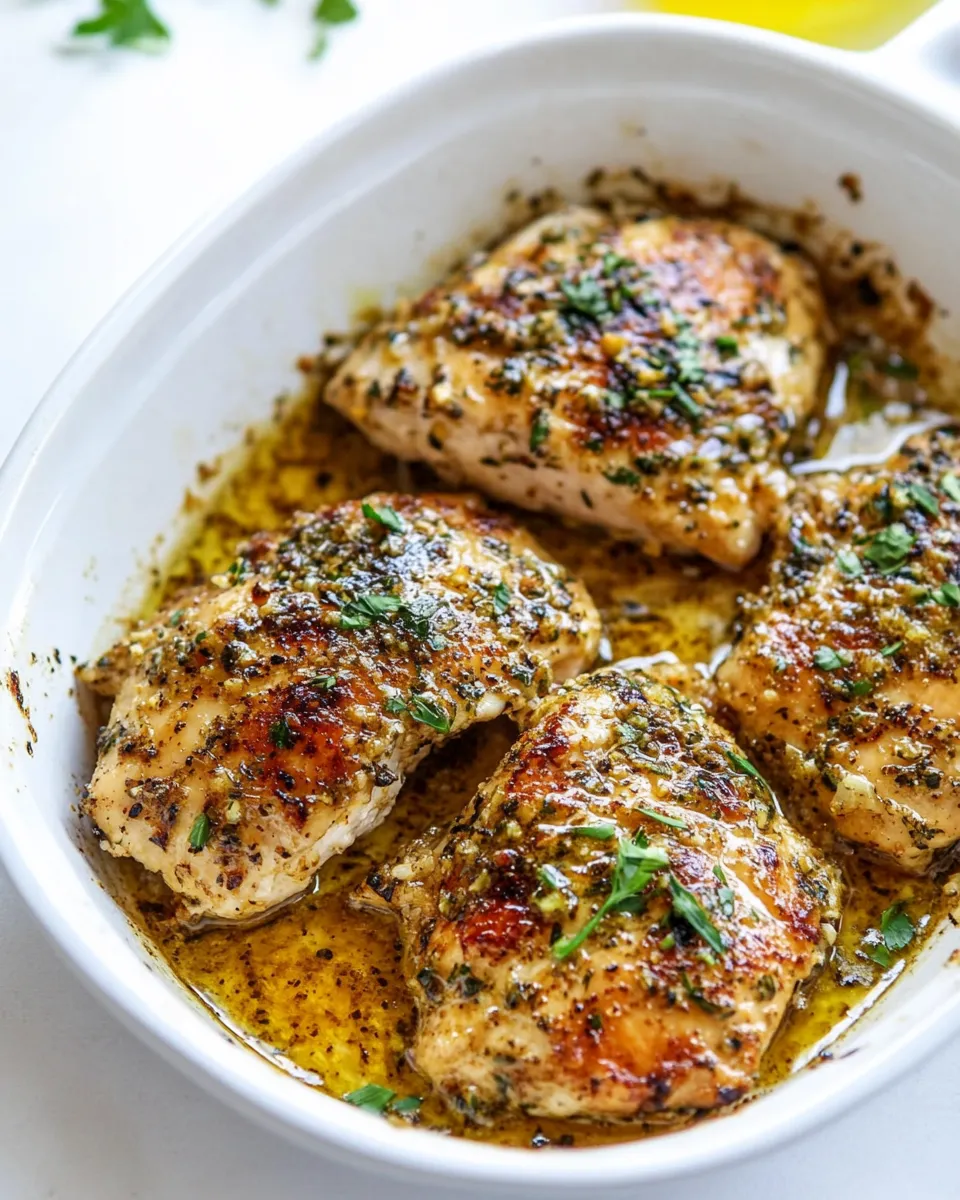
Garlic Butter Chicken
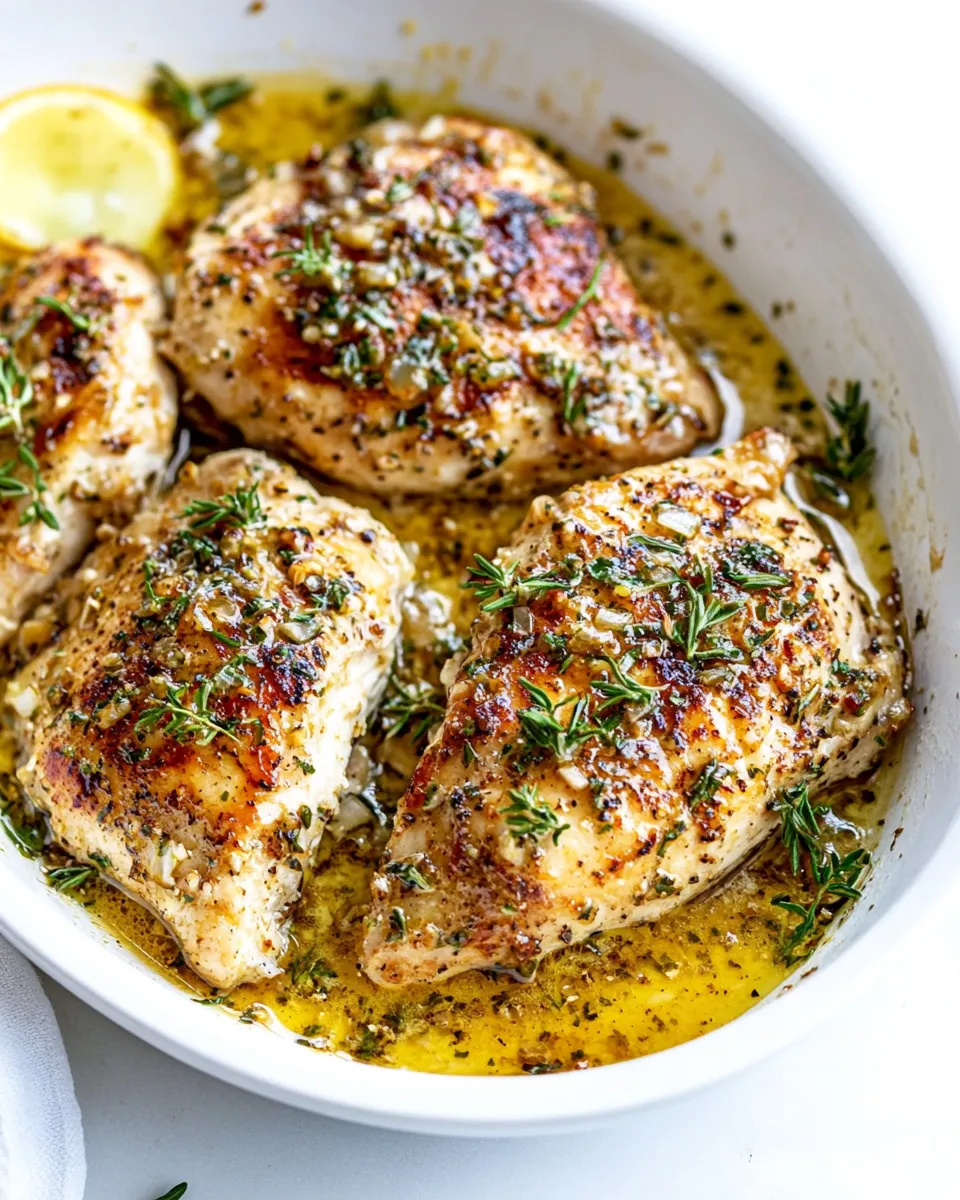
This garlic butter chicken is the kind of weeknight dish I make when I want something comforting, fast, and reliably delicious. It hits four winning notes: a brown, slightly crisp exterior from a light dredge in flour, a bright hit of lemon, a garlicky butter sauce that clings to the chicken, and just enough heat if you choose to add red pepper flakes. No trickery, just straightforward technique.
I like this recipe because it’s practical. You sear on the stovetop to build flavor, finish in the oven for even cooking, and spoon the pan sauce over the chicken at the end. Little steps—patting the chicken dry, not letting garlic brown, resting the meat—make a big difference.
Below you’ll find the ingredient notes, exact step-by-step instructions straight from the kitchen, and sensible tips for swaps, storage, and troubleshooting. If you’re short on time or feeding picky eaters, you’ll be able to adapt this without losing the core flavors.
Ingredient Breakdown
Ingredients
- 4 boneless, skinless chicken breasts — The main protein; pat dry so the flour sticks and the meat sears properly.
- 2 teaspoons Italian seasoning — Adds an herb-forward backbone; rubs into the chicken during seasoning.
- 1 teaspoon kosher salt — Brings out flavor; seasons both sides for even seasoning.
- ½ teaspoon ground black pepper — A simple peppery edge; freshly ground is best.
- ½ cup all-purpose flour — Creates a light crust and helps thicken the pan sauce slightly when mixed with butter.
- 1 tablespoon olive oil — Raises the smoke point and helps get a golden sear before baking.
- 1 tablespoon unsalted butter (⅛ stick) — Used with the oil to brown the chicken and add richness to the pan fond.
- 4 cloves garlic (minced) — The star aromatic; adds savory depth. Mince finely for even distribution.
- ¼ teaspoon crushed red pepper flakes (optional) — Adds heat if you want it; leave out for mild flavor.
- 4 tablespoons unsalted butter (½ stick) — Melted into the sauce for the buttery pan finish that keeps the chicken glossy.
- 1 tablespoon minced fresh parsley — Fresh herb brightness to finish the sauce; chop fine.
- 1 tablespoon freshly squeezed lemon juice (from ½ lemon) — Adds acidity to lift all the richness; squeeze fresh for best flavor.
Garlic Butter Chicken: From Prep to Plate
- Preheat the oven to 350°F.
- Pat the 4 boneless, skinless chicken breasts dry with paper towels. Season both sides with 2 teaspoons Italian seasoning, 1 teaspoon kosher salt, and ½ teaspoon ground black pepper.
- Place ½ cup all-purpose flour in a shallow bowl. Dredge both sides of each seasoned chicken breast in the flour, shaking off any excess.
- Heat 1 tablespoon olive oil and 1 tablespoon unsalted butter in a large oven-safe skillet over medium-high heat until the butter melts and the oil shimmers.
- Add the floured chicken breasts to the skillet and sear until golden, about 3–5 minutes per side. The chicken will not need to be fully cooked through at this point. Remove the chicken from the skillet and set aside on a plate.
- Reduce the heat to medium. Add 4 cloves minced garlic and ¼ teaspoon crushed red pepper flakes (if using) to the same skillet. Cook, stirring, until fragrant, about 30–60 seconds—do not let the garlic brown.
- Stir in 4 tablespoons unsalted butter and let it melt. Once melted, stir in 1 tablespoon minced fresh parsley and 1 tablespoon freshly squeezed lemon juice.
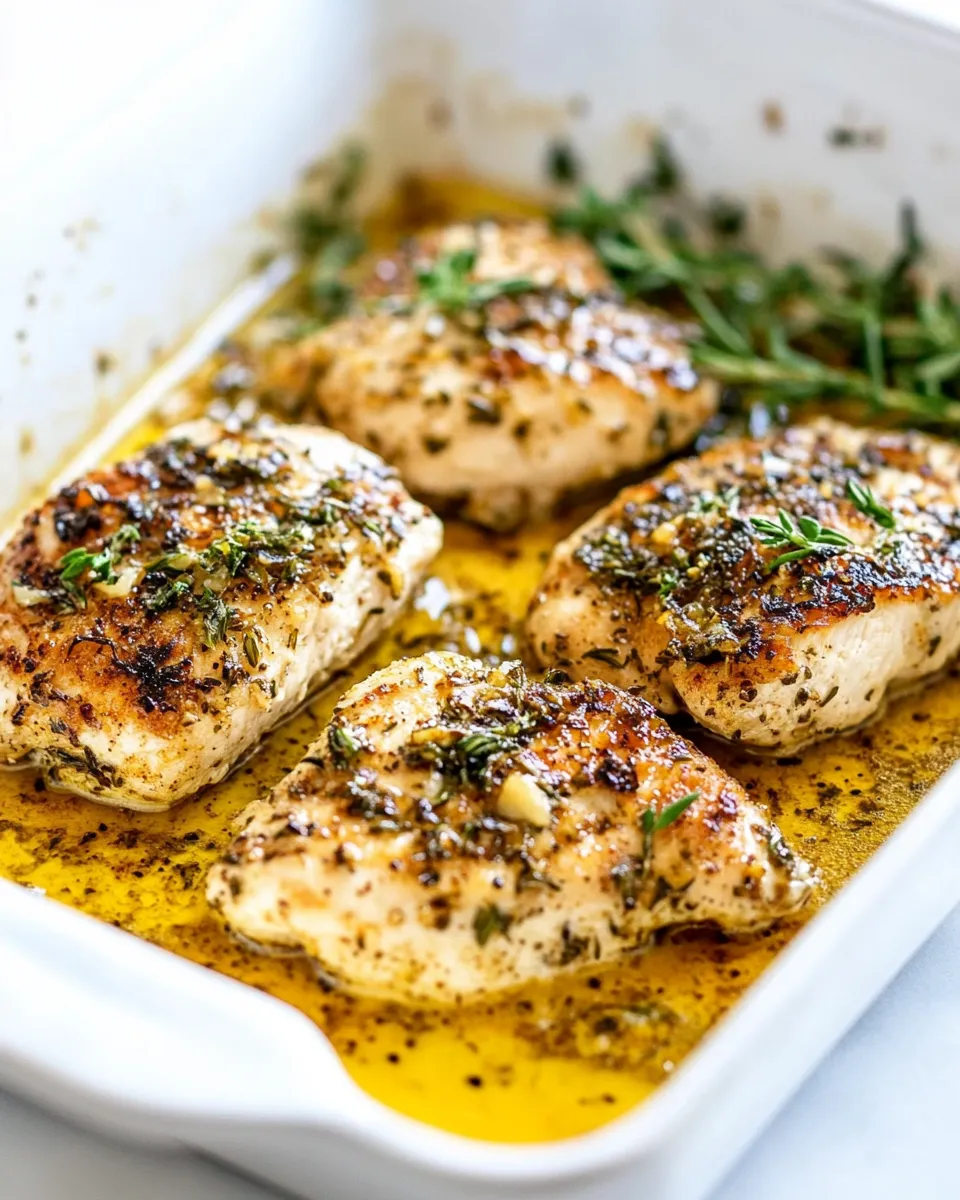
- Return the seared chicken breasts to the skillet, spooning sauce over each piece to baste. Transfer the skillet to the preheated oven and bake for 20–30 minutes, or until the chicken is cooked through (internal temperature 165°F or juices run clear).
- Remove the skillet from the oven and let the chicken rest for a few minutes. Spoon the pan sauce over the chicken before serving.
Why This Recipe is a Keeper
This recipe is dependable. It uses basic pantry ingredients and one skillet that goes from stovetop to oven, which keeps cleanup simple. The flour dredge creates a thin crust that carries the buttery sauce without becoming pasty, and the oven finish gives even doneness—no dry edges and raw centers.
It’s flexible in portion and pairings. Serve it with rice, mashed potatoes, or a simple salad and you’ve got a satisfying meal that doesn’t demand hours in the kitchen. The balance of butter and lemon makes it feel rich without being heavy, and the brief sear locks in juices.
Smart Substitutions
Need to swap something? Keep the flavor logic in mind: a fat for searing, an acid to balance richness, and herbs for brightness.
- Chicken cut: If you prefer dark meat, bone-in thighs can replace the breasts—expect longer cooking and check doneness by temperature rather than time.
- Butter: If you only have salted butter, reduce additional salt elsewhere. Or use olive oil for a lighter, dairy-free option (the richness will be different).
- Lemon juice: A splash of white wine or a teaspoon of vinegar can add acidity if you’re out of lemons.
- Parsley: Swap with fresh thyme or chives for a different herb note; dried herbs can work but add them earlier to bloom.
- Flour dredge: For a gluten-free option, use a 1:1 gluten-free flour blend for dredging.
Gear Checklist
- Large oven-safe skillet (cast iron is ideal) — allows searing and baking without transferring meat.
- Shallow bowl for dredging flour — keeps the process tidy and even.
- Instant-read thermometer — the most reliable way to check doneness (165°F target for chicken).
- Sharp knife and cutting board — for trimming and mincing garlic/parsley efficiently.
- Tongs or a spatula — for safe flipping during the sear and to handle hot chicken.
Steer Clear of These
Small mistakes are easy to make and ruin an otherwise great dish. Watch out for these common pitfalls.
- Don’t skip drying the chicken. Moisture prevents browning and causes steaming instead of searing.
- Don’t let the garlic brown. Add it over medium heat and watch carefully—burnt garlic tastes bitter.
- Avoid overcrowding the pan. If the chicken pieces touch, they won’t brown properly. Sear in batches if necessary.
- Don’t skip resting. Cutting immediately lets juices run out; a few minutes of rest keeps the meat juicy.
- Don’t assume color equals doneness. Use a thermometer or check that juices run clear.
Seasonal Ingredient Swaps
Make minor swaps depending on what’s seasonal to keep this dish feeling fresh all year.
- Spring: Add quickly wilted baby spinach to the pan just before you finish for a green pop.
- Summer: Toss in halved cherry tomatoes during the final minutes in the oven so they blister and add sweetness.
- Fall: Stir in a small handful of sliced mushrooms with the garlic for earthier depth.
- Winter: Add a splash of white wine to the garlic before the butter for warmth and acidity on cold nights.
Flavor Logic
Understanding why each component exists helps you make confident swaps.
The flour creates surface texture and helps the butter cling to the chicken. Searing develops Maillard flavors—the deep, savory notes you taste in the final dish. Garlic provides aromatic backbone; it must be cooked briefly to release flavor but not long enough to brown. Butter delivers richness and carries the sauce, while lemon juice cuts through that richness with brightness. Parsley adds fresh, herbal lift at the end so the sauce doesn’t feel heavy.
How to Store & Reheat
Store leftover chicken in an airtight container in the refrigerator for up to 3 days. Keep the pan sauce with the chicken so the meat doesn’t dry out.
To reheat, place pieces in a skillet over low-medium heat with a tablespoon or two of butter or olive oil and spoon the sauce over the meat until warmed through. This helps refresh the texture and keeps the coating from becoming rubbery. You can also reheat gently in a 300°F oven until warmed, but cover loosely with foil to prevent drying.
Reader Q&A
Q: Can I double the recipe?
A: Yes. If you double, sear in batches so the pan isn’t crowded, then finish in a larger oven-safe dish or multiple skillets as needed.
Q: Can I make the sauce ahead?
A: You can make the garlic-butter sauce and store it, but for the best texture spoon it over freshly reheated chicken. The butter-based sauce firms when chilled and will need gentle reheating to loosen.
Q: Is the crushed red pepper necessary?
A: No. It’s optional and only adds a hint of heat. Omit it for a kid-friendly version.
Q: Can I use dried parsley?
A: You can, but fresh parsley at the end gives a brighter, fresher finish. If using dried, add it earlier so it has time to rehydrate and release flavor.
Next Steps
Make this the go-to garlic butter chicken in your weeknight rotation. Start by gathering the ingredients and preheating the oven—little prep goes a long way. If you loved the balance of buttery richness and lemon brightness, try pairing the chicken with steamed green beans and roasted potatoes or a simple lemon-herb rice. Save this method: sear, garlicky butter, oven-finish, rest. It works for chicken and beyond.
If you try a swap or add a seasonal twist, note what worked and what didn’t. Recipes like this evolve into family favorites through small adjustments. Happy cooking—and enjoy the sauce.
Garlic Butter Chicken
Ingredients
Equipment
Method
- Preheat the oven to 350°F.
- Pat the 4 boneless, skinless chicken breasts dry with paper towels. Season both sides with 2 teaspoons Italian seasoning, 1 teaspoon kosher salt, and ½ teaspoon ground black pepper.
- Place ½ cup all-purpose flour in a shallow bowl. Dredge both sides of each seasoned chicken breast in the flour, shaking off any excess.
- Heat 1 tablespoon olive oil and 1 tablespoon unsalted butter in a large oven-safe skillet over medium-high heat until the butter melts and the oil shimmers.
- Add the floured chicken breasts to the skillet and sear until golden, about 3–5 minutes per side. The chicken will not need to be fully cooked through at this point. Remove the chicken from the skillet and set aside on a plate.
- Reduce the heat to medium. Add 4 cloves minced garlic and ¼ teaspoon crushed red pepper flakes (if using) to the same skillet. Cook, stirring, until fragrant, about 30–60 seconds—do not let the garlic brown.
- Stir in 4 tablespoons unsalted butter and let it melt. Once melted, stir in 1 tablespoon minced fresh parsley and 1 tablespoon freshly squeezed lemon juice.
- Return the seared chicken breasts to the skillet, spooning sauce over each piece to baste. Transfer the skillet to the preheated oven and bake for 20–30 minutes, or until the chicken is cooked through (internal temperature 165°F or juices run clear).
- Remove the skillet from the oven and let the chicken rest for a few minutes. Spoon the pan sauce over the chicken before serving.
Notes
Don’t skip patting the chicken dry. This helps the seasoning to better adhere.
Take care not to burn the garlic; this will lead to a bitter sauce.
If you’d like a more buttery sauce, you can add an additional 2 tablespoons of butter.
Use a digital thermometer to ensure that the chicken is cooked to 165°F.
Let the chicken rest for 5 minutes before serving. This will lock in the juices.