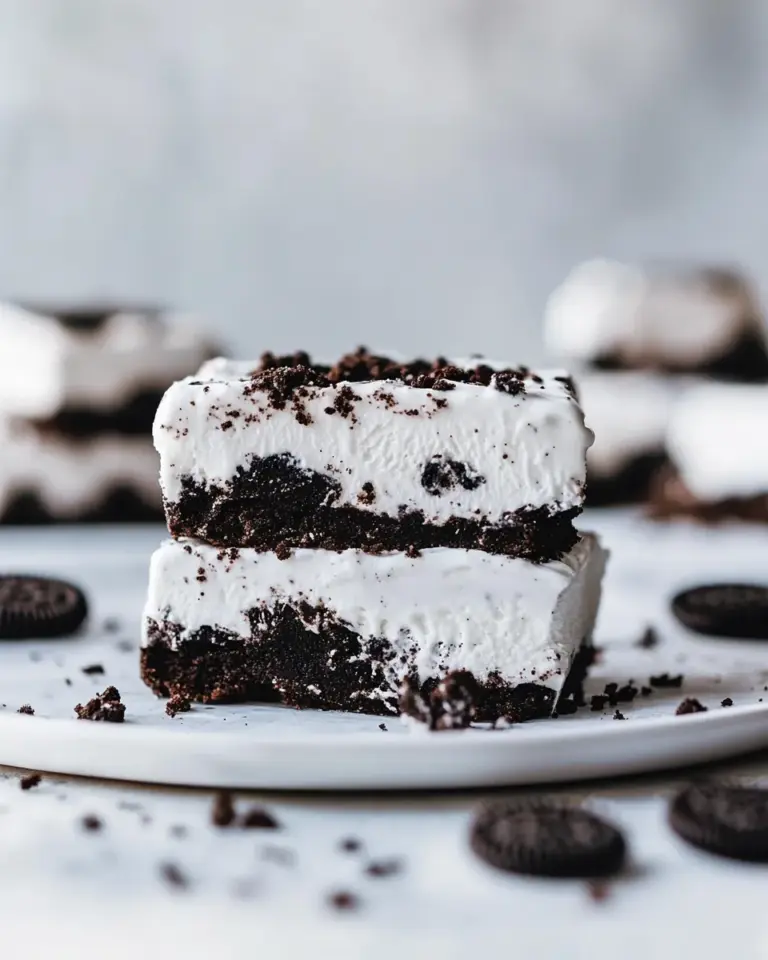
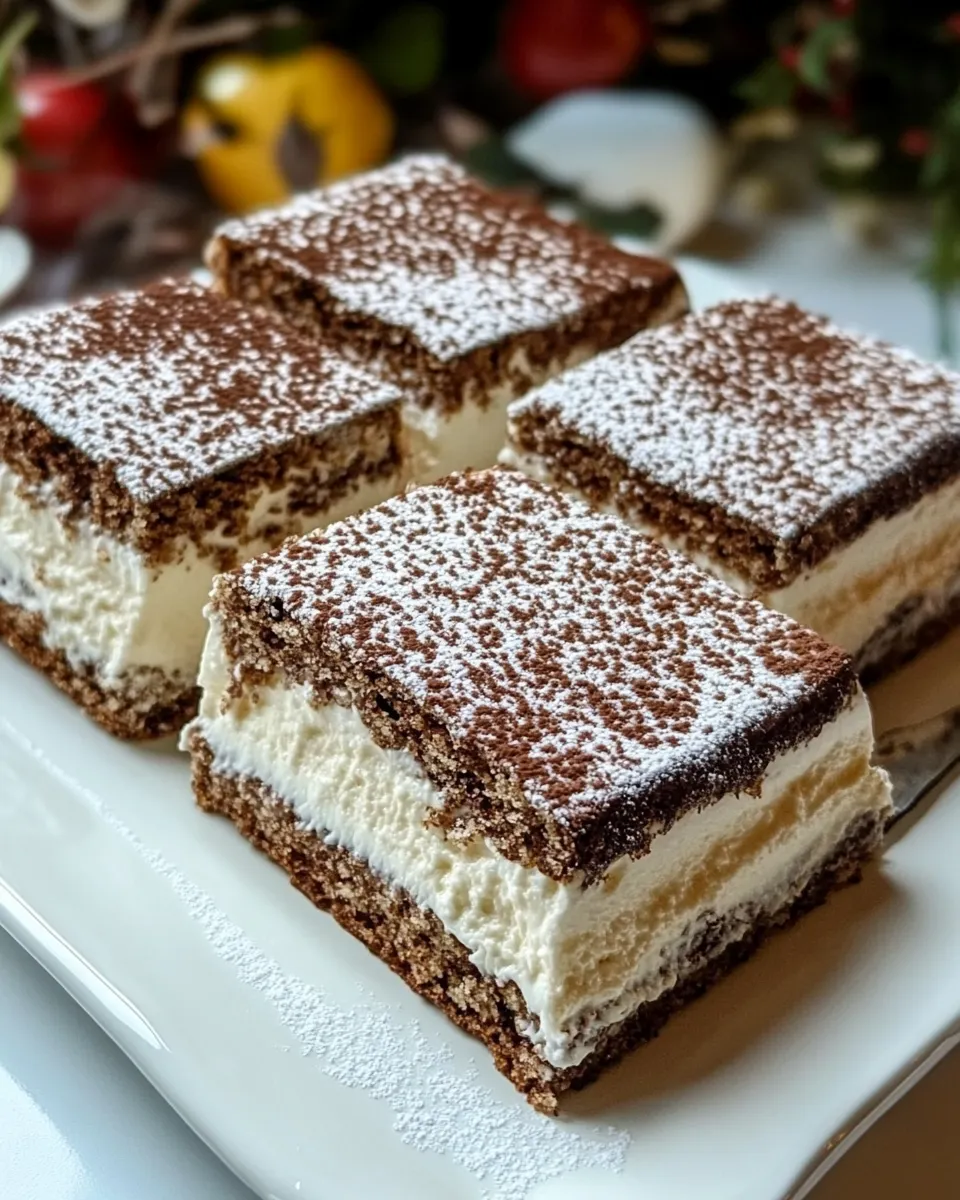
Homemade Milk Slice Cake (Kinder Milch-Schnitte)
This cake is a home-version of the milk-slice you remember from the supermarket: thin, tender chocolate sponge layers wrapped around a rich, milky mascarpone cream. It’s straightforward to make, but the little technical moments—temperature, timing, whipped-cream texture—are what turn it from “good” into “exactly like the one you loved as a kid.”
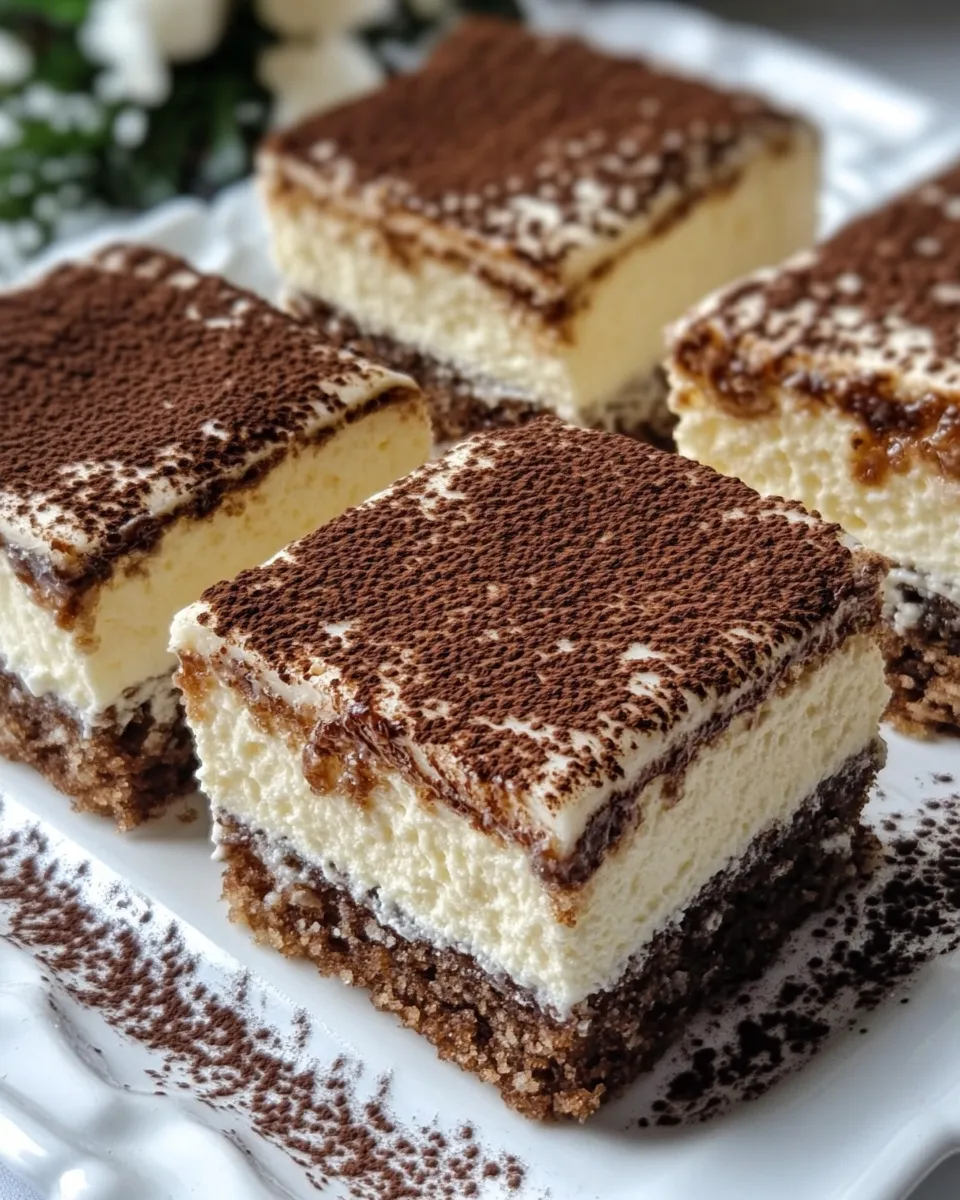
I test this on busy weeknights and lazy Sundays alike. The sponge is intentionally thin and delicate; it bakes quickly and needs care when handling. The filling is simply mascarpone and whipped cream sweetened with vanilla—clean flavors, easy assembly, and a fridge-set finish that slices neatly.
Read on for a clear ingredient rundown, the exact step-by-step method I use in the test kitchen, plus common missteps and fixes so your Milch-Schnitte comes out perfectly every time.
Ingredient Rundown
Ingredients
- 10 eggs — provides structure and lift to the sponge; room temperature helps even whipping.
- 200 g granulated sugar — sweetens and helps stabilize the beaten eggs for a glossy sponge.
- 50 ml oil — keeps the sponge tender and flexible for slicing and handling.
- 250 g flour — the bulk of the sponge; sift to avoid lumps and to keep the texture light.
- 60 g cocoa — gives the layers their chocolate flavor and color; sift with the flour for even distribution.
- 1 tbsp vanilla essence — adds warm, aromatic background to the sponge batter.
- 1 sachet baking powder — a small lift agent to support the egg foam without changing the thin profile.
- 500 g mascarpone — the creamy base of the filling; chilled for best whipping and stability.
- 300 ml whipping cream — combined with mascarpone for a soft, spreadable cream; chilling is important.
- 150 g sugar — sweetens the filling; adjust to taste but keep measured here for balance.
- 1 tbsp vanilla essence — doubles down on the vanilla note in the cream for a milky, comforting finish.
Homemade Milk Slice Cake (Kinder Milch-Schnitte): Step-by-Step Guide
- Place the 500 g mascarpone and 300 ml whipping cream in the refrigerator for at least 2–3 hours (or keep them chilled until you are ready to whip the cream).
- Preheat the oven to 180°C (356°F). Line a 36×24 cm (14×10 in) baking sheet with parchment paper (or prepare a same-size pan).
- In a large mixing bowl, combine all 10 eggs and 200 g granulated sugar. Beat on low speed at first, then increase the speed and continue beating until the mixture is pale, thick and slightly increased in volume (about 5–8 minutes with an electric mixer).
- Add 50 ml oil and 1 tbsp vanilla essence to the beaten eggs and sugar. Mix briefly until incorporated.
- Sift together 250 g flour, 60 g cocoa and 1 sachet baking powder into a separate bowl (or directly over the egg mixture). Gently fold the dry ingredients into the egg mixture with a spatula until just combined and no flour streaks remain.
- Divide the batter into two equal portions. (You can weigh the batter, eyeball, or pour half into a second prepared sheet; alternatively see step 8 for the single-bake option.)
- Pour one portion of batter onto the prepared baking sheet and spread it evenly to the edges. Bake in the preheated oven for 10–12 minutes, or until the sponge is set, springs back to the touch, and a toothpick inserted near the center comes out clean or with only a few moist crumbs.
- Remove the baked layer to a wire rack and let it cool completely. Repeat baking with the second portion of batter on the same prepared sheet (or bake the whole batter at once in a deeper pan and, after cooling completely, use a long serrated knife to cut the cake horizontally into two even layers).
- When the sponge layers are cooling, prepare the cream. Put the chilled mascarpone (500 g), chilled whipping cream (300 ml), 150 g sugar, and 1 tbsp vanilla essence in a cold mixing bowl.
- Whip the cream and mascarpone mixture on medium-high speed until it reaches stiff peaks and holds its shape. Do not overbeat—stop as soon as the cream is firm and spreadable.
- Place one cooled sponge layer on your serving board or tray. Spread all of the prepared cream evenly over this layer, smoothing to the edges.
- Place the second sponge layer on top of the cream. Cover the top with a plate, tray or chopping board and press gently and evenly to compact the cake (do not press so hard that cream squeezes out).
- Refrigerate the assembled cake for at least 2–3 hours to set the cream before slicing. Use a sharp serrated knife to slice and serve chilled.
Why It Deserves a Spot
This cake balances nostalgia and technique. Two thin chocolate sponges keep the cake light; the mascarpone-cream layer keeps it rich but not heavy. It’s quick to assemble once the components are made, and the results are reliably crowd-pleasing. The texture contrast—tender sponge and luscious cream—is exactly what makes this style of cake special.
It’s practical, too. The thin layers mean faster bake times and easier portioning. The final chill step lets everything settle so slices hold together cleanly, making it great for packed lunches, afternoon plates, and small parties.
Substitutions by Category
When you need to adapt, think in categories rather than exact swaps. For dairy, consider the overall fat and water balance: richer components will make a sturdier cream, lighter ones will loosen it. For structure, egg volume and batter handling are key: maintain aeration by folding gently.
- Dairy ideas — adjust texture by changing the ratio between mascarpone and whipped cream; work with chilled ingredients to keep the filling stable.
- Baking approach — if you prefer one-bake options, use a slightly deeper rimmed sheet and split the cooled cake horizontally once frozen slightly to avoid squashing the crumb.
- Flavor tuning — vanilla appears twice in the recipe; keeping both ensures the cream and sponge speak the same language. If you prefer a stronger chocolate note, ensure the cocoa is sifted well into the flour to distribute flavor evenly.
Appliances & Accessories
These tools make the process easier and more repeatable:
- Electric mixer — indispensable for getting the egg-sugar mixture to the right volume and for whipping the mascarpone-cream to stiff peaks.
- 36×24 cm (14×10 in) baking sheet — the recipe is scaled for this size; lining it with parchment speeds release and cleanup.
- Spatula and offset spatula — for gentle folding and for spreading the cream evenly to the edges.
- Wire rack — essential to cool thin sponge layers quickly and evenly so they don’t sweat when stacked.
- Sharp serrated knife — cuts clean slices after the cake is chilled and set.
Missteps & Fixes
Eggs and volume
If your sponge turns out dense, the most common cause is insufficiently whipped eggs. Beat the eggs and 200 g sugar until pale and thick. It takes several minutes; resist the urge to rush. Folding too aggressively after adding the dry ingredients will deflate the batter—use a gentle lift-and-fold motion until no streaks remain.
Wet or collapsing sponge
Baking time is short; check at 10 minutes. A properly set sponge should spring back and a toothpick will show a few crumbs. If the surface is wet and the center is uncooked, your oven temperature may be low or uneven. Use an oven thermometer if results are inconsistent.
Runny filling
If the cream doesn’t set, the likely causes are warm ingredients or overwhipping then letting it sit too long. Keep mascarpone and cream well chilled before whipping. Stop when you reach firm, spreadable peaks; soft peaks will collapse during refrigeration.
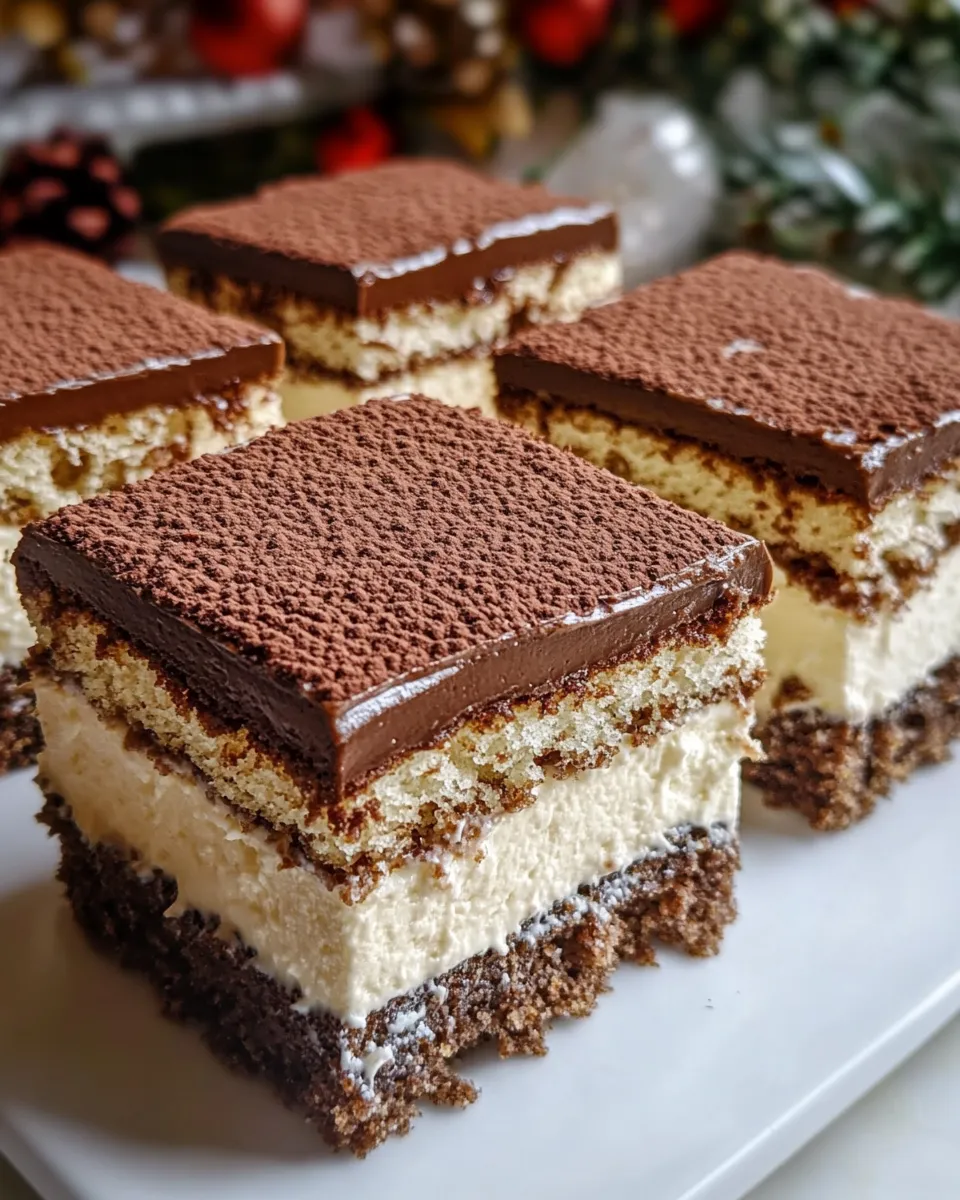
Holiday & Seasonal Touches
For festive servings, the cake is a forgiving canvas. Chill the assembled cake well, then top with thinly sliced fresh fruit or a dusting of cocoa for winter. Press a clean sheet of parchment over the top before pressing down with a tray to keep the finish smooth if you want to add decorations later.
Because the sponge is thin and the cream mild, small seasonal touches—aromatic extracts, a light glaze, or fruit on the side—work well without overpowering the milky center. Keep additions minimal to preserve the familiar balance of the classic Milch-Schnitte.
Notes from the Test Kitchen
I always chill mascarpone and cream together for at least 2–3 hours. Cold ingredients whip more quickly and hold texture longer. When dividing batter, weighing is simple and reliable; it keeps both sponge layers the same thickness.
One practical tip: if you’re nervous about handling thin sponges, bake the entire batter in a single, slightly deeper pan and chill it before using a long serrated knife to slice it horizontally. The recipe includes this option for convenience.
Save It for Later
Storage is simple. Keep the assembled cake refrigerated, wrapped or in an airtight container, for up to 2–3 days for best texture. Beyond that, the sponge will start to absorb moisture and the cream may lose peak structure. For longer storage, freeze single slices wrapped tightly; thaw in the fridge before serving.
Your Questions, Answered
Q: Can I make the sponges ahead? A: Yes. Fully cool them, wrap tightly, and refrigerate for a day or freeze for longer. Bring them to fridge temperature before filling to avoid sweating the cream.
Q: How do I get clean slices? A: Chill the assembled cake for at least 2–3 hours. Use a sharp serrated knife, wipe it clean between cuts, and slice with a gentle sawing motion.
Q: Is it possible to halve or double the recipe? A: The method scales, but keep the same pan proportions or adjust bake time carefully. The egg-to-dry-ingredient ratios are what create the sponge’s character, so keep them balanced.
Wrap-Up
This Homemade Milk Slice Cake (Kinder Milch-Schnitte) is all about balance: a delicate chocolate sponge and a creamy, stable mascarpone filling. Follow the chilling and whipping notes, treat the sponge gently, and you’ll end up with a neat, nostalgic cake that slices clean and tastes like a grown-up version of the childhood favorite.
Make it once following the steps precisely, and you’ll see where small adjustments help you tailor it to your kitchen and taste. Enjoy the process—and the slices afterward.
Homemade Milk Slice Cake (Kinder Milch-Schnitte)
Ingredients
Equipment
Method
- Place the 500 g mascarpone and 300 ml whipping cream in the refrigerator for at least 2–3 hours (or keep them chilled until you are ready to whip the cream).
- Preheat the oven to 180°C (356°F). Line a 36×24 cm (14×10 in) baking sheet with parchment paper (or prepare a same-size pan).
- In a large mixing bowl, combine all 10 eggs and 200 g granulated sugar. Beat on low speed at first, then increase the speed and continue beating until the mixture is pale, thick and slightly increased in volume (about 5–8 minutes with an electric mixer).
- Add 50 ml oil and 1 tbsp vanilla essence to the beaten eggs and sugar. Mix briefly until incorporated.
- Sift together 250 g flour, 60 g cocoa and 1 sachet baking powder into a separate bowl (or directly over the egg mixture). Gently fold the dry ingredients into the egg mixture with a spatula until just combined and no flour streaks remain.
- Divide the batter into two equal portions. (You can weigh the batter, eyeball, or pour half into a second prepared sheet; alternatively see step 8 for the single-bake option.)
- Pour one portion of batter onto the prepared baking sheet and spread it evenly to the edges. Bake in the preheated oven for 10–12 minutes, or until the sponge is set, springs back to the touch, and a toothpick inserted near the center comes out clean or with only a few moist crumbs.
- Remove the baked layer to a wire rack and let it cool completely. Repeat baking with the second portion of batter on the same prepared sheet (or bake the whole batter at once in a deeper pan and, after cooling completely, use a long serrated knife to cut the cake horizontally into two even layers).
- When the sponge layers are cooling, prepare the cream. Put the chilled mascarpone (500 g), chilled whipping cream (300 ml), 150 g sugar, and 1 tbsp vanilla essence in a cold mixing bowl.
- Whip the cream and mascarpone mixture on medium-high speed until it reaches stiff peaks and holds its shape. Do not overbeat—stop as soon as the cream is firm and spreadable.
- Place one cooled sponge layer on your serving board or tray. Spread all of the prepared cream evenly over this layer, smoothing to the edges.
- Place the second sponge layer on top of the cream. Cover the top with a plate, tray or chopping board and press gently and evenly to compact the cake (do not press so hard that cream squeezes out).
- Refrigerate the assembled cake for at least 2–3 hours to set the cream before slicing. Use a sharp serrated knife to slice and serve chilled.