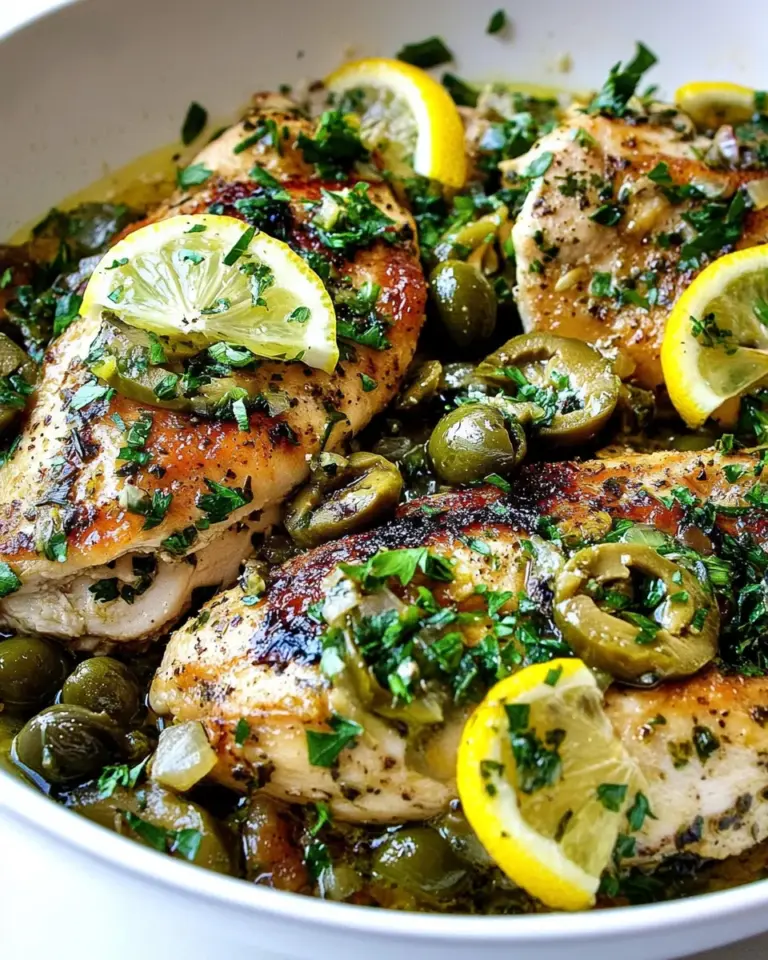
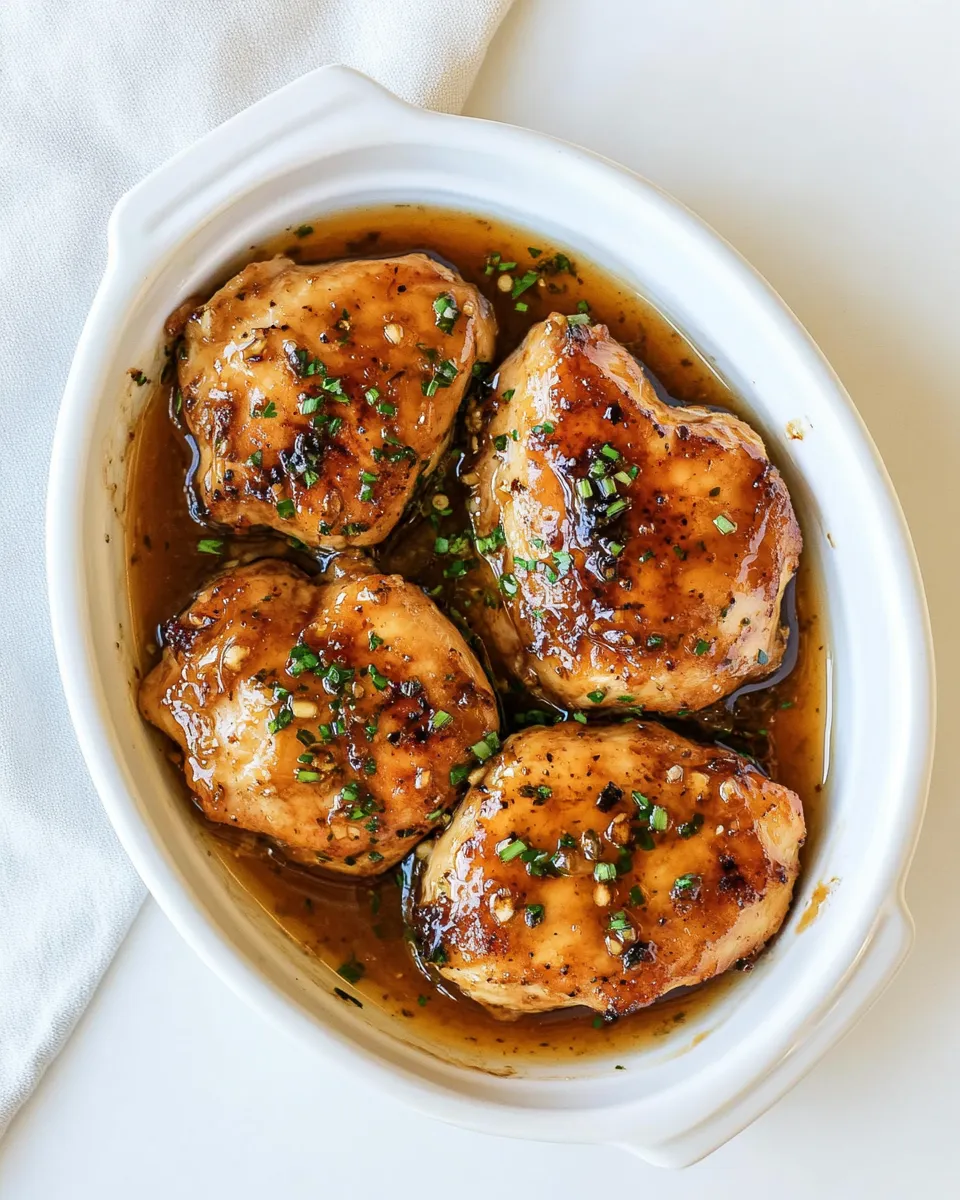
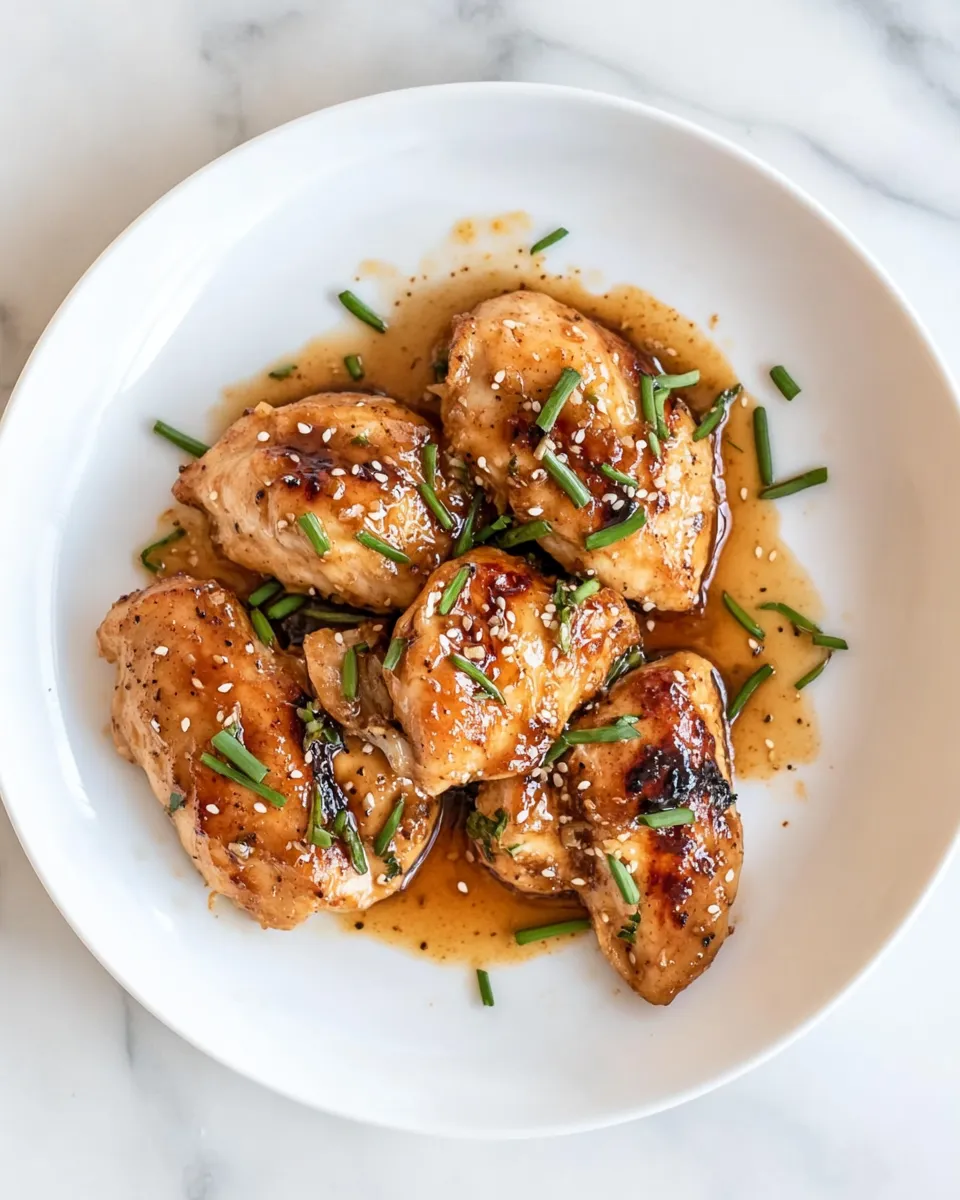
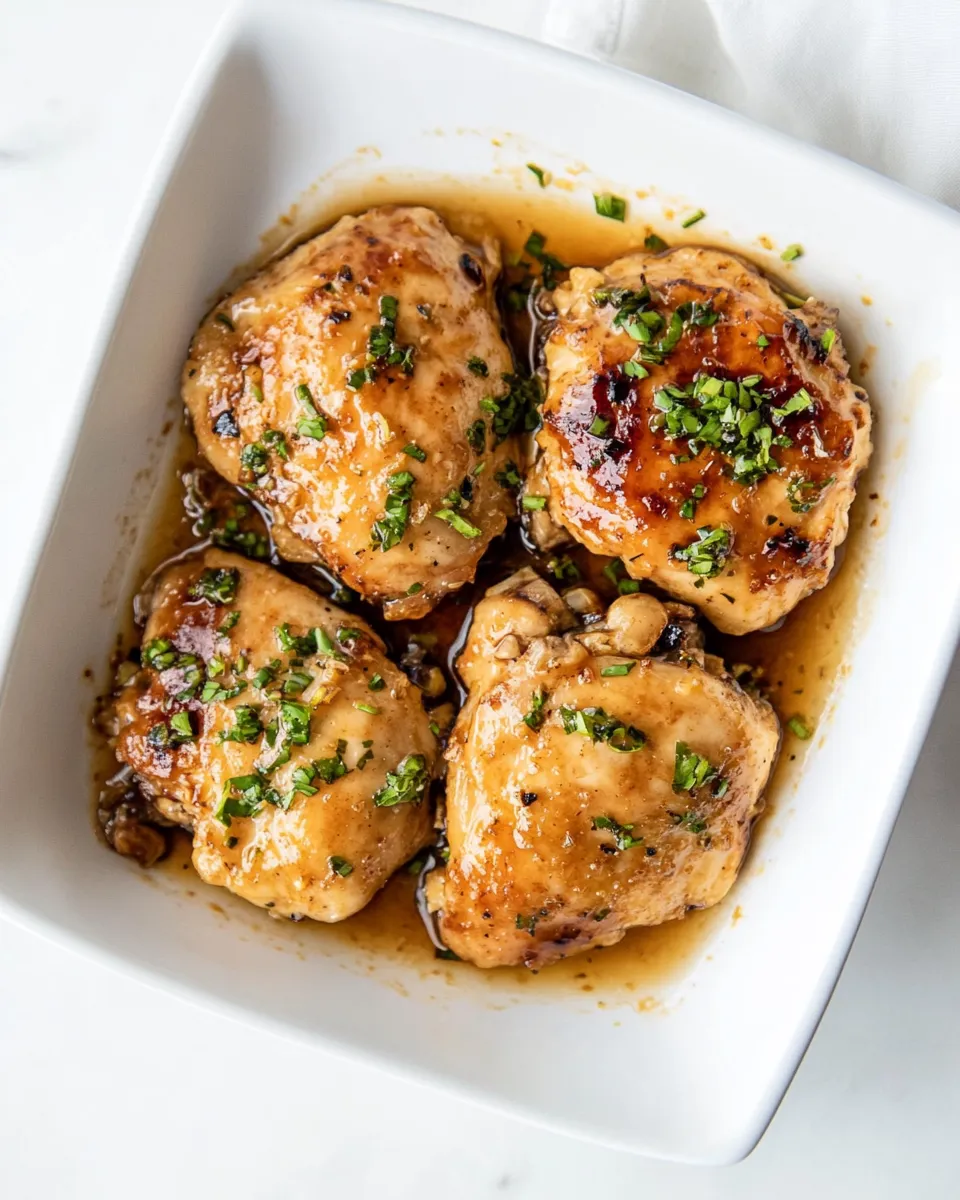
Honey Garlic Soy Sauce Chicken
This honey garlic soy sauce chicken is one of those weeknight wins that feels more special than the effort it takes. It delivers glossy, savory-sweet sauce, tender pan-seared chicken, and a quick-thickening finish that clings to every bite. I make this when I want comfort without fuss, and it reliably thrills everyone at the table.
There’s a rhythm to the recipe: dry and dredge, brown the cutlets, make a simple pan sauce from the browned bits, and finish the chicken in that sauce until everything is glossy and just cooked through. Timing matters more than technique, and a few small notes (pat the chicken dry, reserve a tablespoon of broth for the slurry) make the difference between good and great.
Below I walk you through the exact ingredients and steps, give substitution options by category, list tools that make the job easier, and share troubleshooting tips so you can get this on your table with confidence. Let’s cook.
What We’re Using
Short version: everyday pantry staples and two large chicken breasts transformed into golden cutlets with a honey-soy-garlic glaze. The recipe leans on butter, a touch of oil for searing, and a cornstarch slurry to get a slightly thickened, clingy sauce. It’s quick, bright, and designed to pair with rice or a simple green vegetable.
Ingredients
- 2 large chicken breasts — split into thin cutlets for faster, even cooking.
- Pepper to taste — seasons the chicken; add salt only if your soy sauce is low-sodium and you want more seasoning at the end.
- 1/2 teaspoon garlic powder — builds a base garlic flavor before the fresh garlic goes in the sauce.
- Flour for dredging — helps form a golden crust and gives the sauce something to cling to.
- 2 tablespoons butter, divided — one for searing with oil, one to finish the sauce for richness and shine.
- 1 tablespoon olive oil — raises the smoke point for a better sear without burning the butter.
- 1/2 cup low-sodium chicken broth or stock — the main liquid for the sauce; low-sodium keeps the dish from oversalting.
- 1 tablespoon low-sodium soy sauce — provides umami and salt; low-sodium lets the honey and broth balance without overpowering.
- 1 tablespoon honey — adds sweetness and helps the sauce caramelize and glaze the chicken.
- 4 cloves garlic, minced — fresh garlic gives bright, aromatic punch to the sauce.
- 1/2 teaspoon cornstarch — mixed with a tablespoon of broth to make a slurry that thickens the sauce quickly.
Build Honey Garlic Soy Sauce Chicken Step by Step
- Cut each large chicken breast in half lengthwise to make 4 thinner cutlets. Pat the cutlets dry with paper towels.
- Season both sides of each cutlet with pepper to taste and 1/2 teaspoon garlic powder. Dredge each cutlet lightly in flour, shaking off any excess.
- Heat a large skillet over medium-high heat. Add 1 tablespoon butter and 1 tablespoon olive oil and heat until the butter melts and the pan is hot but not smoking.
- Add the floured chicken cutlets to the skillet (do not overcrowd). Cook 4–5 minutes per side, until each side is golden brown. Transfer the cooked cutlets to a plate and keep any juices on the plate.
- Before adding the chicken broth to the pan, measure out and set aside 1 tablespoon of the 1/2 cup chicken broth for the cornstarch slurry.
- With the pan off the heat or over low heat, add the remaining chicken broth (about 7 tablespoons), 1 tablespoon low-sodium soy sauce, 1 tablespoon honey, 4 cloves minced garlic, and the remaining 1 tablespoon butter to the skillet. Return the pan to medium heat and bring the sauce to a gentle simmer, scraping up browned bits from the bottom of the pan. Let it simmer about 1 minute.
- In a small bowl, whisk the reserved 1 tablespoon chicken broth with 1/2 teaspoon cornstarch until smooth. Slowly whisk this slurry into the simmering sauce. Cook 30–60 seconds, stirring, until the sauce thickens slightly.
- Return the chicken to the pan along with any juices from the plate. Spoon sauce over the cutlets and continue to cook 3–5 minutes, or until the chicken is cooked through (165°F internal temperature) and the sauce has reduced to your liking. Reduce the heat if the sauce is bubbling too vigorously.
- Remove from heat and serve immediately, spooning extra sauce over the chicken.
Why You’ll Love This Recipe
This recipe checks a lot of boxes: it’s fast, uses pantry basics, and produces a glossy, well-balanced sauce that clings to the chicken. The technique—searing first, then finishing in sauce—locks in moisture and lets the browned bits add flavor. Honey provides sweetness without being cloying, soy sauce adds savory depth, and garlic keeps things aromatic.
It’s also forgiving. The dredge gives texture and a quick cook time keeps the chicken juicy. If you’re feeding a family, it scales well: double the cutlets, brown in batches, and finish all pieces together in a larger pan. Serve with rice to soak up the sauce or alongside steamed greens for a lighter plate.
Substitutions by Category
Protein
- Chicken breasts — swap for boneless skinless thighs if you prefer darker meat; cook times may vary and thighs may need a minute or two longer to reach safe temperature.
Pan & Sear Fat
- Butter and olive oil — use all oil (vegetable, canola) if you want to skip butter, but butter adds flavor and gloss at the finish.
Liquid & Flavor
- Chicken broth — vegetable broth or water plus a splash of white wine works in a pinch; reduce slightly if using salty broths.
- Soy sauce — tamari for gluten-free, or use a reduced amount of soy sauce plus a pinch of salt if you only have regular soy.
- Honey — maple syrup can be used but will change flavor character slightly.
Thickener
- Cornstarch — arrowroot works as a 1:1 swap for glossy results; if you don’t want a slurry, simmer the sauce longer to reduce it, but expect a thinner finish.
Tools & Equipment Needed
- Large skillet — a heavy-bottomed skillet (preferably stainless steel or cast iron) for a good sear and to scrape up browned bits.
- Heatproof spatula or tongs — for turning the chicken and moving pieces without tearing.
- Measuring spoons and cup — to keep the sauce ratios accurate (especially the cornstarch slurry).
- Small bowl and whisk/fork — to mix the cornstarch slurry smoothly.
- Instant-read thermometer — optional but helpful to ensure the chicken hits 165°F without overcooking.
Watch Outs & How to Fix
There are a few common slips that can ruin an otherwise simple dish. Here’s how to avoid and remedy them.
- Chicken didn’t brown / steamed instead: The pan wasn’t hot enough or the chicken was overcrowded. Fix: Remove extra pieces, raise heat slightly, and sear in batches. Dry the chicken thoroughly before dredging.
- Sauce too thin: You may have added slurry too late or not cooked it long enough. Fix: Whisk a tiny extra slurry (very small pinch of cornstarch with a teaspoon of cold liquid) and simmer 30–60 seconds until the sauce thickens.
- Sauce too salty: Likely from soy sauce or a salted broth. Fix: Add a splash more honey and a teaspoon of water or unsalted broth, or remove pan from heat and stir in a small pat of butter to mellow saltiness.
- Garlic burnt: If garlic overheats it turns bitter. Fix: Lower heat, remove burnt garlic bits, and add a fresh clove minced into the sauce or a splash of broth to dilute the burned flavor; in severe cases restart the sauce in a clean pan.
Dietary Customizations
If you or your guests have dietary needs, this recipe adapts well with a few swaps.
- Gluten-free: Use gluten-free all-purpose flour for dredging and tamari instead of soy sauce.
- Dairy-free: Replace butter with a neutral oil or a dairy-free butter alternative; use a little extra oil for flavor.
- Lower-sugar: Reduce honey to 2 teaspoons and add a splash of rice vinegar or lemon juice to keep brightness; note the glaze will be less sweet and slightly less glossy.
- Vegetarian/Vegan: Substitute firm tofu slices pressed, dredged, and pan-seared in place of chicken; use vegetable broth and a plant-based butter alternative.
What Could Go Wrong
Short list of failure points with solutions so you don’t get caught off guard:
- Under- or overcooked chicken: Use an instant-read thermometer; 165°F is the safe target. Thin cutlets cook quickly—watch the time.
- Gritty or lumpy sauce: That’s from poorly mixed slurry. Whisk the cornstarch with cold liquid until smooth before adding and whisk continuously while adding to the hot sauce.
- Soggy crust: Caused by resting cutlets in their juices. Keep juices on the plate but don’t sit the chicken in them; return juices to the pan briefly when finishing to retain flavor without softening the crust too much.
Storage & Reheat Guide
Store cooled leftovers in an airtight container in the refrigerator for up to 3 days. The sauce will thicken as it cools; thin it with a splash of warm broth or water when reheating. Reheat gently on the stovetop over low-medium heat, spooning sauce and turning the chicken until just warmed through to avoid drying.
Freezing
You can freeze cooked chicken in sauce for up to 2 months. Thaw overnight in the fridge, then reheat slowly on the stovetop, adding a little broth if needed to loosen the sauce.
Ask the Chef
Q: Can I make this ahead for guests?
A: You can sear the cutlets and keep them warm while you make the sauce; finish them in the sauce just before serving. If you need to fully prepare ahead, keep the chicken and sauce separate and combine/reheat gently so the crust stays slightly crisp.
Q: My sauce gets gluey—what happened?
A: Too much cornstarch or not enough liquid will create an overly thick, sticky texture. Always mix cornstarch with the reserved cold liquid and add it gradually. If gluey, add small amounts of warm broth and whisk until the texture smooths.
Q: Can I double the sauce?
A: Yes. If doubling, make sure your pan is large enough to reduce the sauce effectively. Taste and adjust honey/soy balance before finishing.
Wrap-Up
This Honey Garlic Soy Sauce Chicken is pantry-friendly, fast, and reliably delicious. The method—dredge and sear, build a simple sauce from the pan fond, thicken with a tiny slurry, and finish the chicken—gives you a glossy, flavorful result with minimal fuss. Pay attention to the few key moments (drying the chicken, saving a tablespoon of broth, tempering your slurry) and you’ll have a weeknight meal that feels like a treat.
Serve it over rice, with steamed broccoli, or a quick salad. If you try a variation—thighs, tofu, tamari for gluten-free—tell me how it turned out. I’m always happy to troubleshoot or suggest small tweaks to suit your pantry and palate.

Honey Garlic Soy Sauce Chicken
Ingredients
Equipment
Method
- Cut each large chicken breast in half lengthwise to make 4 thinner cutlets. Pat the cutlets dry with paper towels.
- Season both sides of each cutlet with pepper to taste and 1/2 teaspoon garlic powder. Dredge each cutlet lightly in flour, shaking off any excess.
- Heat a large skillet over medium-high heat. Add 1 tablespoon butter and 1 tablespoon olive oil and heat until the butter melts and the pan is hot but not smoking.
- Add the floured chicken cutlets to the skillet (do not overcrowd). Cook 4–5 minutes per side, until each side is golden brown. Transfer the cooked cutlets to a plate and keep any juices on the plate.
- Before adding the chicken broth to the pan, measure out and set aside 1 tablespoon of the 1/2 cup chicken broth for the cornstarch slurry.
- With the pan off the heat or over low heat, add the remaining chicken broth (about 7 tablespoons), 1 tablespoon low-sodium soy sauce, 1 tablespoon honey, 4 cloves minced garlic, and the remaining 1 tablespoon butter to the skillet. Return the pan to medium heat and bring the sauce to a gentle simmer, scraping up browned bits from the bottom of the pan. Let it simmer about 1 minute.
- In a small bowl, whisk the reserved 1 tablespoon chicken broth with 1/2 teaspoon cornstarch until smooth. Slowly whisk this slurry into the simmering sauce. Cook 30–60 seconds, stirring, until the sauce thickens slightly.
- Return the chicken to the pan along with any juices from the plate. Spoon sauce over the cutlets and continue to cook 3–5 minutes, or until the chicken is cooked through (165°F internal temperature) and the sauce has reduced to your liking. Reduce the heat if the sauce is bubbling too vigorously.
- Remove from heat and serve immediately, spooning extra sauce over the chicken.