How to Cook Farro
I fell for farro the way a cook falls for any good ingredient: because it keeps its texture, takes on flavor willingly, and makes simple meals feel grown-up. If you’ve bought a bag and then stared at it for a while wondering where to start, this guide will walk you through a reliable, fail-safe method. No exotic equipment. No fuss. Just grain that cooks to tender-with-bite perfection and a bright dressing that makes it sing.
This recipe is a base—one that becomes a salad, a bowl component, or the foundation for a picnic. The method focuses on good texture, clean seasoning, and a little finish to keep things fresh. Follow the steps, pay attention to the brief cooling stage, and you’ll avoid gummy farro every time.
Expect practical notes along the way: timing for pearled versus whole grain, an explanation of why we spread the cooked grain to cool, and quick fixes if something goes off course. I cook farro on repeat in colder months and on busy weeknights. Once you get the rhythm, it will be the grain you reach for when you want something simple but satisfying.
Ingredients at a Glance
- 1 cup uncooked farro, rinsed — the grain base; rinsing removes surface dust and any loose hull fragments.
- 1 tablespoon extra-virgin olive oil — provides body and helps emulsify the dressing.
- ½ tablespoon fresh lemon juice, plus more to taste — bright acid to wake up the grain.
- ½ tablespoon fresh thyme leaves — herb note that pairs well with earthy farro.
- 1 garlic clove, grated — gentle raw garlic flavor distributed evenly through the dressing.
- ¼ teaspoon Dijon mustard — an emulsifier that helps the oil and lemon marry.
- ½ teaspoon sea salt, plus more to taste — seasoning for the dressing and the grain.
- Freshly ground black pepper — finishing spice; grind to taste.
- ½ cup chopped fresh parsley — freshness and color; fold in at the end.
- Red pepper flakes, optional — a pinch if you want a little heat.
Build (Farro) Step by Step
- Place 1 cup rinsed uncooked farro in a medium pot half full of water and bring to a boil.
- Reduce the heat to a simmer and cook the farro until tender with a chewy, al dente bite: 10–20 minutes for pearled farro, 20–30 minutes for semi-pearled, or up to 40 minutes for whole farro.
- Drain the cooked farro and spread it in a single layer on a large plate or sheet pan. Let it cool and dry for about 20 minutes to stop steaming and prevent it from becoming mushy.
- While the farro cools, make the dressing: in a large mixing bowl whisk together 1 tablespoon extra-virgin olive oil, ½ tablespoon fresh lemon juice, ½ tablespoon fresh thyme leaves, 1 grated garlic clove, ¼ teaspoon Dijon mustard, ½ teaspoon sea salt, and several grinds of freshly ground black pepper.
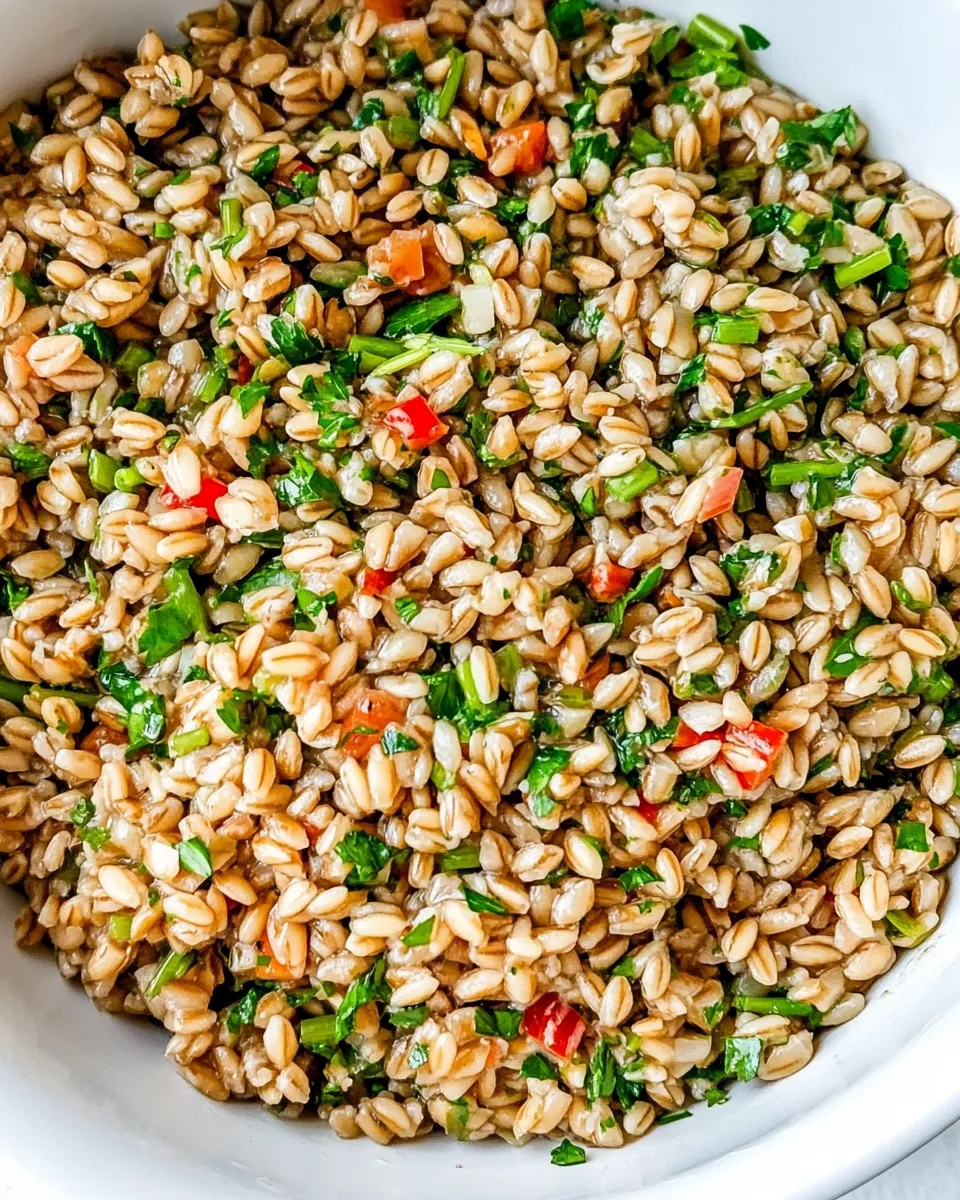
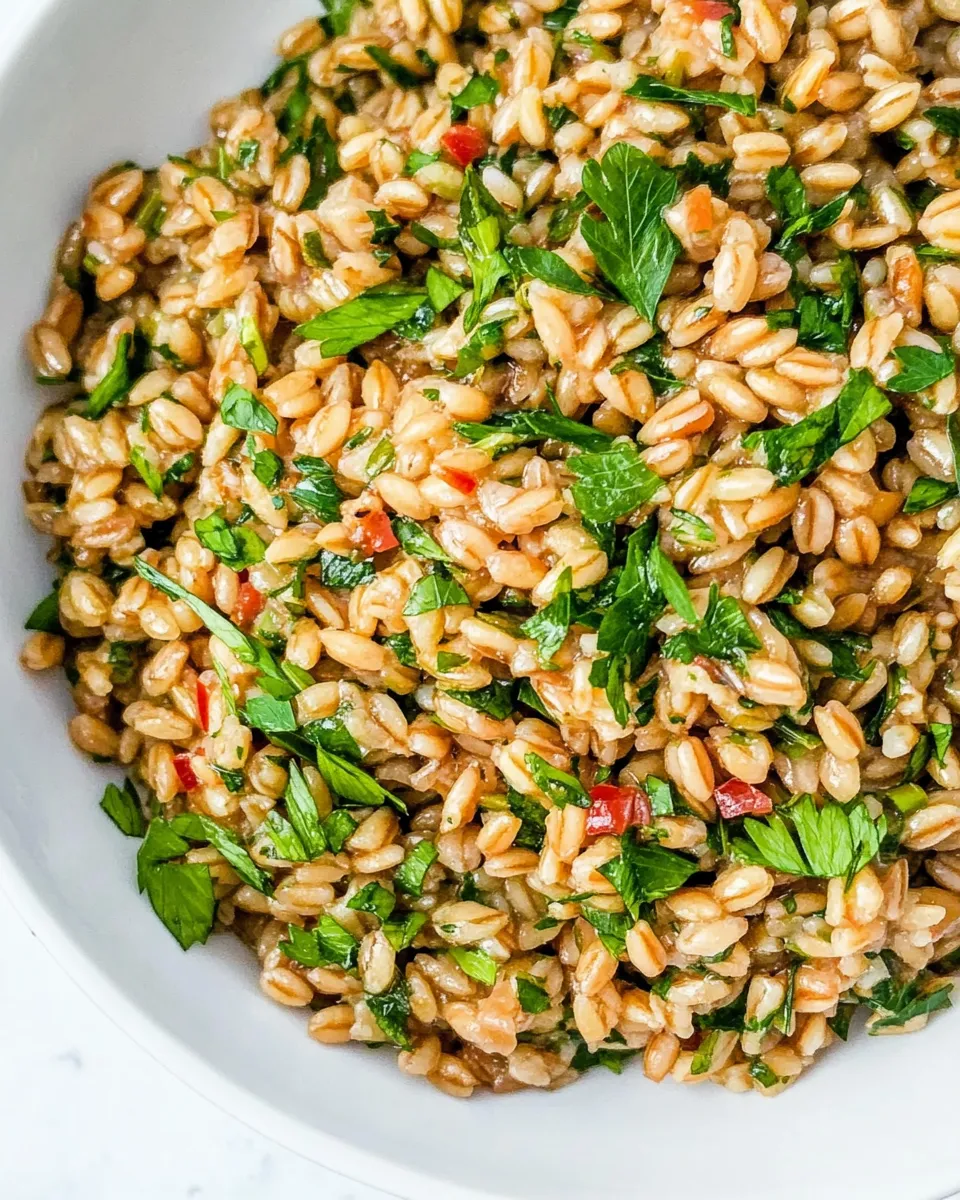
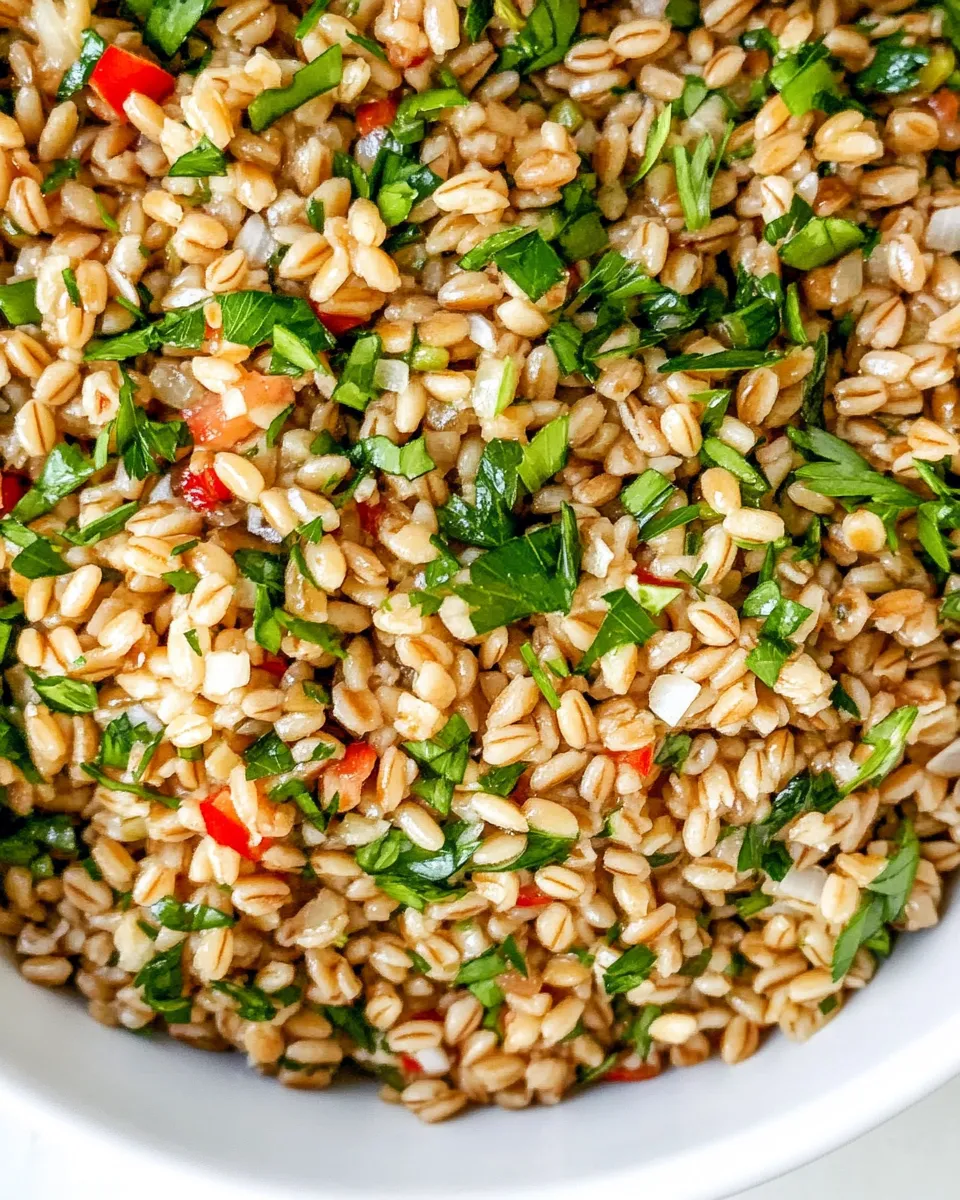
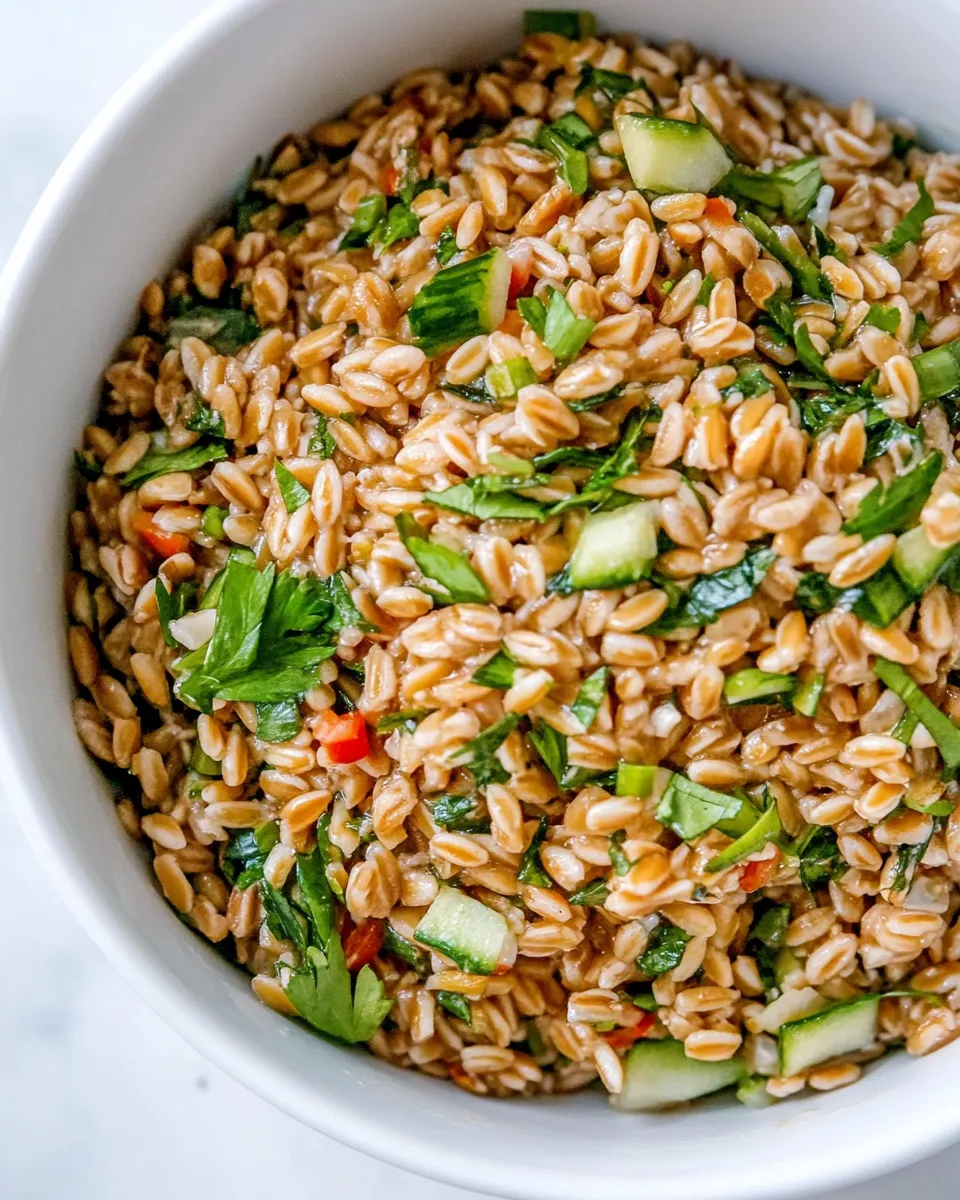
- Add the cooled farro to the bowl with the dressing and toss until evenly coated.
- Stir in ½ cup chopped fresh parsley and a pinch of red pepper flakes, if using.
- Taste and adjust seasonings as desired, adding more lemon juice, sea salt, or black pepper to taste. Serve.
Why This Recipe Is Reliable
This method prioritizes texture and seasoning. Cooking farro in plenty of water and then draining it is forgiving: you won’t over-reduce the pot and concentrate starches the way you might if you used a tight liquid ratio. The timing window for different farro types is explicit, so you can stop testing early with pearled or let whole grain go longer without fretting.
Spreading the grain to cool is a small step with a big payoff. Hot, steaming farro will steam itself in a bowl and soften into a paste; spreading it stops the carryover cooking and helps each kernel remain distinct. That’s why step 3 is non-negotiable if you want a salad-like texture.
The dressing is simple but built to cling. The Dijon and grated garlic act as emulsifiers, the lemon brightens, and a modest amount of olive oil gives the farro a glossy finish. Toss while the grain is cool so the dressing adheres without wilting the parsley or overpowering the grain.
International Equivalents
Farro is an ancient wheat grain most commonly associated with Italian cooking, but similar chewy grains appear worldwide. If you’re comparing, keep these points in mind:
- Barley — similar chew and nutty flavor; hulled barley is the closest in texture, though cooking times and hydration differ.
- Bulgur — quicker-cooking and more crumbly; cracked wheat that soaks up dressings well but lacks the same chew.
- Wheat berries — essentially whole wheat kernels; they match farro’s chew if you’re after a whole-grain profile, but cook times vary.
When substituting, expect to adjust cooking time and the draining/cooling step to preserve texture. The dressing ratios here work well with any of these swaps, but start with less oil and lemon and adjust to taste.
Tools of the Trade
- Medium pot — for even heat and enough water to boil the farro without crowding.
- Fine-mesh sieve — for draining the grain quickly and thoroughly.
- Large plate or rimmed sheet pan — to spread the cooked farro in a single layer for cooling.
- Large mixing bowl — to make the dressing and toss the grain.
- Whisk or fork — to emulsify the dressing.
- Microplane or fine grater — for grating the garlic so it disperses evenly (a small knife and finely mincing works too).
Missteps & Fixes
Even experienced cooks hit snags. Here are the common issues and how to correct them.
- Farro is mushy: That usually means it overcooked or didn’t cool quickly. Fix: If it’s salvageable, spread it thin on a sheet pan and chill briefly to firm up; use it warm in soups or stews where softer texture is fine. Next time, shorten simmer time and follow the cooling step exactly.
- Farro is undercooked and hard: Return it to a pot with a splash of water, simmer gently until tender, and then drain and cool. Taste at the lower end of the recommended time window for future batches.
- Dressing tastes flat: Add a little more lemon juice or a pinch more salt. Freshly ground black pepper wakes the flavors right up.
- Grain sticks together after dressing: Toss while the farro is cool and use just enough oil to coat. If it’s clumping because of excess starch, spread it out again and let it dry briefly before re-tossing.
Variations for Dietary Needs
The recipe as written is vegetarian and suitable for most diets that allow wheat. Here are tweaks without changing the ingredient list itself—only adjustments to how you serve and pair the finished Farro.
- Vegan: Already vegan as written. Keep the olive oil and lemon; they give plenty of richness.
- Lower sodium: Use less of the listed ½ teaspoon sea salt initially and finish with a taste of lemon instead. Add small pinches of salt while tasting rather than all at once.
- Gluten-free swap: Farro contains gluten. If you need a gluten-free option, substitute cooked quinoa or gluten-free sorghum and follow the same dressing and cooling method.
Chef’s Notes
Farro has personality. Cooking it well gives you chewy, nutty kernels that stand up in salads, bowls, and as a side. A couple of chef-minded notes:
- Timing is your friend: If you’re using pearled farro, start checking at 10 minutes. The range in step 2 accounts for package variability and altitude, so rely on a taste test for final judgment.
- Herb choices: The recipe lists thyme and parsley; they’re subtle companions. If you prefer, swap thyme for another herb in the same quantity, but add that variation after you’ve tasted the base dressing.
- Garlic handling: Grated garlic disperses more evenly and gives a milder, integrated flavor than a rough chop. If raw garlic is aggressive for you, let the grated clove sit in the lemon and salt for a few minutes before adding the oil to soften the bite.
Storing, Freezing & Reheating
Cooked farro keeps well and is convenient to batch-cook.
- Refrigeration: Store dressed farro in an airtight container for up to 3–4 days. If you plan to use it as a base for multiple meals, store the plain cooked-and-cooled farro (undressed) separately for up to 5 days and dress just before serving.
- Freezing: I don’t recommend freezing the dressed salad; the texture changes. Plain cooked farro freezes fine for up to 3 months in a freezer-safe bag. Thaw overnight in the fridge and refresh by tossing with fresh lemon and oil.
- Reheating: For warm bowls, reheat plain farro gently on the stovetop with a splash of water or broth, then finish with the lemon-oil dressing off the heat. Microwaving is fine for short bursts, but avoid overheating which will dry it out.
Ask & Learn
If you’re trying this for the first time, tell me what kind of farro you used and how the texture measured up for you. Pearled farro is forgiving and fast; whole farro is heartier and chewier. If the dressing didn’t cling or the garlic felt too sharp, those are easy fixes I can help you tweak.
Common questions I get: how to scale this for a crowd (double the grain and dressing, but taste as you go), whether to salt the cooking water (not necessary with this draining method because we season the dressing), and how to make it a full meal (add roasted vegetables or a can of rinsed beans for protein—if you want exact pairing ideas, say the word and I’ll give combinations that keep the spirit of this recipe).
In Closing
This farro method is straightforward because small steps matter: rinse, watch the clock, cool flat, and dress gently. Those few minutes in step 3 make all the difference between a clumpy dish and something light and versatile.
Make a batch on Sunday and you’ll have a base for weeknight dinners, quick lunches, and grain salads that feel considered without being complicated. I cook it for its texture, but I keep going back for its ability to improve whatever it meets—herbs, lemon, and a good drizzle of olive oil included.
How to Cook Farro
Ingredients
Equipment
Method
- Place 1 cup rinsed uncooked farro in a medium pot half full of water and bring to a boil.
- Reduce the heat to a simmer and cook the farro until tender with a chewy, al dente bite: 10–20 minutes for pearled farro, 20–30 minutes for semi-pearled, or up to 40 minutes for whole farro.
- Drain the cooked farro and spread it in a single layer on a large plate or sheet pan. Let it cool and dry for about 20 minutes to stop steaming and prevent it from becoming mushy.
- While the farro cools, make the dressing: in a large mixing bowl whisk together 1 tablespoon extra-virgin olive oil, ½ tablespoon fresh lemon juice, ½ tablespoon fresh thyme leaves, 1 grated garlic clove, ¼ teaspoon Dijon mustard, ½ teaspoon sea salt, and several grinds of freshly ground black pepper.
- Add the cooled farro to the bowl with the dressing and toss until evenly coated.
- Stir in ½ cup chopped fresh parsley and a pinch of red pepper flakes, if using.
- Taste and adjust seasonings as desired, adding more lemon juice, sea salt, or black pepper to taste. Serve.
Notes
Store cooked farro in the fridge for up to 5 days. To freeze farro, first freeze it on a single layer on a baking sheet, then transfer to a freezer container.