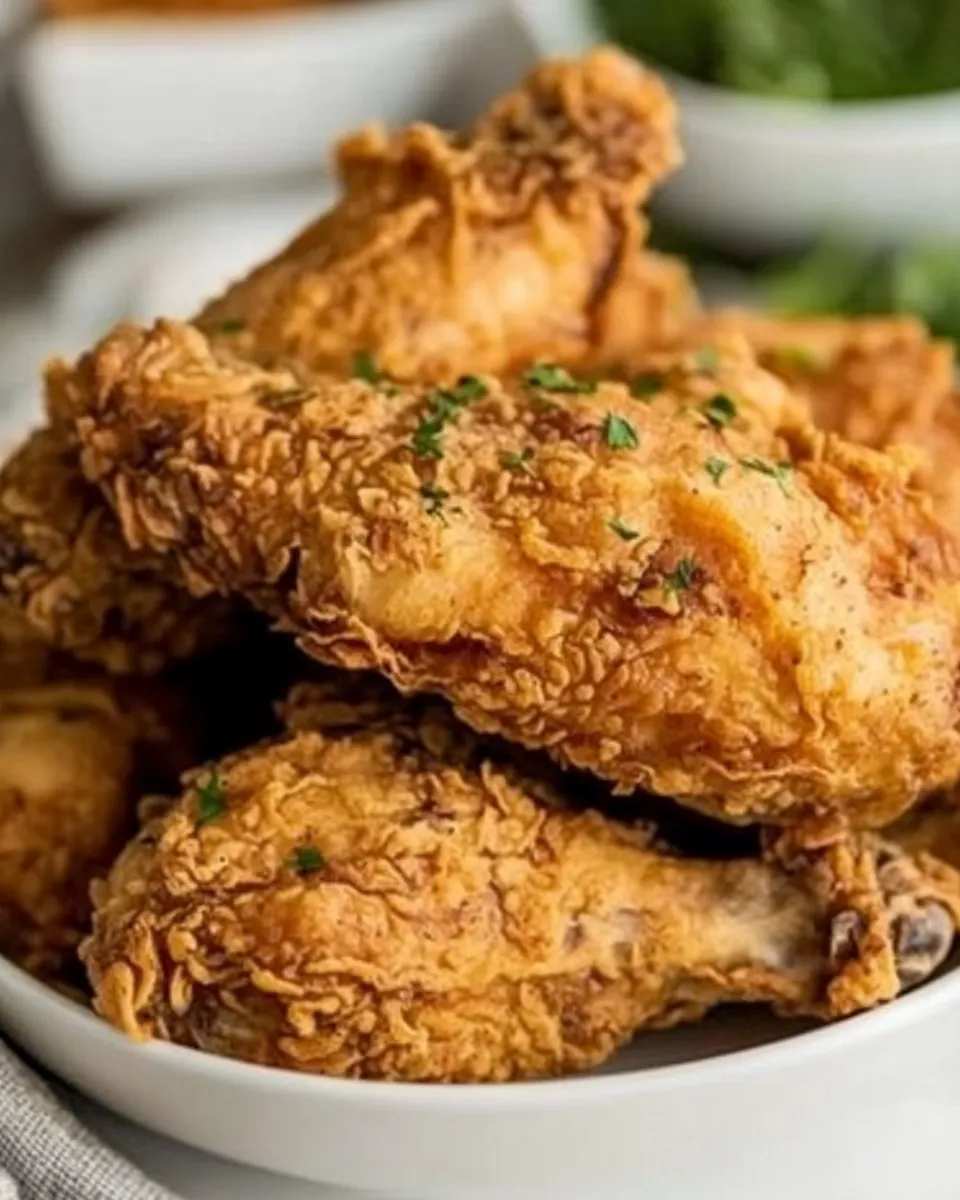
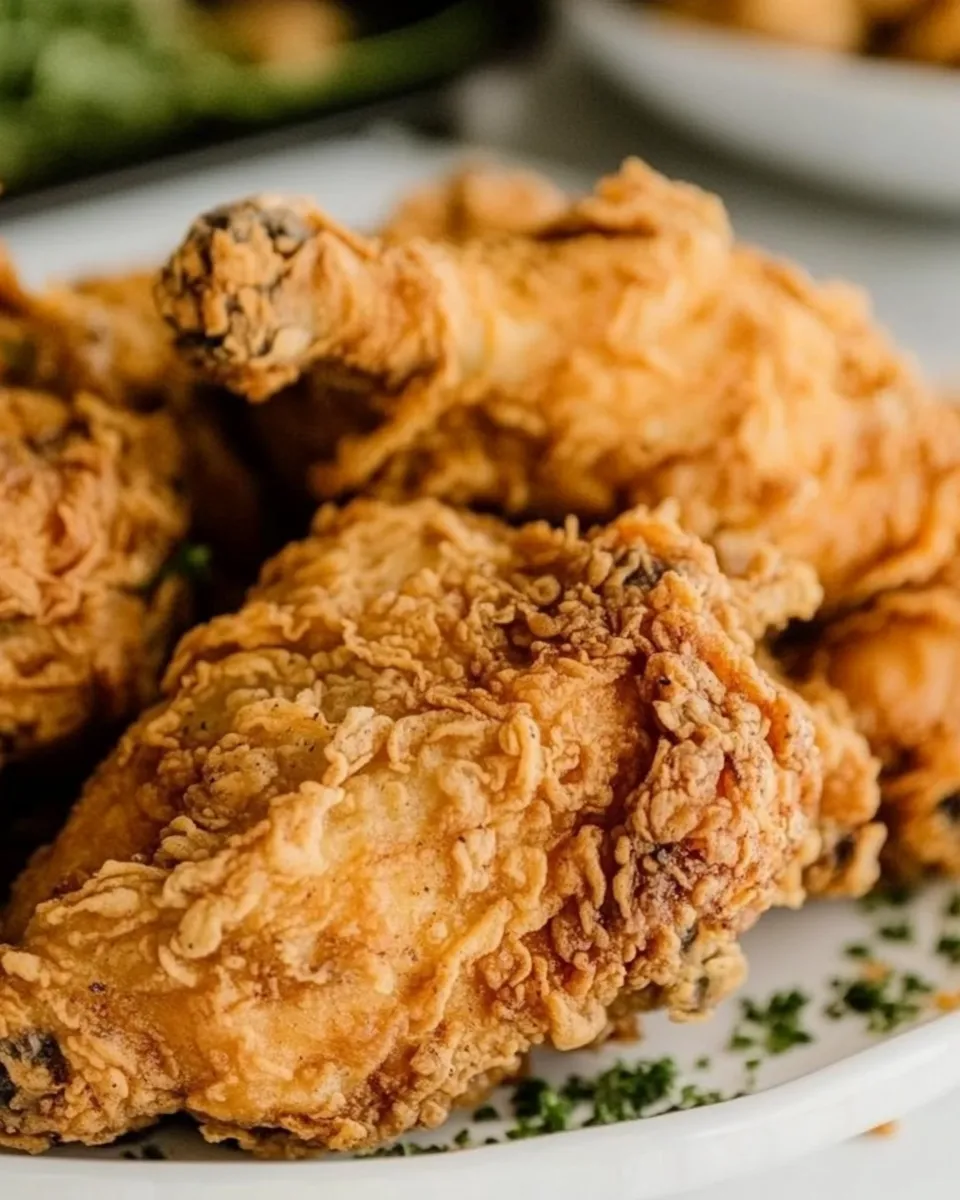
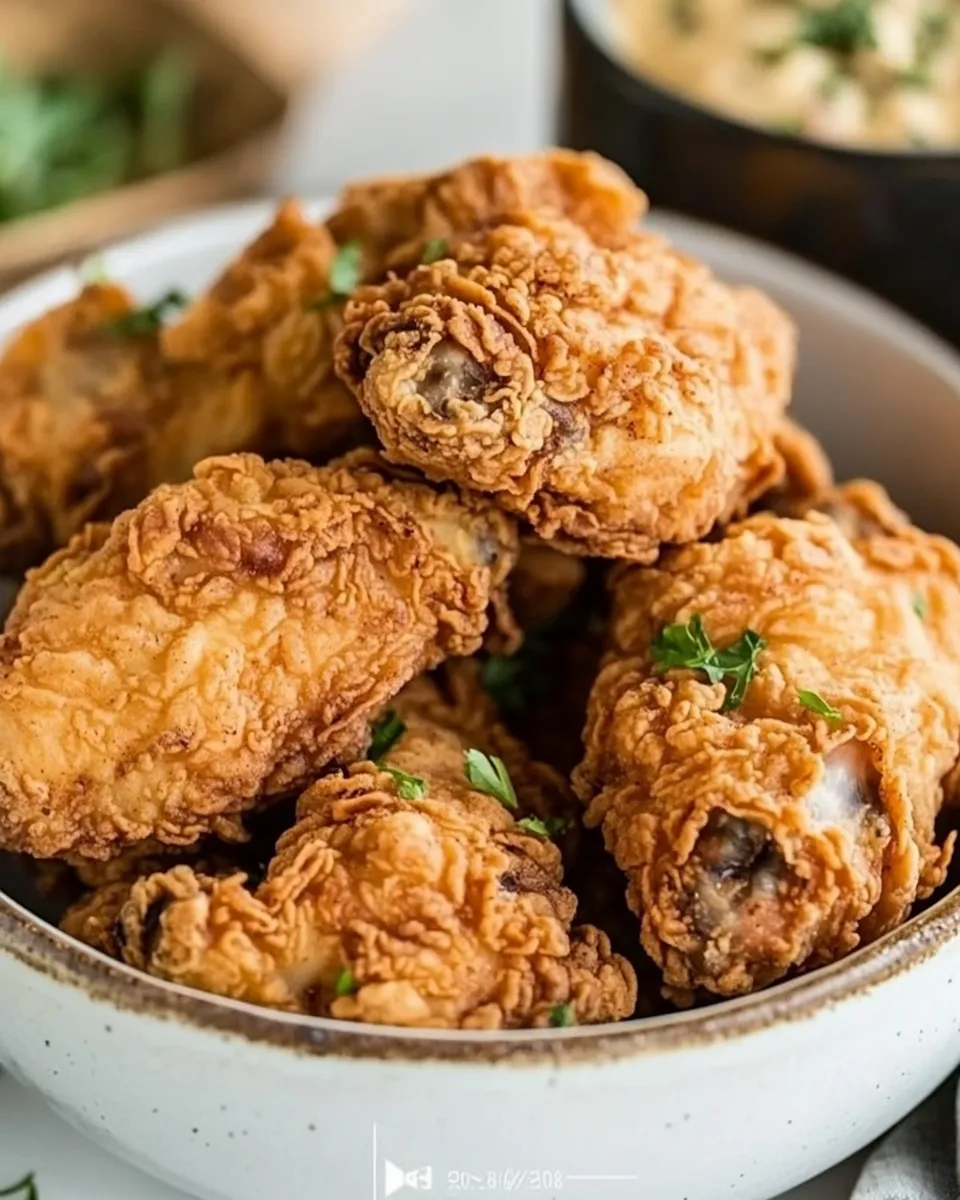
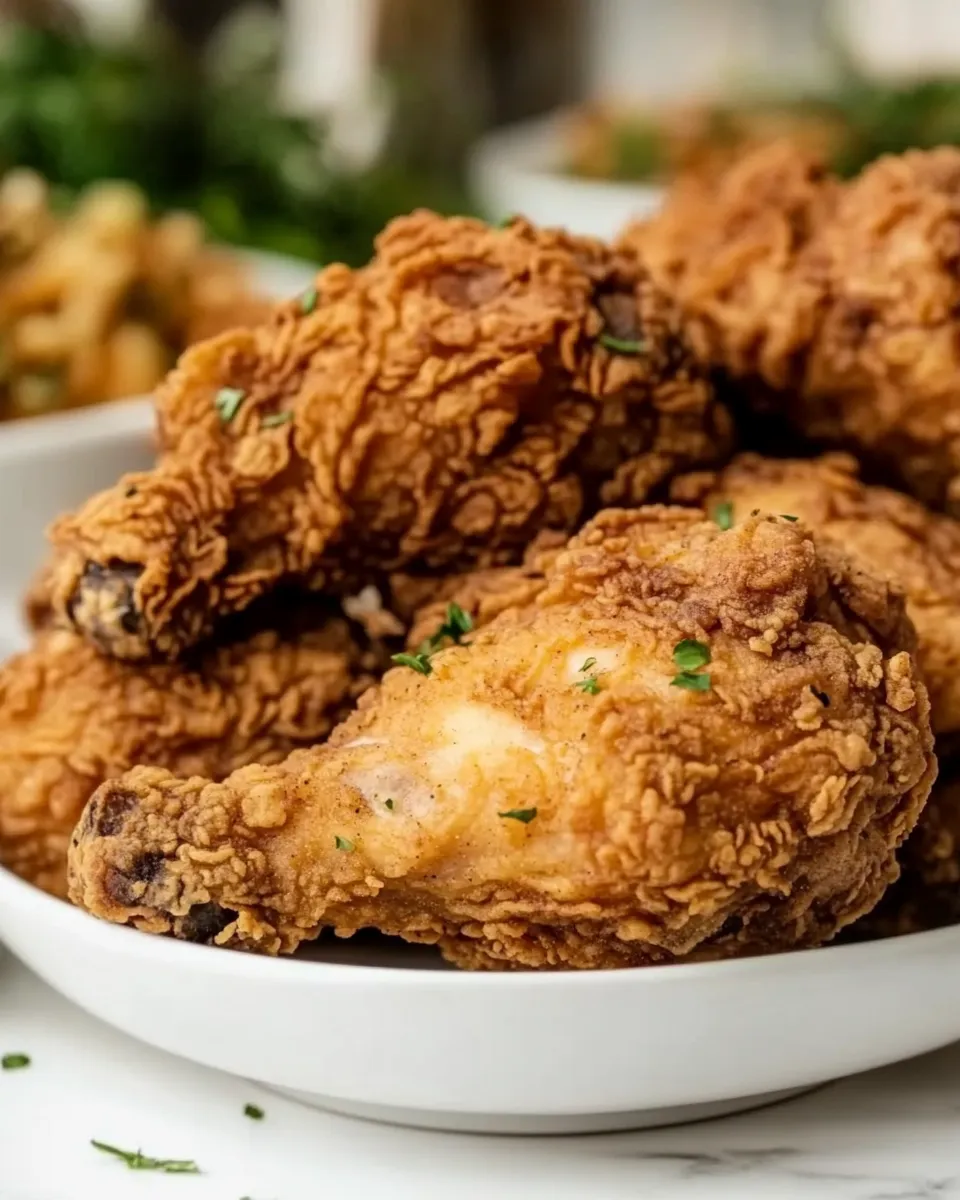
How to Make Crispy Fried Chicken
This is my go-to recipe when I want perfectly crisp skin, juicy meat, and a straightforward process I can rely on every time. No complicated brines or mysterious steps — just simple seasoning, a wet dip, and a double-dredge that creates that crackling crust. If you like a golden, crunchy exterior and meat that stays tender, this method delivers.
I’ll walk you through the shopping priorities, the exact frying sequence, and the troubleshooting tips I use when a batch doesn’t behave. There are small details that make the biggest difference: oil temperature, order of frying, and giving the chicken a short rest before serving. Follow those, and you’ll get consistently great results.
This post includes the ingredients as written, a clear step-by-step frying sequence, and practical variations that stick to the same core components. Read the full instructions before you start frying so you can set up efficiently and keep the oil steady.
Shopping List
Shop with the frying process in mind: buy a 4–5 pound whole chicken and ask the butcher to cut it into eight pieces if you prefer not to do it yourself. Pick up enough oil to give you about 2 inches in your pot — a neutral oil with a high smoke point works best. Check your pantry for all-purpose flour and the three dry seasonings listed; if any are low, replace them before you begin.
Buttermilk is an important ingredient here, so buy 2 cups. If you’re out, you’ll want to pick some up rather than substitute; the acid and thickness help the coating adhere. Also grab paper towels and a reliable instant-read thermometer if you don’t already own one — they’re small purchases that pay off on the first try.
Ingredients
- Oil for frying — the cooking medium; needs a high smoke point and enough volume for 2 inches of depth.
- 3 cups all-purpose flour — the base for the dry coating; gives structure and crunch.
- 1 tablespoon garlic powder — primary savory note in the flour mixture.
- 1 1/2 teaspoons onion powder — adds depth to the seasoning blend.
- 1 teaspoon cayenne pepper — provides heat; adjust slightly to taste.
- Salt and freshly ground black pepper — seasoning to taste; essential for balanced flavor.
- 2 cups buttermilk (see note 1) — for the wet dip that helps the flour adhere and tenderizes slightly.
- 1 (4- to 5-pound) whole chicken cut into 8 pieces and giblets removed and discarded (see note 2) — the protein; pieces are fried in order for even cooking.
Crispy Fried Chicken: From Prep to Plate
Instructions
- Set up two large bowls: in Bowl A whisk together 3 cups all-purpose flour, 1 tablespoon garlic powder, 1 1/2 teaspoons onion powder, 1 teaspoon cayenne pepper, and salt and freshly ground black pepper to taste. In Bowl B pour 2 cups buttermilk.
- Pat the 1 (4- to 5-pound) whole chicken pieces dry with paper towels (if not already cut, cut into 8 pieces and remove/discard giblets as noted).
- In a large pot, Dutch oven, or deep fryer, pour about 2 inches of oil and heat to 325°F (use a thermometer to monitor temperature).
- Working one piece at a time and starting with a breast as instructed, dredge the chicken piece first in the flour mixture (Bowl A), shaking off any large clumps.
- Dip the floured piece into the buttermilk (Bowl B), then lightly tap it on the side of the bowl to remove excess buttermilk.
- Return the piece to the flour mixture and firmly press and pinch the flour onto the chicken so it is well coated. Place the coated piece into the hot oil. (Repeat the dredge–buttermilk–dredge process for each piece.)
- Continue coating and placing pieces into the oil in this order: breast, thighs, legs, wings. Do not overcrowd the pot — fry in batches if necessary to keep the oil temperature steady.
- Maintain the oil temperature near 325°F, adjusting heat as needed. Turn the pieces occasionally for even browning.
- After about 15 minutes from when the pieces go into the oil (timing will vary by batch and size), check the thickest part of a breast with an instant-read thermometer; the internal temperature should reach 165°F.
- When cooked, remove chicken from the oil and drain on paper towels. Let rest and cool for 10 minutes before serving.
Why It Works Every Time
The method is simple and dependable because each element plays a clear role. The dry flour mix builds structure; garlic and onion powders season the crust evenly; cayenne gives a controlled heat. Buttermilk acts as both adhesive and tenderizer — it helps the flour stick and creates steam between layers of coating as the chicken fries, which contributes to a flakier crust.
Temperature control is the real secret. Heating the oil to roughly 325°F allows the inside to cook fully before the coating gets too dark. Keeping the oil steady and frying in batches prevents the temperature from dropping too far when cold pieces go in — that’s what leads to greasy, soggy crusts. Turning pieces occasionally produces even color and a consistent crust thickness.
The order of frying matters, too. Starting with breasts and finishing with wings balances cook times because breasts are thicker and need early placement while wings are smaller and brown faster. Resting the chicken after frying allows the juices to redistribute and the crust to set, so it stays crisp when you bite in.
Flavor-Forward Alternatives
Work with the seasonings already in the mix to shift the profile without changing the technique:
- Heat up or tone down: Increase or decrease the 1 teaspoon cayenne pepper to adjust spiciness. A small increase makes the crust noticeably bolder; a reduction keeps things mild.
- Boost savory notes: Add a little more garlic powder or onion powder to the flour mixture if you want a more pronounced savory crust while keeping the same method.
- Salt strategy: Be precise with salt in the flour and at the end. The salt in the flour seasons the crust; a light finish after frying gives a bright lift without overwhelming.
- Buttermilk timing: Extend the time the pieces sit in buttermilk before dredging for a subtle tenderizing effect. Even 30–60 minutes in the fridge helps the surface pick up more flavor and adhesion.
Prep & Cook Tools
Gather these items before you begin so the process moves smoothly:
- Large pot, Dutch oven, or dedicated deep fryer — to hold 2 inches of oil safely.
- Instant-read thermometer — for both oil and chicken internal temperature checks.
- Two large bowls — one for the flour mix (Bowl A) and one for buttermilk (Bowl B).
- Tongs and a slotted spoon or spider — to turn and remove pieces safely.
- Paper towels and a rimmed baking sheet — for draining and resting fried pieces.
- Plate or wire rack — a rack over a sheet pan is ideal to keep the crust crisp while cooling.
Problems & Prevention
Here are the common mishaps and what to do about them.
Soggy crust
Cause: oil too cool or overcrowding the pot. Prevention: keep the oil near 325°F and fry in batches so the temperature recovers quickly.
Over-browned exterior, undercooked interior
Cause: oil too hot. Prevention: monitor with a thermometer and lower heat to maintain roughly 325°F. If pieces are browning too fast, reduce heat and finish in the oven (see Pro Tips).
Coating falls off
Cause: not enough pressing of the flour on the second dredge or wet surface. Prevention: firmly press the flour onto the buttermilk-damp chicken during the second coating and tap off excess but don’t brush it away.
Greasy chicken
Cause: oil temperature drop or not letting drained pieces rest properly. Prevention: allow oil to return to temp between batches, and drain on paper towels or a wire rack briefly before serving. Rest for 10 minutes so steam doesn’t re-soften the crust.
Holiday-Friendly Variations
This basic fried chicken fits into many holiday meals with small, conservative adjustments that keep to the same ingredient list and technique:
- Make extra and hold warm in a low oven on a rack for holiday service. Low oven helps keep the crust crisp while you finish other dishes.
- Adjust the cayenne and garlic powder to dial the flavor toward what your guests prefer — milder for family gatherings, spikier for a party vibe.
- Plan batch timing: fry in multiple rounds and keep finished pieces on a wire rack in a warm oven until ready to plate so everyone gets crisp chicken at once.
Pro Tips & Notes
Short, practical tips I use every time:
- Thermometer discipline: use a reliable thermometer for both oil and internal checks. 325°F oil and 165°F internal for breasts are your targets.
- Order of pieces: follow the order given — breast, thighs, legs, wings — to manage cooking times and oil temperature consistency.
- Press the coating: when you return a buttermilk-dipped piece to the flour, press the flour into the surface so it adheres during frying.
- Let it rest: the 10-minute rest after frying firms the crust and lets juices redistribute, improving texture and flavor.
- Paper towels vs. rack: a wire rack over a sheet pan is preferable to paper towels if you want to keep the underside crisp during a longer plating period.
Storing, Freezing & Reheating
Store cooled fried chicken in airtight containers in the refrigerator for up to 3 days. For longer storage, freeze portions on a tray until solid, then transfer to freezer-safe containers for up to 2 months.
To reheat without sacrificing too much crispness, use a preheated oven at 350°F on a wire rack set over a baking sheet. Reheat until the internal temperature reaches at least 165°F. Avoid the microwave for reheating if you care about crispness — it will soften the crust.
Ask & Learn
If you run into specific problems with your batch, tell me what happened: oil temperature, which pieces seemed off, and whether you pressed the coating tightly. With those details I’ll suggest focused fixes — whether that’s adjusting your heat source, changing batch size, or using a quick oven finish.
Save & Share
If this method works for you, save the recipe and share it with a friend who needs a dependable fried chicken technique. It’s the kind of recipe that gets better with repetition — each batch teaches a small lesson about heat control and timing, and soon you’ll have your routine down.
How to Make Crispy Fried Chicken
Ingredients
Equipment
Method
- Set up two large bowls: in Bowl A whisk together 3 cups all-purpose flour, 1 tablespoon garlic powder, 1 1/2 teaspoons onion powder, 1 teaspoon cayenne pepper, and salt and freshly ground black pepper to taste. In Bowl B pour 2 cups buttermilk.
- Pat the 1 (4- to 5-pound) whole chicken pieces dry with paper towels (if not already cut, cut into 8 pieces and remove/discard giblets as noted).
- In a large pot, Dutch oven, or deep fryer, pour about 2 inches of oil and heat to 325°F (use a thermometer to monitor temperature).
- Working one piece at a time and starting with a breast as instructed, dredge the chicken piece first in the flour mixture (Bowl A), shaking off any large clumps.
- Dip the floured piece into the buttermilk (Bowl B), then lightly tap it on the side of the bowl to remove excess buttermilk.
- Return the piece to the flour mixture and firmly press and pinch the flour onto the chicken so it is well coated. Place the coated piece into the hot oil. (Repeat the dredge–buttermilk–dredge process for each piece.)
- Continue coating and placing pieces into the oil in this order: breast, thighs, legs, wings. Do not overcrowd the pot — fry in batches if necessary to keep the oil temperature steady.
- Maintain the oil temperature near 325°F, adjusting heat as needed. Turn the pieces occasionally for even browning.
- After about 15 minutes from when the pieces go into the oil (timing will vary by batch and size), check the thickest part of a breast with an instant-read thermometer; the internal temperature should reach 165°F.
- When cooked, remove chicken from the oil and drain on paper towels. Let rest and cool for 10 minutes before serving.
Notes
Chicken:This recipe uses a whole raw chicken (cut apart into breasts, thighs, legs, and wings). Or, substitute 8 pieces of bone-in, skin-on chicken pieces of your choice.