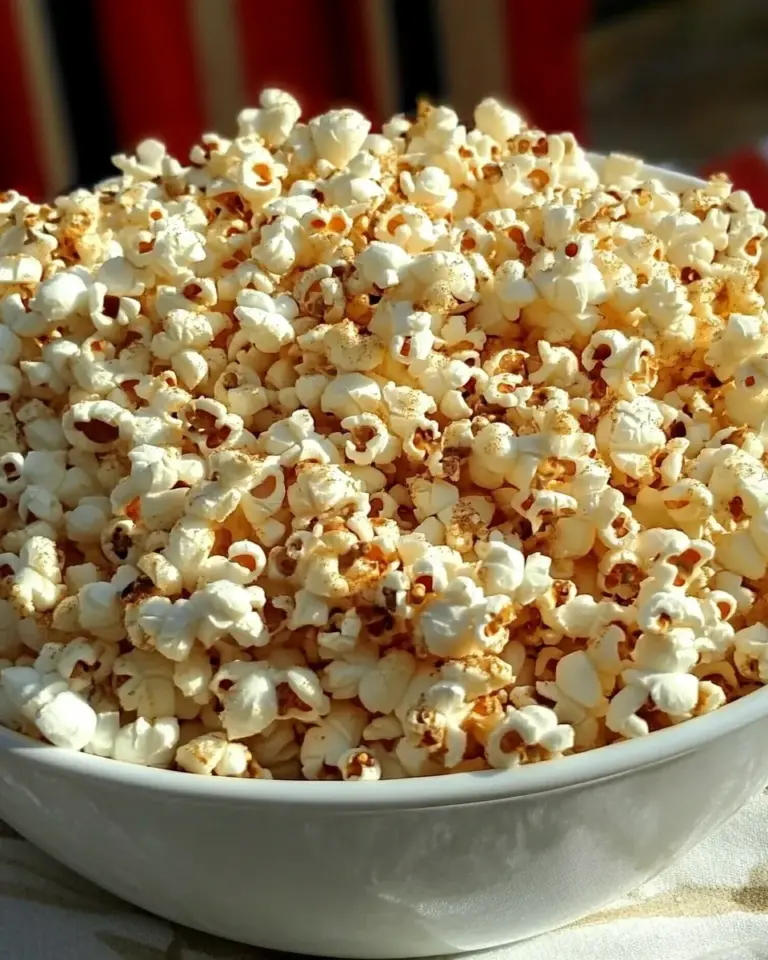
How to Pop Popcorn on the Stove
I love the ritual of making stovetop popcorn: the gentle clink of kernels, that first triumphant pop, and the steam that smells like comfort. It’s simple, fast, and gives you control over flavor and texture in a way microwave bags never do. Once you get a rhythm with the pot, you’ll find this method is both reliable and oddly satisfying.
This guide walks you through everything you need to know to pop a single, perfect batch on the stove. I keep the instructions practical and precise so you can replicate the results every time. Expect crisp, fluffy popcorn and a quick cleanup.
Read the steps first, then bookmark the tips. With a 9-inch pot and a handful of attention, you’ll have fresh popcorn in minutes.
What You’ll Need

Stovetop popcorn is about a few pieces working together: the right pot, a reliable oil, and measured kernels. Below are the ingredients from the recipe, followed by the basic equipment you’ll use.
Ingredients
- 1/4 cup canola, vegetable, or coconut oil — the heat medium that gets kernels to pop; pick one with a high smoke point and a flavor you like.
- 1 cup popcorn kernels — the only grain you need here; measure this for a single full pot so kernels spread in a single layer.
- sea salt, optional — a finishing touch; you can add a pinch before popping or sprinkle after, depending on preference.
- melted butter or additional mix-ins, optional — to finish and carry flavors; toss while the popcorn is warm so coatings stick better.
Cooking (Pop Popcorn on the Stove): The Process
- Use a pot with a matching lid and a large surface area (about 5 inches deep and 9 inches across is good for 1 cup of popcorn).
- Pour 1/4 cup canola, vegetable, or coconut oil into the pot.
- Add 1 cup popcorn kernels to the oil. If using, sprinkle in a little sea salt. Shake or tilt the pot so the kernels are coated with oil and spread in a single layer (not piled on top of each other).
- Place the pot over medium heat. Begin sliding the pot back and forth over the burner or gently shaking it side to side so the kernels move and heat evenly.
- When the first kernel pops (about 3–5 minutes), put the lid on the pot. Continue sliding/shaking the pot so the remaining kernels pop evenly.
- When the popping slows to about 2–3 seconds between pops, remove the pot from the heat and carefully lift the lid away from you to release steam.
- Transfer the popcorn to a bowl. Toss with melted butter or other mix-ins and additional sea salt if desired, and serve immediately.
What Makes This Recipe Special

This stovetop method gives you flavor control and texture that’s hard to match. You choose the oil, so you can keep it neutral or pick one with a touch of coconut aroma. You can salt lightly before popping for even seasoning or wait and adjust afterward. Either way, the popcorn stays crisp because the steam is released when you lift the lid away from the bowl.
Compared with microwave or prepackaged options, this approach delivers bigger, more evenly popped kernels. The wider, shallow pot helps spread heat so kernels cook together rather than in concentrated hot spots. Shaking the pot keeps things moving; that movement reduces scorch and gives a more consistent pop.
It’s also fast. From pouring in oil to transferring to a bowl you’re looking at under 10 minutes, and cleanup is straightforward. This makes it perfect for last-minute snacks, a small movie night, or a quick treat for kids after school.
If You’re Out Of…

If you don’t have one of the oils listed, use one of the other two — the recipe names three interchangeable options for a reason. Vegetable and canola are neutral and reliable. Coconut adds a hint of its characteristic scent and can brown faster, so watch the heat closely.
If you find you’re out of sea salt and want a little seasoning immediately, you can skip it during popping and add whatever finishing salt or seasoning you have on hand after the popcorn is in the bowl. The recipe gives you optional space for finishing ingredients so you won’t lose the core method if something’s missing.
Setup & Equipment
Essential
- A pot roughly 5 inches deep and 9 inches across with a tight-fitting lid — the right size matters for even heating.
- A reliable burner and medium heat setting — consistent heat matters more than high heat.
- Measuring cup for oil and kernels — keep the ratio the same for predictable results.
- Large mixing bowl for tossing and serving — popcorn expands quickly; use a roomy bowl.
Nice to Have
- A pair of oven mitts or a thick towel for handling a hot pot.
- A small heatproof bowl for melted butter or seasonings you plan to drizzle.
- A wooden spoon or heatproof spatula to help tilt or shake if the pot is heavy.
Errors to Dodge
Don’t use too small a pot. If kernels pile on top of each other they’ll steam instead of pop and give you many unpopped pieces. A wide surface matters.
Avoid high heat. Cranking the burner will scorch the oil and burn the popped corn before the rest of the kernels have a chance. Medium heat gives the kernels time to reach popping temperature together, which yields more complete popping and fewer burnt bits.
Don’t leave the pot stationary. Sliding or gently shaking the pot keeps the kernels moving and distributes heat. It also prevents hot spots and burned kernels along the pot’s bottom.
Don’t remove the lid right away once popping slows. Doing so traps steam and soggifies the popcorn. Lift the lid away from your face to release steam safely once you’ve taken the pot off the heat.
Seasonal Serving Ideas
Stovetop popcorn is a versatile base for seasonal flavors. For cozy autumn evenings, serve warm popcorn in a bowl on the coffee table for family movie night. In winter, it’s a great party nibble that travels well — toss just before guests arrive so it stays crisp. During warmer months, a plainly salted batch is refreshing on a porch with lemonade.
Because the recipe finishes with optional melted butter or mix-ins, you can adapt the popcorn to the occasion without changing the popping method. Make a big bowl for game day, or portion smaller bowls for kids to customize at a party.
Chef’s Notes
Use the pan size suggested for a one-cup batch. If you double the kernels, use a larger pot and increase the oil proportionally, but keep them in a single layer so they heat evenly. If you’re unsure whether your pot is large enough, err on the side of a wider pan rather than a taller one.
Coating the kernels with oil ensures even heating and helps any salt adhere if you add it before popping. If you plan to toss with melted butter, let the popcorn cool for a minute so it doesn’t steam itself soggy, then add the butter in small amounts and toss quickly.
When you hear the first pop, that’s your cue to cover the pot. It traps heat so the other kernels come up to temperature quickly, but keep motion going. A little shake every few seconds keeps things moving without constant lifting of the lid.
Save It for Later
Leftover popcorn stays best when stored in an airtight container at room temperature. It will keep for a few days with good texture if sealed tightly. If you plan to add any wet toppings like melted butter, serve immediately or those additions will soften the crispness over time.
For longer storage, avoid heavy mix-ins that can go stale or rancid. Plain popped corn stores better than heavily seasoned batches. When in doubt, re-crisp leftovers in a 250°F (120°C) oven for a few minutes — watch carefully so it doesn’t brown.
Common Questions
- How much oil should I use per cup of kernels? The recipe calls for 1/4 cup oil with 1 cup kernels. That ratio is tested and gives good coverage without excessive oiliness.
- Why does my popcorn burn? Burning usually results from too high heat or an inadequate pot surface area. Lower the heat to medium and keep the pot moving so kernels heat evenly.
- Why are many kernels unpopped? If kernels are piled up they won’t heat evenly. Use a wide pot so kernels can lay in a single layer and shake the pot to keep them moving. Old or very dry kernels also pop less; fresh kernels generally give better results.
- Can I add salt before popping? Yes. A light sprinkle of sea salt added with the kernels seasons more evenly during popping. You can also salt afterward if you prefer to control seasoning by taste.
- Should I keep the lid on the whole time? Start with the lid off until you hear the first pop, then cover and continue sliding/shaking the pot. This helps the rest of the kernels pop together and keeps the steam from building too much.
Final Thoughts
Stovetop popcorn is an easy win for anyone who likes a fast, flavorful snack with minimal fuss. The method centers on a sensible ratio, medium heat, and a wide pot. Follow the steps, keep your pot moving, and you’ll be rewarded with fluffy popcorn every time. It’s a small ritual that gives big, crunchy results—perfect for quiet nights in or last-minute gatherings.
Try it once exactly as written, then adapt the finishings to your taste. Once you’ve mastered the basic pop, you’ll find yourself reaching for the pot more often than the microwave bag. Enjoy.
How to Pop Popcorn on the Stove
Ingredients
Equipment
Method
- Use a pot with a matching lid and a large surface area (about 5 inches deep and 9 inches across is good for 1 cup of popcorn).
- Pour 1/4 cup canola, vegetable, or coconut oil into the pot.
- Add 1 cup popcorn kernels to the oil. If using, sprinkle in a little sea salt. Shake or tilt the pot so the kernels are coated with oil and spread in a single layer (not piled on top of each other).
- Place the pot over medium heat. Begin sliding the pot back and forth over the burner or gently shaking it side to side so the kernels move and heat evenly.
- When the first kernel pops (about 3–5 minutes), put the lid on the pot. Continue sliding/shaking the pot so the remaining kernels pop evenly.
- When the popping slows to about 2–3 seconds between pops, remove the pot from the heat and carefully lift the lid away from you to release steam.
- Transfer the popcorn to a bowl. Toss with melted butter or other mix-ins and additional sea salt if desired, and serve immediately.
Notes
And the savory suggested add-ins from RecipeGirl readers:1. sea salt + freshly ground pepper2. maple and bacon3. Parmesan + freshly chopped rosemary4. butter + cajun spice + brown sugar5. fajita seasoning6. cayenne pepper or tabasco7. Parmesan and pepper8. butter-flavored olive oil9. ranch seasoning10. white truffle oil + Parmesan11. brewers/nutritional yeast12. chili oil + garlic powder + curry powder13. cheese packet from a macaroni & cheese box14. Old Bay Seasoning15. Dill pickle seasoning (not sure I've ever seen that)16. Meat tenderizer (what?? Really?)