Mint Brownies
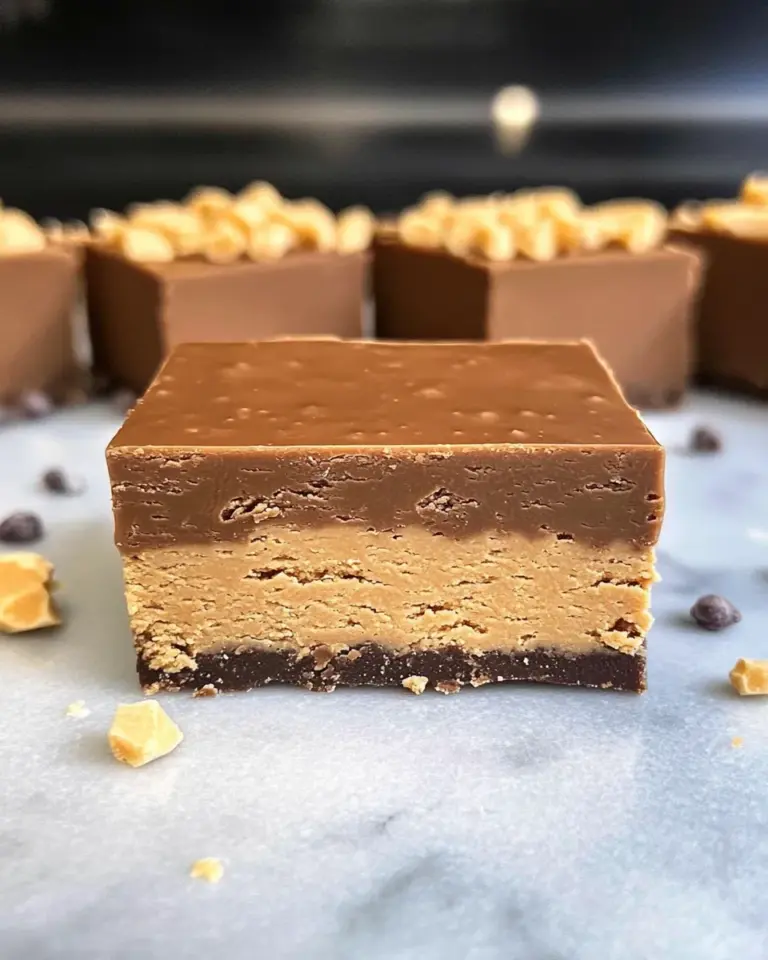
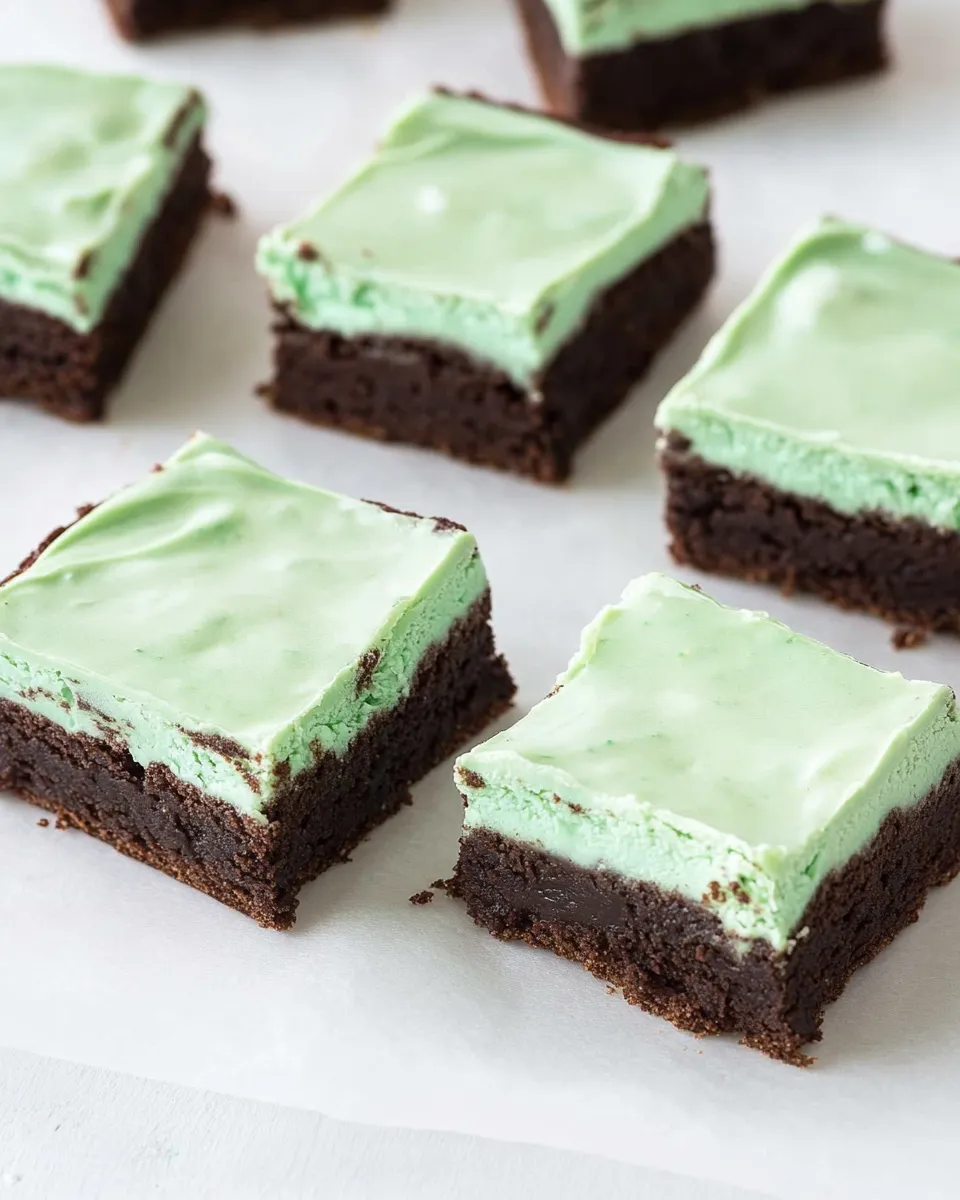
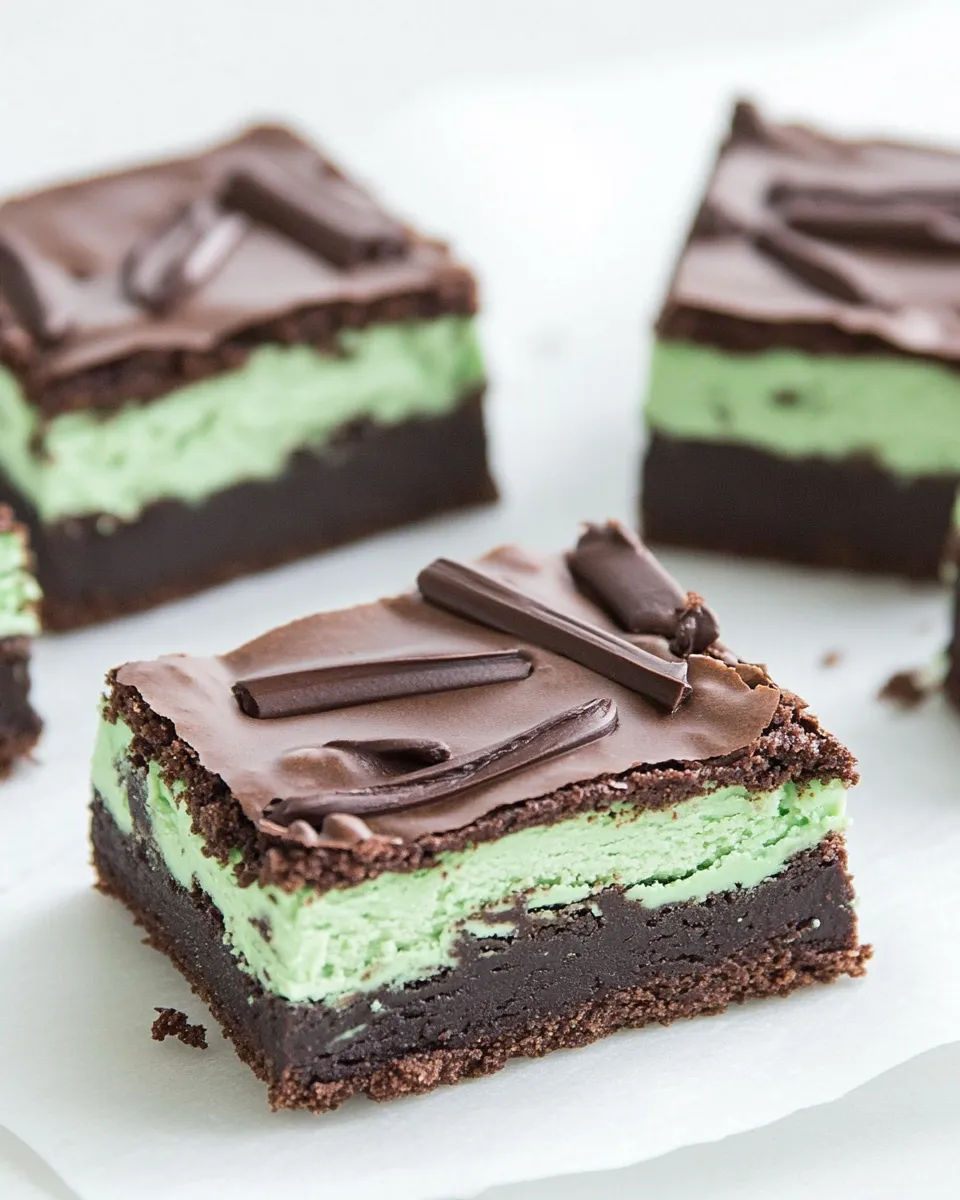
Mint and chocolate are a classic pairing that feels more indulgent than most weeknight desserts, and these Mint Brownies deliver that bright hit of peppermint without being overpowering. The recipe layers a fudgy brownie base with a creamy mint filling and finishes with a glossy chocolate top. It’s a straightforward build, but the chilled layers give neat slices and a professional look.
I test recipes in a small kitchen and favor techniques that keep cleanup minimal and results consistent. This version uses melted unsweetened chocolate and butter for the base, a simple butter–powdered-sugar mint layer, and a quick melted chocolate top. There are a few chill-and-wait moments, but no tempering, no candy thermometer, and no heavy equipment. If you want tidy bars that cut cleanly and travel well, follow the chill steps closely.
Below you’ll find the ingredient list (with a quick note on each item), the exact step-by-step instructions, and practical tips for equipment, storage, and avoiding common mistakes. Read through once, pull the ingredients, and you’ll be ready to get these in the oven.
What’s in the Bowl
This section lists every ingredient used in the recipe with a short note on why it’s there or how to handle it. I keep quantity notes as written in the source recipe—check them twice before you start.
Ingredients
- ¾ cup unsalted butter (12 tablespoons) — melted with chocolate for a glossy, rich brownie base.
- 3 ounces unsweetened Baker’s chocolate (1‑ounce squares) — provides deep, bittersweet chocolate flavor for the base.
- 3 large eggs at room temperature — add structure and a silky texture when beaten into the cooled chocolate.
- ½ teaspoon pure vanilla extract — rounds out and softens the chocolate notes.
- 1 ½ cups granulated sugar — sweetens and helps create a tender crumb.
- ½ cup whole wheat pastry flour or additional all-purpose flour — the recipe offers whole wheat pastry flour for a slight nuttiness or AP flour as a substitute; measure carefully.
- ¼ cup all-purpose flour — combined with the other flour to set the base texture.
- 3 tablespoons unsalted butter, softened — creamed with powdered sugar to form the mint layer.
- 1 ½ cups powdered sugar — sweetens and thickens the mint filling into a spreadable frosting.
- 1 ½ tablespoons milk — loosens the mint filling to a spreadable consistency; keep a little extra on hand if needed.
- ¾ teaspoon pure peppermint extract — the concentrated mint flavor for the filling; measure carefully.
- 2 drops green food coloring — optional, for that characteristic mint-green look.
- 1 ½ ounces unsweetened chocolate (1‑ounce squares) — melted with butter to make the shiny chocolate topping.
- 1 ½ tablespoons unsalted butter — added to the melted topping for shine and spreadability.
Mint Brownies: How It’s Done
- Position a rack in the center of the oven and preheat to 350°F. Grease an 8×8-inch pan and set it aside.
- Make the brownie base: place a heatproof bowl over (not touching) a pan of simmering water. Add ¾ cup unsalted butter (12 tablespoons) and 3 ounces unsweetened Baker’s chocolate (3 1‑ounce squares). Stir frequently until melted and smooth. Remove the bowl from the heat and let the chocolate mixture cool completely to room temperature.
- Once the chocolate mixture is cool, add 3 large eggs one at a time, beating well after each addition (use a whisk or electric mixer). Add ½ teaspoon pure vanilla extract and 1 ½ cups granulated sugar, and beat until thoroughly combined.
- Add the dry ingredients: ½ cup whole wheat pastry flour (or ½ cup additional all-purpose flour, if substituting) and ¼ cup all-purpose flour. Beat or stir just until blended and no streaks of flour remain.
- Spread the batter evenly into the prepared 8×8-inch pan. Bake for 20–25 minutes, until the center appears set and a toothpick inserted in the center comes out clean. Remove from the oven and let the brownies cool completely in the pan.
- Prepare the mint layer: in a medium bowl, beat 3 tablespoons unsalted butter (softened) together with 1 ½ cups powdered sugar until smooth and combined.
- Add 1 ½ tablespoons milk and ¾ teaspoon pure peppermint extract to the butter–sugar mixture. Beat until smooth. Add 2 drops green food coloring and mix until the color is uniform.
- Spread the mint filling evenly over the cooled brownie base. Refrigerate the pan until the mint layer is firm (chilled), about until it holds its shape when touched.
- Prepare the chocolate topping: melt 1 ½ ounces unsweetened chocolate (1 ½ 1‑ounce squares) and 1 ½ tablespoons unsalted butter together in a heatproof bowl over simmering water, stirring until smooth. (You may also melt gently in short bursts in the microwave, stirring between bursts.)
- Drizzle the melted chocolate over the chilled mint layer, then use a spatula to spread it gently into a thin, even layer covering the surface.
- Return the pan to the refrigerator and chill until the topping is set. Cut into squares while chilled—the brownies will cut more cleanly when cold.
Reasons to Love Mint Brownies
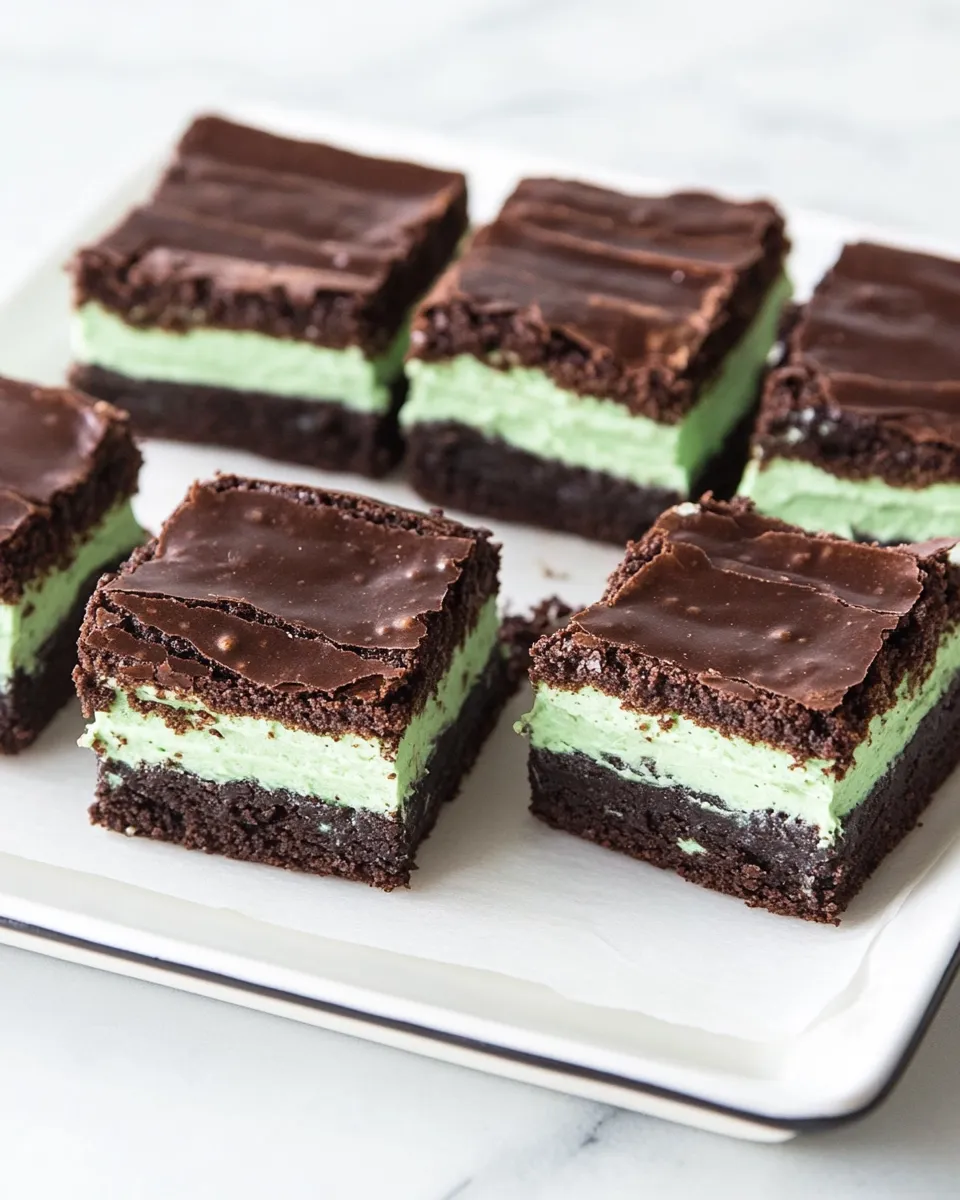
- Layered texture: fudgy base, creamy mint, and a crisp chocolate top give three distinct bites in one square.
- Fast to mix: most of the work is melting and stirring; the mint filling comes together in the bowl in minutes.
- Scales well: the 8×8 pan size produces tidy servings and easy portion control; you can double the recipe for a larger gathering.
- Make-ahead friendly: chilling improves sliceability, and these keep their texture in the fridge for several days.
- Kid-friendly assembly: the mint layer is no-bake and spreadable, so helpers can help smooth it under supervision.
Allergy-Friendly Substitutes
- Flour: the recipe already lists “½ cup whole wheat pastry flour or additional all-purpose flour” for the dry component—use the AP flour if you prefer a more neutral base.
- Eggs: if you need to avoid eggs, consider an egg-replacement option you trust; note that the texture and rise will change, so test one-for-one commercial egg replacers for best results.
- Dairy: the recipe relies on butter and milk for richness. For dairy-free needs, swap with your preferred plant-based butter and a non-dairy milk; expect slightly different spread and setting times for the mint layer.
- Chocolate: the recipe uses unsweetened chocolate in two places. You can use the same unsweetened chocolate for both layers if matching flavor matters, or choose your usual unsweetened square brand.
Must-Have Equipment
- 8×8-inch baking pan — the recipe is sized to this; a different pan size will change bake time and layer depth.
- Heatproof bowl and a saucepan for the double boiler — for melting the chocolate without burning it.
- Whisk or electric mixer — for beating the eggs into the cooled chocolate and creaming the mint layer.
- Spatula — for spreading the batter, mint layer, and chocolate topping evenly.
- Cooling rack and refrigerator space — the bars need to cool completely and the mint layer and topping need chilling to set.
Avoid These Mistakes
- Adding eggs while the chocolate is still hot. If the chocolate mixture isn’t cooled to room temperature, the eggs will scramble. Wait until it’s fully cool.
- Overbaking the brownie base. Remove at 20–25 minutes and test with a toothpick—the center should be set. Overbaking dries the base and makes the bars crumbly.
- Skipping the chill steps. Cutting warm or room-temperature bars will smear the mint and crack the chocolate top. Chill until each layer holds its shape.
- Using too much peppermint extract. ¾ teaspoon gives a clear mint note; a little goes a long way—measure carefully.
- Melting chocolate directly over high heat. Use a double boiler or short microwave bursts and stir between bursts to avoid seizing the chocolate.
Smart Substitutions
- Butter in the mint layer: if your softened butter is too soft, chill it briefly so the filling holds shape better; if it’s too hard, let it soften slightly before beating.
- Sugars: powdered sugar is required for the mint layer to get a smooth texture. Granulated sugar won’t dissolve to the same effect.
- Coloring: the 2 drops of green food coloring are optional—feel free to omit if you prefer a pale, natural mint filling.
- Chocolate topping: melting the small amount of chocolate with butter keeps the top glossy and easy to spread; don’t skip the butter unless you enjoy a very firm finish.
If You’re Curious
Why whole wheat pastry flour? It offers a lighter crumb than regular whole wheat, adding a subtle nutty note without the heft. The recipe gives the option to substitute with additional all-purpose flour if you don’t have it on hand. The chocolate quantities are small but concentrated—unsweetened chocolate provides the backbone of chocolate flavor without extra sweetness, which balances the sugary mint layer.
The mint layer is essentially a firm frosting. Powdered sugar provides structure, and the small amount of milk keeps it spreadable. Peppermint extract is highly concentrated; start with the listed ¾ teaspoon and taste a small amount if you’re unsure—you can always add a touch more, but you can’t take it back.
Keep It Fresh: Storage Guide
- Refrigerator: store cut brownies in an airtight container in the refrigerator for up to 5 days. The chilled environment keeps the mint and chocolate layers stable.
- Freezer: wrap individual squares tightly in plastic and place in a freezer-safe bag for up to 1 month. Thaw in the refrigerator before serving to keep layers intact.
- Serving from fridge: plan to cut and serve the brownies straight from the fridge—the cold makes cleaner slices and prevents the topping from smudging.
Questions People Ask
- Can I use salted butter? Yes, but reduce any added salt elsewhere in your baking. The recipe calls for unsalted butter to control seasoning precisely.
- Can I make the mint layer thinner or thicker? Yes. Reduce powdered sugar slightly for a thinner layer (it will be less firm), or add a touch more powdered sugar to thicken it—work incrementally and keep texture in mind.
- What if my chocolate seizes when melting? Seized chocolate can sometimes be saved by adding a small amount of warm liquid (but that will change consistency). To avoid seize, melt gently and keep water out of the chocolate and tools.
- Do I have to use green food coloring? No. The green is purely aesthetic. The filling will still taste minty without it.
- How cleanly will these cut? Very clean when chilled. Use a sharp knife warmed under hot water and wiped dry between cuts for the neatest squares.
Ready, Set, Cook
Pull together the ingredients, preheat the oven, and allow the chocolate mixture to cool before you add the eggs. Plan the chill time into your schedule—most of the active work is quick, but the refrigerator does the finishing for you. These Mint Brownies are a dependable make-ahead treat for parties, lunchboxes, or a special weeknight dessert. Cut them cold, store them cold, and enjoy the bright contrast of peppermint and deep chocolate in every layered bite.
Mint Brownies
Ingredients
Equipment
Method
- Position a rack in the center of the oven and preheat to 350°F. Grease an 8×8-inch pan and set it aside.
- Make the brownie base: place a heatproof bowl over (not touching) a pan of simmering water. Add ¾ cup unsalted butter (12 tablespoons) and 3 ounces unsweetened Baker’s chocolate (3 1‑ounce squares). Stir frequently until melted and smooth. Remove the bowl from the heat and let the chocolate mixture cool completely to room temperature.
- Once the chocolate mixture is cool, add 3 large eggs one at a time, beating well after each addition (use a whisk or electric mixer). Add ½ teaspoon pure vanilla extract and 1 ½ cups granulated sugar, and beat until thoroughly combined.
- Add the dry ingredients: ½ cup whole wheat pastry flour (or ½ cup additional all-purpose flour, if substituting) and ¼ cup all-purpose flour. Beat or stir just until blended and no streaks of flour remain.
- Spread the batter evenly into the prepared 8×8-inch pan. Bake for 20–25 minutes, until the center appears set and a toothpick inserted in the center comes out clean. Remove from the oven and let the brownies cool completely in the pan.
- Prepare the mint layer: in a medium bowl, beat 3 tablespoons unsalted butter (softened) together with 1 ½ cups powdered sugar until smooth and combined.
- Add 1 ½ tablespoons milk and ¾ teaspoon pure peppermint extract to the butter–sugar mixture. Beat until smooth. Add 2 drops green food coloring and mix until the color is uniform.
- Spread the mint filling evenly over the cooled brownie base. Refrigerate the pan until the mint layer is firm (chilled), about until it holds its shape when touched.
- Prepare the chocolate topping: melt 1 ½ ounces unsweetened chocolate (1 ½ 1‑ounce squares) and 1 ½ tablespoons unsalted butter together in a heatproof bowl over simmering water, stirring until smooth. (You may also melt gently in short bursts in the microwave, stirring between bursts.)
- Drizzle the melted chocolate over the chilled mint layer, then use a spatula to spread it gently into a thin, even layer covering the surface.
- Return the pan to the refrigerator and chill until the topping is set. Cut into squares while chilled—the brownies will cut more cleanly when cold.
Notes
TO FREEZE: Wrap brownies tightly and freeze them in an airtight freezer-safe storage container for up to 3 months. Thaw and enjoy as desired.