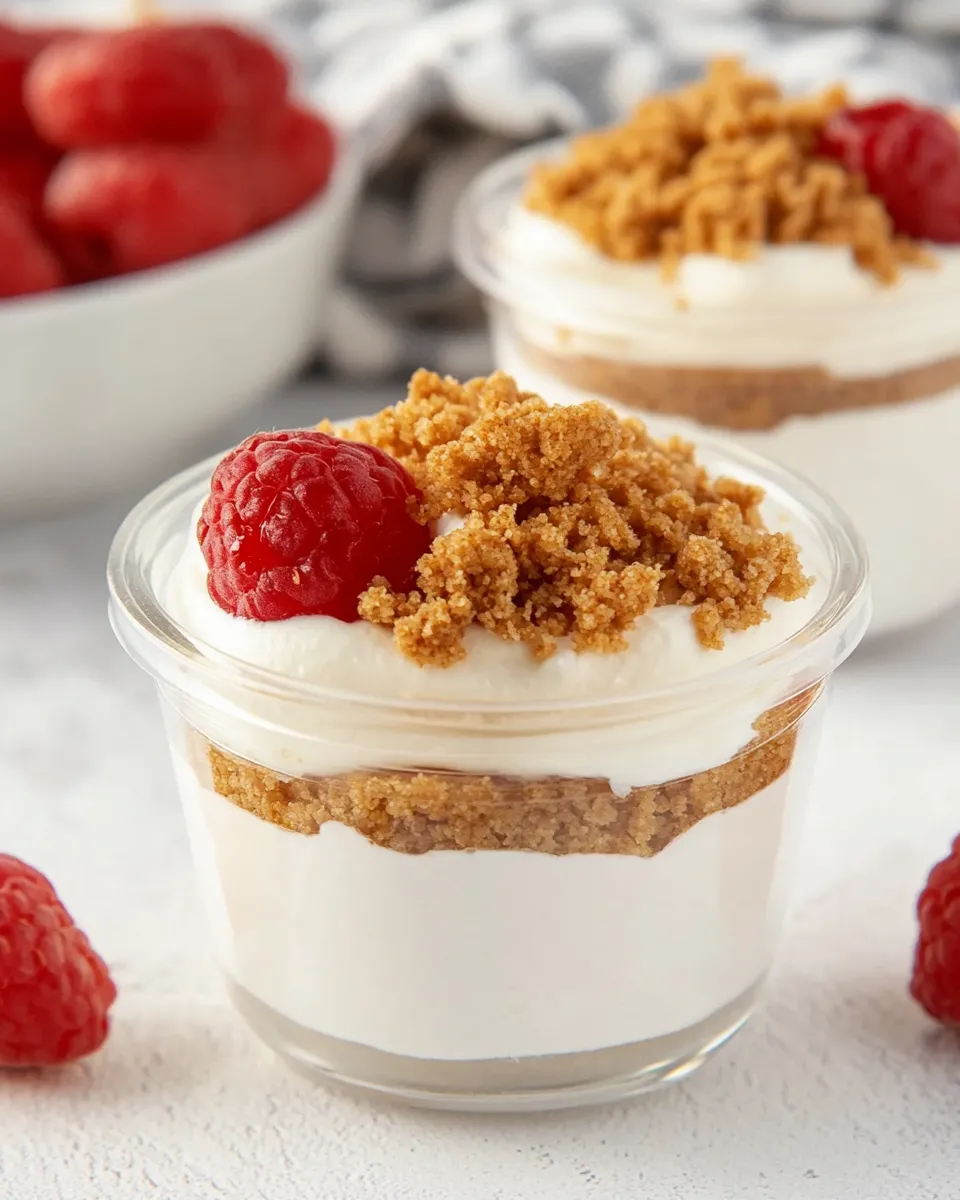
No Bake Cheesecake Cups with Graham Crumble Topping
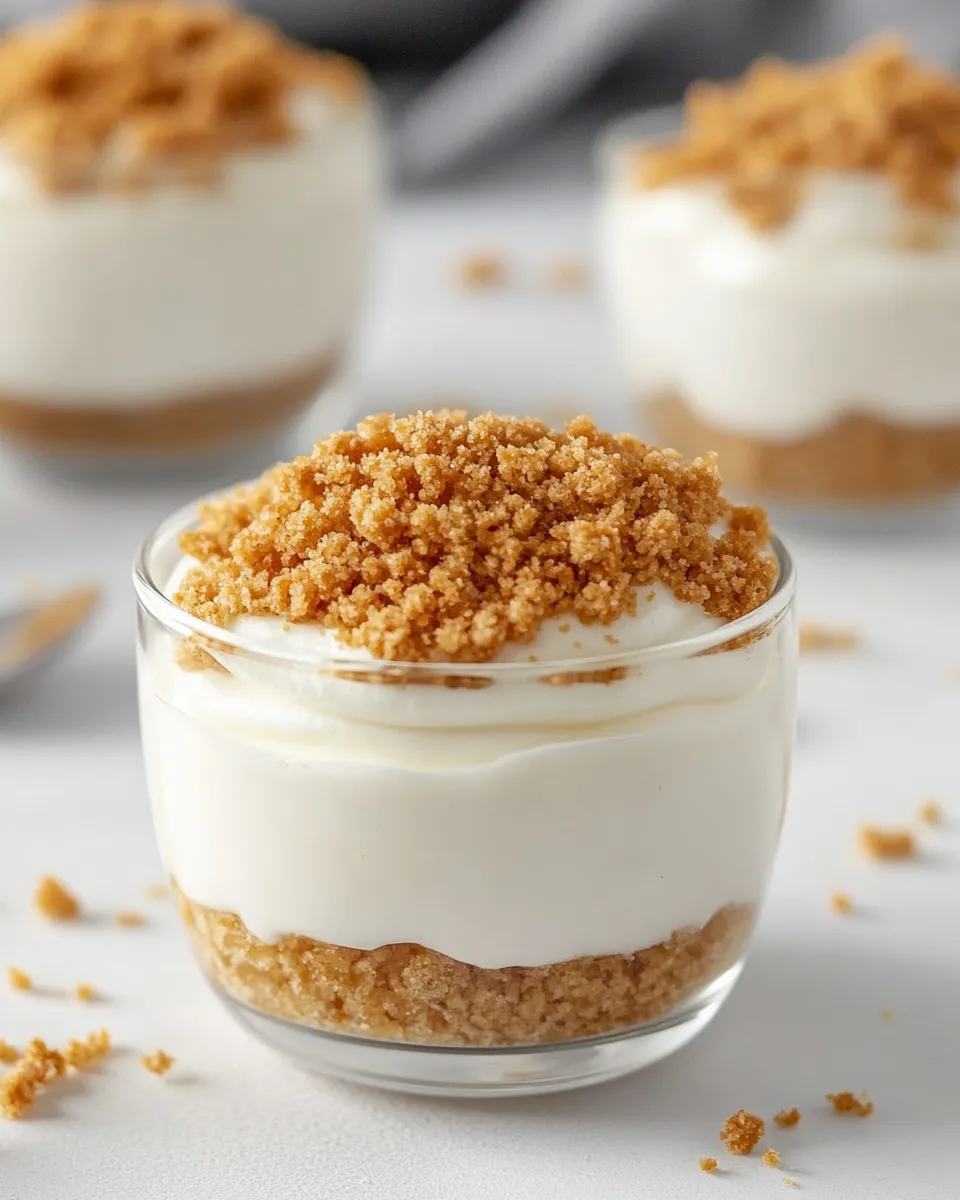
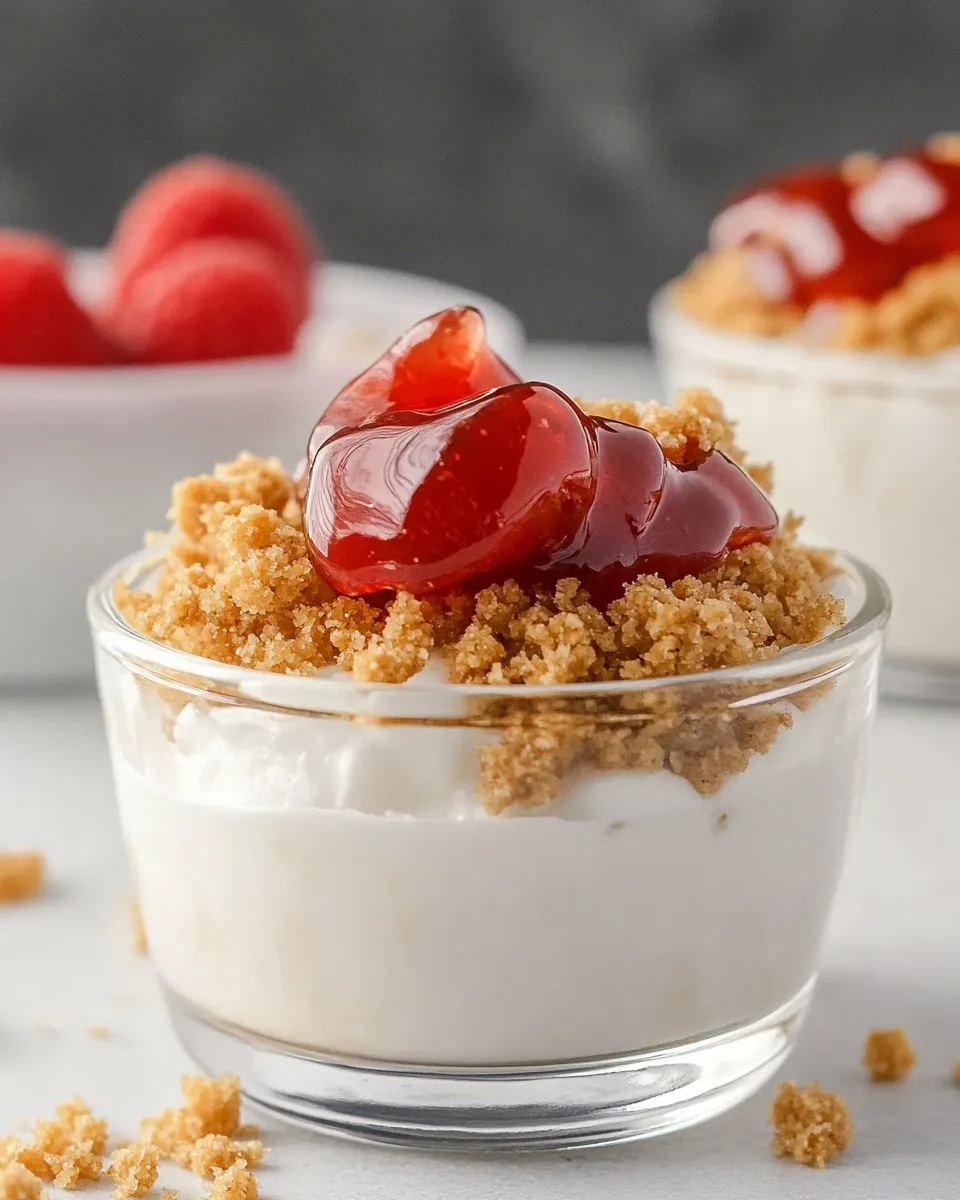
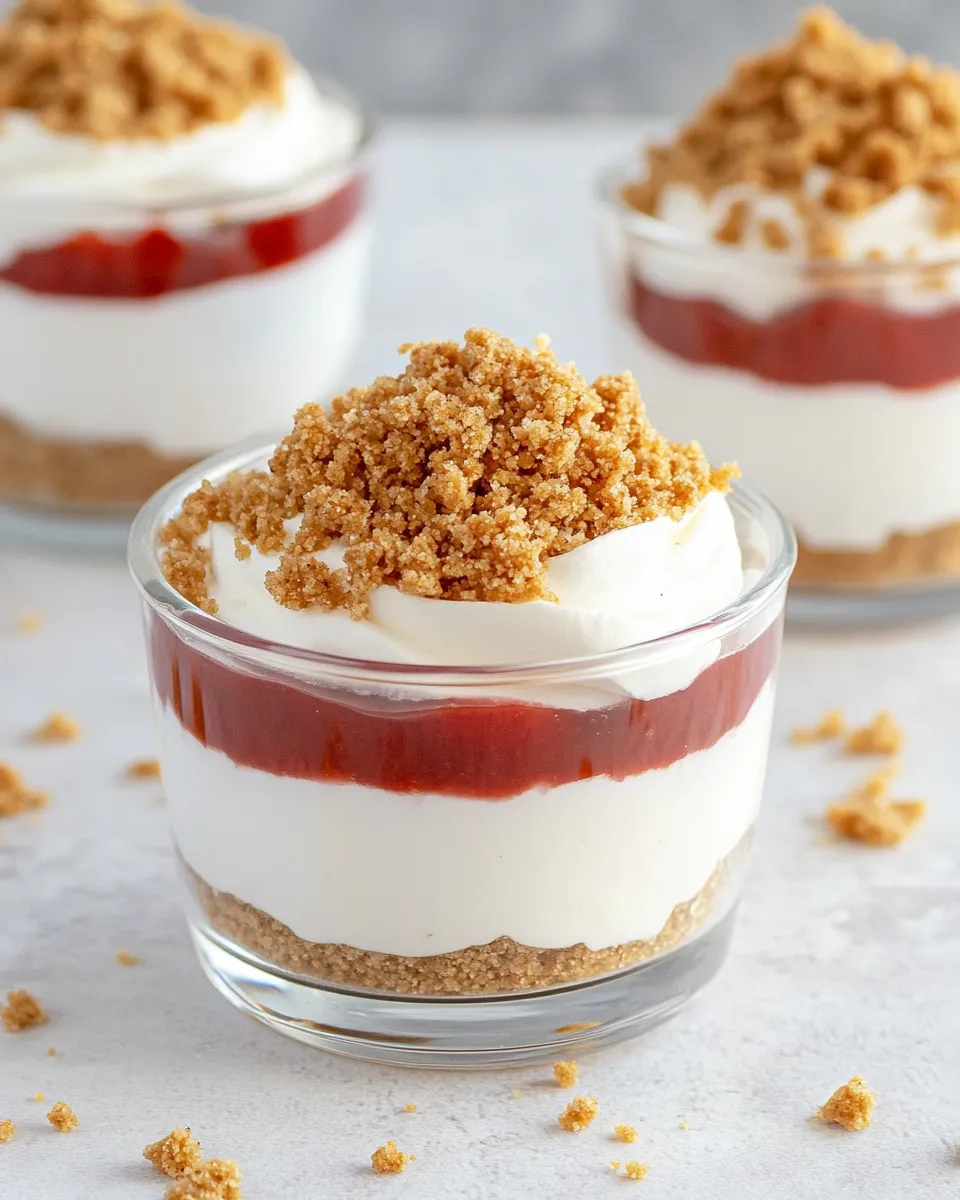
These little jars are the kind of dessert I keep on repeat because they’re fast, clean, and reliably impressive. No baking means no oven heat in summer and no last-minute timing panic. Each cup layers a tiny spoon of fruit, a pillowy no-bake cheesecake, and a crunchy graham crumble—familiar textures that always feel special.
They’re easy to scale, portable, and forgiving. You can make them the morning of a party or a day ahead; lids on the jars keep them neat in the fridge. The key is simple technique: room-temperature cream cheese, properly whipped cream, and a gentle fold so the filling stays airy.
Below I walk you through exactly what you need, the steps as written, and practical swaps and troubleshooting so your first batch — and every batch after — comes out perfect.
Ingredient Rundown
- ¼ recipe Graham Cracker Crumble Topping (click underlined text for the recipe) — the crunchy finish; reserve one-quarter of the linked crumble recipe for topping or set aside if making ahead.
- 8 ounces brick-style cream cheese, softened to room temperature — provides the base structure and tang; soften fully so it creams smoothly.
- 2 tablespoons sour cream — adds silkiness and a touch of tang to balance the sweetness.
- 1 teaspoon vanilla extract — flavor boost; use good-quality vanilla for the best aroma.
- 1 teaspoon fresh lemon juice — brightens the filling and cuts richness.
- ½ cup sifted confectioner’s sugar (2 ounces) — sweetens and helps stabilize the cream cheese base; sifting prevents lumps.
- 1 cup heavy cream, chilled — whipped to stiff peaks to aerate the filling; chilling the bowl and beaters speeds the process.
- ½ cup prepared pie filling (such as blueberry, strawberry, cherry, or raspberry) — the fruit layer at the bottom; any prepared fruit pie filling works for consistent texture and flavor.
No Bake Cheesecake Cups with Graham Crumble Topping Made Stepwise
- Prepare the Graham Cracker Crumble Topping using the linked recipe (you need 1/4 of that recipe). Set the crumble aside for topping.
- In a large bowl, using a hand mixer or a stand mixer fitted with the paddle attachment, beat the 8 ounces softened cream cheese, 2 tablespoons sour cream, 1 teaspoon vanilla extract, 1 teaspoon fresh lemon juice, and 1/2 cup sifted confectioners’ sugar until the mixture is smooth and creamy.
- In a separate clean bowl, whip the 1 cup chilled heavy cream with a whisk or mixer until stiff peaks form (when you lift the whisk or beaters the peaks should stand without flopping). Avoid overwhipping.
- Fold the whipped cream into the cream cheese mixture with a rubber spatula. Do this in two additions: first add about one-third of the whipped cream and fold to lighten the base, then fold in the remaining whipped cream gently but thoroughly until uniform.
- Spoon about a rounded tablespoon of the 1/2 cup prepared pie filling into the bottom of each of eight 4-ounce jars (this will use the full 1/2 cup).
- Spoon or pipe the cheesecake mixture into each jar, filling to the top and smoothing the surface.
- If serving immediately, sprinkle the prepared graham cracker crumble over each cheesecake cup.
- If making ahead, place lids on the jars and refrigerate for up to 3 days. Add the graham cracker crumble to each cup just before serving.
Why You’ll Keep Making It
They’re quick and unfussy, but they read as thoughtful. The three-layer format—fruit, creamy cheesecake, and crunchy crumble—offers contrast in every spoonful. Guests get the look of a plated dessert without the plating stress.
Make-ahead is the real winner here. Assemble the jars, seal them, and they’re tidy in the fridge for up to three days. That means you can prep desserts for a weeknight dinner or a weekend gathering in advance and still have fresh topping crunch at service.
Portion control is built in. These 4-ounce jars are just enough to feel indulgent without tipping into overindulgence, so they’re great for events where people want variety.
Budget & Availability Swaps
- Brick-style cream cheese — If you can’t find a block, tub-style works; the flavor is similar though texture can be slightly softer. Neufchâtel is an easy lower-fat swap.
- Sour cream — Greek yogurt works in a pinch; use plain full-fat for the closest texture and tang.
- Confectioner’s sugar — Powdered sugar is the same product labeled differently; if lumpy, sift before using.
- Heavy cream — Look for labels that say “heavy whipping cream” or “whipping cream”; avoid ultralight creams that won’t whip to stiff peaks.
- Prepared pie filling — Any canned or jarred fruit filling works. If fresh fruit is all you have, macerate briefly with a touch of sugar to release juices, but prepared filling gives the clean texture this recipe expects.
Equipment at a Glance
- Hand mixer or stand mixer (paddle attachment recommended for the cream cheese stage).
- Whisk or mixer for whipping the cream.
- Mixing bowls — one for the cream cheese base and one clean bowl for whipping cream.
- Rubber spatula for gentle folding.
- Eight 4-ounce jars (or small glasses) with lids if making ahead.
- Measuring spoons and cups; a sifter for confectioner’s sugar is helpful.
- Optional: small piping bag and plain round tip for neater filling.
Errors to Dodge
- Overwhipping the cream — stiffness is good, but go past stiff peaks and the cream will grain or separate. Stop when peaks stand without flopping.
- Too-cold or too-warm cream cheese — if it’s cold, you’ll get lumps; if it’s hot, the filling will be too loose. Bring it to room temperature before beating.
- Folding aggressively — fold gently to keep the mixture airy. Use two additions: first to lighten, second to finish.
- Adding the crumble too early when making ahead — crumb will turn soggy in the fridge. Store it separately and add just before serving.
- Under-measuring pie filling — the recipe expects 1/2 cup total, divided among eight jars (about a rounded tablespoon per jar). Too much filling upsets the balance.
Warm & Cool Weather Spins
In warm weather keep everything chilled: chill the mixing bowl, beaters, and heavy cream. The jars also benefit from a brief chill before filling; cold containers help maintain whipped cream structure. Serve straight from the fridge and add the crumble just before handing out the cups.
In cooler months you can let the jars come to a slightly cooler-than-room temperature (15–20 minutes out of the fridge) so the filling is softer and more mousse-like. Add the crumble just before serving so it stays crisp against the cream.
Seasonal fruit fillings make a difference: berry fillings feel bright in summer, while cherry or apple-leaning options read cozier in fall and winter.
Pro Tips & Notes
- Soften cream cheese properly: take it out of the fridge 30–60 minutes before you start. It should give under gentle finger pressure but not be oily.
- Chill the heavy cream and the bowl for faster, more reliable whipping. If whipping by hand, a chilled metal bowl makes the job easier.
- Use a paddle attachment for the cream cheese stage to avoid over-aerating; use a whisk for the cream stage only.
- Folding technique: scoop from the bottom and fold over the top, rotate the bowl, and repeat. Think gentle turns rather than vigorous stirs.
- Piping vs spooning: a piping bag with a plain round tip gives clean tops and uniform jars. Spoon carefully and smooth with the back of a spoon if you don’t want to pipe.
- Adjust sweetness by tasting the base before you fold in all the whipped cream. If your pie filling is very sweet, you may want to cut back slightly on the confectioner’s sugar next time.
Best Ways to Store
Follow the recipe’s make-ahead instruction: place lids on the jars and refrigerate for up to 3 days. Store the graham crumble separately at room temperature in an airtight container and add it to each cup just before serving so it stays crunchy.
If you’re transporting jars, keep them upright and chilled in a cooler pack. Avoid stacking jars directly on top of each other to prevent smudging the tops.
Common Questions
- How long do these keep? Up to 3 days in the refrigerator with lids on. The topping should be added just before serving.
- Can I use low-fat cream cheese or light cream? You can, but texture and richness will change. Low-fat options may be less creamy and more prone to separating.
- Can I double the recipe? Yes. Keep proportions identical and split into as many jars as you need; this recipe makes eight 4-ounce servings.
- What if my whipped cream softens? Chill the bowls and whip to firm peaks; if it softens after folding, a short chill in the fridge will help it firm up before serving.
- Can I make the crumble gluten-free? Swap the graham crumble for a certified gluten-free cookie crumble; keep the quantity equal to 1/4 of the crumble recipe called for.
Ready to Cook?
Gather your ingredients, make the graham crumble (remember you need one-quarter of that recipe), and follow the steps in order. The technique is straightforward: cream the cheese mixture, whip the cream, fold carefully, layer with pie filling, and top with fresh-crisp crumble just before serving.
These jars are fast to assemble, kind to a busy schedule, and reliable every time. If you want to scale or tweak flavors, do a small test batch first. Enjoy the ease and the smiles—little desserts like these are worth keeping in your regular rotation.
No Bake Cheesecake Cups with Graham Crumble Topping
Ingredients
Equipment
Method
- Prepare the Graham Cracker Crumble Topping using the linked recipe (you need 1/4 of that recipe). Set the crumble aside for topping.
- In a large bowl, using a hand mixer or a stand mixer fitted with the paddle attachment, beat the 8 ounces softened cream cheese, 2 tablespoons sour cream, 1 teaspoon vanilla extract, 1 teaspoon fresh lemon juice, and 1/2 cup sifted confectioners’ sugar until the mixture is smooth and creamy.
- In a separate clean bowl, whip the 1 cup chilled heavy cream with a whisk or mixer until stiff peaks form (when you lift the whisk or beaters the peaks should stand without flopping). Avoid overwhipping.
- Fold the whipped cream into the cream cheese mixture with a rubber spatula. Do this in two additions: first add about one-third of the whipped cream and fold to lighten the base, then fold in the remaining whipped cream gently but thoroughly until uniform.
- Spoon about a rounded tablespoon of the 1/2 cup prepared pie filling into the bottom of each of eight 4-ounce jars (this will use the full 1/2 cup).
- Spoon or pipe the cheesecake mixture into each jar, filling to the top and smoothing the surface.
- If serving immediately, sprinkle the prepared graham cracker crumble over each cheesecake cup.
- If making ahead, place lids on the jars and refrigerate for up to 3 days. Add the graham cracker crumble to each cup just before serving.
Notes
*
You’ll only need about 1/4 of the recipe to make 8 Cheesecake Cups, but I recommend making a full recipe–the crumble freezes well and is great for other uses!
**If you prefer a plain Cheesecake Cup, omit the pie filling and simply fill the jars with the cheesecake mixture. You can also make this recipe with a non-fruit bottom layer. Try adding your favorite dessert sauces to the bottom of the jar (such as strawberry, chocolate, or salted caramel), or a dollop of Nutella (with crumbles made from chocolate graham crackers).
Cooking Time and Total Time include making the Graham Cracker Crumble from the linked recipe. I like to make the cheesecake filling and layer the cups while the crumble is baking and cooling.