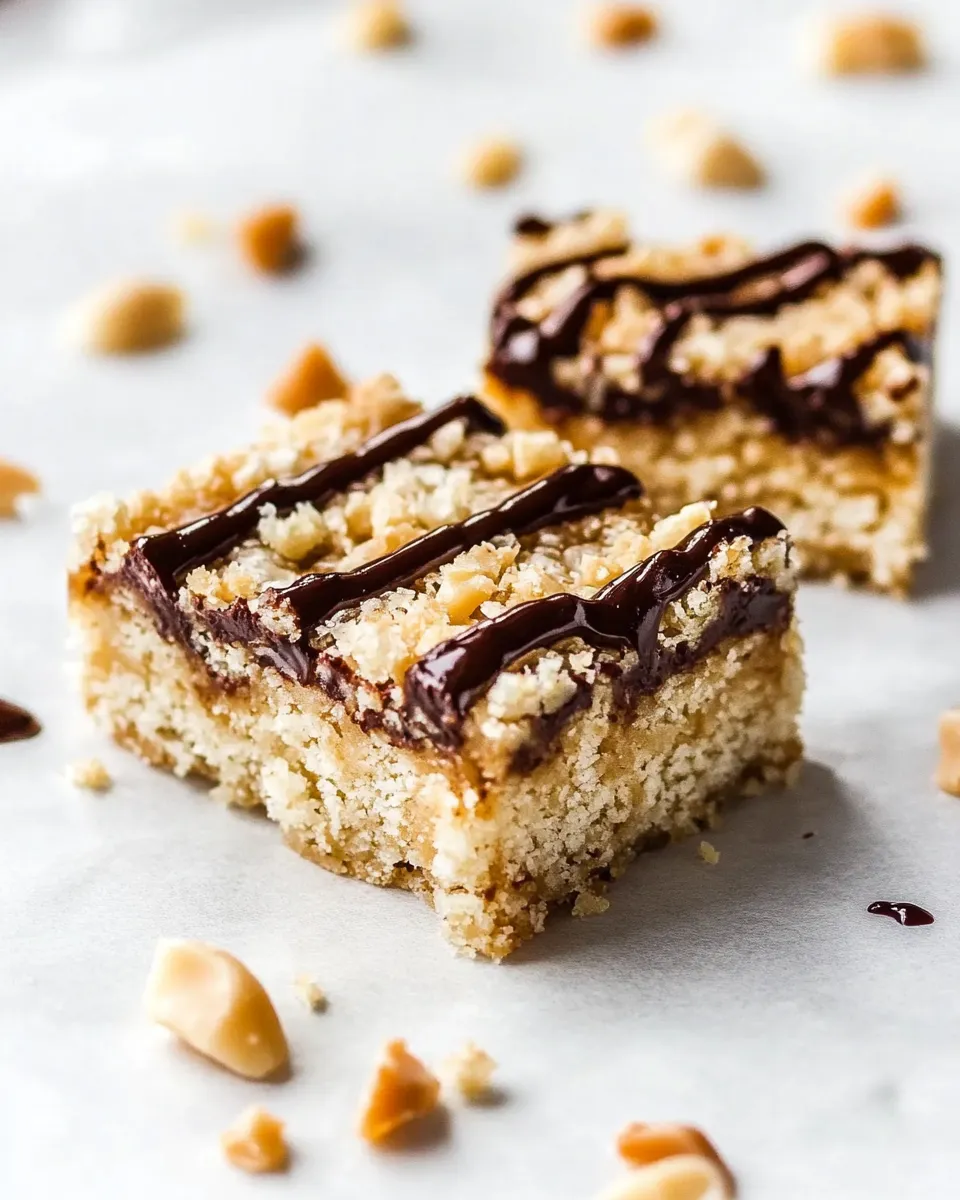
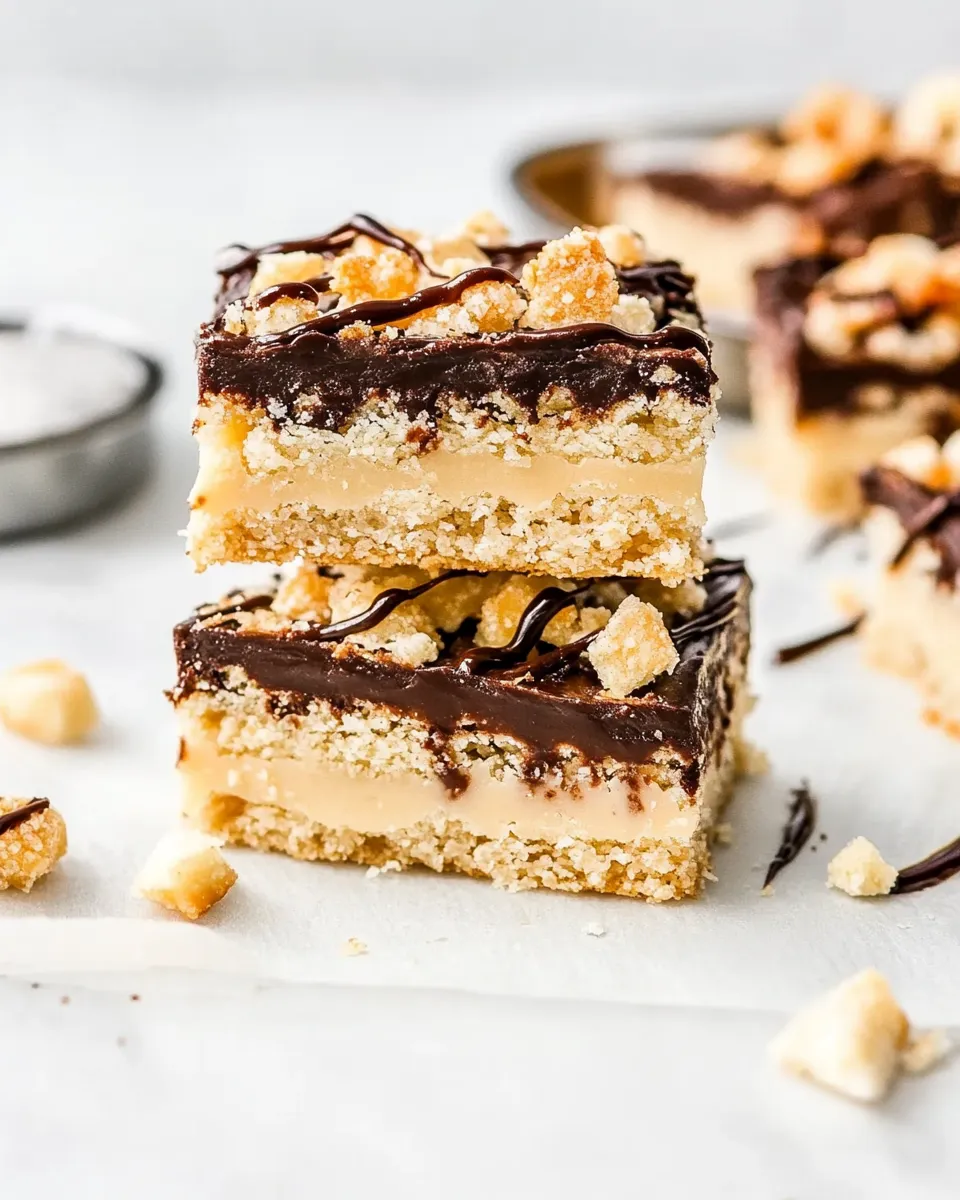
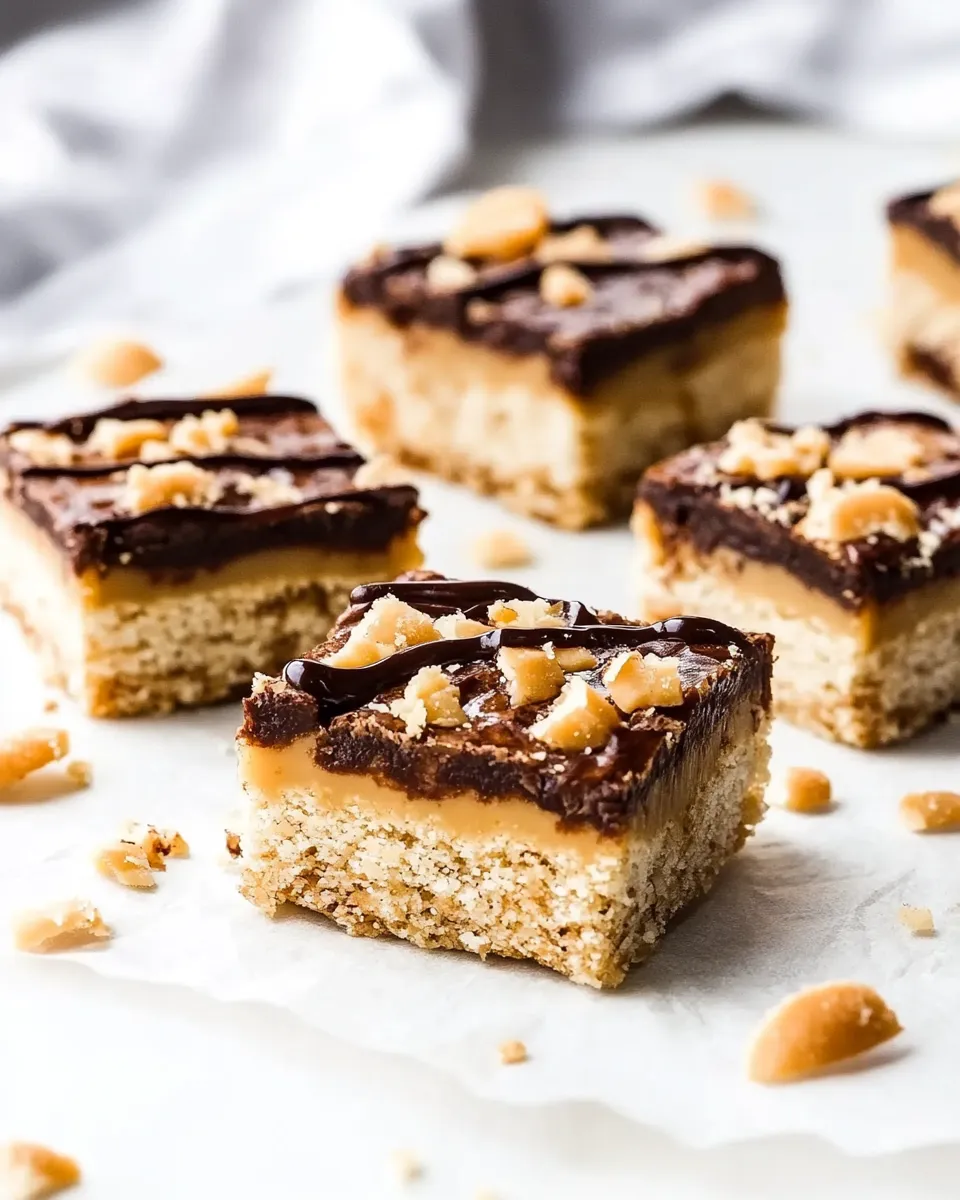
No Bake Samoa Bars
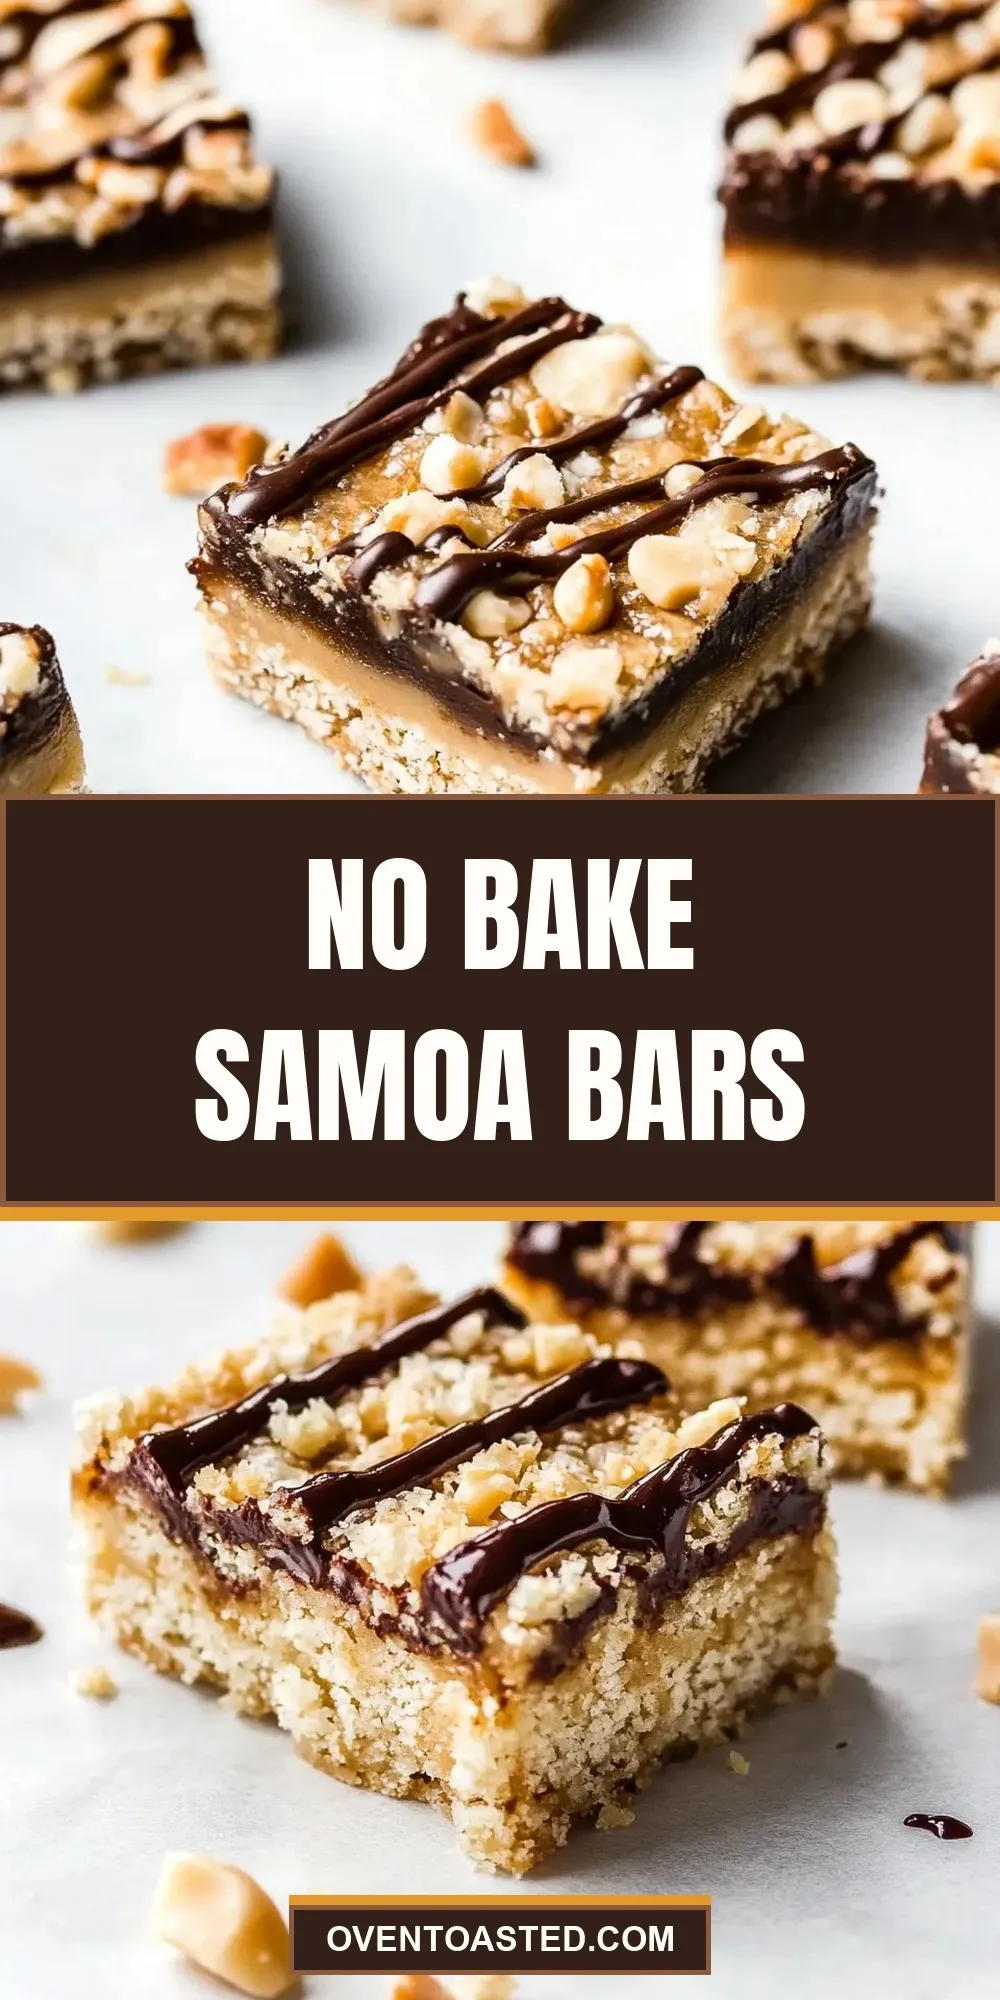
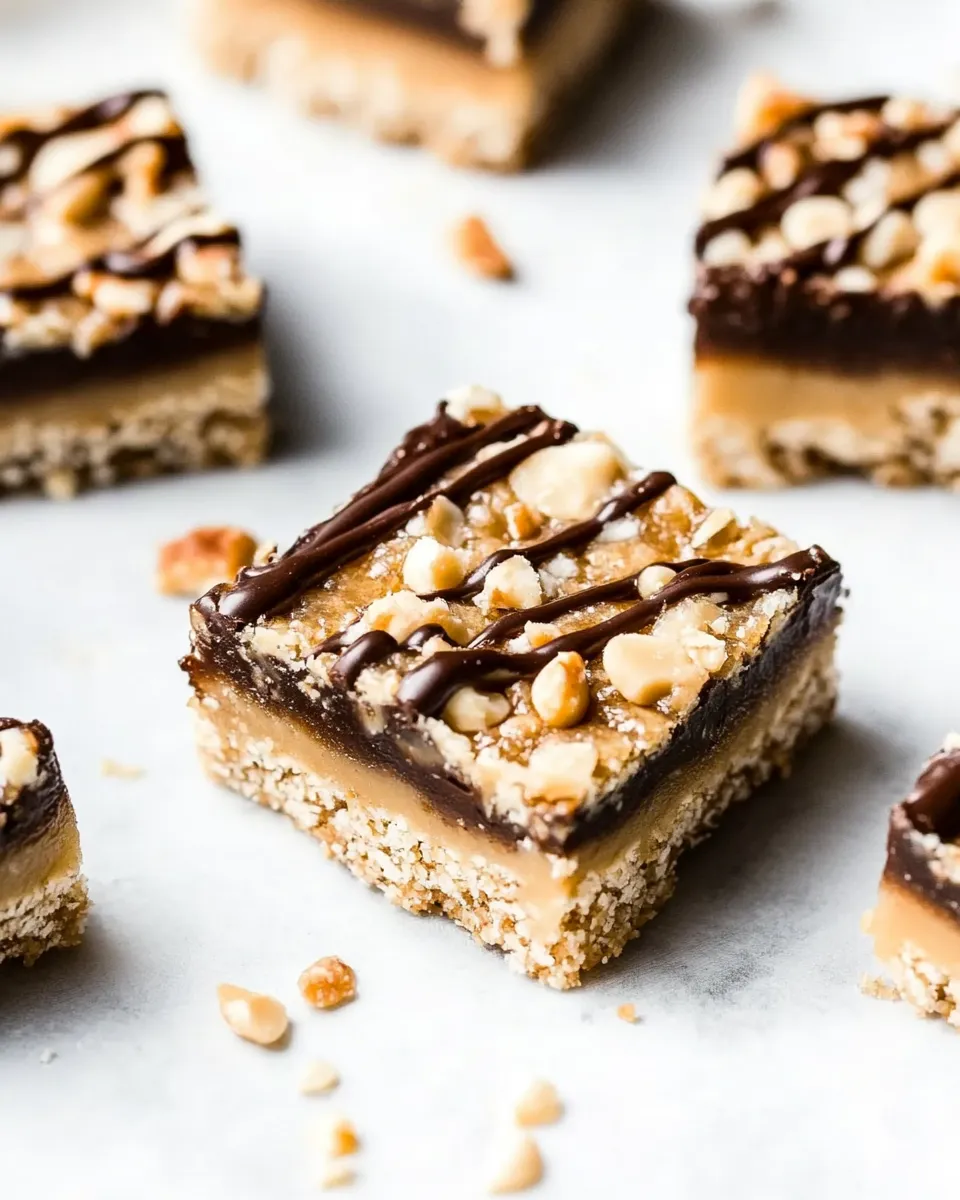
These No Bake Samoa Bars are exactly what you want when you need a rich, chewy treat without turning on the oven. They layer a nutty cashew crust with a sticky date-coconut center and a quick chocolate drizzle on top. The texture mimics the classic Samoa cookie—chewy coconut, caramel-like dates, a hint of vanilla and salt—while keeping everything gluten-free and simple to assemble.
I test recipes in a small kitchen with limited counter space, so I build instructions that actually work for busy afternoons and last-minute dessert needs. The whole recipe comes together in stages: soak, process, chill, and finish. The most time-consuming part is patience while layers firm up in the fridge or freezer.
Below you’ll find the exact ingredient list and step-by-step directions taken from the recipe source. I add practical tips, storage notes, and variations that keep the flavor authentic if you want to swap one thing or two. If you’ve made energy bars before, this will feel familiar; if not, follow the order and the bars will set reliably.
What We’re Using
- 2 c raw cashews — forms the nutty base; pulse to a coarse grain so the crust holds without becoming paste-like.
- 3-4 T maple syrup — sweetener for the crust; adjust to taste and to help the mixture bind.
- 1 tsp vanilla extract — adds depth and warmth to the crust.
- 2/3 c shredded coconut, unsweetened — folded into the crust for coconut flavor and texture.
- Dash of sea salt — balances sweetness and enhances nuttiness.
- 15-16 medjool dates, pitted and soaked in hot water for 20 minutes — the caramel-like center; soaking softens them so they process smoothly.
- 3 T maple syrup — sweetener for the date layer; helps achieve a spreadable consistency.
- 1 tsp vanilla extract — brightens the date-coconut mixture.
- 1 c, (heaping) shredded coconut, unsweetened — gives that tropical, chewy Samoas character in the middle layer.
- Dash of Sea Salt — a second touch of salt for the date-coconut layer to balance flavors.
- 2 oz. Dark Chocolate Bar, approx. 2/3 of a 3 oz. bar — for the drizzle; choose a chocolate you enjoy eating.
- 1/2 T coconut oil — thins and glosses the chocolate so it drizzles cleanly and sets shiny.
Stepwise Method: No Bake Samoa Bars
- Place 15-16 medjool dates (pitted) in a bowl and cover with hot water; let soak for 20 minutes while you prepare the crust. Line an 8×8 pan with parchment paper.
- In a food processor, add 2 c raw cashews and process until they reach a grain-like (coarse) consistency.
- Add 3-4 T maple syrup, 1 tsp vanilla extract, 2/3 c shredded coconut (unsweetened), and a dash of sea salt to the cashews. Process until the mixture holds together into a sticky dough.
- Press the cashew mixture firmly and evenly into the prepared 8×8 pan to form the crust. If the mixture sticks to your fingers, rub a very small amount of coconut oil on your fingers to help.
- Place the crust in the refrigerator to chill while you make the date-coconut layer.
- Drain the soaked dates and add them to the food processor. Process until smooth and caramel-like.
- Add 3 T maple syrup, 1 tsp vanilla extract, and a dash of sea salt to the processed dates; process briefly to combine and smooth.
- Add 1 c (heaping) shredded coconut (unsweetened) to the date mixture and process until fully combined and spreadable.
- Pour and spread the date-coconut mixture evenly over the chilled cashew crust. Place the pan in the freezer and chill for about 20–30 minutes to firm the layers.
- While the bars chill, melt 2 oz dark chocolate (approx. 2/3 of a 3 oz. bar) with 1/2 T coconut oil using a double boiler (or a heatproof bowl over simmering water). Stir until smooth and fully melted.
- Transfer the melted chocolate to a small plastic bag, snip a small corner, and drizzle the chocolate evenly over the chilled bars. Return the pan to the refrigerator or freezer and chill about 5 minutes to set the chocolate.
- Lift the bars from the pan using the parchment, place on a cutting board, and cut into 2-inch squares. Store the finished bars in the refrigerator.
Why You’ll Keep Making It
These bars are predictable and forgiving. The cashew crust makes a dense, nut-forward base that behaves well when pressed and chilled. Dates provide a reliable, caramel-like sweetness that doesn’t need cooking. Coconut adds chew and personality—it’s the element that turns an energy bar into a Samoa-like treat. The chocolate drizzle finishes them with a small, salty-sweet contrast.
They store well, travel well, and satisfy cravings for something both sweet and substantial. If you want a dessert to bring to a potluck or to keep in the fridge for weekday snacks, these hit the sweet spot between treat and practical.
Quick Replacement Ideas
- Cashews — swap for raw almonds if you don’t have cashews; the texture will be slightly grittier but still solid.
- Maple syrup — use honey if you’re not strict about keeping it plant-based; measure the same amounts.
- Shredded coconut — unsweetened is called for, but lightly sweetened coconut will work if that’s all you have; reduce other sweeteners slightly.
- Dark chocolate — milk chocolate is fine for milder flavor; white chocolate will be very sweet, so use sparingly.
Equipment at a Glance
Keep the tools simple. You’ll need:
- Food processor — critical for texture control in both crust and date layer.
- 8×8 pan lined with parchment — makes removal and cutting much easier.
- Small saucepan or double boiler — to gently melt the chocolate with coconut oil.
- Small plastic bag or piping bag — for drizzling the chocolate precisely.
Don’t Do This
Do not skip soaking the dates. Unsoaked dates can be tough and will strain your food processor. Also, don’t rush chilling steps. If you try to cut the bars before the layers have set, they’ll squish and smear. Finally, avoid overheating the chocolate—keep it just melted; scorched chocolate tastes bitter and won’t set properly.
Holiday-Friendly Variations
For holiday flair, add a small pinch of ground cinnamon or cardamom to the crust or date layer. Toast the shredded coconut lightly before adding to the date mixture for deeper flavor. You can press a few toasted coconut flakes on top before drizzling chocolate to create a crisp look. If you’re gifting them, wrap squares individually in parchment and tie with a ribbon.
Cook’s Commentary
I make these when I want something that reads decadent but is straightforward to prepare. The method relies on technique more than timing: pulsing to the right texture, pressing evenly into the pan, and letting the bars chill properly. A food processor with a strong motor makes a big difference; weaker machines may require more scraping and patience.
The dual use of maple syrup and vanilla—once in the crust and again in the date layer—creates a layered sweetness that stops the bars from tasting one-note. The dash of sea salt in both layers is not optional in my book; it brightens and lifts the whole bar.
Make-Ahead & Storage
Refrigerator
Store the bars in an airtight container in the refrigerator for up to 1 week. Keep parchment between layers to prevent sticking. Chilling keeps the texture firm and the chocolate intact.
Freezer
For longer storage, freeze the bars in a single layer until solid, then transfer to a freezer-safe bag or container for up to 2 months. Thaw in the refrigerator for 30–60 minutes before serving to preserve the texture.
Questions People Ask
Can I make the bars nut-free? The current crust uses cashews for texture. To go nut-free, try sunflower seeds in the same quantity, but expect a slight change in flavor and color.
What if my date mixture is too dry? If the date-coconut layer won’t come together after processing, add a teaspoon of hot water or an extra tablespoon of maple syrup and process again until spreadable.
How thick should the layers be? Press the crust so it’s evenly distributed across the pan; the date-coconut layer should be thick enough to cover the crust in one even spread—about a half-inch or so. The exact thickness is flexible but aim for balance between nut base and date filling.
Hungry for More?
If you enjoy these bars, try switching the base nut to almonds or adding a tablespoon of cocoa powder to the crust for a chocolate-nut foundation. I also keep a jar of the date-coconut mixture in the fridge for spooning onto yogurt or toast—it’s that versatile.
Pin the recipe, stash it in your weekend plan, and make a batch when you want something that feels special without the oven. These No Bake Samoa Bars deliver chewy, coconut-forward satisfaction with minimal fuss.
No Bake Samoa Bars
Ingredients
Equipment
Method
- Place 15-16 medjool dates (pitted) in a bowl and cover with hot water; let soak for 20 minutes while you prepare the crust. Line an 8x8 pan with parchment paper.
- In a food processor, add 2 c raw cashews and process until they reach a grain-like (coarse) consistency.
- Add 3-4 T maple syrup, 1 tsp vanilla extract, 2/3 c shredded coconut (unsweetened), and a dash of sea salt to the cashews. Process until the mixture holds together into a sticky dough.
- Press the cashew mixture firmly and evenly into the prepared 8x8 pan to form the crust. If the mixture sticks to your fingers, rub a very small amount of coconut oil on your fingers to help.
- Place the crust in the refrigerator to chill while you make the date-coconut layer.
- Drain the soaked dates and add them to the food processor. Process until smooth and caramel-like.
- Add 3 T maple syrup, 1 tsp vanilla extract, and a dash of sea salt to the processed dates; process briefly to combine and smooth.
- Add 1 c (heaping) shredded coconut (unsweetened) to the date mixture and process until fully combined and spreadable.
- Pour and spread the date-coconut mixture evenly over the chilled cashew crust. Place the pan in the freezer and chill for about 20–30 minutes to firm the layers.
- While the bars chill, melt 2 oz dark chocolate (approx. 2/3 of a 3 oz. bar) with 1/2 T coconut oil using a double boiler (or a heatproof bowl over simmering water). Stir until smooth and fully melted.
- Transfer the melted chocolate to a small plastic bag, snip a small corner, and drizzle the chocolate evenly over the chilled bars. Return the pan to the refrigerator or freezer and chill about 5 minutes to set the chocolate.
- Lift the bars from the pan using the parchment, place on a cutting board, and cut into 2-inch squares. Store the finished bars in the refrigerator.
Notes
*See the link in the post to the Mint Chocolate Truffles for the double boiler method.