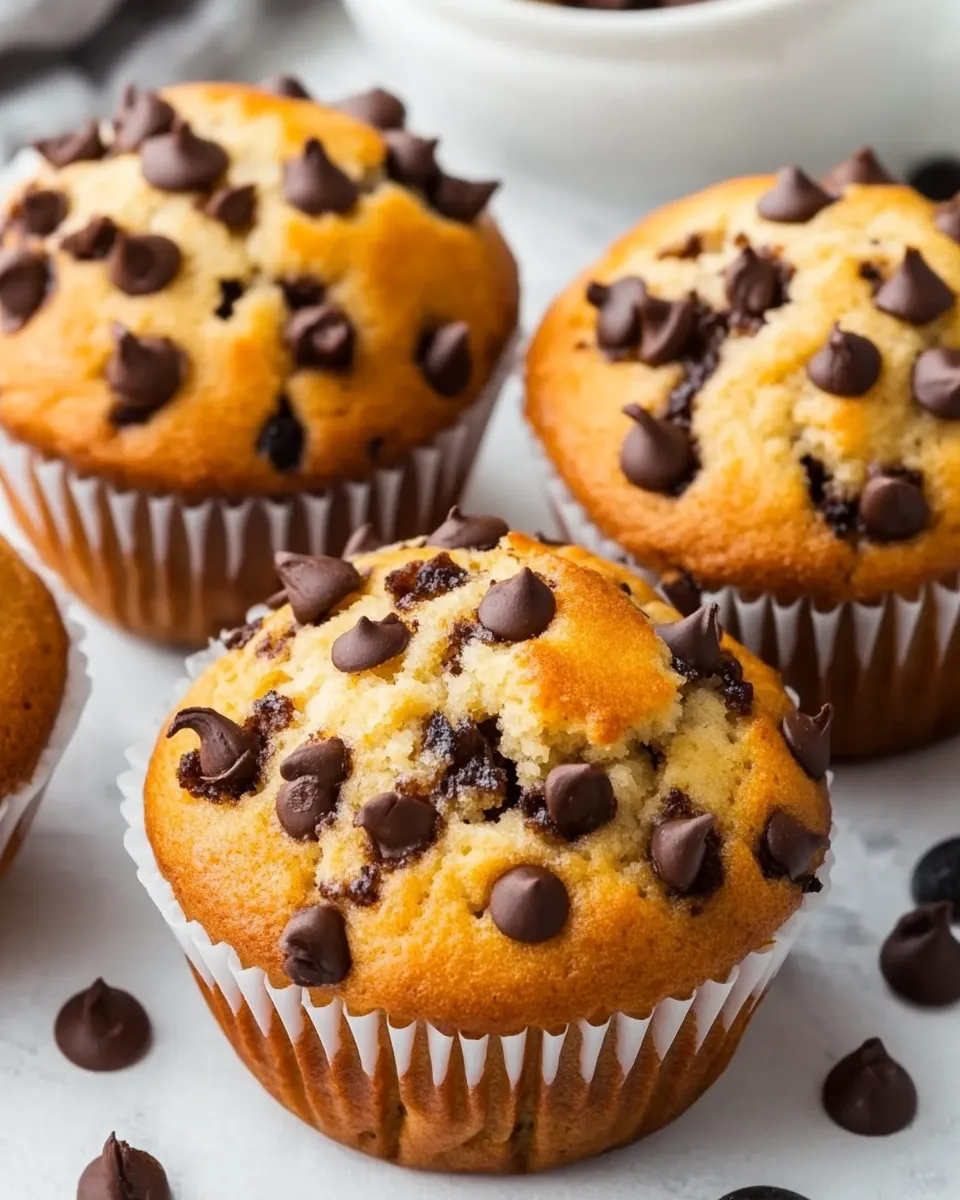
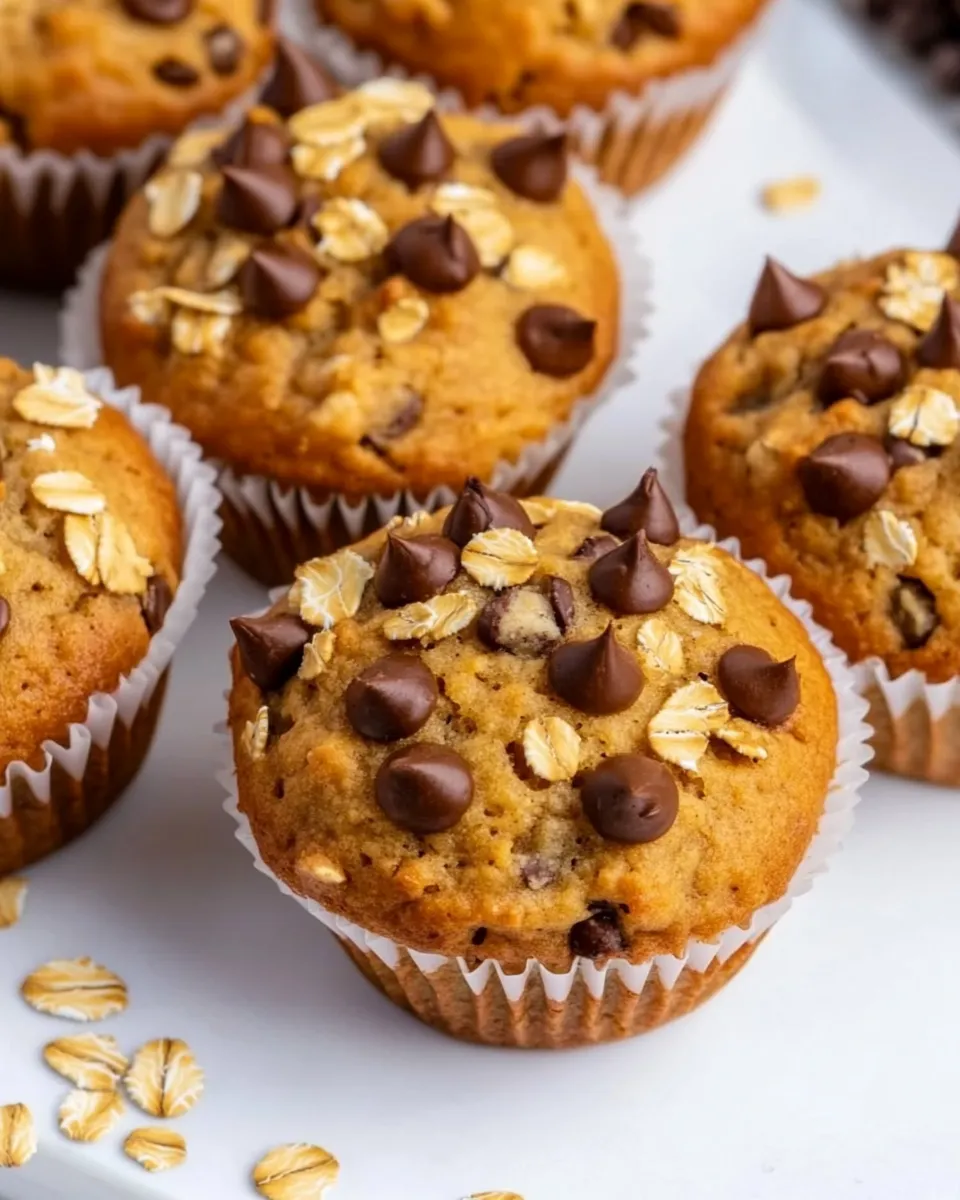
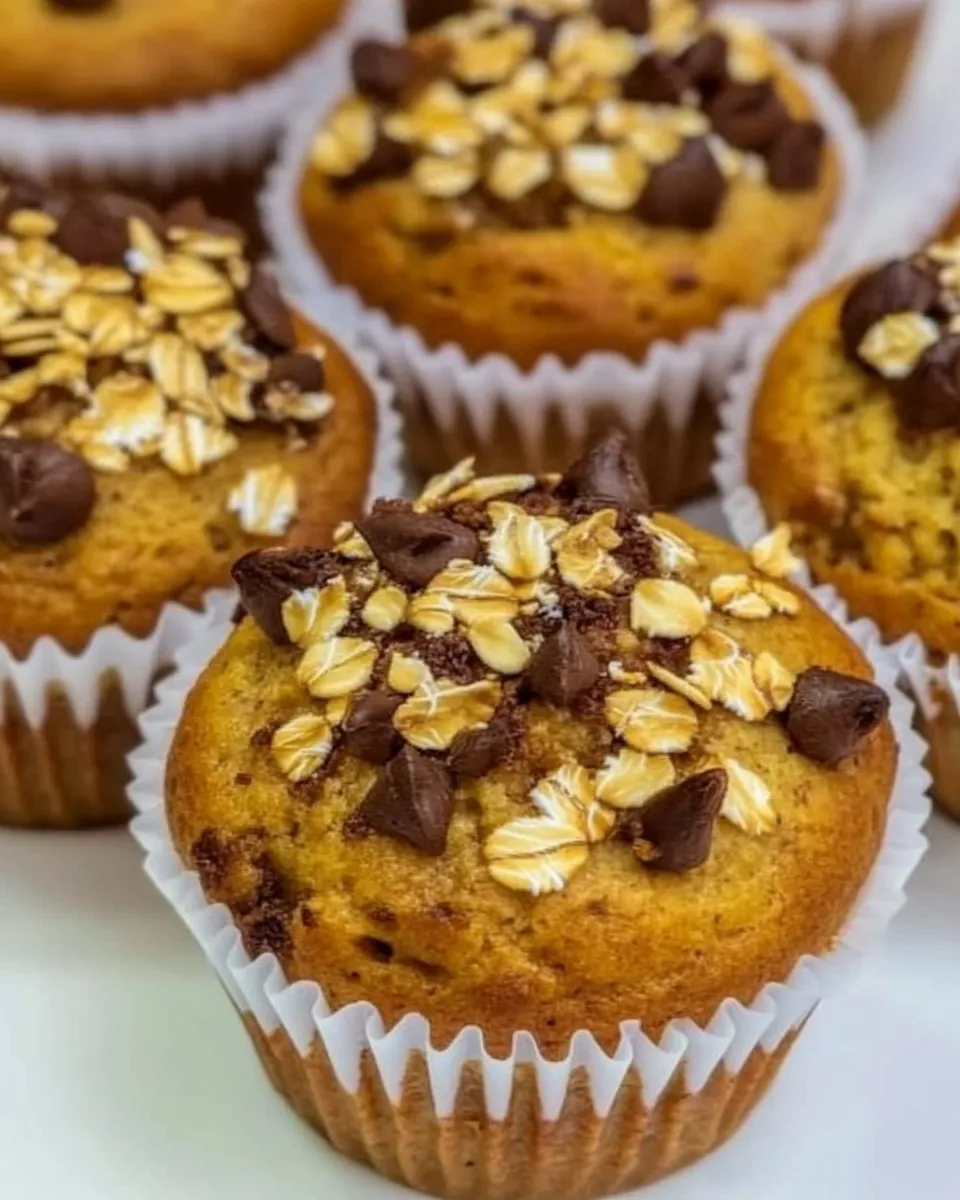
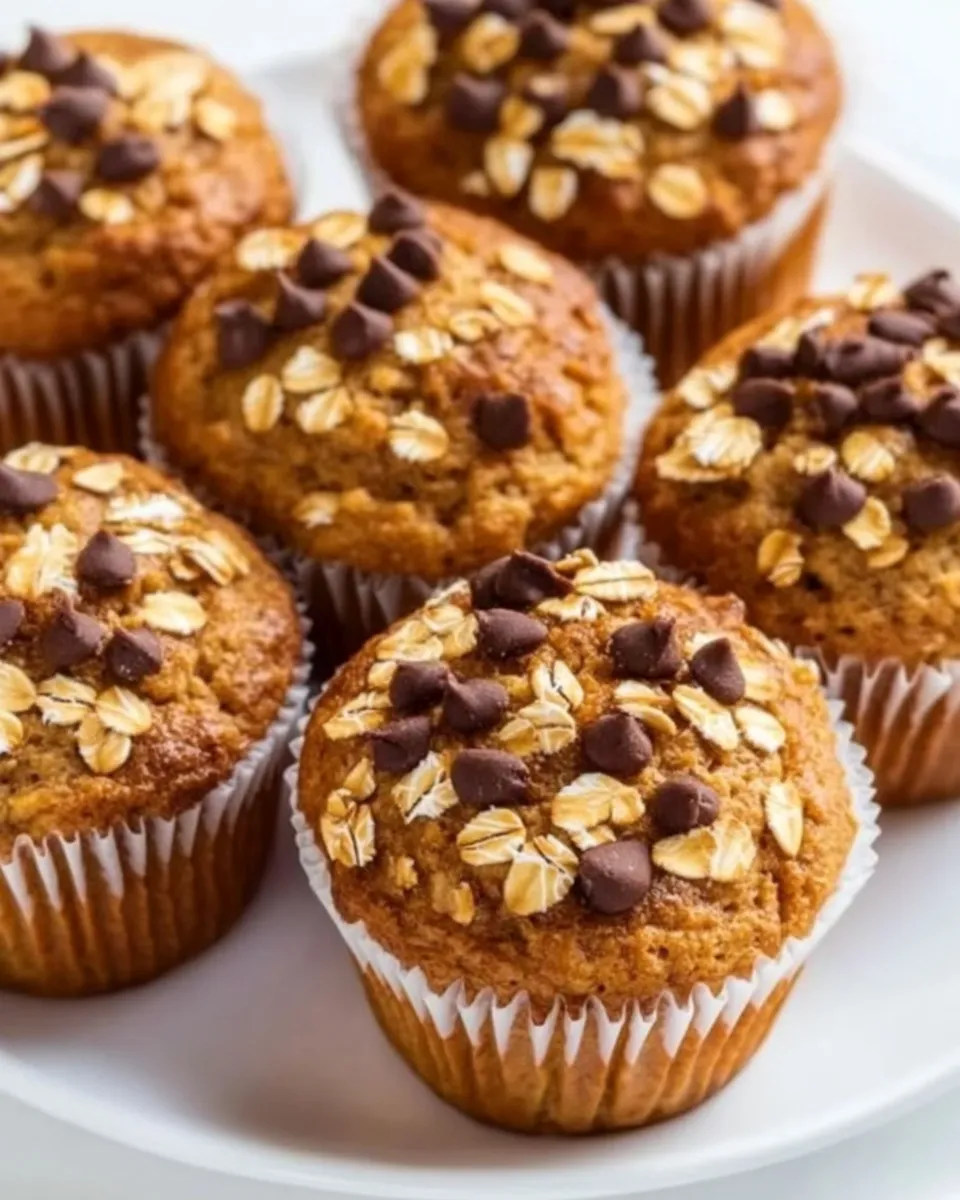
Oat Flour Muffins
These oat flour muffins are the kind of recipe I reach for when I want something straightforward, reliable, and a little bit wholesome. They come together quickly, use pantry-friendly ingredients, and bake into tender, lightly domed muffins that hold up well through a busy morning. No one piece of this recipe is glamorous — that’s the point. It’s practical baking that gives you consistent results.
I like them plain with a smear of butter, with chocolate stirred through, or warmed and served with yogurt and fruit. The base is forgiving: the combination of oat flour, Greek yogurt and melted coconut oil keeps the crumb moist without being gummy. Follow the steps, don’t overmix, and you’ll have a dozen muffins that travel well and freeze beautifully.
Below you’ll find a shopping guide, exact ingredients and step-by-step instructions, troubleshooting notes and swap ideas. I’ve written this to be easy to follow at the counter, with tips you can read in a minute while you wait for the oven to preheat.
Ingredients
- 1 3/4 cups oat flour — the base of the muffins; provides structure and a mild oat flavor.
- 1 teaspoon baking powder — gives lift; make sure it’s fresh for best rise.
- 1/2 teaspoon baking soda — balances acidity from the yogurt and helps rise.
- 1/4 teaspoon salt — enhances flavor and balances sweetness.
- 3/4 cup sugar or sugar substitute — sweetens; adjust if using a substitute per package directions.
- 1/2 cup coconut oil, melted — adds tenderness and moisture; melted and slightly cooled works best.
- 1 cup Greek yogurt or any plain yogurt — gives moisture, tang and reacts with the soda for lift.
- 2 large eggs — bind and help set the crumb.
- 1 teaspoon vanilla extract — rounds out the flavor.
- 1/2 cup chocolate, chopped, optional — a mix-in for chocolate muffins; fold in gently.
Your Shopping Guide
When you shop for this recipe, focus on three things: fresh leaveners, a reliable oat flour, and a neutral-tasting coconut oil. Baking powder and baking soda lose strength over time, so if you haven’t replaced them in a year, toss them and buy new. For oat flour, pick a bag labeled “oat flour” or blitz rolled oats in a blender until fine — both work, but pre-made oat flour saves time.
If you prefer a milder coconut aroma, choose refined coconut oil. Unrefined will lend a noticeable coconut scent and flavor. For yogurt, Greek yogurt creates a thicker batter and tangy profile; plain yogurt works too and gives slightly looser batter. If you like chocolate in your muffins, bring a small bar and chop it to about 1/2 cup total — dark, milk, or a mix, whatever you prefer.
Oat Flour Muffins: How It’s Done
- Preheat the oven to 180°C (350°F). Place a rack in the center of the oven. Line a 12-count muffin pan with paper liners.
- If the coconut oil is solid, melt it and let it cool slightly while you prepare the other ingredients.
- In a large bowl, combine 1 3/4 cups oat flour, 1 teaspoon baking powder, 1/2 teaspoon baking soda, 1/4 teaspoon salt, and 3/4 cup sugar (or sugar substitute). Stir until evenly mixed.
- In a separate bowl, whisk together 1/2 cup melted coconut oil, 1 cup Greek yogurt, 2 large eggs, and 1 teaspoon vanilla extract until smooth.
- Pour the wet mixture into the dry mixture and stir gently with a spatula or spoon just until the ingredients are combined and no large streaks of flour remain. Do not overmix.
- If using, fold 1/2 cup chopped chocolate into the batter until evenly distributed.
- Divide the batter evenly among the 12 lined muffin cups, filling each about three-quarters full.
- Bake for 20–23 minutes, or until a skewer inserted into the center of a muffin comes out mostly clean.
- Remove the pan from the oven and let the muffins cool in the pan for 10 minutes. Then transfer the muffins to a wire rack and let them cool completely.
Why Oat Flour Muffins is Worth Your Time
These muffins strike a rare balance: they’re wholesome enough to feel like a smarter choice, yet indulgent enough to satisfy a craving. Oat flour gives a pleasant nutty note and tender texture that’s different from wheat-flour muffins. The Greek yogurt keeps them moist without oiliness, and the simple ingredient list means you can make them from pantry staples.
They also adapt easily. Keep them plain for weekday breakfasts, fold in chocolate for an afternoon pick-me-up, or add fruit and spices for a seasonal variation. They hold their shape and don’t dry out quickly because of the yogurt and coconut oil, making them great for packing into lunchboxes or taking on the go.
Easy Ingredient Swaps
- Oat flour — swap with equal measure of finely ground rolled oats if you don’t have packaged oat flour.
- Greek yogurt — use plain yogurt (same volume) if you prefer a lighter texture; drain a little if it’s very loose.
- Coconut oil — replace with neutral vegetable oil or melted butter in the same amount if you don’t want coconut flavor.
- Sugar — use your preferred granulated sugar substitute, watching package conversion guidance — volume remains 3/4 cup, but sweetness varies.
- Chocolate — swap for the same amount of chopped nuts, dried fruit, or seeds for texture and flavor variation.
Cook’s Kit
- 12-count muffin pan — essential for even portions.
- Muffin liners or cooking spray — liners make cleanup easier.
- Large mixing bowl and medium mixing bowl — for dry and wet ingredients.
- Spatula or wooden spoon — for gentle folding.
- Measuring cups and spoons — accuracy matters for baking.
- Wire rack — cools muffins quickly and prevents sogginess.
Things That Go Wrong
Here are common issues and quick checks to fix them:
- Muffins are dense — likely caused by overmixing or using too much flour. Mix only until combined and measure flour accurately (don’t pack it).
- Flat tops — check whether your baking powder is old or whether the oven was too cool at the start. Fresh leaveners and a preheated oven help create height.
- Gummy center — underbaking or too much moisture. Bake until a skewer comes out mostly clean and let muffins cool in the pan for 10 minutes before transferring to a rack.
Holiday & Seasonal Touches
These muffins make a great base for seasonal flavors. In fall, stir in a teaspoon of cinnamon and 1/2 cup chopped apple (tossed in a little flour) or replace the chocolate with chopped walnuts and a tablespoon of maple syrup in the batter for a small flavor change. For winter, orange zest plus dark chocolate makes a bright, cozy combination. In spring and summer, fold in fresh berries just before baking, but be careful not to add too much juice which can change the batter consistency.
For holidays, top the muffins before baking with a sprinkle of coarse sugar, a pinch of spice blend, or a few oats for a rustic look. If you want to glaze them, wait until they are completely cool and brush on a thin sugar glaze or a mixture of yogurt and honey for a lighter finish.
What Could Go Wrong
Some problems show up only after cooling or when reheating. Here’s what to watch for:
- Become dry after a day — store airtight at room temperature with a slice of apple or a damp paper towel in the container to retain moisture for short-term storage, or freeze extras.
- Sticking liners — grease the liners lightly or use higher-quality liners to prevent sticking, especially if you add a lot of fruit or sticky toppings.
- Uneven bake — rotate the pan halfway through baking if your oven has hot spots, and ensure the rack is centered.
Storage & Reheat Guide
Cool muffins completely before storing. At room temperature, keep them in an airtight container for up to 2 days. For longer storage, freeze in a single layer on a sheet tray until firm, then transfer to a freezer bag for up to 3 months.
To reheat, thaw at room temperature or pop a frozen muffin into the microwave for 20–30 seconds. For a crisper top, reheat in a 175°C (350°F) oven for 5–8 minutes from thawed, or 12–15 minutes from frozen. If you like them warm with a soft center, halve and toast briefly or microwave for a shorter time.
Quick Q&A
Can I make these gluten-free?
Yes. Oat flour is naturally gluten-free, but use certified gluten-free oats if you need to avoid cross-contamination.
Can I make a bigger or smaller batch?
Yes. Scale the ingredients proportionally. The baking time may change a bit if you switch pan sizes — check doneness with a skewer.
Can I use oil instead of coconut oil?
Yes. Neutral vegetable oil or melted butter can replace coconut oil 1:1. Butter will add a richer flavor.
Why no wheat flour?
Oat flour is the defining ingredient here. It creates a tender crumb and a slightly chewy texture that feels different and lighter than wheat-based muffins.
Wrap-Up
These oat flour muffins are straightforward, forgiving, and adaptable. They’re a good choice when you want a quick batch of reliable muffins without pulling out a long ingredient list. Keep the leaveners fresh, don’t overmix, and you’ll get tender, moist muffins every time. I hope you enjoy baking them as much as I do — whether plain, chocolate-studded, or dressed up for the season.
Oat Flour Muffins
Ingredients
Equipment
Method
- Preheat the oven to 180°C (350°F). Place a rack in the center of the oven. Line a 12-count muffin pan with paper liners.
- If the coconut oil is solid, melt it and let it cool slightly while you prepare the other ingredients.
- In a large bowl, combine 1 3/4 cups oat flour, 1 teaspoon baking powder, 1/2 teaspoon baking soda, 1/4 teaspoon salt, and 3/4 cup sugar (or sugar substitute). Stir until evenly mixed.
- In a separate bowl, whisk together 1/2 cup melted coconut oil, 1 cup Greek yogurt, 2 large eggs, and 1 teaspoon vanilla extract until smooth.
- Pour the wet mixture into the dry mixture and stir gently with a spatula or spoon just until the ingredients are combined and no large streaks of flour remain. Do not overmix.
- If using, fold 1/2 cup chopped chocolate into the batter until evenly distributed.
- Divide the batter evenly among the 12 lined muffin cups, filling each about three-quarters full.
- Bake for 20–23 minutes, or until a skewer inserted into the center of a muffin comes out mostly clean.
- Remove the pan from the oven and let the muffins cool in the pan for 10 minutes. Then transfer the muffins to a wire rack and let them cool completely.
Notes
TO STORE
: Leftover muffins can be stored in the refrigerator, covered, for up to 2 weeks.
TO FREEZE
: Place the muffins in a ziplock bag and store them in the freezer for up to 6 months.