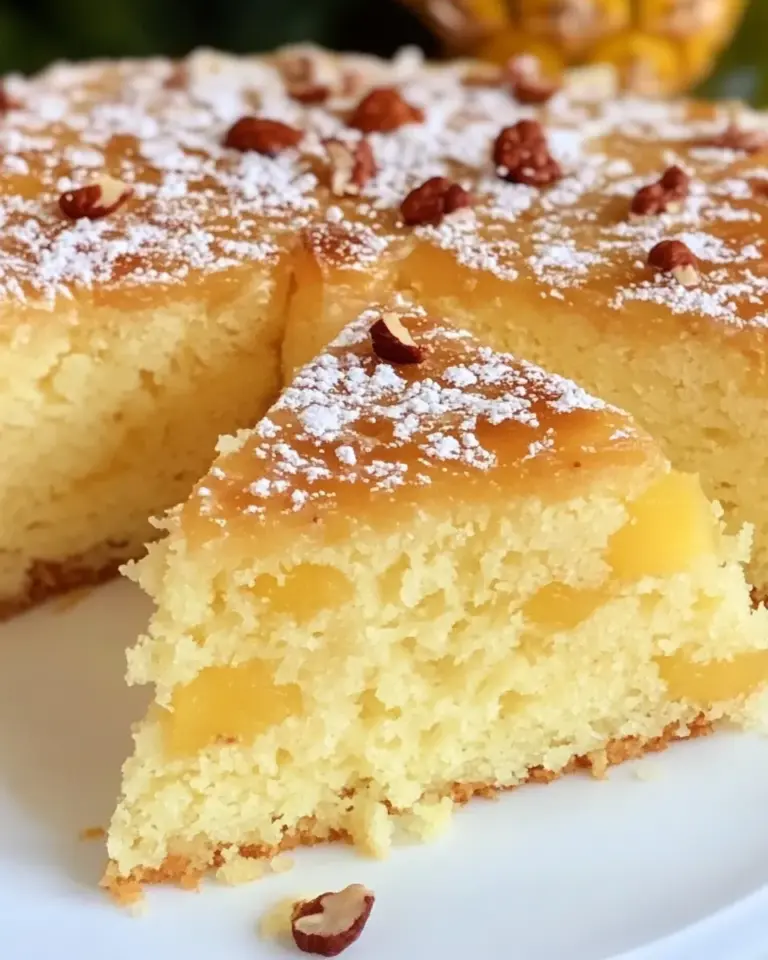
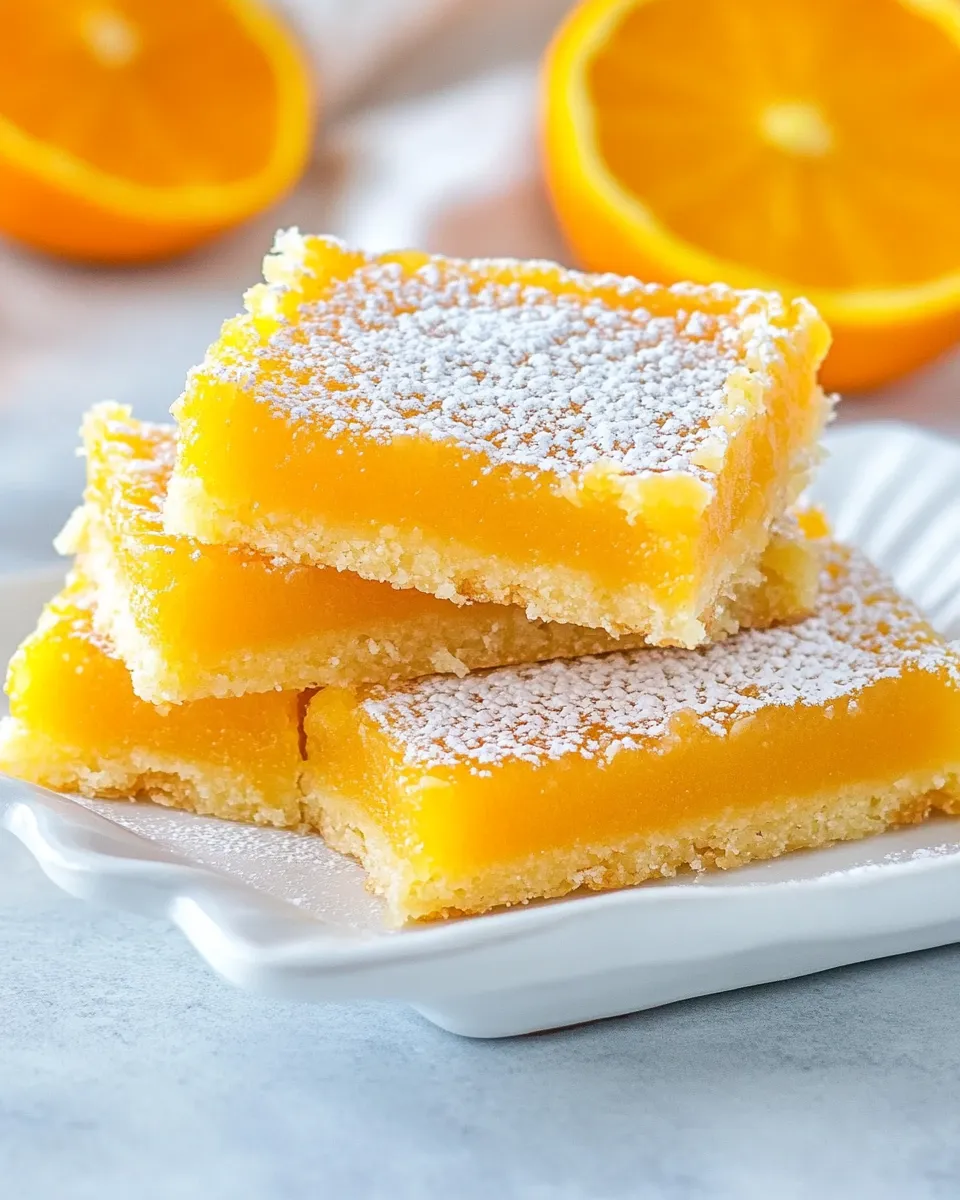
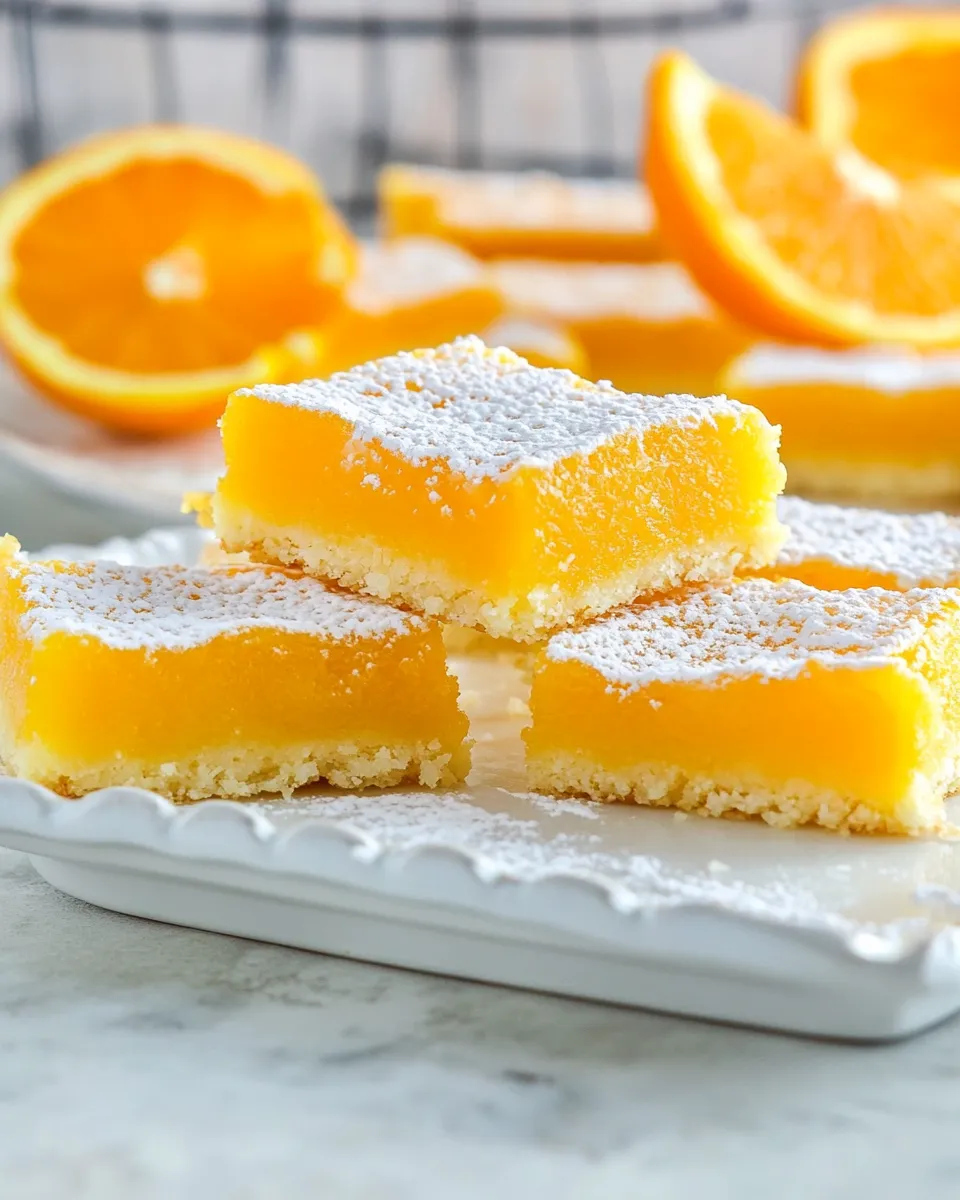
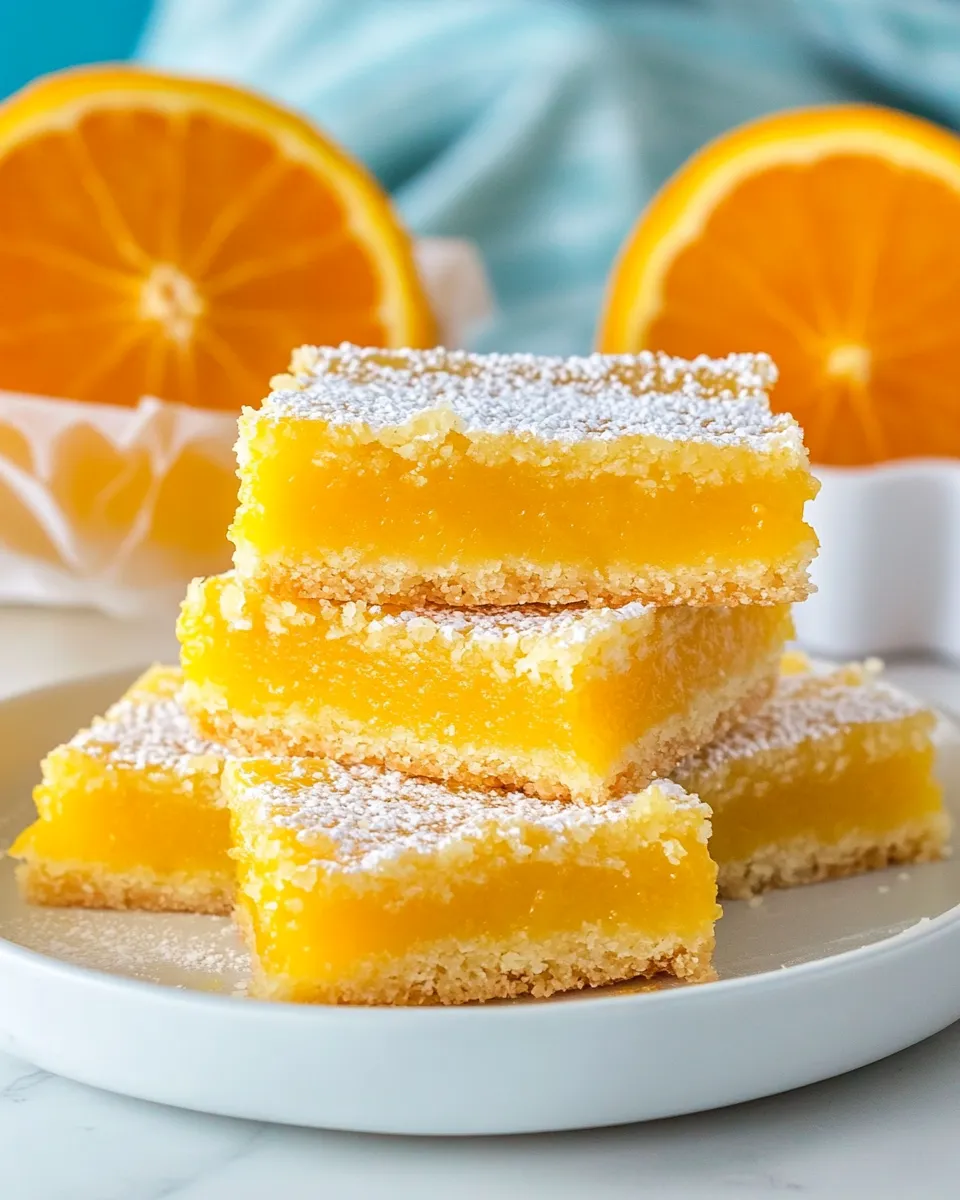
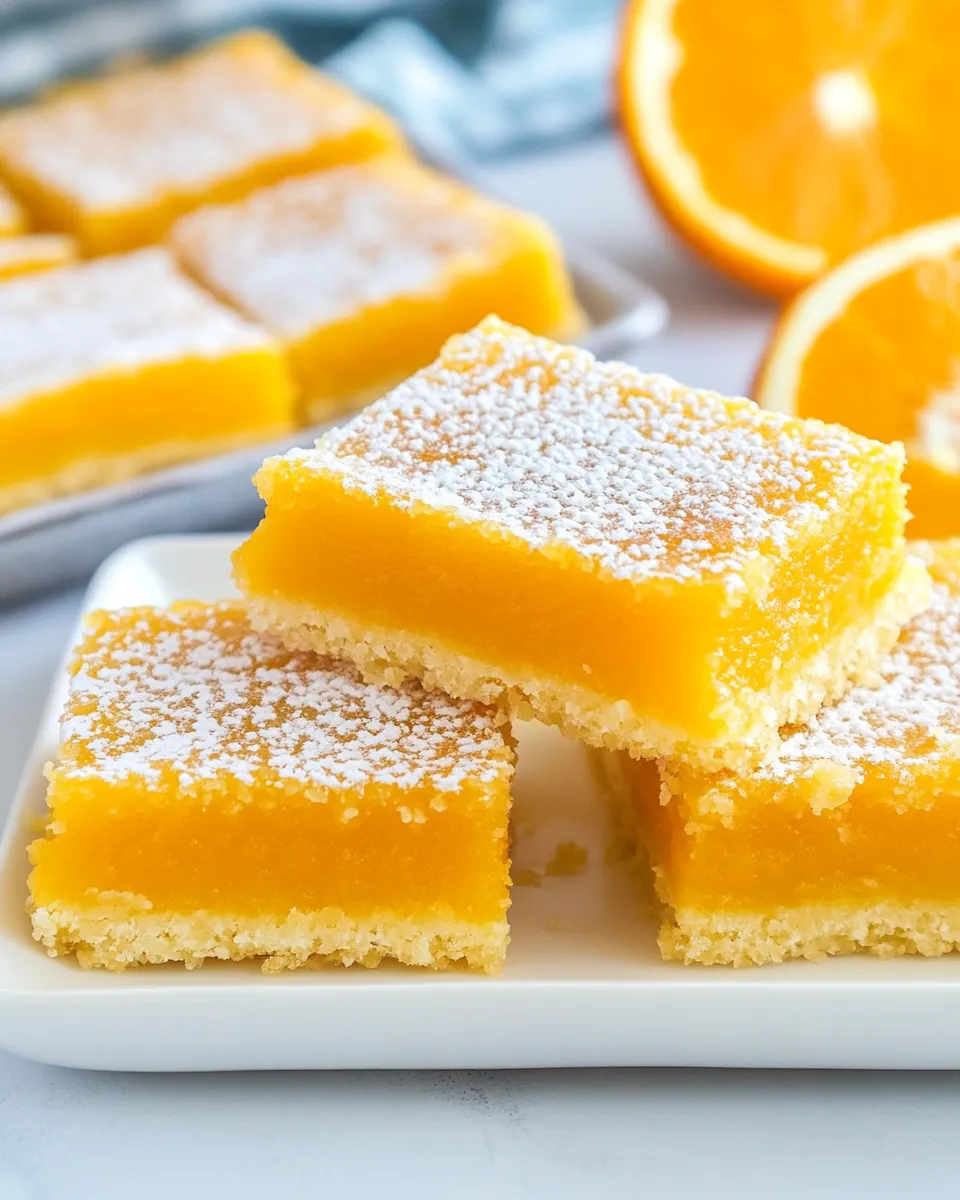
Orange Bars
Bright, buttery, and reliably straightforward—these Orange Bars live on my counter whenever I need something that’s both homey and a little bit celebratory. The shortbread-like crust holds a tangy, custard-y orange filling that slices clean and travels well. They’re the kind of bake that looks fancier than it is.
My readers ask for approachable recipes that don’t hide tricks. This one has two clear stages: a simple buttery crust and a citrus-forward filling you can whisk or blitz in a blender. Timing is forgiving, and oven temperatures are standard, so this is a great recipe to keep bookmarked for unexpected company.
I’ll walk you through the ingredients, the exact step-by-step build, and all the practical notes I use when I bake this for friends, potlucks, or a week of sweet snacks. Expect tips on texture, storage, and quick fixes if you’re missing an item or two.
Ingredient Checklist
Ingredients
- 1 cup (226 g) unsalted butter — provides the rich, tender base for the crust; use room temperature for easier creaming.
- 2 cups (248 g) all-purpose flour — structure for the crust; measure by spooning into the cup and leveling for accuracy.
- ½ cup (100 g) granulated sugar — sweetens and slightly tenderizes the crust.
- ¼ teaspoon salt — balances the sweetness and enhances orange flavor.
- ½ cup (119 ml) fresh squeezed orange juice — the primary citrus flavor in the filling; fresh is best for brightness.
- Zest of 1 orange — concentrated orange oils; don’t skip it for depth.
- 1 teaspoon orange extract — boosts aroma and orange intensity.
- 1 ½ cups (150 g) granulated sugar — sweetens and helps set the filling.
- ¼ cup (31 g) all-purpose flour — a little stabilizer in the filling so it sets cleanly.
- ½ teaspoon baking powder — gives the filling a slight lift and prevents it from being too dense.
- 4 large eggs — the binding and setting agents for the filling; room temperature eggs mix more evenly.
- Powdered sugar for topping — a light dusting for presentation and a touch of extra sweetness.
Build Orange Bars Step by Step
- Preheat oven to 350°F (175°C). Line a 9×13″ pan with foil or parchment and spray the lining with nonstick cooking spray.
- Make the crust: beat 1 cup (226 g) unsalted butter with a hand or stand mixer until creamy. Add 2 cups (248 g) all-purpose flour, ½ cup (100 g) granulated sugar, and ¼ teaspoon salt. Beat until a dough forms (a hand mixer will take longer). Press the dough evenly into the bottom of the prepared pan.
- Bake the crust on the middle rack for 18 minutes. While the crust is baking, prepare the filling.
- Make the filling: in a blender or a large bowl, combine ½ cup (119 ml) fresh squeezed orange juice, zest of 1 orange, 1 teaspoon orange extract, 1½ cups (150 g) granulated sugar, ¼ cup (31 g) all-purpose flour, ½ teaspoon baking powder, and 4 large eggs. Blend for a few seconds to about one minute until smooth, or whisk vigorously until fully combined and smooth.
- When the crust comes out of the oven, carefully and evenly pour the filling over the hot crust.
- Return the pan to the oven and bake for 20–23 minutes, until the filling is set and no longer jiggly in the center.
- Remove from oven and cool completely in the pan. Once fully cooled, dust the top with powdered sugar, lift the bars out using the foil or parchment, and slice into bars.
Why It’s My Go-To
This recipe is quick to assemble and patient in the oven. The crust is forgiving—press it in and it bakes into a tender, slightly crumbly base that contrasts with the smooth, citrus filling. I often choose it when I want a dessert that travels and slices cleanly for a picnic or a box of afternoon treats.
Flavor-wise, the combination is reliably bright without being aggressively sweet. The orange juice and zest give a clear citrus note, while the orange extract amplifies that aroma so the bars read as “orange” even after cooling. Texturally, you get a shortbread-like beneath and a firm, slightly custardy top—there’s a satisfying contrast in every bite.
It’s also forgiving for bakers who don’t bake every day. If your crust is a hair thicker or thinner, or the filling edges color a touch more, you still end up with a great bar. That reliability is why I reach for this recipe repeatedly.
If You’re Out Of…
- Fresh orange juice — bottled orange juice will work in a pinch, though it’s less bright. Increase zest if you want more fresh citrus bite.
- Orange extract — a splash of vanilla will smooth the flavor; use less since vanilla is strong compared to orange extract.
- Unsalted butter — if you only have salted, reduce added salt in other recipes; here the crust includes ¼ teaspoon salt, so omit any extra salt elsewhere.
- All-purpose flour — I don’t recommend swapping with a 1:1 gluten-free blend without testing; structure matters for the crust and filling.
- Powdered sugar — you can skip the dusting; it only changes appearance and a hint of surface sweetness.
What’s in the Gear List
- 9×13″ baking pan (metal or glass both work)
- Parchment paper or foil and nonstick spray
- Hand mixer or stand mixer (for the crust)
- Blender or large bowl and whisk (for the filling)
- Zester or microplane for the orange zest
- Measuring cups and kitchen scale (if you prefer weight accuracy)
- Spatula or the back of a spoon to press the crust
- Cooling rack and sifter for powdered sugar
Slip-Ups to Skip
Watch these common mistakes so the bars come out perfect.
- Overbaking the crust: bake exactly 18 minutes. If it browns too much, the crust will be dry. You want a light golden color.
- Pouring cold filling onto a cold crust: the recipe calls for pouring the filling over a hot crust. That helps the filling set up as it bakes and produces cleaner separation between layers.
- Underbaking the filling: remove when the center is set and no longer jiggly. A little wobble at the very center is okay, but it should not be runny.
- Not cooling completely before slicing: these bars need to cool fully in the pan so the filling firms. Cutting too soon creates sloppy slices.
- Skipping zest: juice alone doesn’t deliver the same aroma. Zest adds oils that make the orange flavor pop.
Fresh Takes Through the Year
These bars are a great canvas for seasonal tweaks. In winter, add a pinch of ground cardamom or swap in blood orange juice when available for a deeper color and floral note. Spring pairs well with a thin layer of raspberry jam under the filling for a bright tart contrast. In summer, try a light glaze of orange juice and powdered sugar after cooling instead of dusting, for a glossy finish.
If you want to riff on texture, press slivered almonds into the crust before baking for crunch, or sprinkle finely chopped candied ginger into the filling for a spicy-sweet bite. For a more delicate, lighter filling, fold in a tablespoon of orange liqueur instead of some of the extract—the alcohol bakes away but leaves flavor if you want an adult twist.
Behind-the-Scenes Notes
Why blend the filling? In a blender you get a perfectly smooth, emulsified mixture that reduces the risk of tiny flour pockets or uneven eggs. That said, whisking works just fine if you don’t have a blender—just whisk longer and make sure the flour is fully incorporated.
Pressing the crust evenly matters. If one corner is thicker the bars will bake unevenly. I press the dough with the bottom of a measuring cup to get a uniform layer. Also, lining the pan with foil or parchment is the small step that makes slicing and transport so much easier—lift the whole slab out to slice on a cutting board for neat edges.
Prep Ahead & Store

You can prep the crust and store it in the pan in the fridge for up to a day before baking; bring it back to room temperature for 10–15 minutes before baking to ensure even cooking. The filled and baked bars keep at room temperature, covered, for 1–2 days.
For longer storage, refrigerate in an airtight container for up to 5 days. If you want to freeze, cut the cooled bars into squares, lay them in a single layer on a baking sheet to flash-freeze for an hour, then stack with parchment between layers in a freezer-safe container for up to 2 months. Thaw in the fridge overnight and dust with powdered sugar before serving.
Quick Q&A
- Can I make these gluten-free? — I haven’t tested a direct swap; a tested gluten-free blend might work, but expect differences in texture.
- Why did my filling crack? — Overbaking can cause minor cracking. Remove when set and slightly firm rather than dry.
- Can I halve the recipe? — Yes, but use a smaller pan and watch baking times closely; times will be shorter.
- Can I use bottled orange juice? — Yes, though fresh juice gives the best brightness.
- How do I get clean slices? — Chill completely and use a sharp knife, wiping between passes. Lifting out the slab on parchment helps a lot.
Next Steps
Ready to bake? Assemble the ingredients and line your pan first—this recipe moves quickly once you start. If you enjoy citrus, make extra zest and freeze it in a small container for future bakes. Serve these Orange Bars with a cup of strong coffee or a bright herbal tea.
If you want more citrus-forward bakes, try a lemon bar recipe next or a grapefruit olive oil cake for a different texture. Bookmark this one: it’s perfect for gifting, slicing for a brunch spread, or keeping on hand for a week of portable treats.
Orange Bars
Ingredients
Equipment
Method
- Preheat oven to 350°F (175°C). Line a 9×13" pan with foil or parchment and spray the lining with nonstick cooking spray.
- Make the crust: beat 1 cup (226 g) unsalted butter with a hand or stand mixer until creamy. Add 2 cups (248 g) all-purpose flour, ½ cup (100 g) granulated sugar, and ¼ teaspoon salt. Beat until a dough forms (a hand mixer will take longer). Press the dough evenly into the bottom of the prepared pan.
- Bake the crust on the middle rack for 18 minutes. While the crust is baking, prepare the filling.
- Make the filling: in a blender or a large bowl, combine ½ cup (119 ml) fresh squeezed orange juice, zest of 1 orange, 1 teaspoon orange extract, 1½ cups (150 g) granulated sugar, ¼ cup (31 g) all-purpose flour, ½ teaspoon baking powder, and 4 large eggs. Blend for a few seconds to about one minute until smooth, or whisk vigorously until fully combined and smooth.
- When the crust comes out of the oven, carefully and evenly pour the filling over the hot crust.
- Return the pan to the oven and bake for 20–23 minutes, until the filling is set and no longer jiggly in the center.
- Remove from oven and cool completely in the pan. Once fully cooled, dust the top with powdered sugar, lift the bars out using the foil or parchment, and slice into bars.
Notes
The orange extract is essential here to amp up the orange flavor.
Use your favorite oranges! For the zest be sure to use at least 1 tablespoon (or more if your orange is larger).
Make sure your crust is compacted firmly. Any holes in the bottom can cause the filling to leak through, ending in upside down bars. This is not usually a problem with shortbread crusts like this one (it happens more if you’re using a cookie crust) but just in case it happens, that’s why.
Want a crunchier crust? Bake it for 22 minutes before topping.