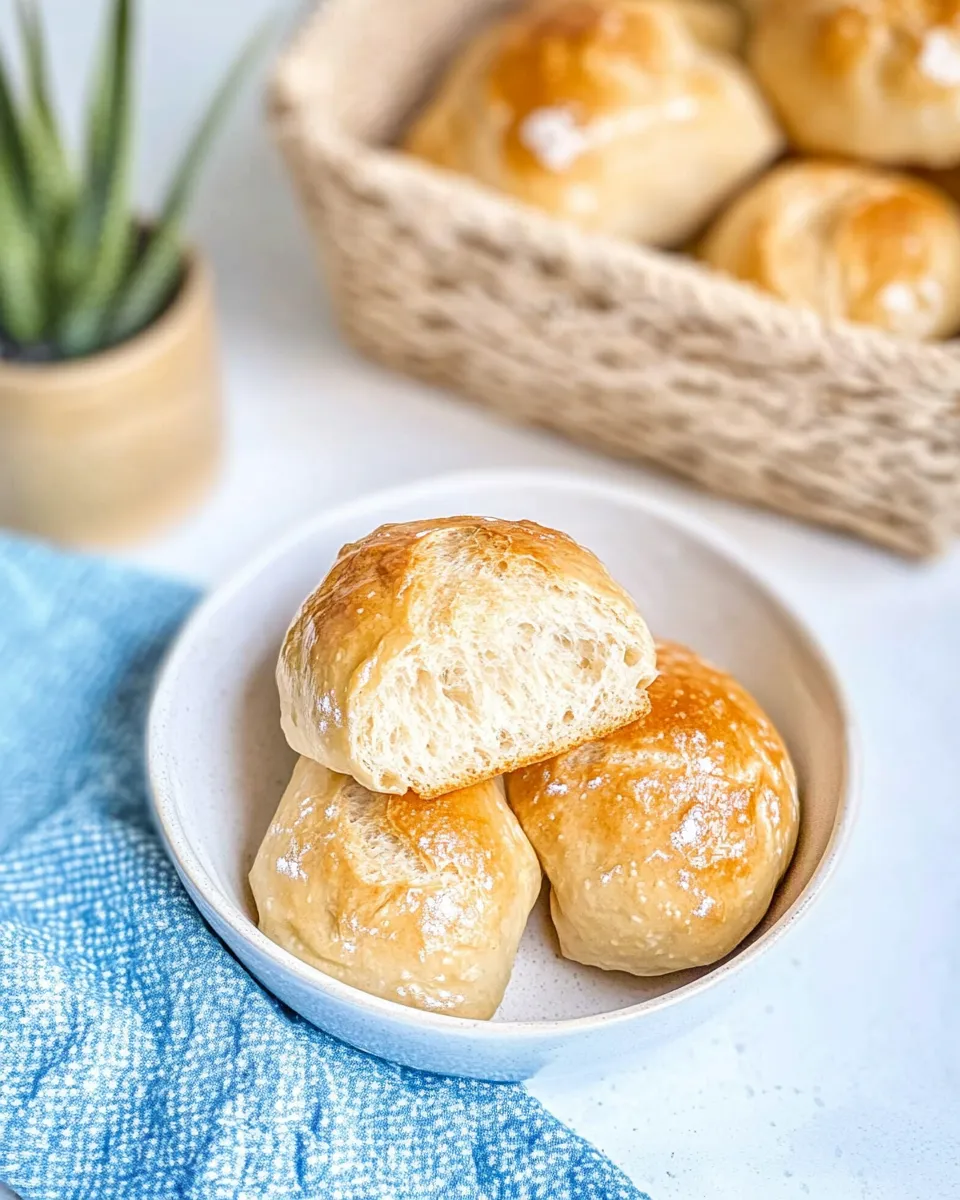
Pan de Agua (Breakfast Bread Rolls)
Pan de Agua are my go-to breakfast rolls when I want something light, airy, and reliably satisfying. They bake up with a thin, golden crust and a soft, open crumb that soaks up butter, coffee, or anything you pair them with. The method is straightforward but precise: cold water, a long knead, and a little steam in the oven make the difference.
I keep this recipe in heavy rotation because it scales well and tolerates a range of kitchen setups. Whether you use a mixer with a dough hook or knead by hand, the sequence of steps controls texture and rise. Follow the timing and simple tricks in the method and you’ll be rewarded with six perfectly shaped mini-baguette-style rolls.
Below you’ll find the ingredient lineup, the step-by-step method written from the original directions, and practical tips I use to get consistent results. No fluff—just clear, tested techniques so your Pan de Agua come out great, every time.
The Ingredient Lineup
- 2 cups bread flour (350 grams) — provides structure and chew; bread flour’s higher protein helps develop the gluten needed for that open crumb.
- 2 teaspoons instant dry yeast — the leavening agent; instant yeast can be mixed directly with the dry ingredients for convenience.
- ½ tablespoon salt — controls fermentation and enhances flavor; keep it measured accurately.
- 1 cup ice-cold water (236 milliliters) — the primary hydration; the recipe notes two tablespoons extra cold water if the dough looks too dry—use only if needed.
- 1 tablespoon vegetable oil (or olive oil), plus extra to grease hands, parchment paper, and countertop — adds tenderness and prevents sticking; reserve extra oil for greasing surfaces and hands as instructed.
- 3 cups hot water — used to create steam in the oven, essential for a thin, crisp crust.
- 2 tablespoons room temperature water — placed in a spray bottle to mist the rolls right before they go into the oven to help crust formation.
The Method for Pan de Agua (Breakfast Bread Rolls)
- Sift together 2 cups (350 g) bread flour, 2 teaspoons instant dry yeast, and ½ tablespoon salt into a bowl. Transfer the dry mixture to the mixer bowl (or work on your countertop if kneading by hand).
- Add 1 cup ice-cold water (236 ml) to the flour. Start kneading at low speed with the dough hook. Scrape the sides as needed. If the dough looks too dry, add up to the two tablespoons of extra cold water.
- Increase mixer speed to medium and knead for 10 minutes.
- While the dough is kneading, line two baking sheets with parchment paper and grease the parchment, the baking sheets, your hands, and a clean countertop with a little oil.
- Stop the mixer. Pour 1 tablespoon vegetable oil onto the dough. Resume kneading at low speed until the oil is incorporated (about 3 minutes).
- Increase the mixer to medium and knead another 10 minutes, or until the dough passes the windowpane test. If it does not pass the windowpane test, knead an additional 5 minutes and recheck.
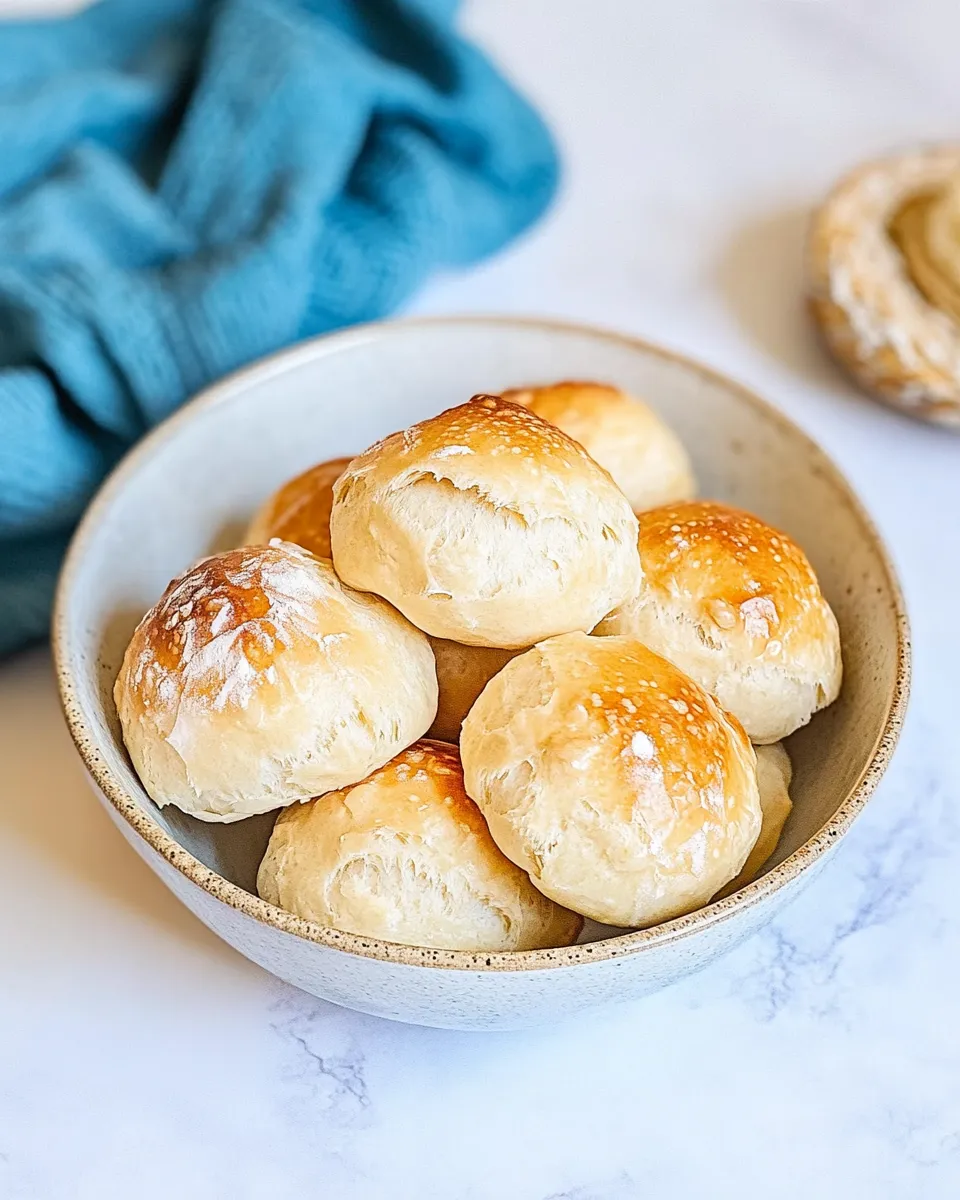
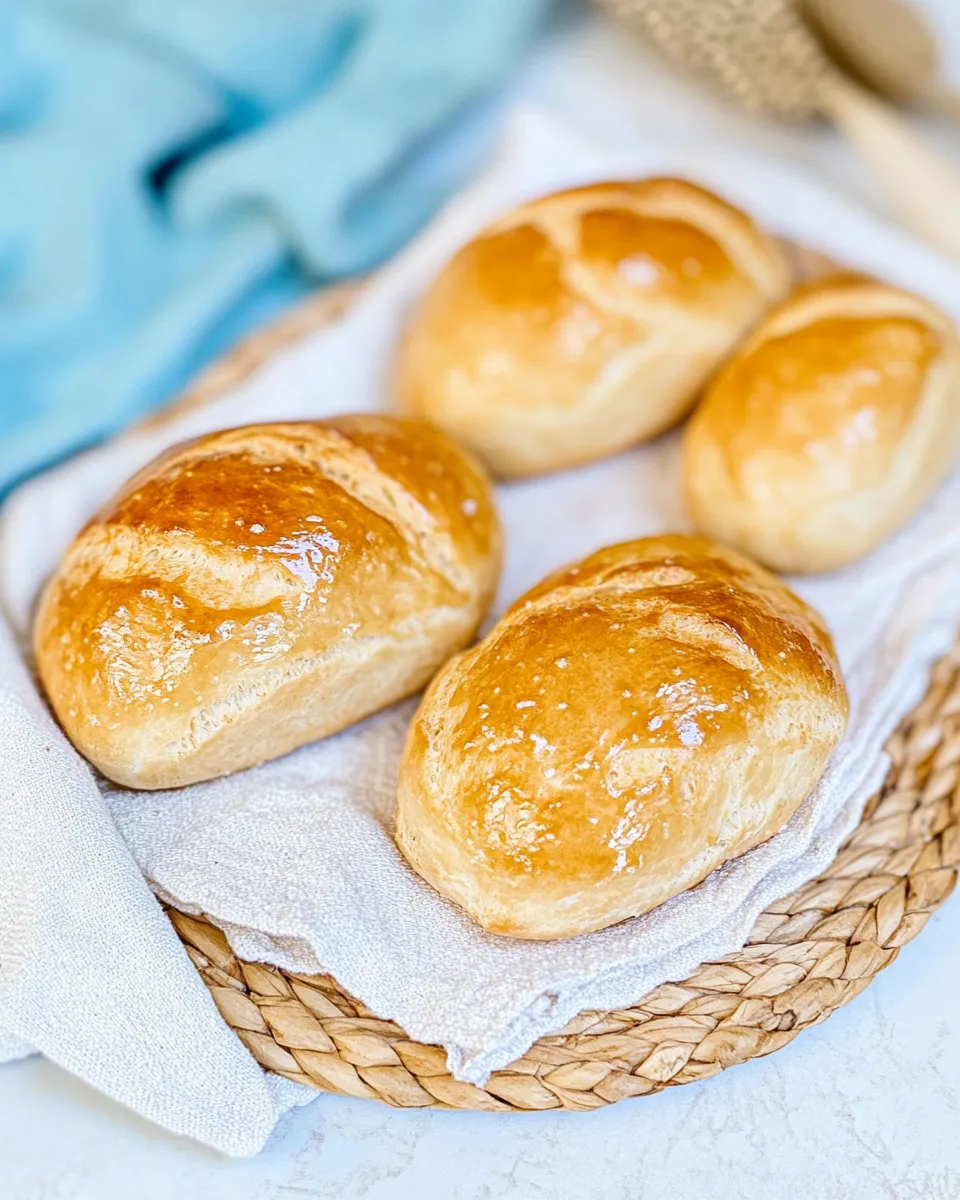
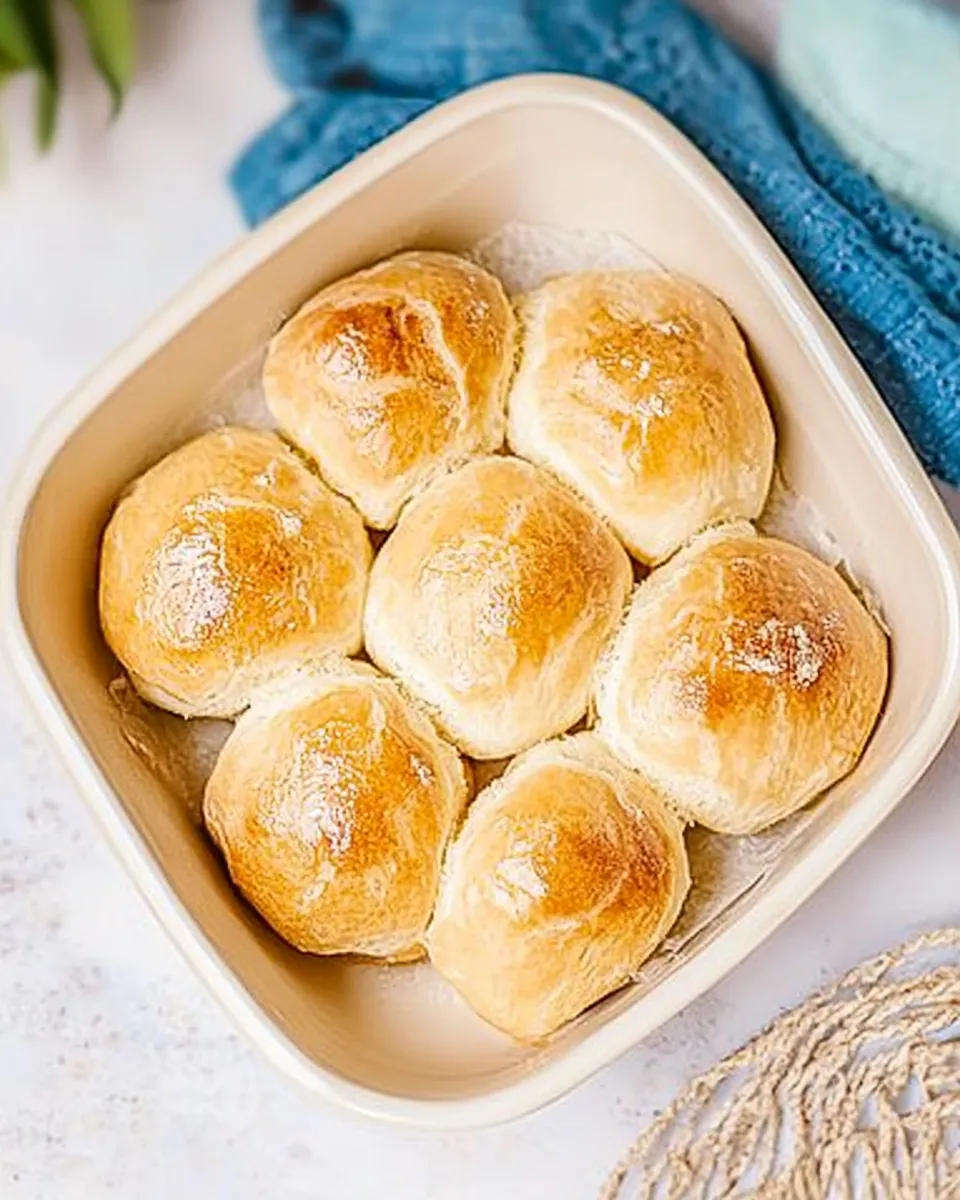
- Grease your hands with oil. Turn the dough out onto the greased countertop and divide it into 6 equal pieces. Shape each piece into a thin roll roughly 1 inch (2.5 cm) in thickness (mini-baguette-type) and place them seam-side-down on one of the prepared baking sheets.
- Cover the baking sheet with a clean cotton tea towel and let the rolls rise in a comfortable, draft-free place until doubled in size, about 60–90 minutes. Check at 60 minutes and then every 15 minutes if not yet doubled.
- When the rolls are about 40 minutes into rising (or when they are nearing doubled size), preheat the oven to 350°F (177°C) for convection or 375°F (190°C) for a regular oven. Place a baking pan on the bottom rack and carefully pour 3 cups hot water into that pan so the oven will produce steam.
- Once the rolls have doubled, remove the tea towel. Grease a piece of parchment paper and place it greased side-down over the rolls. Place the second greased baking sheet on top of the parchment without pressing down on the rolls.
- Holding both baking sheets together, flip them so the rolls are now on the second sheet and the seams are facing up. Remove the top baking sheet and the parchment that was covering the rolls.
- Fill a spray bottle with the 2 tablespoons room-temperature water and mist the rolls with a fine spray. Immediately place the baking sheet with the rolls in the center of the oven and close the door quickly to retain steam.
- Bake for 20 minutes. If the bottom pan still contains water, carefully remove that pan from the oven.
- Move the rolls to the top rack and continue baking another 7–10 minutes, or until they develop a golden-brown crust.
- Remove the rolls from the oven and transfer them to a cooling rack before serving.
Why I Love This Recipe
This Pan de Agua method produces rolls that are both airy and tender. The use of ice-cold water in the initial mix slows yeast activity just enough to let the dough hydrate properly during kneading, which promotes better gluten development without rushing the fermentation. The two-stage kneading—first to hydrate and then after adding oil—creates a dough that’s strong but supple, which is exactly what you want for thin, elongated rolls.
The steam technique is simple and effective: a hot tray of water on the lower rack creates a moist oven environment that delays crust formation long enough for the rolls to expand fully. The quick mist from the spray bottle right before they go in gives the crust a glossy finish and helps the final oven spring. All these details add up to a roll that looks bakery-made without requiring special tools.
No-Store Runs Needed
This recipe is one of those rare winners that relies on pantry basics: flour, yeast, salt, water, and a bit of oil. If you bake often you probably have everything on hand. The only “extra” you might need is a spray bottle for the fine mist; if you don’t have one, a quick, careful splash from a small spoon can substitute in a pinch—just be mindful not to drench the dough.
If you already keep olive oil in your kitchen, you can use that in place of vegetable oil as the ingredient list permits. Beyond that, there aren’t obscure items or specialty flours required, so you can get started without a supermarket trip.
Must-Have Equipment
- Stand mixer with a dough hook (recommended) or a clean countertop for hand-kneading.
- Two baking sheets and parchment paper.
- Measuring scale (for grams) or accurate measuring cups and spoons.
- Clean cotton tea towel to cover the dough while it proofs.
- Oven-safe pan to hold hot water and produce steam in the oven.
- Spray bottle filled with room-temperature water for the pre-bake mist.
- Cooling rack to rest the rolls after baking.
Troubles You Can Avoid
Here are a few common problems and the fixes I use:
- Dense, tight crumb — usually under-kneading. The method specifies multiple kneading stages and a windowpane test. If the dough tears instead of stretching thin, keep kneading in 5-minute increments and recheck.
- Poor rise — check yeast freshness and proofing environment. The recipe’s cold water strategy is intentional, but if your kitchen is very cool, give the rolls a slightly warmer, draft-free spot to rise. If rising stalls at 60–90 minutes, be patient and check every 15 minutes afterward.
- Flat rolls — too much handling or heavy pressing when shaping. Shape gently into thin rolls and place seam-side-down as instructed; the flip technique in the method protects the final shape.
- Crust too thick or too pale — timing of steam matters. Add the hot pan of water as directed and remove the bottom pan if it still contains water after the first bake to let the crust finish browning on the top rack.
Seasonal Flavor Boosts
Rather than adding ingredients to the dough itself, I tune the environment and timing with the seasons. In winter, proofing takes longer—plan for extra minutes and use a slightly warmer, but not hot, spot. In humid summer months, dough may feel tackier; reduce reliance on the optional extra two tablespoons of water and rely more on kneading to develop structure.
If you want to showcase the rolls seasonally without altering the recipe, serve them with seasonal accompaniments: warm weather fruit preserves in summer, roasted vegetables in fall, or a rich spread for winter breakfasts. The rolls’ neutral, tender crumb makes them versatile for any season’s flavors.
Chef’s Notes
Small details matter here. The ice-cold water is deliberate: starting cold delays yeast activity while the flour hydrates, which gives you a little more control during the long kneading process. The oil is added partway through to make the dough softer and easier to shape; don’t skip that step or add the oil too early.
Windowpane test and texture
The windowpane test is the hallmark of properly kneaded dough. Take a small piece and stretch it gently—if it forms a thin, translucent membrane without tearing, you’re done. If it tears, knead a bit more. The recipe instructs a final 10 minutes then an extra 5 if needed—stick to that; under-kneaded dough won’t develop the airy structure we want.
Save It for Later
These rolls are best the day they’re baked—warm, with a crisp crust. To store leftovers, cool completely on a rack, then place in an airtight container at room temperature for up to 24 hours. For longer storage, freeze cooled rolls wrapped tightly in plastic and aluminum foil for up to one month. Reheat from frozen at 350°F (175°C) for 8–10 minutes to refresh the crust and crumb.
Your Questions, Answered
Q: Can I use all-purpose flour instead of bread flour? A: Bread flour is specified because its higher protein content builds the gluten network this recipe relies on. You could use all-purpose, but expect a slightly softer, less chewy result.
Q: What if my dough is sticky after kneading? A: A slightly tacky dough is normal. Greasing your hands and the countertop as instructed helps. Only add the optional two tablespoons of extra cold water if the dough looks noticeably dry—don’t add more flour to compensate for tackiness.
Q: Is the steam step essential? A: The steam stage is key to a thin, glossy crust. The hot pan of water creates the humid environment the rolls need for good oven spring. If steam is impossible, you’ll still get edible rolls, but the crust will be firmer and less shiny.
Wrap-Up
Pan de Agua are simple to make but reward attention to technique. Follow the ingredient list and the method steps closely: cold water start, staged kneading with oil, careful shaping, and an intentional steam bake. With those elements in place you’ll bake rolls that are light, golden, and perfect for breakfast or any time you want a tender, versatile bread.
Enjoy the process and the fresh bakes. If something doesn’t go as planned, revisit the kneading and steam steps first—those are where most issues start. Happy baking.
Pan de Agua (Breakfast Bread Rolls)
Ingredients
Equipment
Method
- Sift together 2 cups (350 g) bread flour, 2 teaspoons instant dry yeast, and ½ tablespoon salt into a bowl. Transfer the dry mixture to the mixer bowl (or work on your countertop if kneading by hand).
- Add 1 cup ice-cold water (236 ml) to the flour. Start kneading at low speed with the dough hook. Scrape the sides as needed. If the dough looks too dry, add up to the two tablespoons of extra cold water.
- Increase mixer speed to medium and knead for 10 minutes.
- While the dough is kneading, line two baking sheets with parchment paper and grease the parchment, the baking sheets, your hands, and a clean countertop with a little oil.
- Stop the mixer. Pour 1 tablespoon vegetable oil onto the dough. Resume kneading at low speed until the oil is incorporated (about 3 minutes).
- Increase the mixer to medium and knead another 10 minutes, or until the dough passes the windowpane test. If it does not pass the windowpane test, knead an additional 5 minutes and recheck.
- Grease your hands with oil. Turn the dough out onto the greased countertop and divide it into 6 equal pieces. Shape each piece into a thin roll roughly 1 inch (2.5 cm) in thickness (mini-baguette-type) and place them seam-side-down on one of the prepared baking sheets.
- Cover the baking sheet with a clean cotton tea towel and let the rolls rise in a comfortable, draft-free place until doubled in size, about 60–90 minutes. Check at 60 minutes and then every 15 minutes if not yet doubled.
- When the rolls are about 40 minutes into rising (or when they are nearing doubled size), preheat the oven to 350°F (177°C) for convection or 375°F (190°C) for a regular oven. Place a baking pan on the bottom rack and carefully pour 3 cups hot water into that pan so the oven will produce steam.
- Once the rolls have doubled, remove the tea towel. Grease a piece of parchment paper and place it greased side-down over the rolls. Place the second greased baking sheet on top of the parchment without pressing down on the rolls.
- Holding both baking sheets together, flip them so the rolls are now on the second sheet and the seams are facing up. Remove the top baking sheet and the parchment that was covering the rolls.
- Fill a spray bottle with the 2 tablespoons room-temperature water and mist the rolls with a fine spray. Immediately place the baking sheet with the rolls in the center of the oven and close the door quickly to retain steam.
- Bake for 20 minutes. If the bottom pan still contains water, carefully remove that pan from the oven.
- Move the rolls to the top rack and continue baking another 7–10 minutes, or until they develop a golden-brown crust.
- Remove the rolls from the oven and transfer them to a cooling rack before serving.
Notes
Be very careful when dealing with a hot oven and hot implements, exercise caution, and use proper oven mitts and holders.