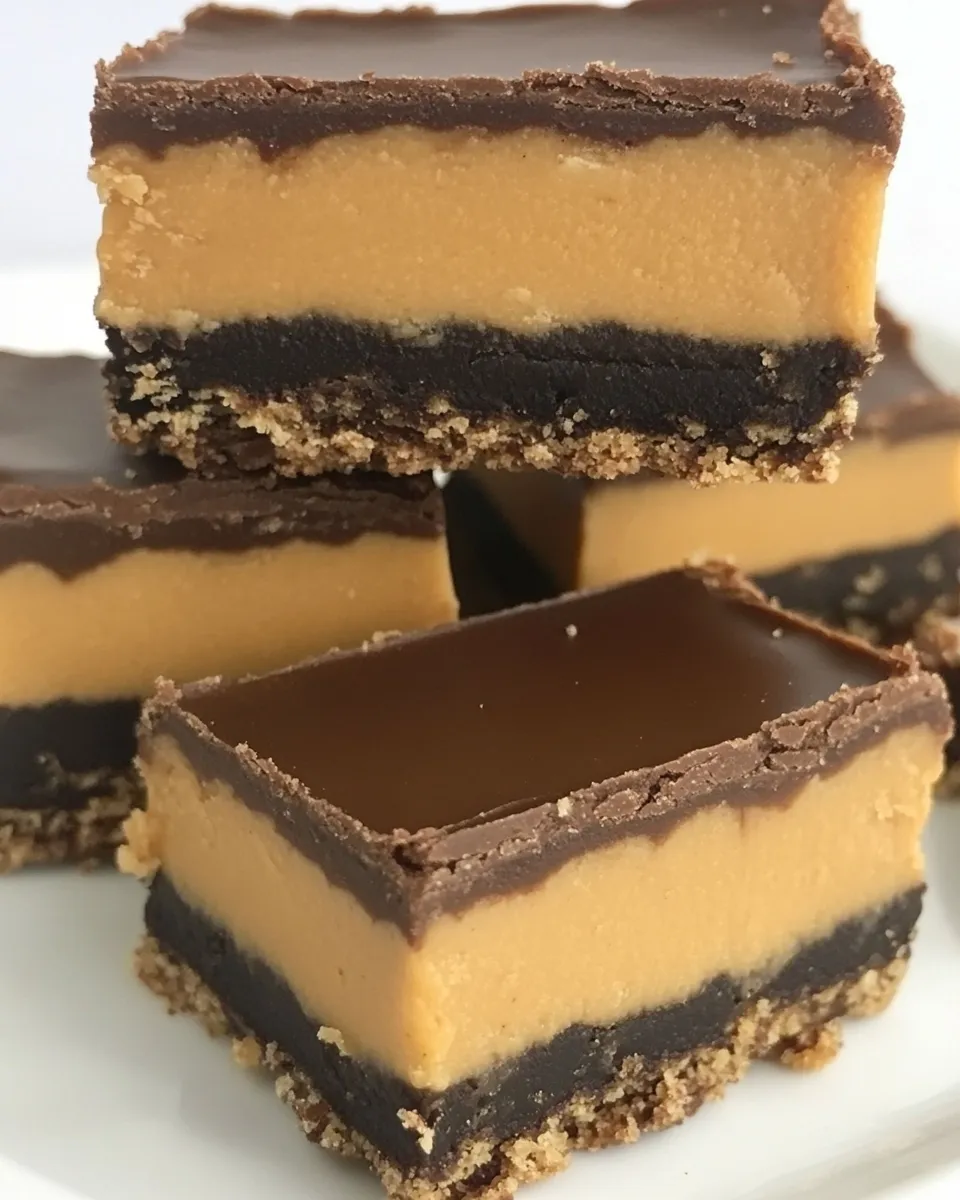
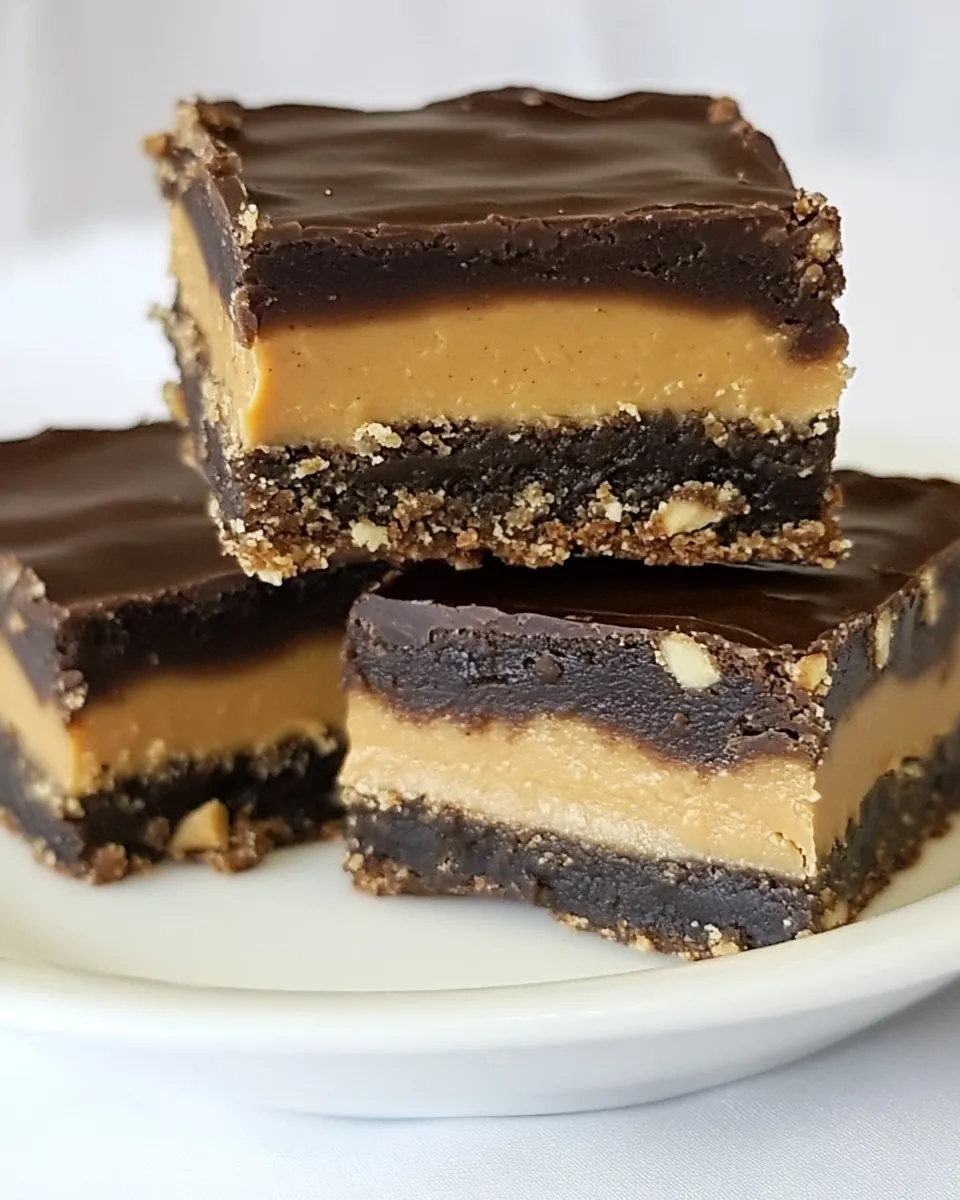
Peanut Butter Nanaimo Bars
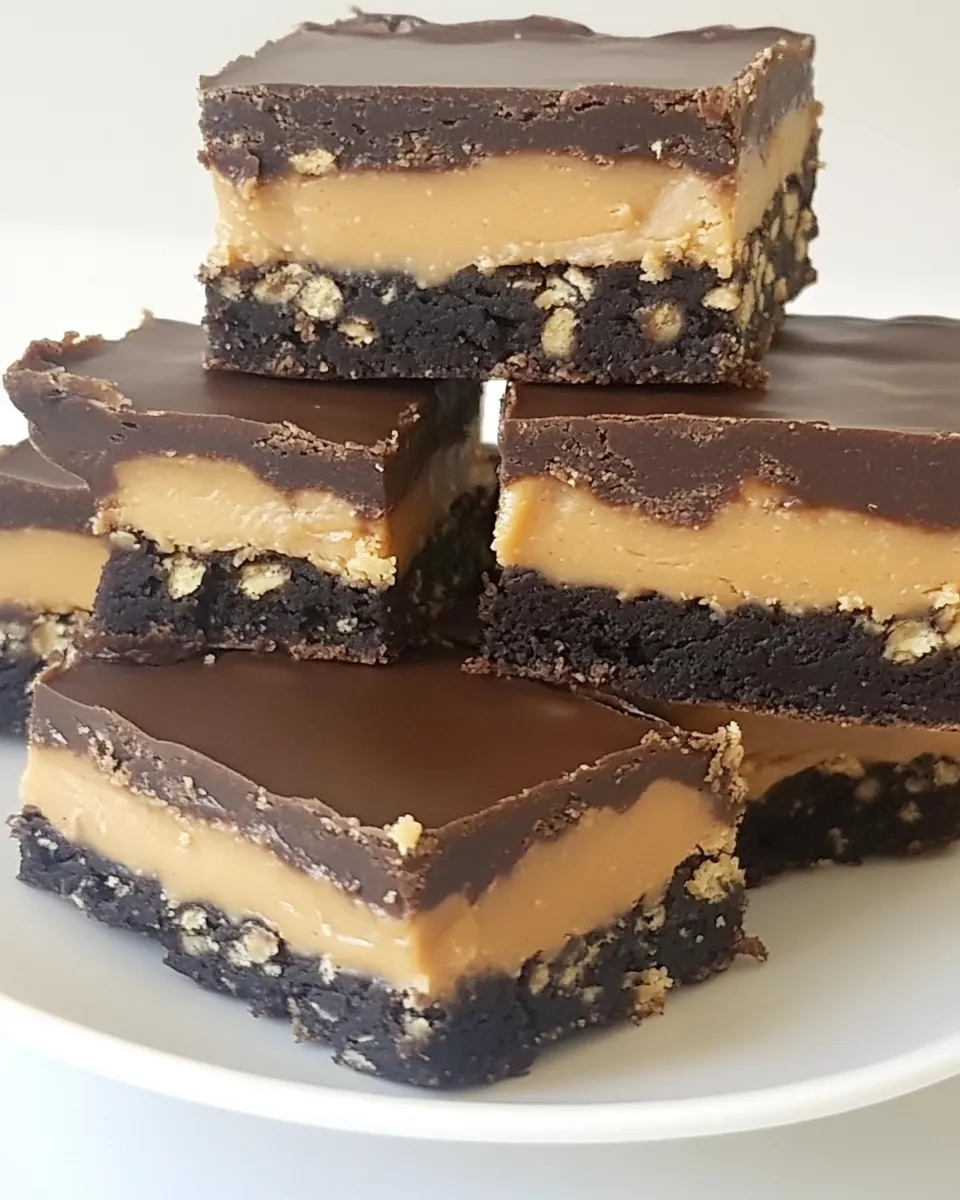
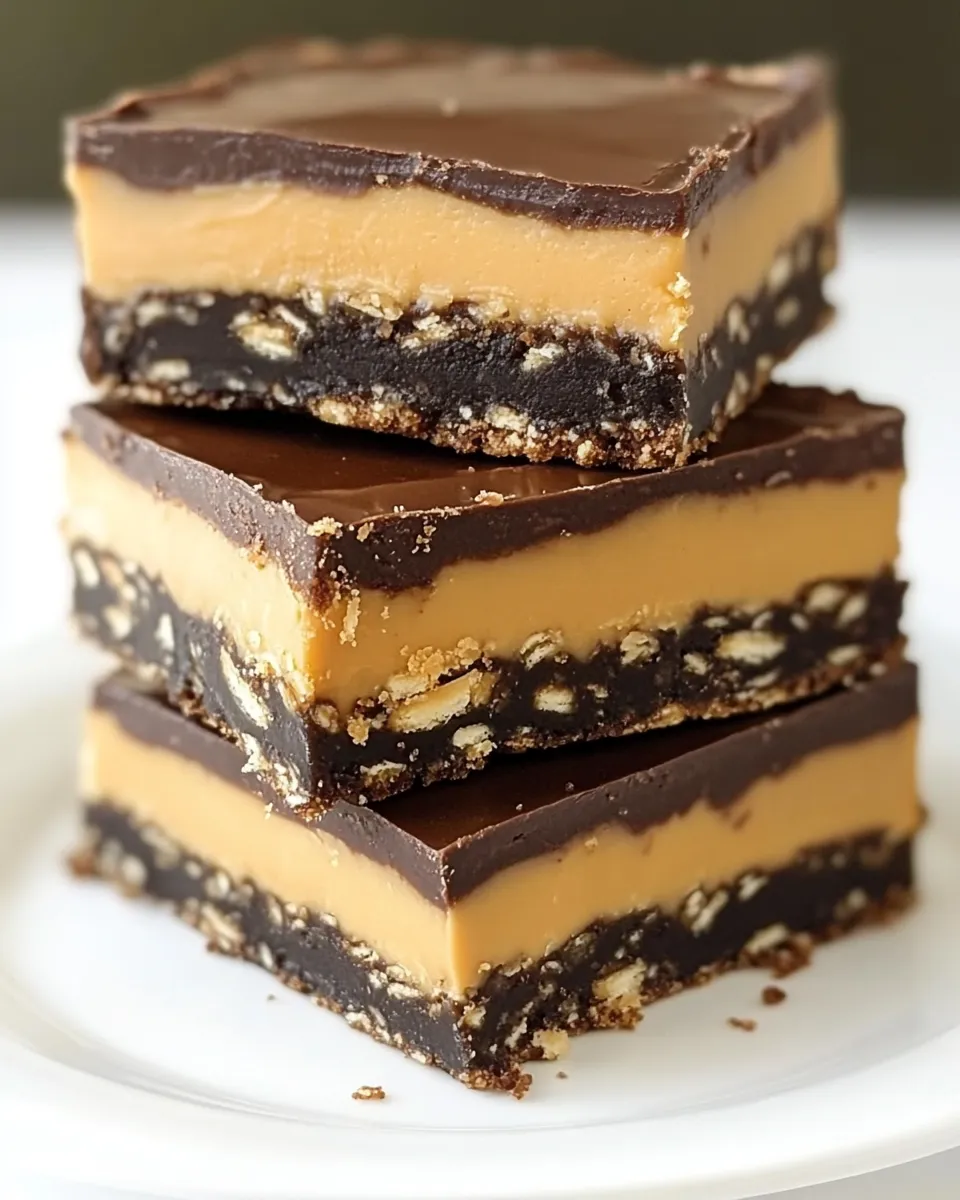
These Peanut Butter Nanaimo Bars are the kind of treat that makes me smile every single time I cut a piece. They keep the classic three-layer Nanaimo texture — a dense, crunchy cocoa base, a creamy middle, and a glossy chocolate top — but with a salted-peanut-butter heart that gives every bite a little extra lift. They travel well, please a crowd, and are endlessly adaptable for lunchboxes, bake sales, or a late-night snack counterattack.
I tested this recipe until the textures felt right: a firm, slightly crumbly base that holds together, a filling that’s smooth but not gummy, and a topping that snaps cleanly when cooled. The method is straightforward and forgiving; most of the work is waiting while layers chill. If you’re comfortable with basic measuring and heating on the stove or in short microwave bursts, you’re set.
Below you’ll find a clear shopping list, the exact ingredient breakdown copied from the recipe source, step-by-step instructions you can follow as written, and practical troubleshooting. I’ll also share storage advice and small tweaks that keep the bars interesting through the seasons. No fluff — just useful, tested guidance so your first batch comes out great.
What to Buy
When you shop for these bars, focus on two things: quality and convenience. Pick a creamy peanut butter you like (this is the flavor center of the filling), and get a good semisweet chocolate for the topping — it needs to melt smooth and glossy. Graham crackers and sweetened shredded coconut are pantry classics; if you bake regularly, you may already have them.
A few quick notes: buy extra powdered sugar if you don’t use it often — 3 cups goes by fast in frostings and no-bake fillings. Keep the cocoa powder and shredded coconut fresh; old coconut can lose flavor and become dry. And choose unsalted butter in the exact amounts listed so you control the salt level in the bars.
Ingredients
- ¾ cup (170.25 g) unsalted butter, melted — forms the base and adds richness; melt gently.
- ½ cup (100 g) granulated sugar — sweetens the base and helps structure when baked.
- 2 eggs — bind the base as it bakes; use room temperature for even mixing.
- 2½ cups (210 g) graham cracker crumbs — provides the crunchy, cookie foundation for the base.
- ¾ cup (67.5 g) shredded sweetened coconut — adds chew and traditional Nanaimo flavor to the base.
- ⅓ cup (28.67 g) cocoa powder — gives the base a chocolate backbone; sift if lumpy.
- 1¼ cups (322.5 g) creamy peanut butter — the star of the filling; use a smooth, full-flavored variety.
- ⅓ cup (75.67 g) unsalted butter — combined with peanut butter to make a spreadable filling.
- 3 cups (360 g) powdered sugar — sweetens and thickens the filling; add in stages.
- ⅓ cup (81.33 ml) milk — makes the filling spreadable; add slowly to control consistency.
- 8 ounces (226.8 g) semisweet chocolate, finely chopped — the glossy top layer; chop finely so it melts evenly.
- 2 tablespoons unsalted butter — added to the chocolate topping for shine and smoothness.
Cook (Peanut Butter Nanaimo Bars) Like This
- Preheat the oven to 350°F (175°C). Line a 9×13-inch baking pan with parchment paper, leaving some overhang for easy removal; set the pan aside.
- Make the base: In a large bowl, whisk together 3/4 cup (170.25 g) melted unsalted butter, 1/2 cup (100 g) granulated sugar, and 2 eggs until smooth.
- Add 2 1/2 cups (210 g) graham cracker crumbs, 3/4 cup (67.5 g) shredded sweetened coconut, and 1/3 cup (28.67 g) cocoa powder to the butter mixture. Stir with a large spoon until completely combined.
- Transfer the mixture to the prepared pan. Press it into an even layer across the bottom of the pan (the mixture will be sticky—wet your fingers slightly if needed). Bake for 12 to 15 minutes, until the surface is firm and no longer shiny.
- Remove the pan from the oven and transfer to a cooling rack. Cool the base completely in the pan before adding the filling.
- Make the filling: In a microwave-safe bowl, combine 1 1/4 cups (322.5 g) creamy peanut butter and 1/3 cup (75.67 g) unsalted butter. Microwave in short bursts, stirring between bursts, until the mixture is completely melted and smooth.
- Whisk in 3 cups (360 g) powdered sugar in three additions (about 1 cup at a time). Add 1/3 cup (81.33 ml) milk in two roughly equal additions between the sugar additions—i.e., sugar, half the milk, sugar, remaining milk, final sugar—whisking until the filling is smooth and spreadable.
- Spread the filling evenly over the cooled base. Refrigerate the pan until the filling is firm, about 1 hour.
- Make the topping: In a heatproof bowl set over simmering water (double boiler) or in the microwave at 50% power in short bursts, melt 8 ounces (226.8 g) semisweet chocolate with 2 tablespoons unsalted butter, stirring until smooth.
- Pour and spread the melted chocolate evenly over the chilled filling. Let the topping set at room temperature, or refrigerate to speed up setting.
- Once the topping is set, use the parchment overhang to lift the slab from the pan. Cut into bars. Store leftovers in an airtight container at room temperature or in the refrigerator.
Why You’ll Keep Making It
These bars hit the sweet spot between candy and baking. The base has enough density to feel substantial, while the peanut butter layer is decadent without being cloying. The chocolate top adds a polished finish and a satisfying snap. If you like desserts that combine textures — crunchy, creamy, firm — this one keeps delivering.
They’re also very shareable. Make a full pan for parties, slice them into small squares for afternoon coffee, or cut large bars for an indulgent dessert. They freeze well, which makes them a convenient make-ahead treat for busy weeks or unexpected guests.
No-Store Runs Needed
One of the best things about this recipe is that many households already have the essentials: butter, sugar, eggs, and milk. If you bake a lot, graham crackers and powdered sugar are probably in your pantry. The only item you might need to pick up specifically is semisweet chocolate if you don’t keep baking chocolate on hand.
If you want to avoid a supermarket trip, check for substitutions you already tolerate: leftover crushed cookies can replace graham crumbs (same quantity by volume), or adjust the filling with a different nut butter you already have on hand — though I recommend the creamy peanut butter in this recipe for best flavor.
Tools & Equipment Needed
- 9×13-inch baking pan — the recipe size is calibrated to this pan for even layers.
- Parchment paper — for easy removal and clean edges.
- Mixing bowls — at least one large bowl for the base and one for the filling.
- Whisk and large spoon — whisk for wet ingredients, spoon for folding crumbs.
- Measuring cups and spoons or a kitchen scale — the recipe includes gram measurements for accuracy.
- Microwave-safe bowl or double boiler setup — for melting the filling and topping safely.
- Offset spatula or butter knife — for spreading the filling and chocolate evenly.
- Cooling rack — helps the base cool evenly before you add the filling.
Watch Outs & How to Fix
Base too soft after baking
If the base feels gummy or falls apart when you press it, it likely needed a few more minutes in the oven. Return the pan to the oven for 2–4 minutes and check again; it should be firm and not shiny. Let it cool fully before adding the filling — warmth will make the filling run.
Filling too runny or too stiff
If the filling looks runny after you whisk in the milk and powdered sugar, it probably needs more powdered sugar (a tablespoon at a time) to thicken, or a short chill to firm up. Conversely, if it’s too stiff from overworked powdered sugar, add a teaspoon of milk and whisk until spreadable.
Chocolate topping seizes or becomes grainy
Chocolate can seize if it gets water or is overheated. Use a dry bowl and chop the chocolate finely so it melts evenly. If it seizes, try stirring in a small amount of warm butter (a teaspoon at a time) to bring it back. If that fails, gently melt a small new portion of chocolate and stir it in to smooth the mix.
Fresh Seasonal Changes
Small seasonal tweaks keep these bars feeling new. In late summer, serve them with a bowl of sliced stone fruit or berries on the side to cut the richness. In winter, a sprinkle of flaky sea salt on the chocolate top adds brightness and balances the sweetness. For a spring party, consider adding a thin layer of marmalade or jam between the filling and the top before the chocolate sets — it adds a bright contrast without changing the main recipe.
Make small adjustments without changing the core measurements: think texture and pairing rather than swapping big components. The recipe’s structure — base, filling, topping — is flexible, but the quantities work best as written.
Author’s Commentary
I tested this version because I wanted a peanut-butter-forward Nanaimo that still felt true to the original three-layer experience. The balance is essential: too much peanut butter overwhelms the base and topping, too little makes it a vague nod. The protocol here — melting, staging the sugar additions, and chilling between layers — gives reliable results even when you’re not a pastry chef.
As someone who writes about food every day, I value recipes that are forgiving and transportable. These bars are both. They travel well to potlucks, lend themselves to neat squares for gifting, and make a perfect “bake once, slice later” treat to have on hand for a busy week.
Make Ahead Like a Pro
These bars are excellent for make-ahead planning. Once assembled and topped, store the pan covered in the refrigerator for up to one week. For longer storage, cut into bars and freeze in a single layer on a sheet until firm, then stack with parchment between layers in an airtight container for up to three months. Thaw in the refrigerator or at room temperature before serving.
If you’re making them the day before an event, do the base and filling the day prior and keep the topping separate. Melt and pour the chocolate the morning of your event for the freshest sheen and the cleanest slices when serving.
Troubleshooting Q&A
How do I get clean slices? Use a sharp, warm knife and wipe it between cuts. A short dip in hot water, dried, then cut, gives a neat edge.
Can I reduce the sugar? The filling relies on powdered sugar for texture; reducing it will change consistency. If you prefer less sweet, consider cutting smaller bars and serving with unsweetened coffee to balance the sweetness.
Will these hold at room temperature? Yes, they’re fine at room temperature for a day. For longer storage, keep them refrigerated, especially in warm climates, so the topping stays set and the filling maintains structure.
What if my topping takes forever to set? If your kitchen is warm, pop the pan into the refrigerator for 10–20 minutes to speed setting. Avoid freezing unless you need to, because extreme cold can cause the chocolate to dull or bloom.
Final Bite
Peanut Butter Nanaimo Bars are one of those reliably crowd-pleasing recipes that feel special without being finicky. Follow the steps as written, respect the chilling stages, and use the tips above if something looks off. You’ll end up with a layered bar that’s texturally satisfying, peanut-butter-rich, and beautifully finished with a glossy chocolate top. Make a pan, cut them small, and watch the smiles gather.
Peanut Butter Nanaimo Bars
Ingredients
Method
- Preheat the oven to 350°F (175°C). Line a 9x13-inch baking pan with parchment paper, leaving some overhang for easy removal; set the pan aside.
- Make the base: In a large bowl, whisk together 3/4 cup (170.25 g) melted unsalted butter, 1/2 cup (100 g) granulated sugar, and 2 eggs until smooth.
- Add 2 1/2 cups (210 g) graham cracker crumbs, 3/4 cup (67.5 g) shredded sweetened coconut, and 1/3 cup (28.67 g) cocoa powder to the butter mixture. Stir with a large spoon until completely combined.
- Transfer the mixture to the prepared pan. Press it into an even layer across the bottom of the pan (the mixture will be sticky—wet your fingers slightly if needed). Bake for 12 to 15 minutes, until the surface is firm and no longer shiny.
- Remove the pan from the oven and transfer to a cooling rack. Cool the base completely in the pan before adding the filling.
- Make the filling: In a microwave-safe bowl, combine 1 1/4 cups (322.5 g) creamy peanut butter and 1/3 cup (75.67 g) unsalted butter. Microwave in short bursts, stirring between bursts, until the mixture is completely melted and smooth.
- Whisk in 3 cups (360 g) powdered sugar in three additions (about 1 cup at a time). Add 1/3 cup (81.33 ml) milk in two roughly equal additions between the sugar additions—i.e., sugar, half the milk, sugar, remaining milk, final sugar—whisking until the filling is smooth and spreadable.
- Spread the filling evenly over the cooled base. Refrigerate the pan until the filling is firm, about 1 hour.
- Make the topping: In a heatproof bowl set over simmering water (double boiler) or in the microwave at 50% power in short bursts, melt 8 ounces (226.8 g) semisweet chocolate with 2 tablespoons unsalted butter, stirring until smooth.
- Pour and spread the melted chocolate evenly over the chilled filling. Let the topping set at room temperature, or refrigerate to speed up setting.
- Once the topping is set, use the parchment overhang to lift the slab from the pan. Cut into bars. Store leftovers in an airtight container at room temperature or in the refrigerator.
Notes
Nutritional values are based on one serving