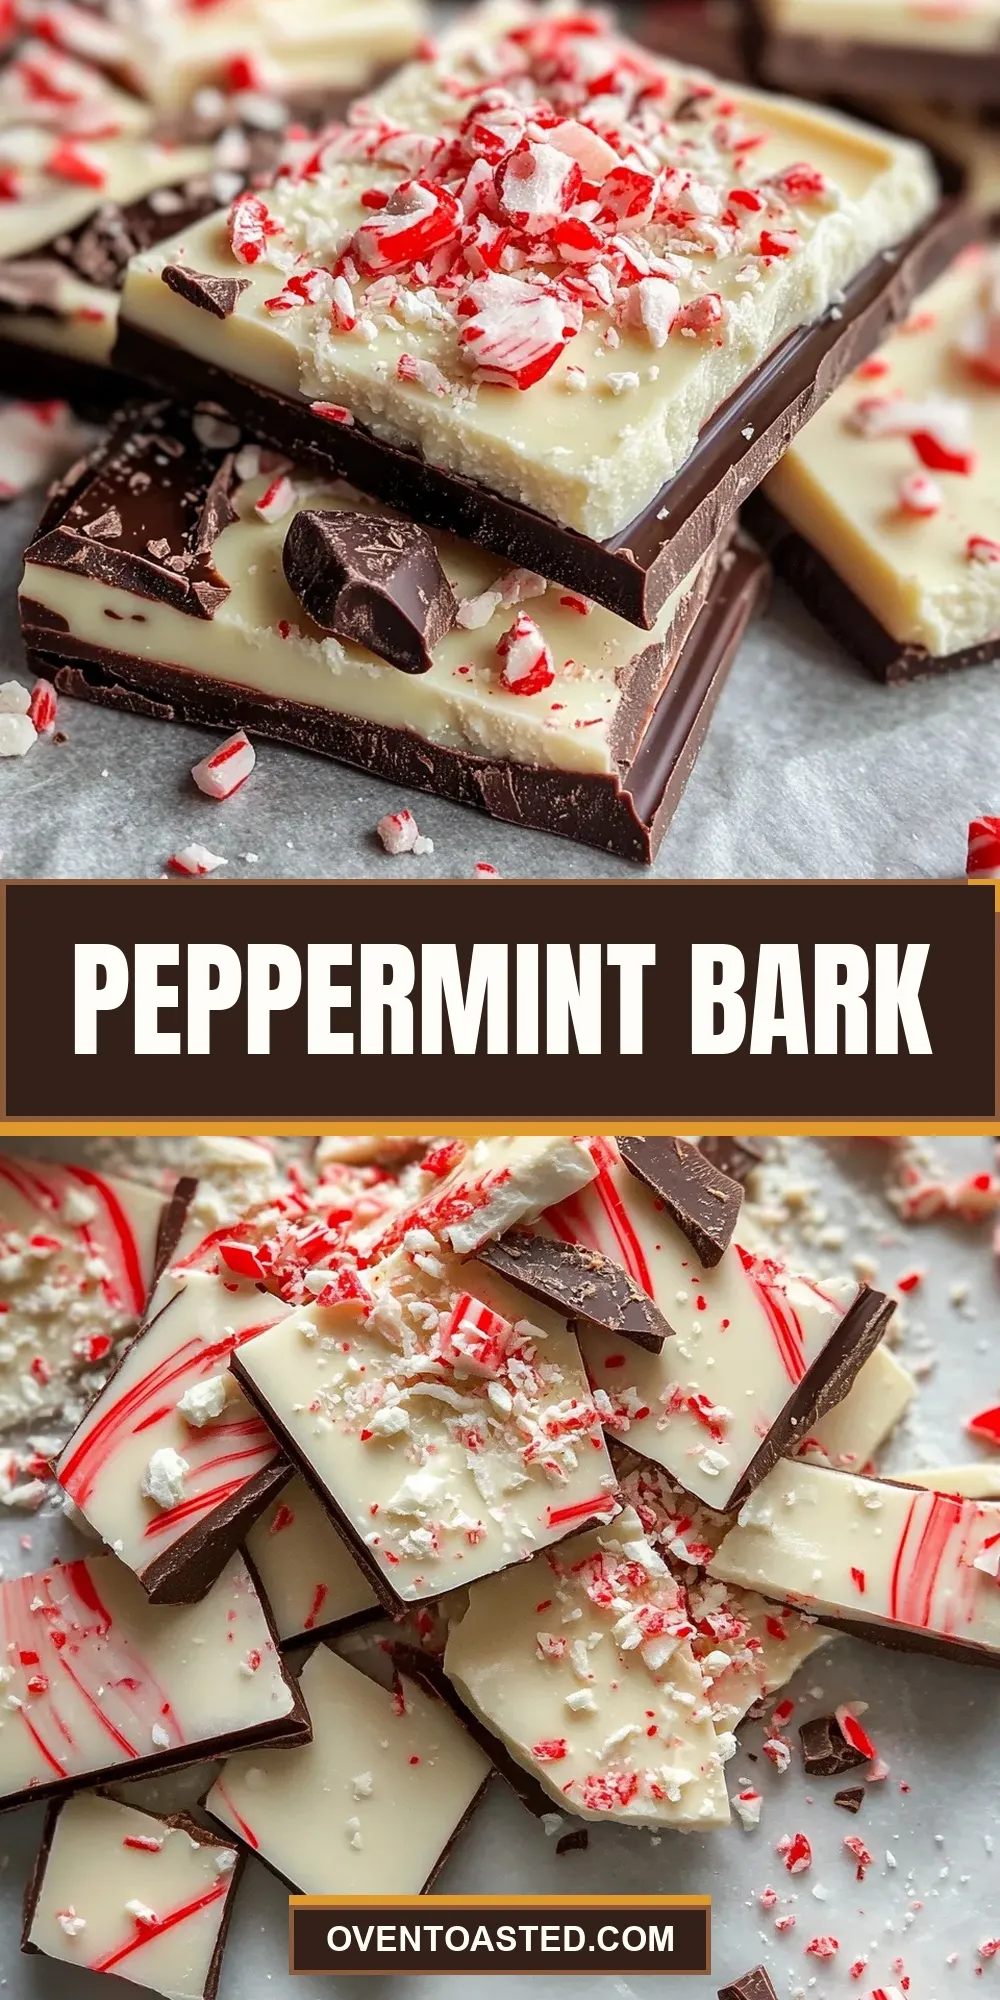
Peppermint Bark
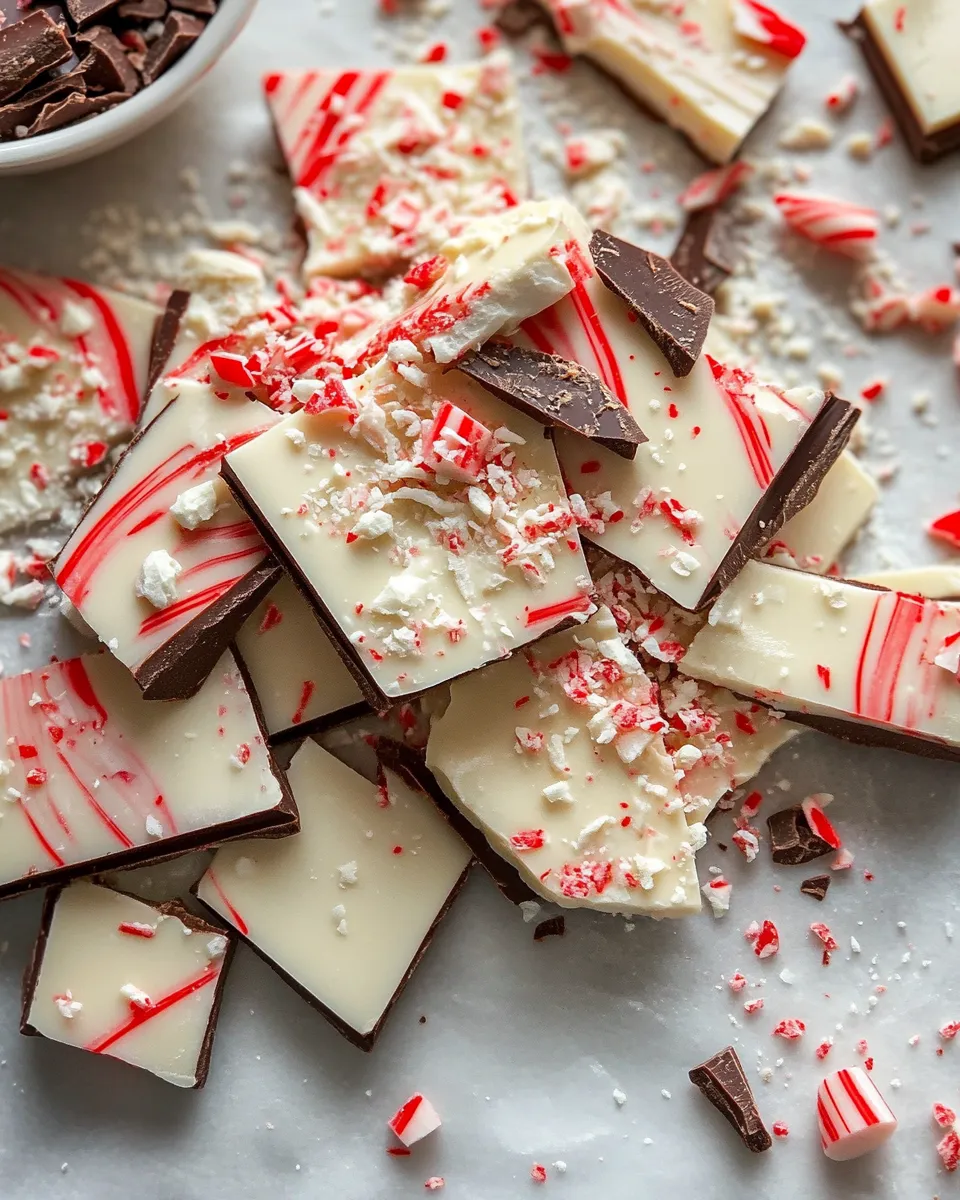
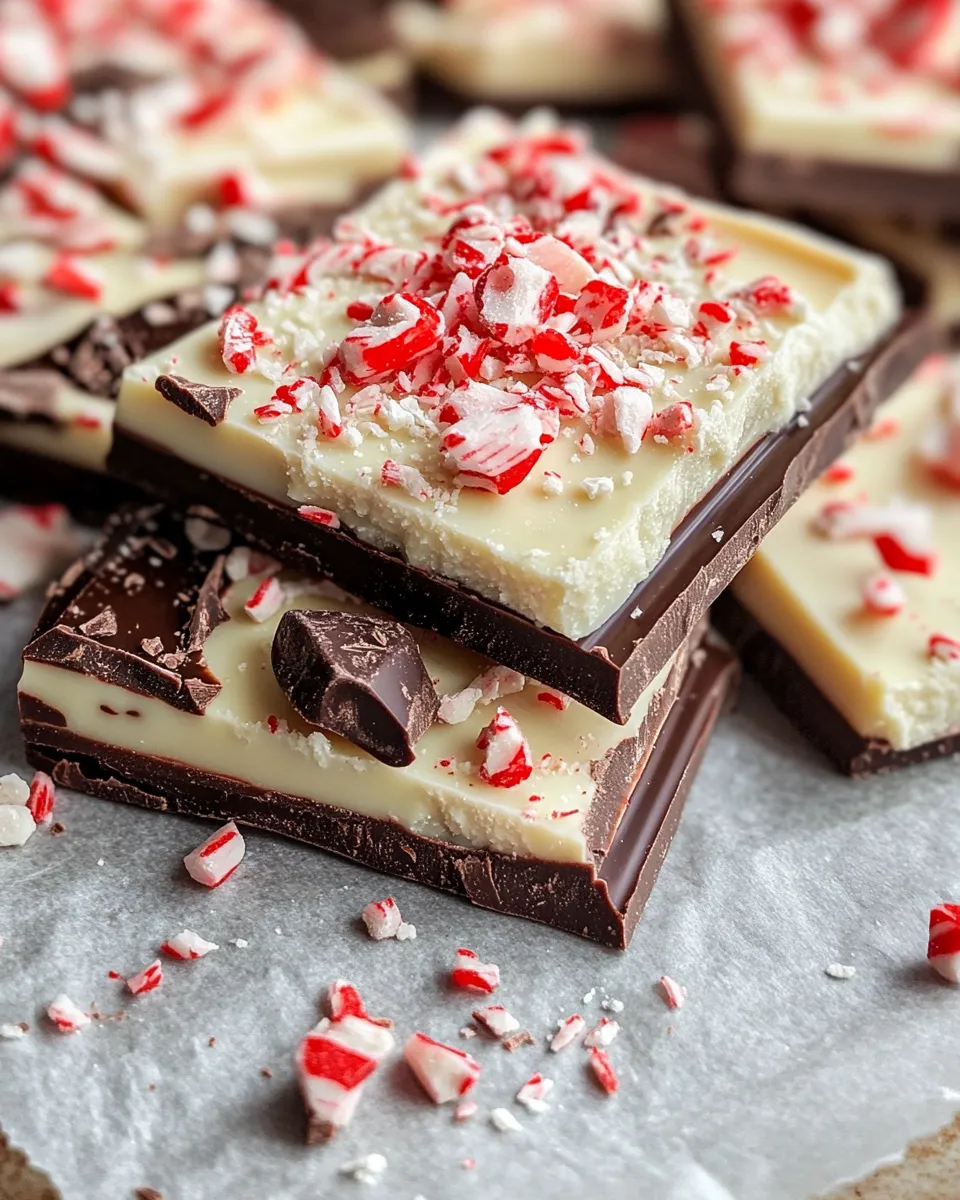
I make peppermint bark every holiday season. It’s one of those recipes I return to because it’s fast, forgiving, and always disappears first from the cookie plate. The contrast between the bittersweet chocolate, creamy white chocolate, and bright peppermint pieces is simple and ridiculously satisfying.
There’s no need for special skills. You’ll work with chocolate chips, a little peppermint extract, and crushed candy canes. Even if you’ve never tempered chocolate, this method gives you clean layers, crisp snap, and a candy that stores well in the fridge.
Below I’ll walk you through exactly what to buy, the steps to follow, and practical tips I’ve learned from making it dozens of times. Stick to the sequence in the instructions and you’ll have beautiful, giftable peppermint bark in under an hour.
What to Buy
- 12 ounces semi-sweet chocolate chips — the base layer for contrast and structure; choose good-quality chips for better flavor and a cleaner snap.
- 12 ounces white chocolate chips — creates the creamy top layer that shows off the peppermint; avoid cooking chocolate labeled for baking only if you want a smooth melt.
- ½ to ¾ teaspoon peppermint extract — adds bright peppermint flavor; start with ½ teaspoon and taste the melted chocolate before adding more.
- ½ cup crushed peppermint candy canes — gives texture and the classic look; crush to varied sizes for a prettier finish and better bite.
From Start to Finish: Peppermint Bark
- Line a rimmed baking sheet with parchment paper; set aside.
- Fill a pot with about 1–2 inches of water and bring to a gentle simmer. Set a heatproof bowl with the 12 ounces semisweet chocolate chips over the pot (bowl should not touch the water). Stir the chips as they heat until they are almost completely melted, then remove the bowl from the pot and stir until smooth.
- Pour the melted semisweet chocolate onto the prepared parchment and use an offset spatula or knife to spread it into an even rectangle about 1/8 inch thick.
- Refrigerate the sheet until the semisweet layer is cold and firm, about 20 minutes.
- Place a clean heatproof bowl over the same pot of simmering water and add the 12 ounces white chocolate chips. Stir until the white chocolate is almost melted, then remove the bowl from the pot and stir until smooth.
- Stir in 1/2 to 3/4 teaspoon peppermint extract to the melted white chocolate. Let the white chocolate cool for 1–2 minutes so it is warm but not hot (this helps prevent melting the set layer underneath).
- Pour the white chocolate over the chilled semisweet layer and, working quickly, spread it evenly to cover.
- Immediately sprinkle the 1/2 cup crushed peppermint candy canes evenly over the white chocolate and gently press so the pieces adhere.
- Chill until both layers are firm, about 20–30 minutes.
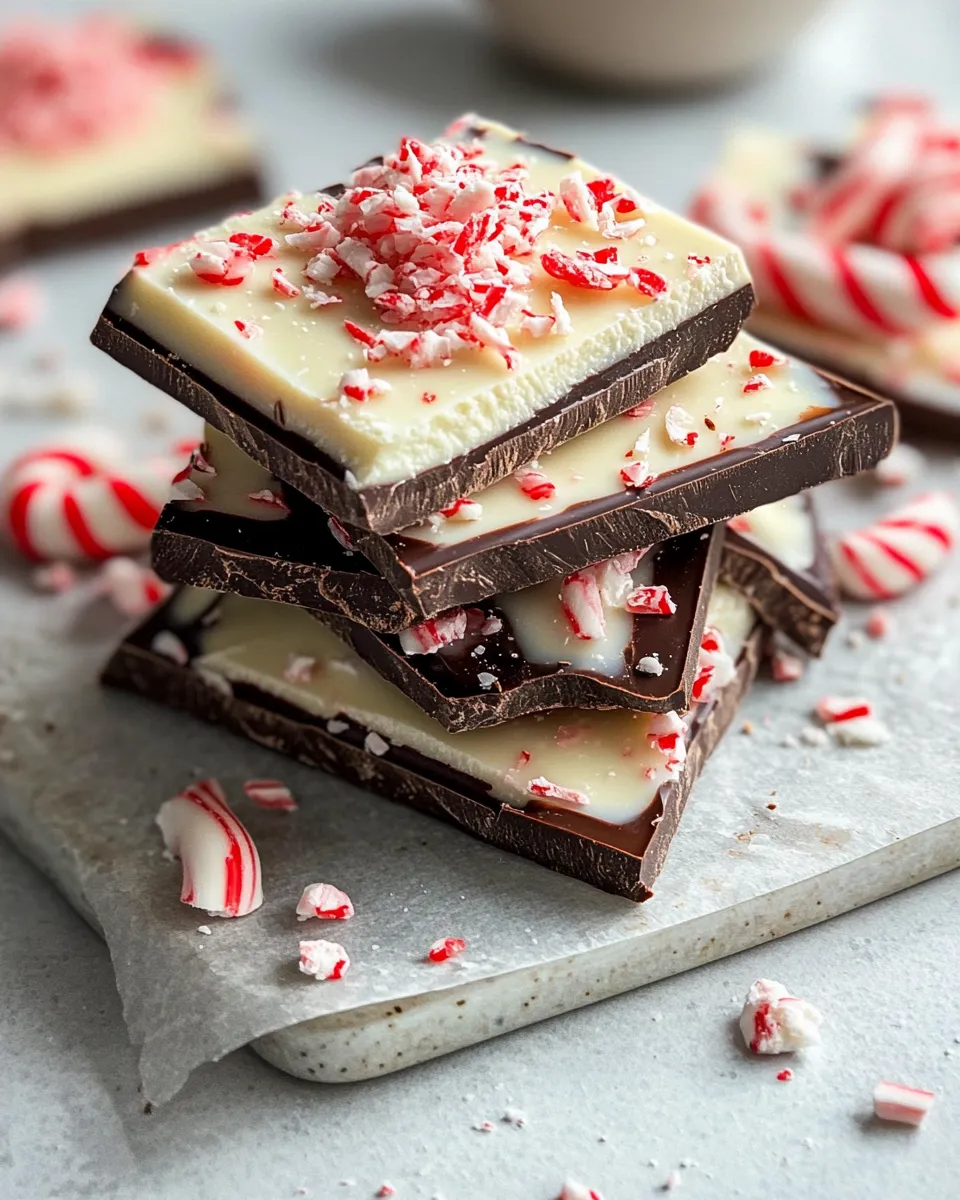
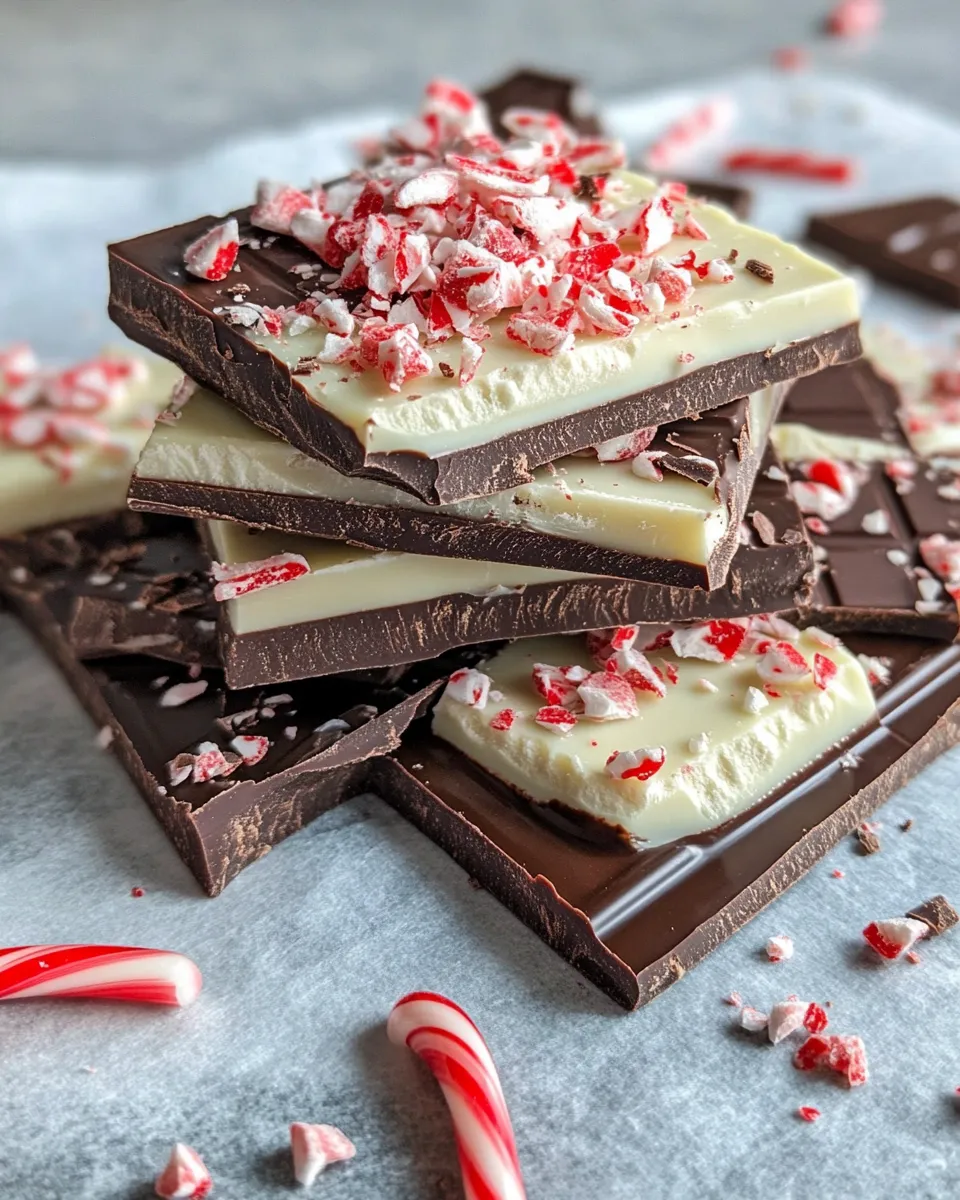
- Break the peppermint bark into irregular pieces or cut into squares. Store chilled in a covered container.
Quick notes on the procedure
The method is staged for a reason: chill the dark base so the white top doesn’t sink in or mix. Work confidently once the white chocolate is poured — it sets fast when chilled, so spread and sprinkle quickly. If your kitchen is warm, pop the tray back into the fridge between small adjustments to keep the layers distinct.
Why It Deserves a Spot
Peppermint bark earns a permanent place in holiday baking for a few clear reasons. First, it’s fast: from start to finish you’re looking at under an hour, most of which is chilling time. That makes it ideal for last-minute trays or a quick edible gift.
Second, it’s visually festive without effort. The white layer studded with pink-and-white peppermint shards looks seasonal and professional, even if you’re making it on a weeknight. Third, it travels and stores very well — keep it chilled and it holds shape and flavor for several weeks.
Finally, it hits multiple textures and flavor notes: crunchy candy, creamy white chocolate, and the depth of semisweet chocolate. That balance is why people come back for more.
Ingredient Flex Options
There’s room to make adjustments while keeping the spirit of peppermint bark.
- Swap semi-sweet for bittersweet chocolate if you prefer a more intense cocoa flavor.
- Use a high-quality couverture white chocolate for a silkier top layer if you want to elevate the texture.
- Adjust the peppermint extract between ½ and ¾ teaspoon to suit your taste; less for a hint, more for a pronounced mint punch.
- Vary the peppermint candy shards: larger pieces give crunch and visual drama, finer crumbs distribute flavor more evenly.
Appliances & Accessories
You don’t need anything fancy to make this, but the right tools simplify the job and improve results.
- Sturdy rimmed baking sheet — prevents spills in the fridge and gives a flat surface for even layers.
- Parchment paper — essential for easy release and clean edges.
- Two heatproof bowls — so you can melt the two chocolates consecutively without flavor transfer.
- Offset spatula or butter knife — for smooth, even spreading of the chocolate.
- Pot for simmering water (double-boiler setup) — a gentle heat source keeps chocolate from scorching.
- Kitchen thermometer (optional) — helpful if you want to be precise, but not required for this method.
Mistakes Even Pros Make
Even experienced cooks can slip up with peppermint bark. Here are the common pitfalls and how to avoid them.
- Overheating chocolate — this causes grainy, dull chocolate. Use a gentle simmer and remove the bowl while stirring to finish melting.
- Pouring hot white chocolate onto a warm base — it will melt into the bottom layer. Always chill the semisweet until firm before adding the white chocolate.
- Waiting too long to sprinkle candy — white chocolate firms quickly when chilled; sprinkle immediately after spreading to ensure pieces adhere.
- Using poor-quality chocolate — chips with stabilizers can affect melt and texture. If possible, choose brands known for melting well.
- Skipping parchment — trying to pry bark off a bare sheet invites breakage and a sticky mess.
How to Make It Lighter
If you want to lighten the result without inventing new ingredients, focus on volume and portion control.
- Make thinner layers: spread each chocolate slightly thinner to reduce the chocolate-to-candy ratio per piece.
- Cut smaller pieces: serving bite-sized pieces lets people enjoy the flavor without overindulging.
- Stretch flavor by adding more peppermint shards (they add flavor without many calories) and lowering the chocolate thickness slightly.
Behind-the-Scenes Notes
Temper and bloom: true tempering isn’t required here because the chocolate cools on a cold surface, but if your white chocolate is overheated it can bloom (a whitish film) as it cools. Bloom affects appearance more than safety. To minimize it, melt gently and avoid excess heat.
Why chips instead of bars: chocolate chips often contain stabilizers to hold their shape, which can be an advantage when you want predictable behavior. However, high-quality chips or chopped chocolate bars will give better flavor and smoother melt in many cases.
Crushing candy canes: use a zip-top bag and a rolling pin, or pulse briefly in a food processor. Aim for a variety of sizes — fine dust can sink slightly into the white chocolate, while larger shards give satisfying crunch.
Refrigerate, Freeze, Reheat
Storage is simple and forgiving.
- Refrigerate: store peppermint bark chilled in a covered container. It keeps well for up to 2–3 weeks when kept cold and dry.
- Freeze: you can freeze pieces in an airtight container for up to 2 months. Thaw in the refrigerator to avoid condensation forming on the chocolate.
- Reheat: peppermint bark is meant to be eaten cold or at room temperature. Don’t reheat; it will lose snap and can become greasy if warmed.
Common Questions
Q: Can I skip the peppermint extract and just use crushed candy canes? A: Yes, but the extract gives a more uniform peppermint flavor throughout the white layer. If you skip it, your bark will have peppermint in the candy pieces only.
Q: My white chocolate seized and became grainy. What happened? A: White chocolate can seize if exposed to steam or too much heat. Melt over very gentle heat, and remove from the pot while stirring once it’s nearly melted so residual heat finishes it off smoothly.
Q: Can I make this on a hot day? A: You can, but work quickly and keep the tray in the fridge between stages. Cooler ambient temps give you more working time when spreading the white chocolate and sprinkling the candy.
Q: Should I cut or break the bark? A: Both are fine. Cutting gives neat squares for packaging; breaking creates rustic shards that look festive on a shared platter. Consider chilling until very firm for cleaner cuts.
Bring It Home
Peppermint bark is one of those recipes that rewards simplicity. Follow the steps, respect the chill times, and don’t overheat the chocolate. The result is a tidy, beautiful candy you can make in an afternoon and hand out as gifts or tuck into cookie boxes.
Make a double batch if you’re gifting — it stores well and wraps beautifully in cellophane bags with ribbon. Keep a few pieces on hand for guests; it’s always the first to disappear. Enjoy the process and the smiles it brings.
Peppermint Bark
Ingredients
Equipment
Method
- Line a rimmed baking sheet with parchment paper; set aside.
- Fill a pot with about 1–2 inches of water and bring to a gentle simmer. Set a heatproof bowl with the 12 ounces semisweet chocolate chips over the pot (bowl should not touch the water). Stir the chips as they heat until they are almost completely melted, then remove the bowl from the pot and stir until smooth.
- Pour the melted semisweet chocolate onto the prepared parchment and use an offset spatula or knife to spread it into an even rectangle about 1/8 inch thick.
- Refrigerate the sheet until the semisweet layer is cold and firm, about 20 minutes.
- Place a clean heatproof bowl over the same pot of simmering water and add the 12 ounces white chocolate chips. Stir until the white chocolate is almost melted, then remove the bowl from the pot and stir until smooth.
- Stir in 1/2 to 3/4 teaspoon peppermint extract to the melted white chocolate. Let the white chocolate cool for 1–2 minutes so it is warm but not hot (this helps prevent melting the set layer underneath).
- Pour the white chocolate over the chilled semisweet layer and, working quickly, spread it evenly to cover.
- Immediately sprinkle the 1/2 cup crushed peppermint candy canes evenly over the white chocolate and gently press so the pieces adhere.
- Chill until both layers are firm, about 20–30 minutes.
- Break the peppermint bark into irregular pieces or cut into squares. Store chilled in a covered container.
Notes
Makes about 1 1/2 pounds.