Peppermint Hot Chocolate
There are recipes that feel like a warm hug, and this peppermint hot chocolate is one of them. It’s straightforward, forgiving, and bright with a clean peppermint lift. I make this whenever I want something cozy without fuss — and it comes together in minutes on the stovetop.
The base is simple: milk, cacao, maple syrup, with a whisper of peppermint and a touch of vanilla if you like. It’s dairy-free by default if you choose a plant milk, and it’s easy to adjust for sweetness and intensity. No melting chocolate, no heavy cream, just whisk-and-warm comfort.
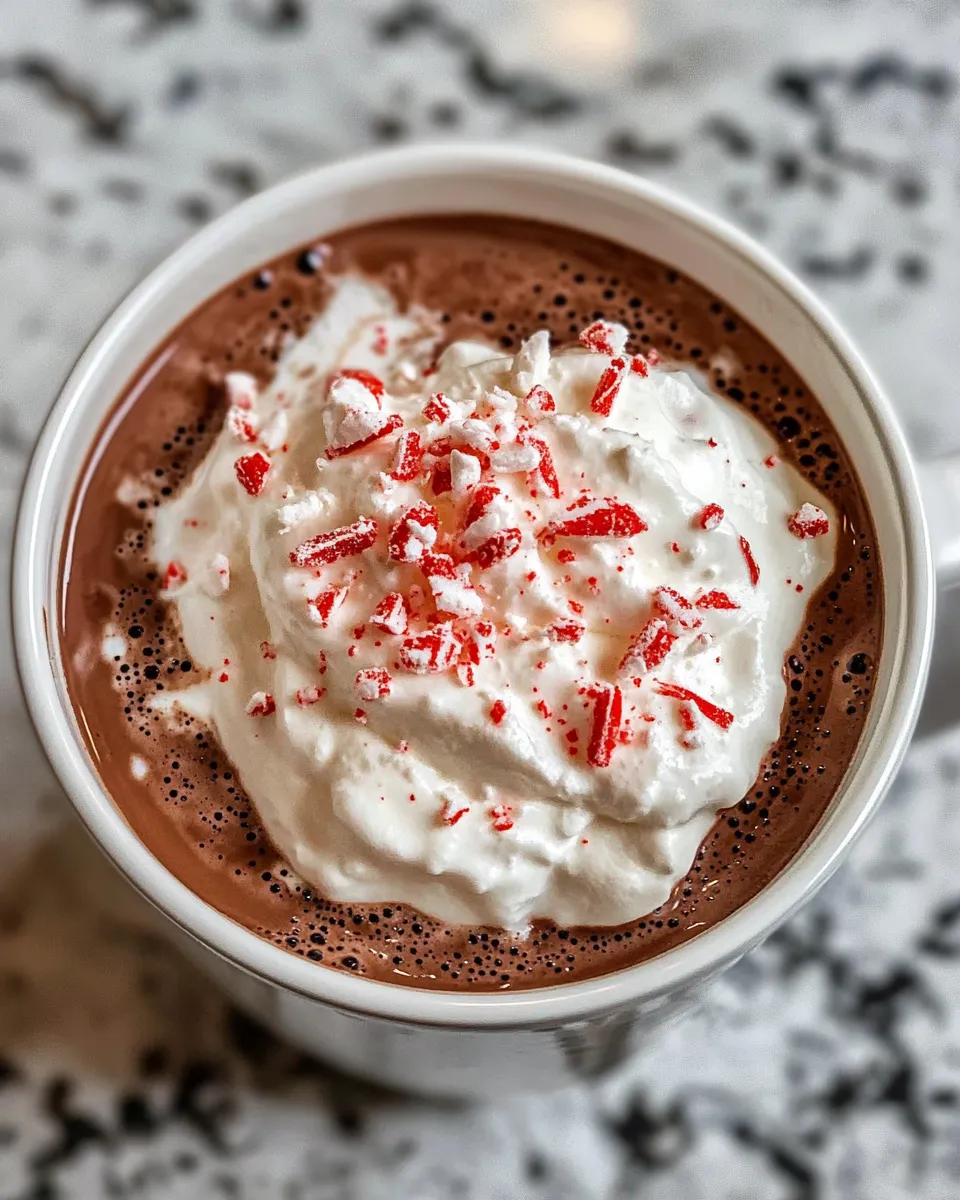
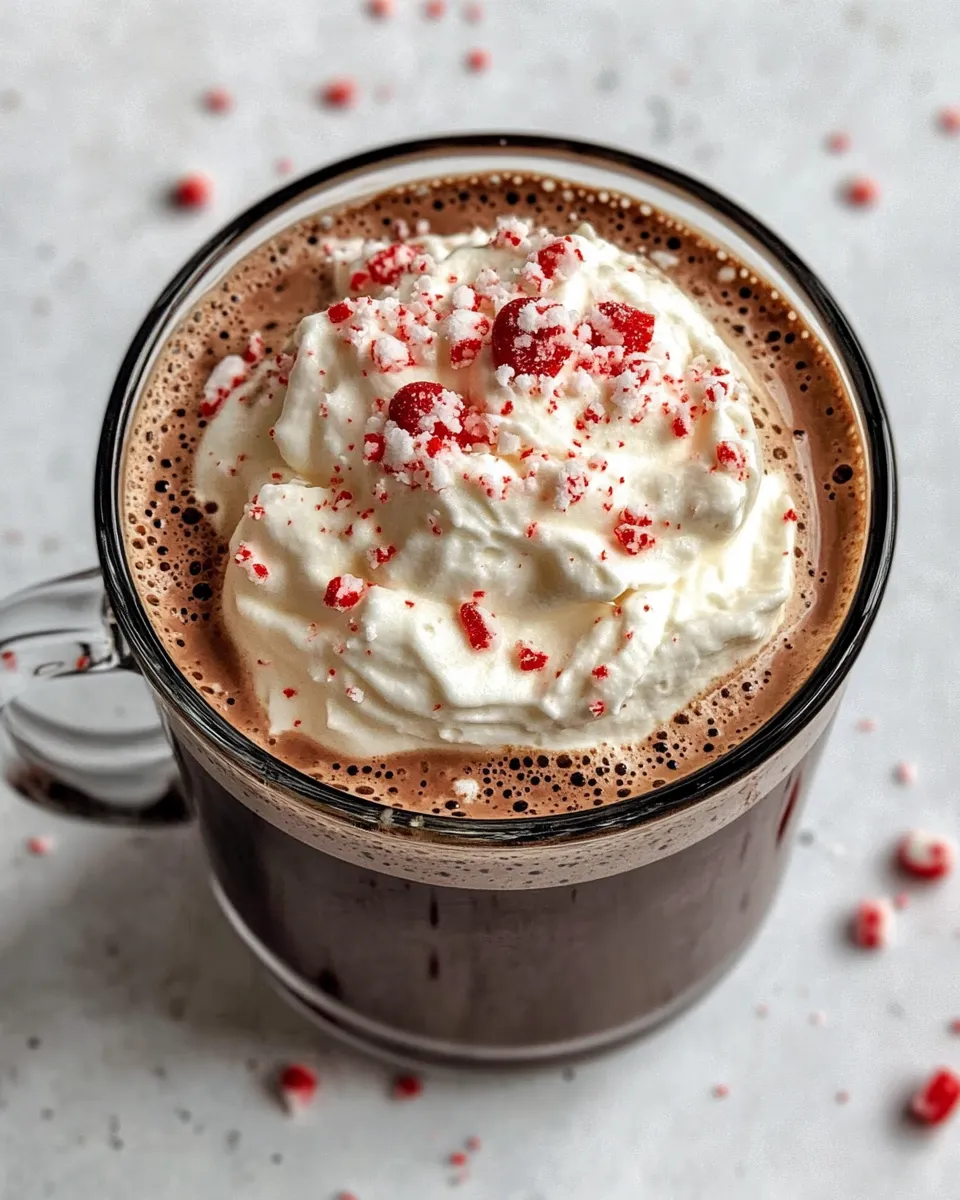
I keep the toppings optional but highly recommended: coconut whipped cream and crushed candy cane make it festive and textural. Below you’ll find the exact ingredients and the step-by-step directions I use every holiday season. Practical notes, troubleshooting tips, and a few variations follow so you can tweak it to your taste.
Ingredients
- 2 cups milk of choice (I use almond milk) — the liquid base; choose dairy or plant milk for your preferred richness.
- 2 heaping tablespoons cacao powder — provides the chocolate flavor; use a good quality cacao for deeper taste.
- 2 to 3 tablespoons maple syrup — sweetener and slight caramel note; start with 2 and add more if needed.
- 1/2 teaspoon vanilla extract (optional) — rounds flavors and softens bitterness; optional but lovely.
- 1/8 teaspoon peppermint flavor — concentrated peppermint; adjust carefully since a little goes a long way. (I used Simply Organic brand.)
- Coconut whipped cream for serving (optional) — adds creaminess and a vanilla-like sweetness; great for dairy-free versions.
- Crushed candy cane, for serving (optional) — garnish for crunch and extra peppermint zing.
What We’re Using
For this recipe you only need one small saucepan and a whisk. That’s it. I prefer a small heavy-bottomed saucepan so the heat distributes evenly and the cacao doesn’t stick. A medium or large whisk helps break up any lumps and keeps the mixture smooth. Mugs and a small bowl for crushed candy cane (if using) complete the setup.
Use measuring spoons for the peppermint flavor — a tiny excess will make the drink medicinal. And if you plan to top with coconut whipped cream, chill it briefly so it holds its shape when scooped on top.
From Start to Finish: Peppermint Hot Chocolate
- Measure and add to a small saucepan: 2 cups milk of choice, 2 heaping tablespoons cacao powder, 2 tablespoons maple syrup (start here; the recipe allows 2 to 3 tablespoons), 1/8 teaspoon peppermint flavor, and 1/2 teaspoon vanilla extract if using. Whisk until the cacao is fully incorporated and the mixture is smooth.
- Place the saucepan over medium heat. Whisk frequently to prevent lumps and to keep the cacao from settling on the bottom.
- Heat until the mixture is hot and small bubbles form at the edges (a gentle simmer). Continue whisking for about 30–60 seconds once it reaches this point to ensure it is evenly heated.
- Taste the hot chocolate. If you prefer it sweeter, add up to 1 more tablespoon maple syrup (to make 3 tablespoons total), then whisk to combine.
- Remove the saucepan from the heat and let sit 10–20 seconds, then pour the hot chocolate into mugs.
- Serve warm, topped with coconut whipped cream and crushed candy cane if desired.
Why It’s My Go-To
This recipe wins for speed and flexibility. It’s built to be adjusted on the fly: increase cacao for intensity, add a bit more maple syrup if you like it sweet, or swap in any plant milk you have on hand. It’s also forgiving — it won’t break if you’re a little loose with measurements.
I like that it’s approachable for non-chocolate-experts. Cacao powder delivers deep, bittersweet notes without the need to melt chocolate bars, and the peppermint flavor brightens the cup without masking the cocoa. It’s reliably comforting and bright at once, which is exactly what I want on chilly mornings or snowy evenings.
Allergy-Friendly Substitutes

- Dairy-free — use almond, oat, soy, or coconut milk in place of dairy milk; each will change the texture slightly (oat is creamier, almond lighter).
- Nut-free — choose oat or soy milk instead of almond milk if you need to avoid nuts.
- Sugar-free option — replace maple syrup with a sugar-free liquid sweetener of your choice, adjusting to taste.
- Whipped topping — if coconut whipped cream isn’t an option, use any preferred nondairy or dairy whipped topping.
Setup & Equipment
- Small heavy-bottomed saucepan — for even heating and to minimize scorching.
- Whisk — a good whisk prevents lumps and helps incorporate cacao smoothly.
- Measuring cups and spoons — essential for that 1/8 teaspoon peppermint precision.
- Mugs and a small spoon — for serving and stirring in toppings.
- Small bowl (optional) — to hold crushed candy cane for topping.
Troubleshooting Tips
- Lumpy cacao — whisk vigorously in the saucepan; start by mixing cacao with a small splash of milk to make a paste before adding the rest if you have trouble.
- Scorching — use medium heat and stir frequently; a heavier pan helps prevent hotspots.
- Too thin — increase cacao next time by an extra half tablespoon, or reduce the milk slightly while heating to concentrate the flavor.
- Too bitter — add an extra splash of maple syrup or a pinch more vanilla to balance bitterness.
- Overly minty — peppermint is powerful; add more milk to dilute if you overshot, and note the exact amount for next time.
Holiday-Friendly Variations
Keep things simple and seasonal without changing the method. Here are a few options that use the same ingredients or small tweaks:
- Extra-decadent — increase cacao by 1/2 to 1 tablespoon for a richer cup; balance with maple syrup to taste.
- Subtly vanilla — make sure to include the 1/2 teaspoon vanilla extract; it softens and rounds the cacao.
- Minty toppers — coconut whipped cream plus crushed candy cane gives you texture and a festive look while doubling the peppermint presence.
- Layered sweetness — start with 2 tablespoons maple syrup and add the optional third tablespoon only after tasting. This keeps the drink from getting too sweet for guests who prefer bitter chocolate.
What Could Go Wrong

Most issues are simple to fix. If the cacao clumps, it’s usually because it wasn’t whisked into a paste early enough. If the drink scorches or tastes burnt, reduce the heat and use a heavier pan next time. Overpowering peppermint is a common mistake — measure carefully and remember you can dilute the drink with a small amount of warmed milk if needed.
Also watch the sweetness. Maple syrup is forgiving, but it’s easy to go from balanced to overly sweet quickly. Taste before adding the final tablespoon. Finally, if you’re using a very thin plant milk, the drink might not be as creamy; choose a creamier plant milk or up the cacao slightly for body.
Prep Ahead & Store
You can prepare the hot chocolate base ahead and reheat it gently. Make the mixture through step 3 (heat until hot and small bubbles form), then cool and store in the fridge up to 48 hours. Reheat over low heat, whisking to reincorporate any settled cacao. Add the final sweetener adjustment and toppings just before serving.
Leftovers in a sealed container will keep 2–3 days in the refrigerator. Rewarm slowly so it doesn’t scorch and whisk well before pouring. If separation occurs, a quick whisk or an immersion blender for a few seconds brings it back together.
Troubleshooting Q&A
My drink is gritty — how do I fix it?
Grittiness usually means the cacao didn’t fully dissolve. Whisk vigorously while warming. If that doesn’t help, strain through a fine mesh sieve into your mug and whisk a little more in the saucepan with a splash of milk to fully incorporate before re-serving.
It tastes slightly burnt — can I save it?
If the pan scorched the mixture, the burnt flavor often carries through and is hard to mask. Your best bet is to start over and heat on slightly lower heat. If it’s only mildly overcooked, adding a little extra maple syrup and vanilla can help balance the off-notes.
I added too much peppermint — any rescue tip?
Add warm milk to dilute the peppermint, then taste and rebalance with a touch more cacao or maple syrup. Serve with coconut whipped cream to mellow the intensity.
How can I make it richer without adding heavy cream?
Use a creamier plant milk such as oat or full-fat coconut milk, or increase the cacao by a half tablespoon for more body. Another trick is to whisk vigorously to aerate the drink slightly — it feels richer on the palate.
Ready, Set, Cook
Now that you have the exact ingredients and method, this Peppermint Hot Chocolate is a quick win for cold mornings or evening treats. It’s fast, flexible, and just the right kind of festive. Keep a jar of peppermint flavor measured out for the season and you’ll be ready to whisk a cozy mug in under ten minutes.
Make a batch, taste as you go, and adjust to your household’s preferences. Top with coconut whipped cream and crushed candy cane for the full experience, or keep it simple and warm. Either way, enjoy.

Peppermint Hot Chocolate
Ingredients
Equipment
Method
- Measure and add to a small saucepan: 2 cups milk of choice, 2 heaping tablespoons cacao powder, 2 tablespoons maple syrup (start here; the recipe allows 2 to 3 tablespoons), 1/8 teaspoon peppermint flavor, and 1/2 teaspoon vanilla extract if using. Whisk until the cacao is fully incorporated and the mixture is smooth.
- Place the saucepan over medium heat. Whisk frequently to prevent lumps and to keep the cacao from settling on the bottom.
- Heat until the mixture is hot and small bubbles form at the edges (a gentle simmer). Continue whisking for about 30–60 seconds once it reaches this point to ensure it is evenly heated.
- Taste the hot chocolate. If you prefer it sweeter, add up to 1 more tablespoon maple syrup (to make 3 tablespoons total), then whisk to combine.
- Remove the saucepan from the heat and let sit 10–20 seconds, then pour the hot chocolate into mugs.
- Serve warm, topped with coconut whipped cream and crushed candy cane if desired.
Notes
Nutrition information is per cup, using 2 tablespoons of maple syrup for the recipe. This information is just an estimate, and not a guarantee.
*Peppermint flavoring can be very strong, so start with the smallest amount possible. I have a 1/8th teaspoon, so that's what I use here, but if you want to be extra-cautious, you can fill it only half-full to start. (So, you'd use 1/16th of a teaspoon instead.)
You can always add more to taste, but it's hard to remove the peppermint flavor once you add it. Feel free to dilute a strong peppermint flavor with more cacao powder or almond milk, if you need to. If you end up making too much, you can always store the leftovers in the fridge to reheat another night!