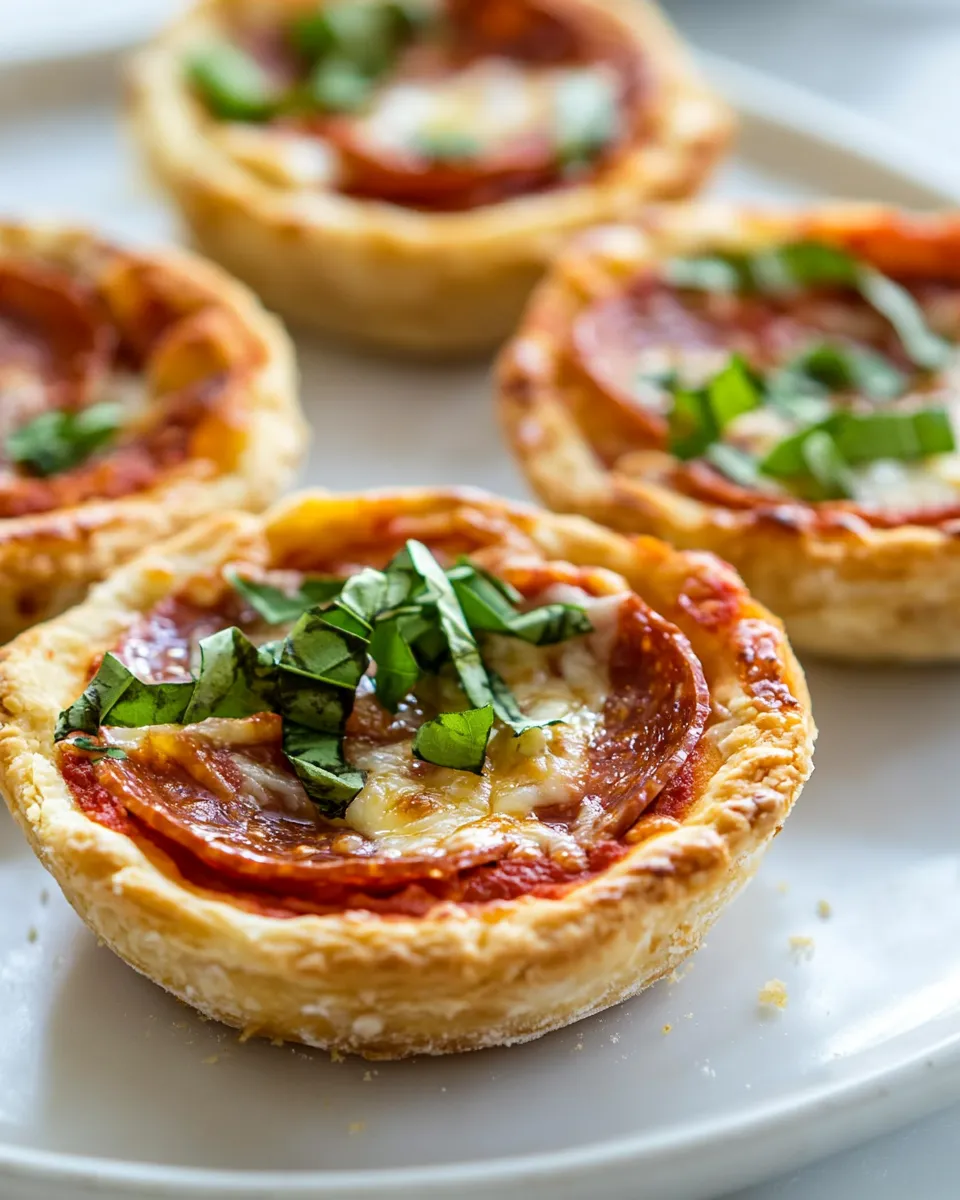
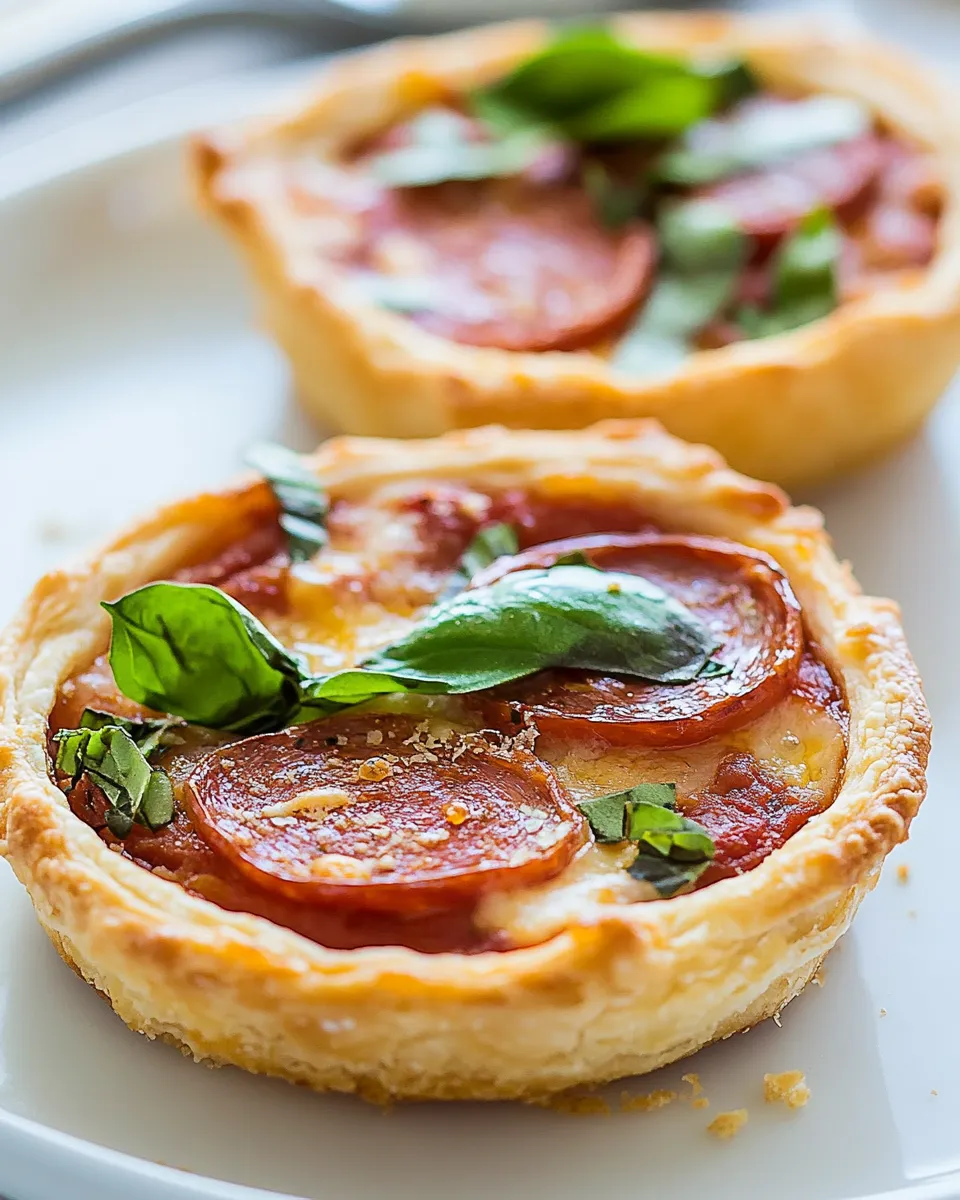
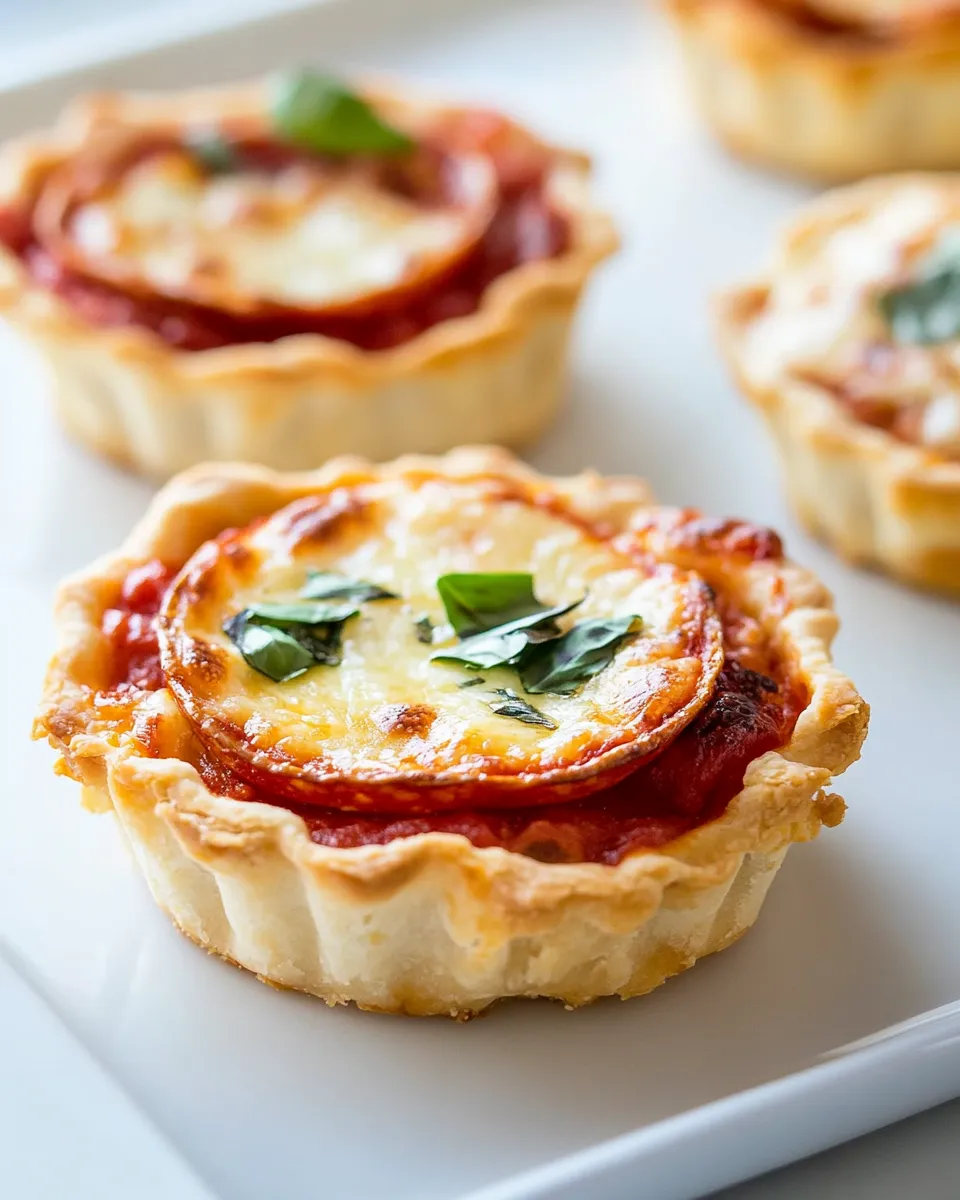
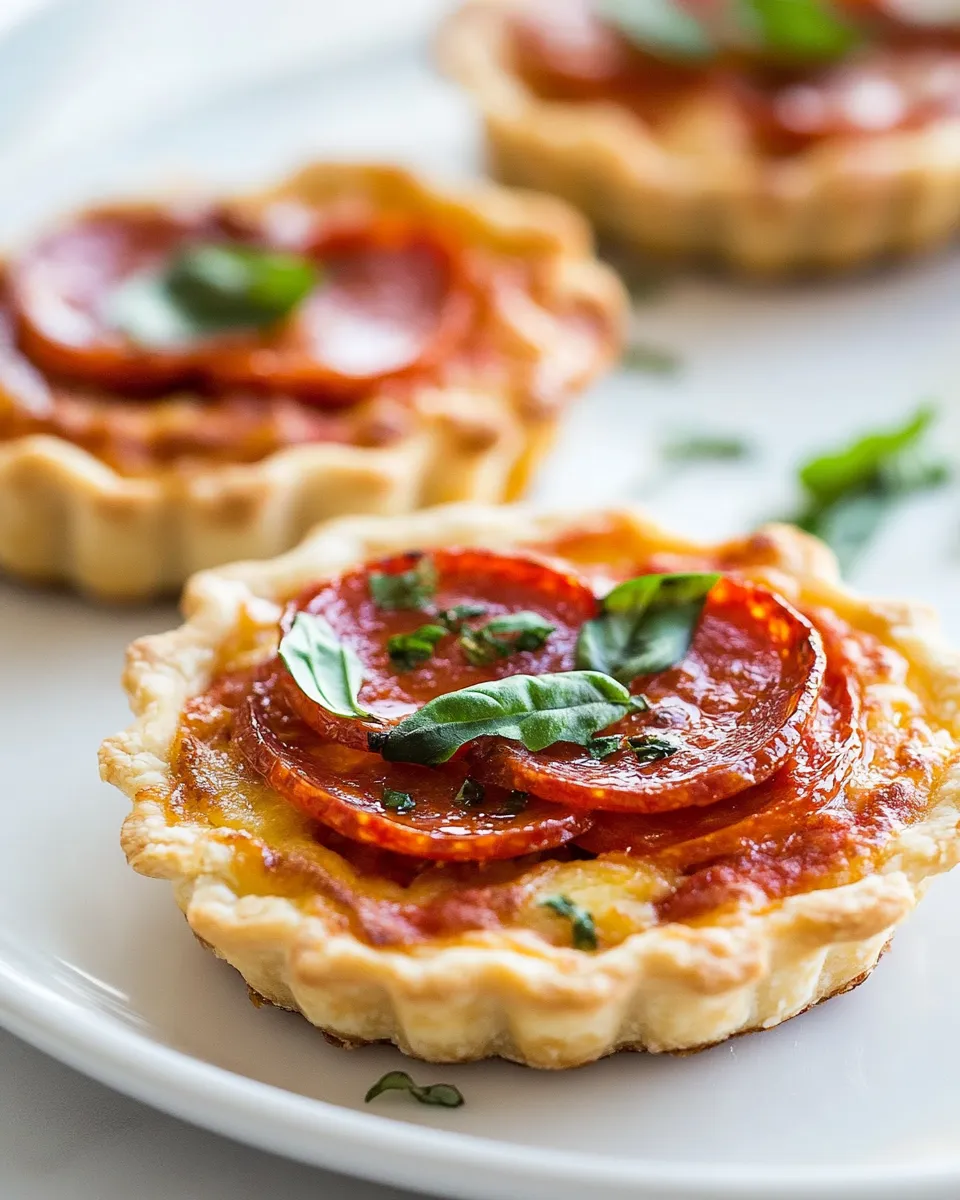
Pie Crust Pizza Tarts
These little pies are the kind of thing I make when I want pizza but also want something a touch more elegant — snackable, shareable, and perfectly portioned. They’re made with a flaky buttermilk pie crust, filled with classic pizza flavors, and baked until the cheese is bubbly and the edges are golden. You get all the joy of pizza with the buttery lift of pie dough.
They’re a reliable weeknight win and an automatic hit at a potluck. The recipe below walks you through blind-baking small tart shells so the crust stays crisp under the sauce and cheese. The process is straightforward, and once you’ve shaped one tart, the rest come together quickly.
Make a half batch of my favorite buttermilk pie crust ahead of time, keep it chilled, and these tarts become a fast assembly job. I’ll cover tools, timing, common missteps, and easy swaps so you can customize these to your kitchen and appetite.
What Goes In
Ingredients
- 4 mini tart pans — size matters: small pans keep each tart a perfect single serving.
- 1/2 batch My Favorite Buttermilk Pie Crust — the crisp, tender shell that makes these feel special; keep it cold.
- 4 tablespoons pizza sauce — homemade or store-bought — thin layer gives bright tomato flavor without soggy crust.
- 1/2 cup (2 oz) shredded mozzarella — melts beautifully; divide evenly for consistent topping.
- 12 slices good-quality pepperoni — three slices per tart; opt for a flavorful brand.
- 2 tablespoons Shredded Parmesan cheese — a salty, nutty finish when sprinkled on top.
- 4 small basil leaves thinly sliced — added after baking for a fresh, aromatic lift.
Pie Crust Pizza Tarts: Step-by-Step Guide
- Preheat the oven to 400°F (200°C).
- Divide the 1/2 batch of My Favorite Buttermilk Pie Crust into 4 even pieces. If the dough is warm, place all but the piece you are working with in the refrigerator while you shape the first tart.
- On a well-floured surface, roll one piece of dough thinly enough that a mini tart pan placed on top would have at least 1 inch of dough around all sides.
- Transfer the dough to the tart pan:
- If your tart pan has a removable bottom: place the pan bottom (disk) centered on the dough, fold the dough up around the disk so no dough hangs below the disk, set the disk with folded dough into the tart ring, then unfold the dough up the sides of the ring.
- If your tart pan does not have a removable bottom: drape the dough over the entire pan and press it into the sides.
- Gently press the dough into the sides of the pan, then run a rolling pin lightly over the rim to trim any excess dough. Repeat steps 3–5 for the remaining dough pieces and tart pans. Return any extra dough pieces to the refrigerator as needed.
- Set all four tart pans on a baking sheet. Cut four pieces of parchment paper to cover the tart bottoms and place one piece in each tart. Fill the parchment-lined tart shells with pie weights, dry beans, or uncooked rice.
- Blind-bake the tart shells at 400°F for 10 minutes.
- Remove the parchment and weights, then return the tart shells to the oven and bake 2 to 3 minutes more, until the bottoms look dry and the edges are very slightly golden. If any tart bottom has puffed, gently press it down.
- Evenly assemble the tarts on the partially baked shells: spread 1 tablespoon pizza sauce in each tart, divide the shredded mozzarella so each tart gets 2 tablespoons, place 3 slices of pepperoni on each tart, and sprinkle each with 1/2 tablespoon shredded Parmesan.
- Place the filled tart pans back on the baking sheet and bake at 400°F for 15 to 20 minutes, until the cheese is bubbly and the crust is golden.
- Remove the tarts from the oven and cool in the pans for at least 5 minutes. Top each tart with the thinly sliced pieces of 1 small basil leaf before serving.
What Sets This Recipe Apart
These aren’t pizza dough folded into cups — they use a buttermilk pie crust, and that makes a difference. The crust is flaky and buttery, giving a tender lift and a crisp edge that contrasts nicely with melty cheese. Blind-baking the shells avoids the sogginess common to sauced mini pizzas.
Portion control is another advantage. Each tart is intentionally single-serve: neat, easy to pick up, and perfect for appetizers, kids, or a light dinner with a salad. And because you shape the shells ahead of time, these feel quicker than making a whole pizza from scratch.
Vegan & Vegetarian Swaps
Vegetarian is already handled — this recipe uses pepperoni, so for strict vegetarians, swap the pepperoni for a plant-based alternative or roasted vegetables (thin slices of zucchini, mushrooms, or bell pepper). Keep the cheeses the same if lacto-ovo is acceptable.
For vegan adaptations:
- Use a vegan pie crust in place of the buttermilk crust.
- Replace shredded mozzarella and Parmesan with vegan shreddable cheeses that melt well.
- Use vegan pepperoni or skip the meat entirely in favor of roasted veggies or olives.
Toolbox for This Recipe
- Mini tart pans (4) — removable bottoms are easier for unmolding, but not required.
- Rolling pin — to roll the dough thin enough to fit the pans with an inch to spare.
- Baking sheet — holds all pans for easy handling in and out of the oven.
- Parchment paper and pie weights/dry beans/uncooked rice — for blind-baking so shells keep their shape.
- Sharp knife or bench scraper — trims dough cleanly and divides your chilled dough.
- Measuring spoons/cups — to portion sauce and cheeses accurately for uniform results.
Don’t Do This
Don’t skip the blind-bake. If you skip it, the bottom will stay soft and damp from the sauce. The short blind-bake gives a dry, sturdy base so the tarts stay crisp.
Don’t work with warm dough. Warm dough tears, sticks, and loses flakiness. If the dough feels soft, chill it between shaping each tart. It’s better to work slowly than to rush and ruin the texture.
Don’t overload with sauce or cheese. Follow the amounts: 1 tablespoon sauce per tart and 2 tablespoons mozzarella per tart. Too much topping makes the crust soggy and ruins the balance.
Make It Your Way
Swap the pepperoni for other toppings — a few options that work well in these small shells:
- Caramelized onions and goat cheese for a sweeter, tangy tart.
- Cooked sausage crumbles and a pinch of fennel seed for a hearty bite.
- Spinach, ricotta, and lemon zest for a fresher, lighter version.
To make them crispier-bottomed, bake the filled tarts on a preheated pizza stone or heavy baking steel. If you want extra browning, switch the oven to broil for the last 1–2 minutes while watching closely.
Flavor Logic
The math behind the toppings is simple: a thin layer of sauce, a modest amount of mozzarella, and a little Parmesan for salt and nuttiness. That’s enough to get a melty, flavorful top without overpowering the buttery crust. Pepperoni contributes fat and spice; the final fresh basil leaf brightens everything and cuts through richness.
Buttermilk in the crust brings a subtle tang and tender crumb. It interacts with the butter to create visible layers and a flaky bite — which feels luxurious against the molten cheese. Parmesan on top browns slightly and adds a finishing note more assertive than mozzarella alone.
Storage & Reheat Guide
These tarts are best the day you make them, while the crust is still crisp. If you need to store leftovers:
- Refrigerate cooled tarts in an airtight container for up to 2 days.
- To reheat and revive crispness: preheat the oven to 375°F (190°C) and bake on a sheet for 8–10 minutes, or until warmed through and the crust feels crisp again.
- A toaster oven works well for single tarts and keeps the crust from getting soggy the way a microwave will.
Do not freeze tarts with fresh basil on top; add herbs after reheating. You can freeze unbaked, shaped shells wrapped tightly for up to a month — blind-bake from frozen, adding a few extra minutes to the blind-bake time.
Common Qs About Pie Crust Pizza Tarts
Q: Can I use store-bought pie dough or puff pastry?
A: Yes. Store-bought pie dough works fine and is the closest to the original. Puff pastry will be flakier and taller; if you use it, blind-bake the shell carefully to avoid over-rising in the base.
Q: My tart bottoms puffed during blind-bake. How do I prevent that?
A: Press them gently down as soon as they come out of the oven if they puff. To avoid puffing, ensure the parchment and weights cover the bottom fully and that the dough sits snugly against the pan sides. Docking the bottom with a fork (light pricks) before putting on the weights can help in prone doughs.
Q: Can I assemble these completely ahead and bake later?
A: Assemble up to the point of adding basil and you’ll be fine. If you assemble and refrigerate, the crust may soften slightly; for best texture, assemble when you’re ready to bake or reheat in the oven to crisp the base.
Q: My edges brown too quickly while the center stays pale—what then?
A: Tent the edges with foil to slow browning while the center finishes. Alternatively, lower the oven temperature slightly and bake a few extra minutes to encourage even color without burning edges.
Bring It Home
These Pie Crust Pizza Tarts are a small investment in time for a satisfying payoff. They look composed on a plate and taste indulgent without being fussy. The key moments to watch are keeping the dough cold, blind-baking until the bottoms are dry, and resisting the urge to pile on sauce and cheese.
Make a double batch of the pie crust, freeze the extra shells, and you’ll have a go-to appetizer for the next time guests drop by. Or keep it simple: make the half-batch, invite a friend, and enjoy how a humble slice of pepperoni and cheese transformed by flaky crust feels like a treat.
Pie Crust Pizza Tarts
Ingredients
Equipment
Method
- Preheat the oven to 400°F (200°C).
- Divide the 1/2 batch of My Favorite Buttermilk Pie Crust into 4 even pieces. If the dough is warm, place all but the piece you are working with in the refrigerator while you shape the first tart.
- On a well-floured surface, roll one piece of dough thinly enough that a mini tart pan placed on top would have at least 1 inch of dough around all sides.
- Transfer the dough to the tart pan: - If your tart pan has a removable bottom: place the pan bottom (disk) centered on the dough, fold the dough up around the disk so no dough hangs below the disk, set the disk with folded dough into the tart ring, then unfold the dough up the sides of the ring. - If your tart pan does not have a removable bottom: drape the dough over the entire pan and press it into the sides.
- Gently press the dough into the sides of the pan, then run a rolling pin lightly over the rim to trim any excess dough. Repeat steps 3–5 for the remaining dough pieces and tart pans. Return any extra dough pieces to the refrigerator as needed.
- Set all four tart pans on a baking sheet. Cut four pieces of parchment paper to cover the tart bottoms and place one piece in each tart. Fill the parchment-lined tart shells with pie weights, dry beans, or uncooked rice.
- Blind-bake the tart shells at 400°F for 10 minutes.
- Remove the parchment and weights, then return the tart shells to the oven and bake 2 to 3 minutes more, until the bottoms look dry and the edges are very slightly golden. If any tart bottom has puffed, gently press it down.
- Evenly assemble the tarts on the partially baked shells: spread 1 tablespoon pizza sauce in each tart, divide the shredded mozzarella so each tart gets 2 tablespoons, place 3 slices of pepperoni on each tart, and sprinkle each with 1/2 tablespoon shredded Parmesan.
- Place the filled tart pans back on the baking sheet and bake at 400°F for 15 to 20 minutes, until the cheese is bubbly and the crust is golden.
- Remove the tarts from the oven and cool in the pans for at least 5 minutes. Top each tart with the thinly sliced pieces of 1 small basil leaf before serving.