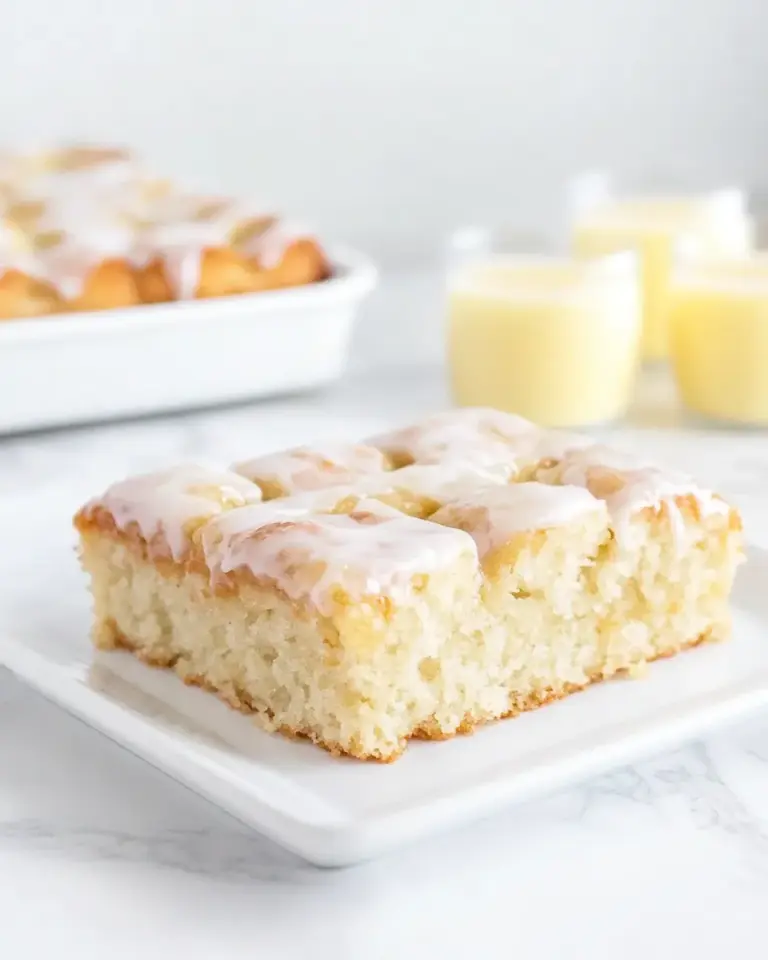
Protein Fudge
This Protein Fudge is the kind of no-nonsense recipe I reach for when I want something that feels indulgent but actually fuels me. It’s a dense, peanut-butter-forward bar with a thin chocolate top—simple, sturdy, and exactly what you want in a snack that holds up in a lunchbox or gym bag. No mystery ingredients, no tempering chocolate, and no oven needed.
It comes together fast: mix the dry protein-boosting ingredients, warm the peanut butter and brown rice syrup until pourable, combine, press into an 8 x 8 pan, chill, and finish with a quick melted chocolate drizzle. The result is firm enough to slice cleanly but soft enough to bite without cracking a tooth.
I’ll walk you through each step, the roles each ingredient plays, common traps that trip home cooks up, and practical storage advice so these bars stay fresh. If you like chocolate-peanut butter flavor and want a protein-forward treat that’s actually useful, this one’s for you.
The Essentials

Texture and timing are the essentials here: you’re aiming for a thick, cohesive base that firms in the refrigerator and accepts a thin chocolate layer on top. The oat flour and vanilla protein powder create the structure; the peanut butter and brown rice syrup bind and sweeten. Pressing the mixture firmly into the pan is non-negotiable—gaps or loose spots show up as crumbly bars later.
No special skills required. Heat the wet ingredients just enough to make them pourable, blend thoroughly so there are no pockets of dry powder, and be patient while chilling. The chocolate topping is a small flourish but it gives a finished look and an enjoyable contrast to the dense base.
Ingredients
- 2 cups peanut butter — the main fat and binder; can sub for almond, cashew, sunflower seed or soy nut butter.
- 1/2 cup brown rice syrup — sweetener and binder; can sub for agave or maple syrup.
- 1 1/2 cup oat flour — bulk and chew; helps give structure without gluten.
- 1 cup vanilla protein powder — provides protein and vanilla flavor; the type will affect texture slightly.
- 1/3 cup chocolate chips — for the topping; choose your preferred chocolate (semi-sweet, dark, or milk).
- 1 teaspoon coconut oil — thins and glosses the melted chocolate so it spreads smoothly.
Mastering Protein Fudge: How-To
- Line an 8 x 8-inch pan with parchment paper and set aside.
- In a mixing bowl, combine 1 1/2 cups oat flour and 1 cup vanilla protein powder; whisk briefly to blend and set aside.
- In a microwave-safe bowl or in a small saucepan over low heat, combine 2 cups peanut butter and 1/2 cup brown rice syrup. Warm just until the mixture is smooth and pourable, stirring to combine (microwave in 20–30 second intervals, stirring between intervals, or heat gently on the stovetop).
- Pour the warm peanut butter–syrup mixture into the dry ingredients. Stir thoroughly until the dry ingredients are fully incorporated and the mixture is uniform. The mixture will be thick; keep stirring and scraping the bowl sides to incorporate everything.
- Transfer the mixture to the prepared pan. Use a spatula or the back of a spoon to press it firmly and evenly into the pan so the surface is compact.
- Refrigerate the pan for at least 20 minutes to firm up.
- While the mixture chills, place 1/3 cup chocolate chips and 1 teaspoon coconut oil in a small microwave-safe bowl or in a heatproof bowl set over a saucepan of simmering water. Heat and stir until the chocolate and oil are fully melted and smooth.
- Remove the pan from the refrigerator and pour or drizzle the melted chocolate over the top. Spread or smooth as desired.
- Return the pan to the refrigerator and chill until the chocolate topping is set. Once set, lift the parchment out of the pan and cut into squares.
Why You’ll Love This Recipe

This Protein Fudge hits a useful sweet spot: it tastes like a treat but feels intentional. The peanut butter gives richness and satiety, the vanilla protein powder adds a clear protein boost without gritty flavor if you mix thoroughly, and the oat flour keeps the base pleasantly dense. The chocolate topping is optional for those who want a classic finish, but it also helps each square feel like a proper dessert.
It’s forgiving: you can switch the nut butter if someone in your household needs an alternative, and the brown rice syrup is sticky enough to bind everything without needing additional oils. Texture is the real win here—chewy, compact, and snappable.
No-Store Runs Needed

If you already have peanut butter, a jar of brown rice syrup or a suitable liquid sweetener, oat flour, and protein powder, you’re set. The recipe explicitly lists acceptable swaps for the nut butter and the syrup: almond, cashew, sunflower seed, or soy nut butter can replace peanut butter; agave or maple syrup can replace brown rice syrup. That flexibility prevents last-minute grocery trips.
If you keep chocolate chips and a small fat like coconut oil on hand for finishing, you can take this from bowl to bars in under an hour, most of that time is chilling.
Kitchen Gear Checklist
Minimal and straightforward tools will get this done:
- 8 x 8-inch baking pan lined with parchment paper
- Mixing bowls (one large for dry, one for wet)
- Measuring cups and spoons
- Spatula and whisk
- Microwave-safe bowl or small saucepan for melting
- Heatproof bowl for double boiler setup (if melting on stovetop)
- Refrigerator for chilling
Avoid These Traps
1) Underheating the peanut butter/syrup: If the mixture isn’t warm and pourable you’ll end up with pockets of dry powder and a crumbly base. Warm until smooth, not boiling.
2) Overheating the chocolate: Chocolate can seize if it gets too hot. Heat slowly in short intervals and stir between bursts. Adding the teaspoon of coconut oil helps keep the chocolate glossy and fluid.
3) Not pressing firmly: If you don’t compact the mixture well in the pan, bars will crumble when sliced. Apply even, firm pressure with the back of a spoon or a flat-bottomed measuring cup.
4) Skipping the chill: Twenty minutes is the minimum to firm up the base. Cutting too soon results in ragged edges and sticky fingers.
Seasonal Serving Ideas
Spring/Summer: Serve chilled straight from the fridge for a cooling snack. Pair a square with fresh berries or sliced banana for a light treat.
Autumn/Winter: Let a square sit at room temperature for a few minutes so the texture softens slightly, then enjoy with a warm mug of coffee or tea. The contrast between the chocolate shell and the dense interior feels very cozy in colder months.
On-the-go: Wrap individual squares in parchment and store in a small airtight container for quick post-workout or mid-afternoon fuel.
Recipe Notes & Chef’s Commentary
Choice of peanut butter matters. Natural, oil-separated peanut butter can be used but check consistency: if it’s very runny when warm it may make the base softer; if it’s very stiff it may need a touch more warming to become pourable. The recipe allows for alternative nut and seed butters—each will subtly change flavor and mouthfeel.
Protein powder selection affects texture. Whey and plant-based powders behave differently; plant powders often absorb more moisture and can create a drier texture. If using a plant-based powder and you find the mix too dry, more thorough stirring while the wet ingredients are still warm usually helps bind everything.
The chocolate top is primarily aesthetic and textural. You can drizzle, spread thinly, or fully cover. If you want a patterned top, pour the chocolate into a narrow spout and create lines, then use a toothpick to swirl.
Make-Ahead & Storage
Refrigerator
Store cut squares in an airtight container in the refrigerator for up to 1 week. Keep layers separated with parchment to prevent sticking. Chilled bars stay firmer and are easier to portion.
Freezer
For longer storage, freeze squares in a single layer on a baking sheet until firm, then transfer to a sealed freezer-safe container or bag. They’ll keep well for up to 2 months. Thaw in the refrigerator or at room temperature for 10–20 minutes before eating.
If you plan to transport bars for a few hours, pack them in an insulated lunchbox with a small ice pack to keep the chocolate top from softening in warm conditions.
Troubleshooting Q&A
Q: The bars are too soft after chilling. A: Make sure the peanut butter-syrup mixture was sufficiently warm and the base was pressed tightly. If bars are still too soft, return them to the refrigerator for an additional 30–60 minutes. For very soft nut butter varieties, chilling longer or freezing briefly helps.
Q: Chocolate seized while melting. A: Remove the bowl from heat immediately and add a small amount of neutral oil (the recipe calls for 1 teaspoon coconut oil) and stir until smooth. If using a microwave, heat in shorter intervals and stir more frequently.
Q: The base is dry and crumbly. A: When you pour the warm peanut butter mixture into the dry ingredients, mix thoroughly and scrape the sides to ensure everything is incorporated. If it remains powdery, reheat the peanut butter mixture gently and add a teaspoon at a time until the dough binds.
Q: Bars taste overwhelmingly of protein powder. A: Try a different protein powder with a milder flavor or increase the peanut butter slightly next time (note: altering amounts changes texture). Thorough stirring helps distribute the powder evenly so no pockets of powder remain.
Time to Try It
This Protein Fudge is one of those recipes you’ll make again once you appreciate how dependable it is. It’s fast to assemble, robust in flavor, and flexible enough to accommodate common pantry swaps. Follow the steps, press firmly, chill properly, and you’ll have neat, satisfying squares that travel well and satisfy a chocolate-peanut-butter craving without derailing your day.
Ready to make a batch? Gather your 8 x 8 pan, the six ingredients listed, and plan for at least 30–45 minutes from start to finish (most of that is chilling). When you cut that first clean square, you’ll see why this simple recipe becomes a staple.

Protein Fudge
Ingredients
Equipment
Method
- Line an 8 x 8-inch pan with parchment paper and set aside.
- In a mixing bowl, combine 1 1/2 cups oat flour and 1 cup vanilla protein powder; whisk briefly to blend and set aside.
- In a microwave-safe bowl or in a small saucepan over low heat, combine 2 cups peanut butter and 1/2 cup brown rice syrup. Warm just until the mixture is smooth and pourable, stirring to combine (microwave in 20–30 second intervals, stirring between intervals, or heat gently on the stovetop).
- Pour the warm peanut butter–syrup mixture into the dry ingredients. Stir thoroughly until the dry ingredients are fully incorporated and the mixture is uniform. The mixture will be thick; keep stirring and scraping the bowl sides to incorporate everything.
- Transfer the mixture to the prepared pan. Use a spatula or the back of a spoon to press it firmly and evenly into the pan so the surface is compact.
- Refrigerate the pan for at least 20 minutes to firm up.
- While the mixture chills, place 1/3 cup chocolate chips and 1 teaspoon coconut oil in a small microwave-safe bowl or in a heatproof bowl set over a saucepan of simmering water. Heat and stir until the chocolate and oil are fully melted and smooth.
- Remove the pan from the refrigerator and pour or drizzle the melted chocolate over the top. Spread or smooth as desired.
- Return the pan to the refrigerator and chill until the chocolate topping is set. Once set, lift the parchment out of the pan and cut into squares.
Notes
Liquid: I use water, but feel free to use milk.
Leftovers: Keep in the fridge for up to 3 weeks or the freezer for 3 months.