Pumpkin Pie
This pumpkin pie is one of those reliable recipes I turn to when I want something comforting and unfussy — a crisp edge, a silky, warmly spiced filling, and a simple timeline that doesn’t demand constant babysitting. It uses canned pumpkin for consistent texture and a straightforward bake schedule that gets you from oven to table with confidence. I like it for holidays, for plain old Wednesdays, and for when company drops by unexpectedly.
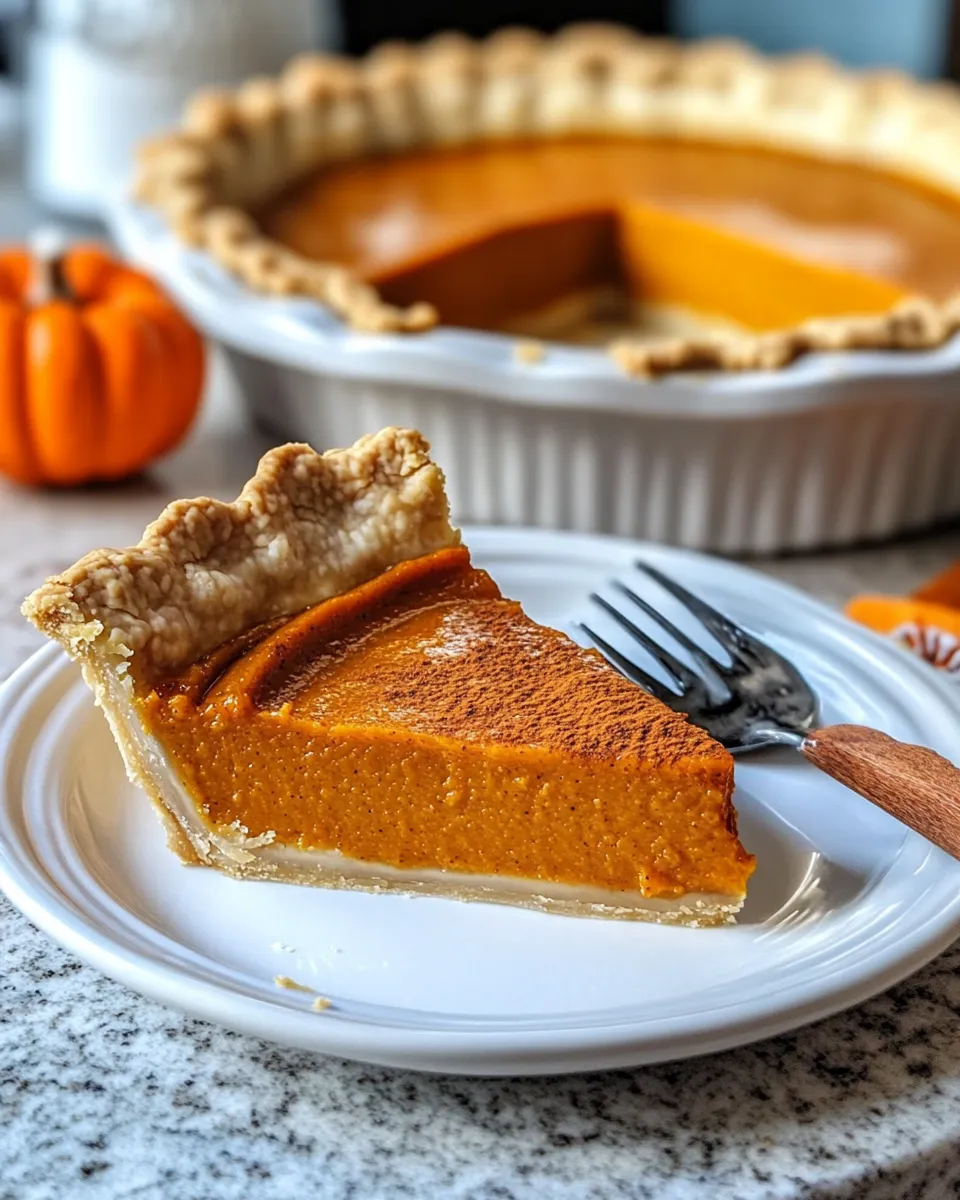
The technique is forgiving: the crust is par-baked only by brushing with egg white, and the custard sets as it cools, so timing and tenting are the two small moves that make the difference. You’ll see a slightly wobbly center coming out of the oven; that’s perfect. Let it rest at least two hours or chill overnight for cleaner slices.
I’ll walk you through the essentials, list the exact ingredients with quick notes, and give focused troubleshooting so you can fix things without starting over. Practical tips, straight talk, and reliable results — that’s the goal.
The Essentials
Yield and size: This recipe is built around a single unbaked 9″ pie crust and serves about 8 slices, depending on how you cut it. Start with a cold crust and a room-temperature mixing bowl for smooth whipping and blending.
Timing and temperature: Preheat to 425°F (220°C). The bake schedule is 15 minutes at 425°F, then 30 minutes at 350°F, and if needed an additional 15 minutes at 350°F after checking and protecting the edges. Cooling is crucial: allow at least 2 hours on a rack or chill overnight to finish setting.
Ingredients
- 1 unbaked 9″ pie crust — the foundation: use a store-bought or homemade crust fitted into a 9″ pie plate and chilled before filling.
- 3 large eggs, with 1 egg divided — eggs are the structure for the custard; reserve one white to brush the crust for a barrier.
- 1 1/4 cups heavy cream — gives the filling richness and a smooth mouthfeel.
- 1 cup granulated sugar — balances pumpkin and spices; keeps texture classic and not overly sweet.
- 15 ounces canned pure pumpkin puree* — the main flavor and body of the pie; use pure pumpkin, not pumpkin pie filling.
- 1 teaspoon ground cinnamon — warm backbone spice.
- 1 teaspoon ground nutmeg — adds aromatic depth; freshly grated is nice if you have it.
- 3/4 teaspoon ground ginger — brings a subtle bite and complexity.
- 3/4 teaspoon kosher salt — enhances sweetness and balances spices.
Mastering Pumpkin Pie: How-To
- Preheat the oven to 425°F (220°C).
- Prepare the unbaked 9″ pie crust: remove it from its packaging, fit it into a 9″ pie plate if needed, flute the edges, and refrigerate while you make the filling.
- Separate the eggs: Crack two whole eggs into a large mixing bowl. Crack the third egg and add only the yolk to the bowl; place the reserved egg white in a small bowl and set aside. Whisk the eggs in the large bowl until combined.
- Add the remaining filling ingredients to the eggs: pour in 1 1/4 cups heavy cream, 1 cup granulated sugar, 15 ounces pumpkin puree, 1 teaspoon ground cinnamon, 1 teaspoon ground nutmeg, 3/4 teaspoon ground ginger, and 3/4 teaspoon kosher salt. Whisk until the mixture is smooth and evenly combined.
- Remove the chilled pie crust from the refrigerator. Lightly whisk the reserved egg white with a fork and brush a thin layer of it over the bottom and up the sides of the pie crust.
- Pour the pumpkin filling into the prepared crust and smooth the top gently.
- Bake the pie: place it in the preheated oven and bake at 425°F for 15 minutes. After 15 minutes, reduce the oven temperature to 350°F and continue baking for 30 minutes.
- After the 30 minutes at 350°F, check the pie. If the crust edges are browning too much, loosely tent the edges with foil or use a pie shield. Continue baking for an additional 15 minutes at 350°F. The pie is done when the filling is set around the edges but still slightly jiggly in the center.
- Remove the pie from the oven and let it cool on a rack for at least 2 hours (or chill overnight) before serving. Store refrigerated for up to 4 days.
Short technique notes
Whisk consistently so the eggs blend smoothly with the cream and pumpkin; you want no streaks of yolk or clumps of puree. Brushing the egg white on the crust creates a thin barrier that helps prevent a soggy bottom by sealing the dough—don’t skip it. When you tent with foil, do it loosely so air still circulates.
Why I Love This Recipe
It’s straightforward and forgiving. The use of canned pumpkin and pantry spices keeps the prep time short, and the bake schedule gives the custard room to set while letting you protect the crust easily. The result is reliably creamy, with a flavor profile that’s warmly spiced but not overpowering.
It’s also adaptable. You can make it a day ahead and chill it for clean slices, or serve it just cooled for a softer texture. The combination of heavy cream and three eggs (one divided) creates a custard that’s rich without being custard-heavy — it slices neatly and holds up under whipped cream or a sprinkle of cinnamon.
Texture-Safe Substitutions
Need a different mouthfeel or have dietary constraints? Here are texture-minded swaps that respect the recipe’s balance:
- Heavy cream swap — use an equal amount of evaporated milk for a lighter, slightly firmer filling. Keep the same 1 1/4 cup volume.
- Egg changes — if you must reduce eggs, know the custard will be softer and more fragile. You can reduce one whole egg, but the pie will set less firmly and may need extra chilling to slice.
- Crust choices — a pressed-graham base yields a denser, slightly chewier texture compared with a flaky rolled crust. If you switch crust types, keep the same pan size and chilling step for the dough.
Prep & Cook Tools
Gather these before you begin to keep the process smooth:
- 9″ pie plate — needed to fit the unbaked crust and produce the intended depth.
- Large mixing bowl — for whisking eggs and combining filling ingredients without spills.
- Small bowl and pastry brush or fork — the small bowl holds the reserved egg white and the brush helps seal the crust.
- Whisk — a reliable tool for emulsifying cream, eggs, pumpkin, and sugar until silky.
- Cooling rack — essential for letting the pie finish setting at room temperature with airflow underneath.
- Foil or pie shield — protect the crust edges from overbrowning during the longer bake.
Missteps & Fixes
Here are the common problems I see and the quick fixes that usually save the day.
- Crust edges browning too fast — tent the edges with foil or use a pie shield when you reduce the oven to 350°F. This preserves the color without slowing the filling set.
- Center still jiggly after full bake — that wobbliness will firm up as it cools. Let the pie rest on a rack for at least two hours; if it still seems underdone after cooling, chilling overnight usually finishes the set.
- Soggy bottom — brushing the crust with the reserved egg white creates a seal; if the bottom is still soft, next time prebake the bottom crust for 5–7 minutes or use a metal pie plate to promote better heat transfer.
- Cracked top — overbaking is the typical cause. Follow the doneness cue in the instructions: set around the edges, slightly jiggly in the center.
In-Season Swaps
When fresh pumpkins are in season, roast and puree sugar pie pumpkins and use them in place of canned pumpkin. Fresh puree will have more moisture and a brighter flavor; if it’s very wet, drain a little liquid or cook it down to concentrate. Use the same weight or volume that the recipe calls for (15 ounces) to keep the same custard balance.
If you have access to freshly ground spices in late autumn, swap the jarred cinnamon, nutmeg, and ginger for freshly grated nutmeg and freshly ground ginger for a livelier, more aromatic pie.
Flavor Logic

This custard hinges on three things: eggs for structure, dairy for creaminess, and pumpkin plus spices for flavor. The sugar sweetens and helps the filling set by slightly increasing firmness as it cools. Salt is the quiet hero — 3/4 teaspoon kosher salt lifts and balances the sweet and spice so the pumpkin comes through cleanly.
Cinnamon and nutmeg provide the classic pumpkin pie signature, while the ground ginger adds a warm bite. Together they form a layered flavor that pairs perfectly with a dollop of lightly sweetened whipped cream or a simple dusting of cinnamon.
Storing, Freezing & Reheating
Store the pie covered in the refrigerator for up to 4 days, as the recipe indicates. For the best texture, try to keep it in a single layer without heavy items resting on top. If you need to freeze, wrap the cooled pie tightly in plastic wrap and then foil. Thaw overnight in the refrigerator and serve chilled or bring to room temperature before slicing.
Reheat small slices in a 300°F oven for 8–12 minutes if you want them warm. Be gentle — reheating too aggressively can dry the custard and crack the surface. A quick microwave zap (10–15 seconds) works for individual slices if you’re in a hurry, but the texture will be softer.
Quick Questions
Q: Can I use pumpkin pie filling instead of canned pumpkin puree? A: No — pumpkin pie filling is already sweetened and spiced. Use pure pumpkin puree to control sweetness and spice levels.
Q: Why brush the crust with egg white? A: It creates a thin seal that helps prevent a soggy bottom by reducing moisture migration from the filling into the raw crust.
Q: How do I know when it’s done? A: The filling will be set around the edges and slightly jiggly in the center. It will finish setting as it cools.
Time to Try It
Ready to bake? Preheat your oven, chill the crust, and assemble the filling precisely as listed. Follow the bake schedule, tent the edges if necessary, and give it the resting time it needs — that patience pays off with clean slices and a silky texture. Take notes the first time you make it: oven variances and crust types can affect timing, and those little adjustments will make this recipe your go-to pumpkin pie.
If you try it, tell me how you shielded your edges, whether you chilled overnight, and what topping you paired with the first slice. Practical tweaks and honest results are the best way to make a good recipe truly yours.
Ingredients
Method
- Preheat the oven to 425°F (220°C).
- Prepare the unbaked 9" pie crust: remove it from its packaging, fit it into a 9" pie plate if needed, flute the edges, and refrigerate while you make the filling.
- Separate the eggs: Crack two whole eggs into a large mixing bowl. Crack the third egg and add only the yolk to the bowl; place the reserved egg white in a small bowl and set aside. Whisk the eggs in the large bowl until combined.
- Add the remaining filling ingredients to the eggs: pour in 1 1/4 cups heavy cream, 1 cup granulated sugar, 15 ounces pumpkin puree, 1 teaspoon ground cinnamon, 1 teaspoon ground nutmeg, 3/4 teaspoon ground ginger, and 3/4 teaspoon kosher salt. Whisk until the mixture is smooth and evenly combined.
- Remove the chilled pie crust from the refrigerator. Lightly whisk the reserved egg white with a fork and brush a thin layer of it over the bottom and up the sides of the pie crust.
- Pour the pumpkin filling into the prepared crust and smooth the top gently.
- Bake the pie: place it in the preheated oven and bake at 425°F for 15 minutes. After 15 minutes, reduce the oven temperature to 350°F and continue baking for 30 minutes.
- After the 30 minutes at 350°F, check the pie. If the crust edges are browning too much, loosely tent the edges with foil or use a pie shield. Continue baking for an additional 15 minutes at 350°F. The pie is done when the filling is set around the edges but still slightly jiggly in the center.
- Remove the pie from the oven and let it cool on a rack for at least 2 hours (or chill overnight) before serving. Store refrigerated for up to 4 days.
Notes
*I prefer using canned pumpkin puree rather than
homemade pumpkin puree
for this recipe. Fresh pumpkins can vary wildly in their moisture content, which affects the bake time of this pie. Stick with canned puree for consistent results every time.