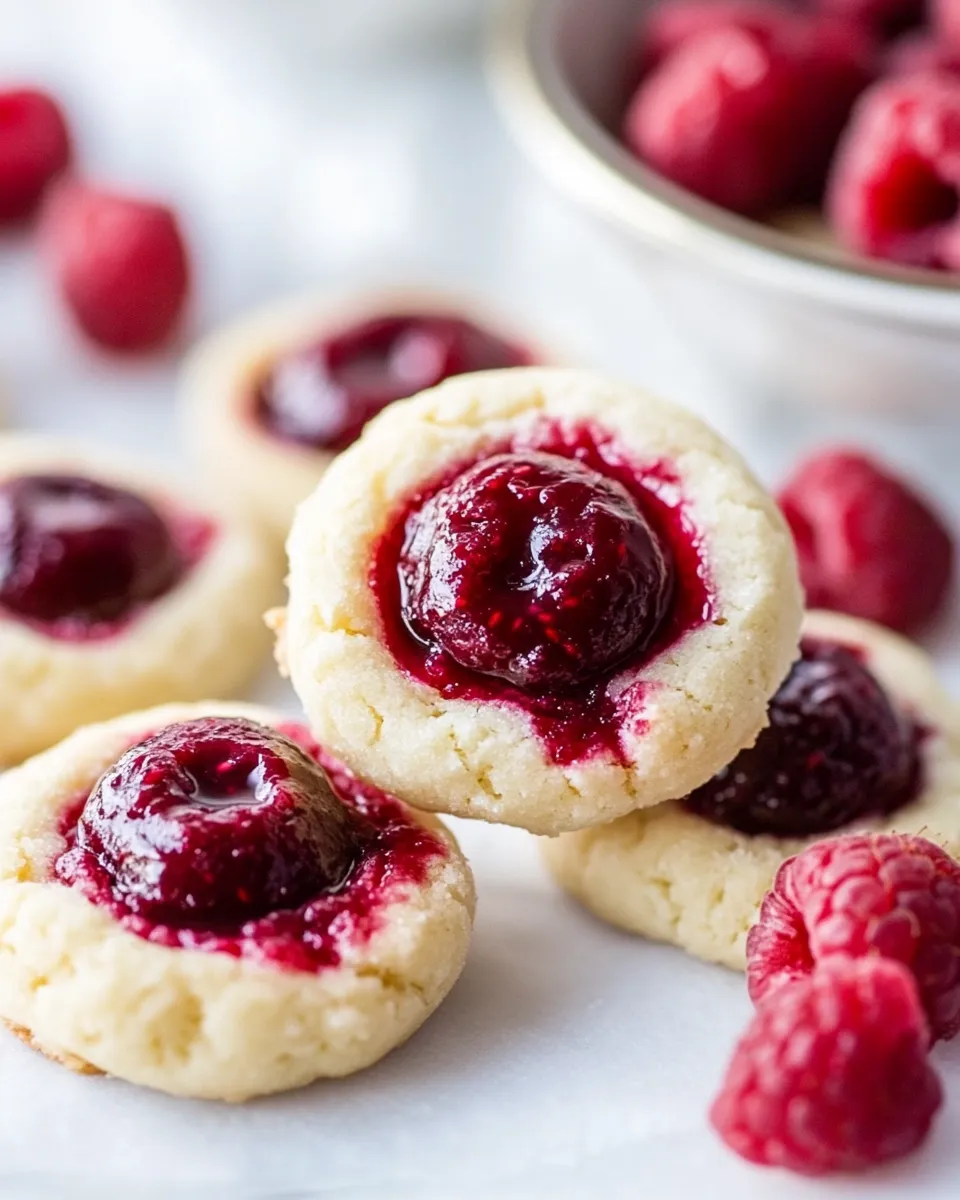
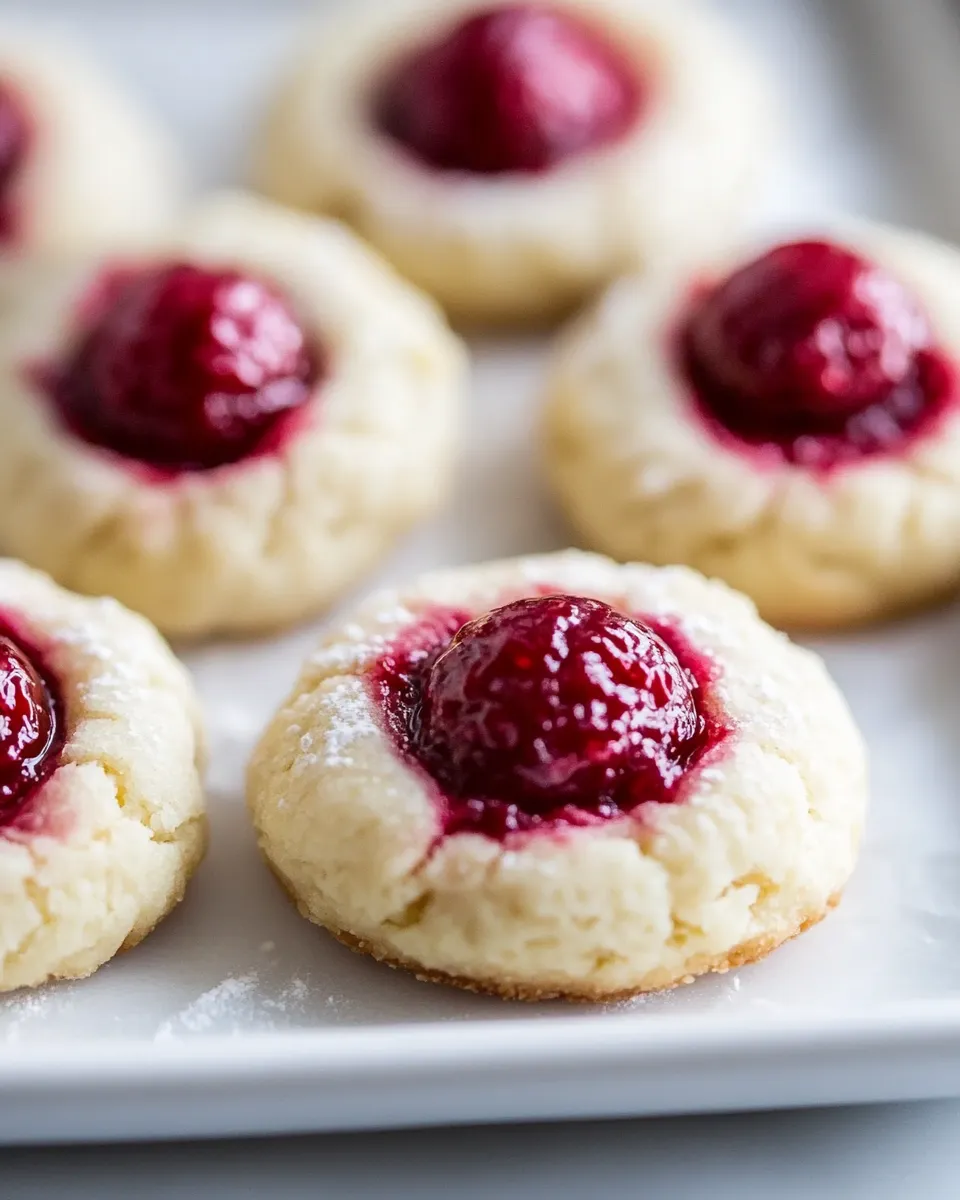
Raspberry Thumbprint Cookies
These raspberry thumbprint cookies are the kind of small-batch bake that delivers big satisfaction. They’re quick to mix, forgiving in technique, and finish with a bright pop of fruit in each bite. If you want a cookie that’s simple, slightly rustic, and perfect for gifting or a tea break, this is it.
There’s no rolling or chilling required—just a single bowl, a spoon and your thumbs. The texture is chewy from peanut butter and desiccated coconut, the centers jewel-like with fresh raspberries. You’ll be surprised how little effort yields a bakery-style result.
I’ve written this recipe for home bakers who like clear, practical steps and a few smart options for adapting the cookies to what’s in the pantry. Read the instructions once, follow the eight short steps and you’ll have 20 even, reliably baked cookies.
The Ingredient Lineup
Ingredients
- 270 g peanut butter (1 cup) — provides the base fat, structure and peanut flavor; smooth or crunchy will both work but smooth yields a cleaner surface.
- 75 g sugar (one third cup) — sweetens and helps with slight caramelization at the edges for color and texture.
- 60 g desiccated coconut (two third cup) — adds chew, extra texture and absorbs a bit of moisture so the cookies hold their shape.
- 1 egg — binds the mixture and gives lift; it’s the primary liquid in this dough.
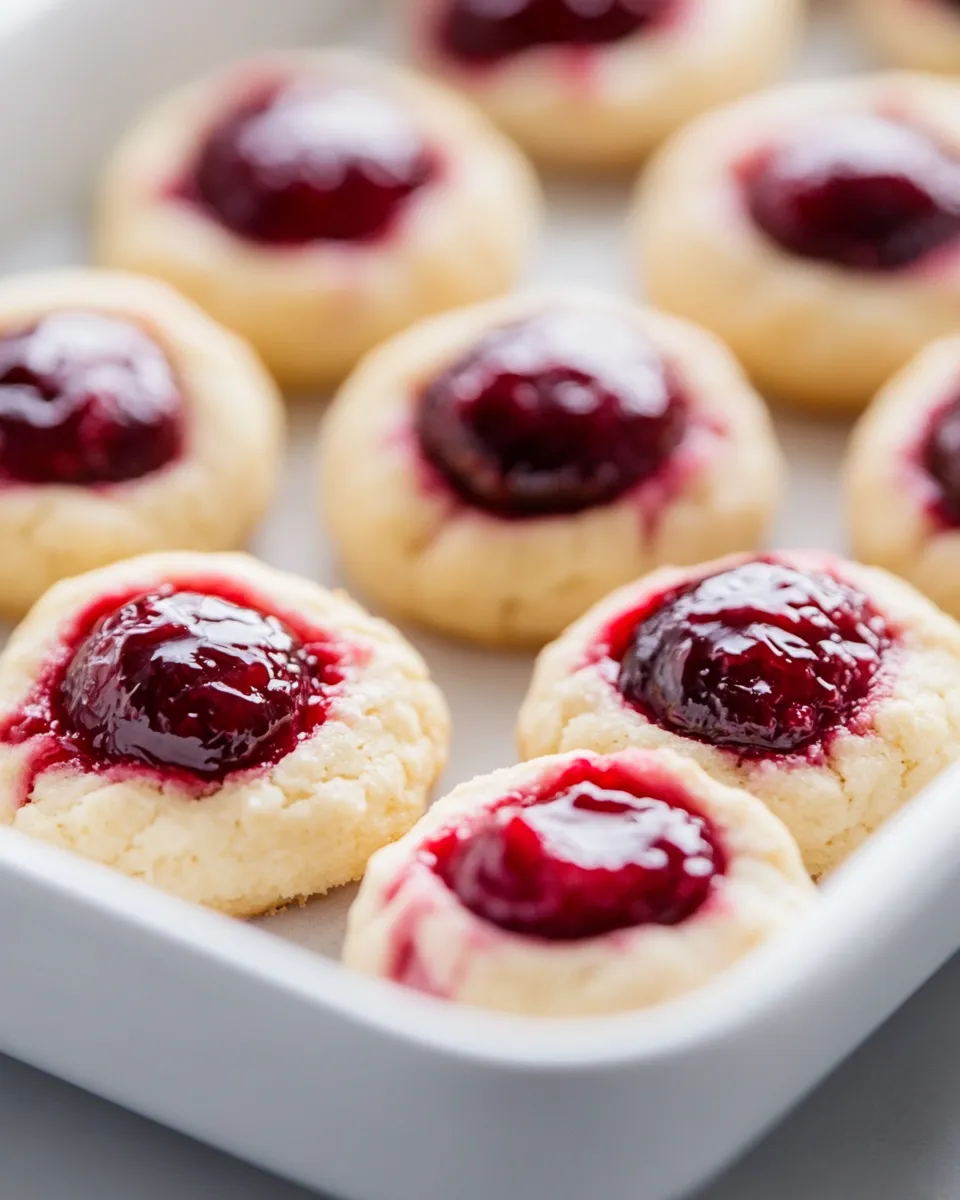
- 20 raspberries — one per cookie; they’re pressed into wells after shaping to give fresh fruit brightness and a beautiful finish.
Make Raspberry Thumbprint Cookies: A Simple Method
- Preheat the oven to 180°C. Line a baking tray with baking paper.
- In a mixing bowl, combine 270 g peanut butter, 75 g sugar, 60 g desiccated coconut, and 1 egg. Stir until the mixture is evenly combined and sticky.
- Use a teaspoon to portion the mixture into 20 equal scoops. If the mixture sticks to your hands, wet your hands slightly. Roll each scoop gently into a ball.
- Place the 20 balls on the prepared tray, spacing them so they will not touch while baking.
- Press down the center of each ball with your thumb (or the back of a teaspoon) to make a shallow well.
- Gently press one raspberry into the well of each cookie using the 20 raspberries.
- Bake at 180°C for 12–15 minutes. Check at 12 minutes; the cookies are done when the edges are set and the bottoms are lightly golden.
- Remove the tray from the oven and let the cookies cool on the tray for about 5 minutes, then transfer them to a wire rack to cool completely.
Why Raspberry Thumbprint Cookies is Worth Your Time
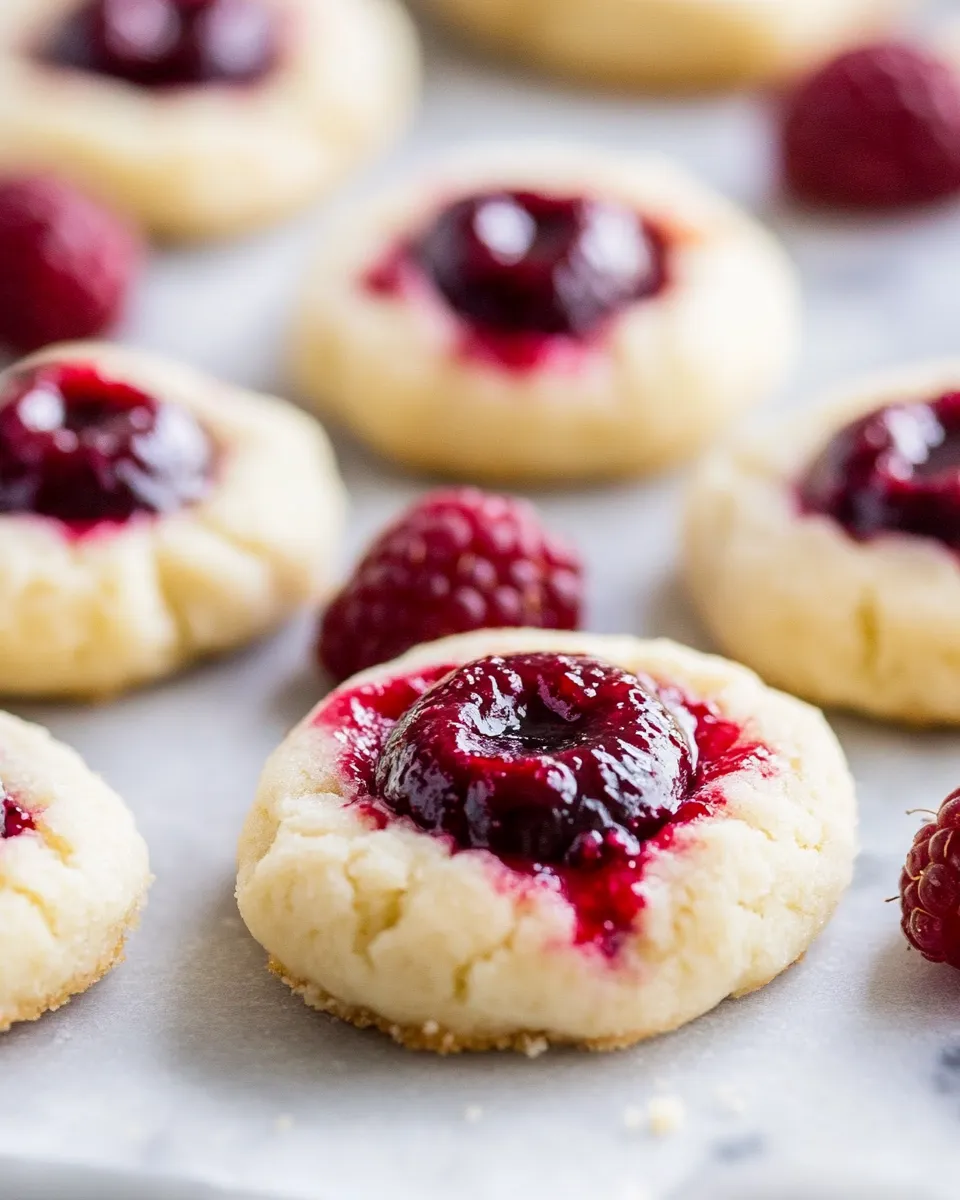
These cookies hit a satisfying balance of flavor and ease. Peanut butter gives a nutty richness that’s more than enough on its own; the coconut keeps them from turning too dense and adds chew. Fresh raspberries finish the cookie with acidity and a burst of freshness that makes each bite interesting.
They’re also fast. From start to finish you can have a tray of 20 cookies in roughly 30–40 minutes, which is excellent for last-minute cookie needs or an afternoon bake with kids. The straightforward technique makes them approachable even if you don’t bake often.
They travel and store well, which makes them ideal for care packages, lunches, or a small holiday platter. And because each cookie is individually topped with a raspberry, they look attractive without any fancy decoration.
Substitutions by Category
Nut butter and texture
If peanut butter is the target flavor, stick with it. For a milder or different nut profile, you can substitute another nut butter (almond, cashew) — note that texture and flavor will shift. I recommend using a spreadable, jar-style nut butter for the strongest success.
Sweeteners
The recipe calls for granulated sugar. You can try a granulated alternative (like coconut sugar) for a deeper flavor, but expect a color and flavor change. Do not change the stated amount unless you are comfortable adjusting sweetness by taste.
Coconut and dry mix-ins
Desiccated coconut contributes chew and structure. If you need to avoid coconut entirely, you can skip it and the dough will be looser; handle gently and expect slightly flatter cookies. If you keep the coconut, shredded vs desiccated will give a different mouthfeel—desiccated is drier and better for structure.
Fruit
Fresh raspberries are specified for bright acidity and visual appeal. If raspberries aren’t available, similarly sized berries (small strawberries halved, blueberries) will change the presentation and moisture. Work in small batches to avoid soggy wells if the fruit is very juicy.
Setup & Equipment
- Baking tray — a rimmed sheet that allows the cookies to sit flat without sliding off.
- Baking paper — prevents sticking and makes cleanup fast.
- Mixing bowl — large enough to stir all ingredients without spilling.
- Spoon and teaspoon — for portioning; a teaspoon is used for the scoops and a spoon for stirring.
- Optional: damp towel — keep nearby to wet fingertips if the dough sticks while rolling.
- Wire rack — for cooling so bottoms don’t trap steam and go soggy.
- Oven — set to 180°C; an oven thermometer helps if your oven runs hot or cold.
Pitfalls & How to Prevent Them
Sticky dough: The mix is intentionally sticky. If it clings to your fingers, dampen them slightly with water. Working with a teaspoon-sized scoop keeps portions even and handling minimal.
Raspberries sinking or breaking: Gently press fruit into the shallow well rather than pushing hard. If the raspberries are overripe and very soft, they can lose shape during baking. Choose berries that are ripe but still firm.
Cookies spreading too much: If your dough feels unusually loose, double-check you used desiccated (dry) coconut. Freshly shredded coconut has more moisture. If you omitted coconut or used a very runny nut butter, refrigerate the scooped balls for 10–15 minutes before pressing wells and baking to minimize spread.
Underdone centers: The cookies are done when edges are set and bottoms are lightly golden. If you remove them too early they may feel soft in the middle; allow the 5-minute rest on the tray to finish cooking gently before transferring to the rack.
Fit It to Your Goals
Want fewer cookies? Reduce the size of your scoops rather than changing ingredient amounts; you’ll get more than 20 if you make smaller portions. Want more? Double the recipe and bake on two trays, rotating position halfway through the baking time for even color.
If you’re baking for a crowd and want to plate attractively, arrange the cookies on a parchment-lined board with small sprigs of mint or a dusting of icing sugar just before serving. For lunchboxes, pack them in a single layer with a piece of parchment between layers to protect the raspberries.
Need to make them gluten-free or allergy-friendly? The recipe is naturally gluten-free as written (check labels on desiccated coconut and peanut butter to ensure there’s no cross-contamination). To remove peanuts, substitute another nut butter and note that flavor will change.
Chef’s Rationale
Every ingredient has a role. The peanut butter supplies fat and prominent flavor while binding the dough. Sugar provides structure through caramelization and keeps the cookies from tasting flat. Desiccated coconut soaks up moisture from the peanut butter and egg, creating a balance—without it the cookies can spread and become too cakey.
The egg is the binder and gives the cookie just enough lift so the texture isn’t dense. Pressing a thumbprint creates a shallow well that cradles the raspberry. The short bake time sets the edges while keeping the interior chewy; the initial 5-minute rest on the tray lets residual heat finish the cook without overbrowning the fruit.
Using fresh raspberries instead of jam preserves the fruit’s bright, fresh acidity and delivers a cleaner look. The limited number of components keeps the technique accessible and the flavors focused.
Save for Later: Storage Tips
Room temperature: Store cooled cookies in an airtight container for up to 2 days to preserve the raspberries’ texture. Place a sheet of parchment between layers if stacking.
Refrigeration: If you prefer chewier fruit or need to keep them longer because of the fresh raspberries, refrigerate in an airtight container for up to 4 days. Bring to room temperature before serving for best flavor.
Freezing: Freeze baked, fully cooled cookies on a tray until solid, then transfer to a freezer-safe container or bag for up to 2 months. Thaw in the refrigerator or at room temperature. Note that freeze-thaw can change the texture of fresh raspberries; they may be softer after thawing.
Common Questions
- Can I substitute jam for fresh raspberries? — Yes. Jam will give a sticky, more uniform filling and is less likely to leak; it will change the look and moisture of the well.
- What if my dough is too crumbly? — Check your peanut butter; drier, powdered-style nut butters can cause dryness. A small splash of water or a lightly beaten egg white can help bind, but follow the recipe first and only adjust sparingly.
- Can I make these ahead? — Scoop and shape the balls, then freeze them on a tray. Transfer frozen balls to a bag. When ready, place on the baking tray from frozen, press wells, add raspberries and bake—add a couple of extra minutes to the bake time.
- Why are my cookies flat? — Likely causes are overly wet nut butter, omitted coconut, or the dough being too warm. Chill briefly before baking to reduce spread.
In Closing
Raspberry Thumbprint Cookies are a dependable, quick bake with a rewarding finish. They’re practical for weeknight baking, easy to scale and forgiving of small technique slips. Follow the simple sequence—mix, portion, press, top and bake—and you’ll have a tray of attractive, flavorful cookies that taste like a little celebration in every bite.
If you try them, notice how the toasted edges and chewy interior contrast with the fresh raspberry. Small changes—different nut butter, alternate fruit—make this a versatile formula that’s worth returning to whenever you want an easy, homemade treat.
Raspberry Thumbprint Cookies
Ingredients
Equipment
Method
- Preheat the oven to 180°C. Line a baking tray with baking paper.
- In a mixing bowl, combine 270 g peanut butter, 75 g sugar, 60 g desiccated coconut, and 1 egg. Stir until the mixture is evenly combined and sticky.
- Use a teaspoon to portion the mixture into 20 equal scoops. If the mixture sticks to your hands, wet your hands slightly. Roll each scoop gently into a ball.
- Place the 20 balls on the prepared tray, spacing them so they will not touch while baking.
- Press down the center of each ball with your thumb (or the back of a teaspoon) to make a shallow well.
- Gently press one raspberry into the well of each cookie using the 20 raspberries.
- Bake at 180°C for 12–15 minutes. Check at 12 minutes; the cookies are done when the edges are set and the bottoms are lightly golden.
- Remove the tray from the oven and let the cookies cool on the tray for about 5 minutes, then transfer them to a wire rack to cool completely.
Notes
In this recipe, I use desiccated coconut to keep the sugar content lower than traditional cookies. When you are baking with sugar it provides two things; sweetness and texture. Desiccated coconut provides the same texture as granulated sugar.
These cookies store in an airtight container for 3 days, or they can be frozen for up to 4 months.
Peanut butter:You can use either crunchy or smooth peanut butter in this recipe. You can substitute the peanut butter for another nut butter to make a peanut-free version.
Desiccated coconut:You can substitute the desiccated coconut for ground almond.
Raspberries: Fresh or frozen raspberries can be used. You can also substitute the raspberries for a small spoonful of your favourite jam or a chocolate button.