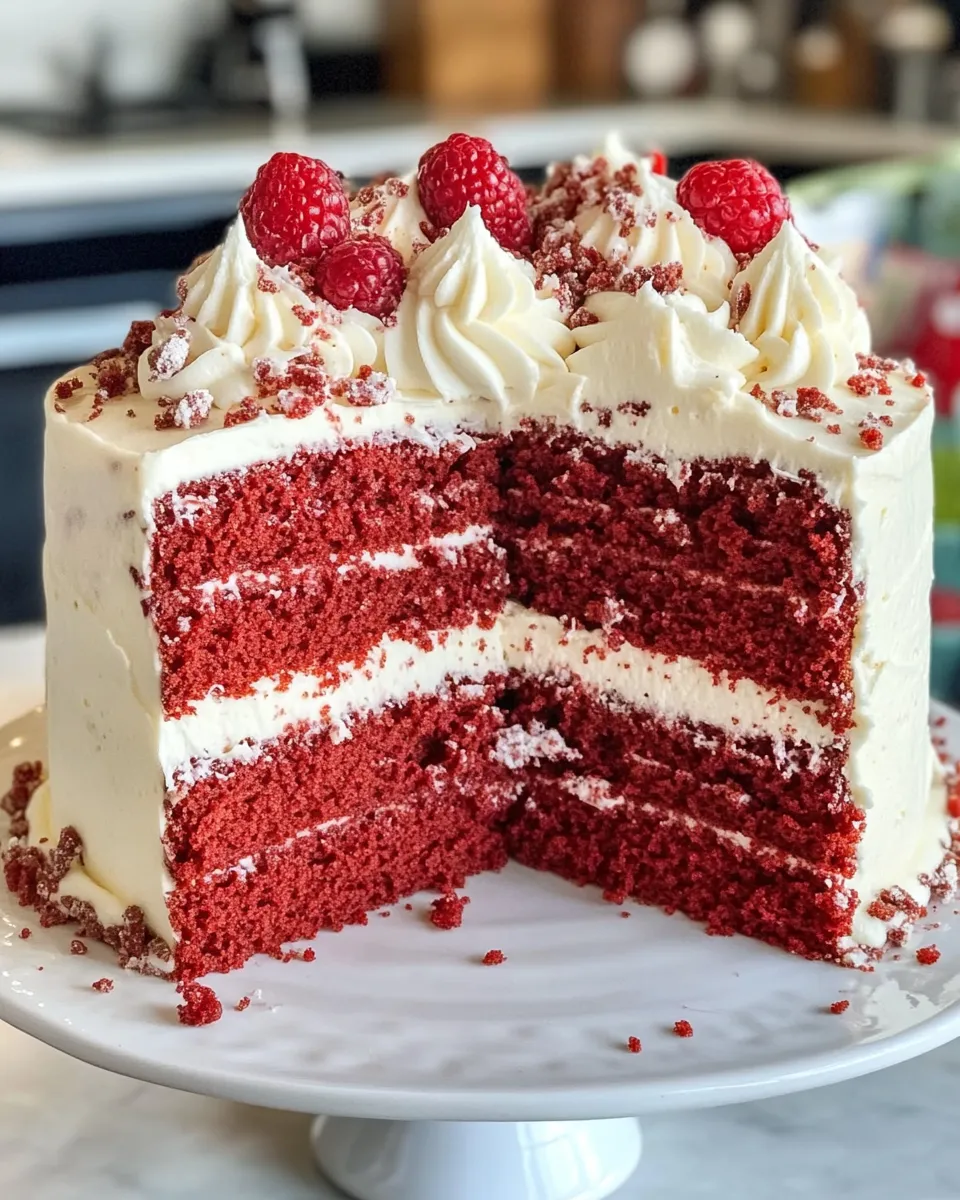
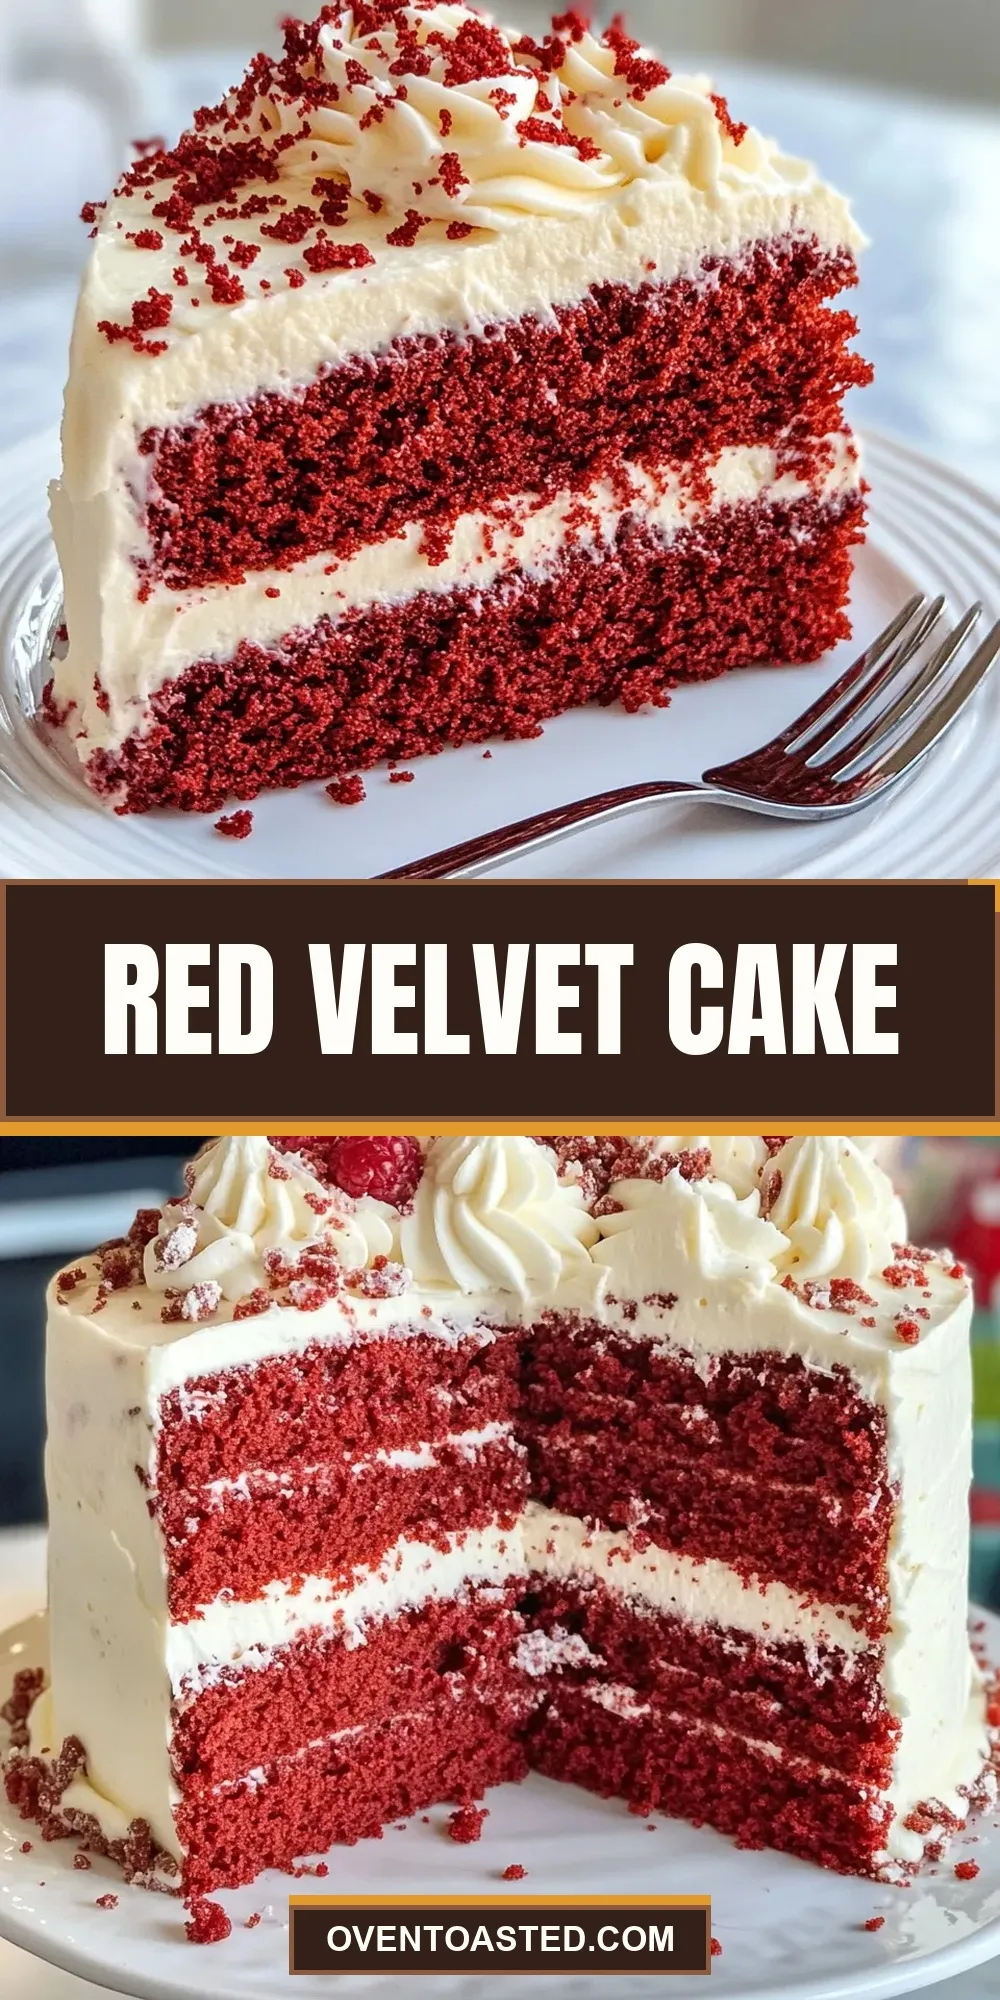
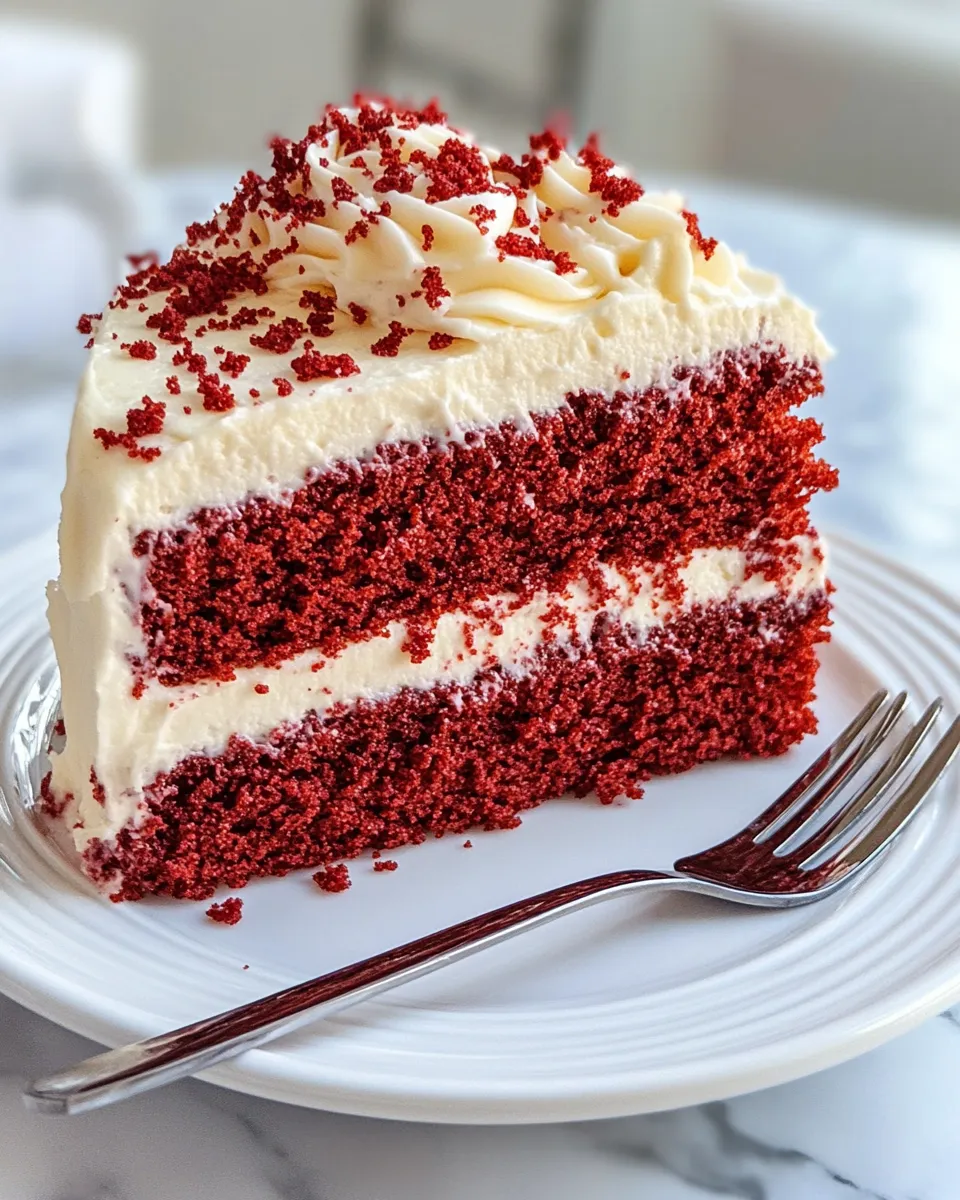
Red Velvet Cake
This red velvet cake is my go-to when I want something classic, reliable, and a little bit showy without the fuss. The crumb is tender, the color is unmistakable, and the cream cheese frosting balances the cake’s subtle cocoa notes with tang and cream. I bake this for birthdays, small dinner parties, and the times I want a dessert that feels both comforting and special.
I’ll walk you through the exact ingredients and step-by-step method I use so you can reproduce the same results at home. I focus on small tricks that make a big difference—how to avoid a sunken center, how to get even layers, and what to do when you need the cake to look polished fast.
Read through the ingredients and the method before you start. Gather tools and plan the cooling time so you’re not left frosting warm layers. Keep a serrated knife and an offset spatula within reach; they’ll change your life when leveling and assembling the cake.
What You’ll Gather
Ingredients
- 2 cups (400 g) granulated sugar — sweetens the cake and contributes to moistness; measure by spooning into the cup and leveling.
- 3 cups (372 g) all-purpose flour — provides the cake’s structure; sift or whisk to remove lumps for a smoother batter.
- 2 tablespoons (10 g) unsweetened cocoa powder — adds the classic red velvet hint of chocolate without overpowering the cake.
- ¾ teaspoon salt — enhances flavor and balances sweetness; don’t skip it.
- 1 ½ teaspoons baking soda — the leavening that creates lift and a fine crumb; ensure it’s fresh for best rise.
- ¾ cup (177 ml) vegetable oil — keeps the crumb tender and moist; room temperature oil blends evenly.
- 1 ½ cups (355 ml) buttermilk — acid in the buttermilk reacts with baking soda for lift and adds tang; shake well before measuring.
- 3 large eggs — binders that add structure and richness; room temperature eggs incorporate better.
- 1 teaspoon vanilla extract — deepens flavor in the cake; split this use between batter and frosting if desired.
- 1 tablespoon white vinegar — enhances the cake’s tender texture and reacts with baking soda for lift.
- 1 tablespoon red food coloring — gives the cake its signature color; stir in until evenly distributed.
- 16 ounces (454 g) cream cheese, softened — the base of the frosting; soften to room temperature for smooth whipping.
- 1 cup (226 g) unsalted butter, softened — provides richness and spreadability in the frosting; make sure it’s soft but not melted.
- 5 cups (600 g) powdered sugar — sweetens and firms the frosting; sift it if you want an extra-silky finish.
- 2 teaspoons vanilla extract — added to the frosting for aromatic depth and balance.
Step-by-Step: Red Velvet Cake
- Preheat oven to 350°F. Grease and flour two 9×2-inch cake pans or three 8×2-inch cake pans.
- In a large bowl, whisk together 2 cups (400 g) granulated sugar, 3 cups (372 g) all-purpose flour, 2 tablespoons (10 g) unsweetened cocoa powder, ¾ teaspoon salt, and 1½ teaspoons baking soda until evenly combined.
- In a medium bowl or large measuring cup, whisk ¾ cup (177 ml) vegetable oil, 1½ cups (355 ml) buttermilk, 3 large eggs, 1 teaspoon vanilla extract, and 1 tablespoon white vinegar until smooth.
- Pour the wet ingredients into the dry ingredients and whisk until the batter is smooth and uniform.
- Whisk in 1 tablespoon red food coloring until the color is even throughout the batter.
- Divide the batter evenly among the prepared pans. Smooth the tops and gently tap the pans on the counter to release large air bubbles.
- Bake until a toothpick inserted into the center comes out clean or with a few moist crumbs, about 30–35 minutes. If using multiple pans, you may rotate them halfway through baking for even browning.
- Let the cakes cool in the pans for 10–15 minutes. Run a knife around the edges, invert the cakes onto wire racks, remove the pans, and cool the cakes completely before frosting.
- To make the frosting, place 16 ounces (454 g) softened cream cheese and 1 cup (226 g) softened unsalted butter in the bowl of a stand mixer or a large mixing bowl if using a hand mixer. Beat on medium speed until light and fluffy.
- With the mixer on low, gradually add 5 cups (600 g) powdered sugar until incorporated, then increase speed and beat until the frosting is smooth.
- Add 2 teaspoons vanilla extract to the frosting and mix until combined and smooth.
- If the cooled cake layers have domed tops, level them with a serrated knife. Reserve any trimmed cake tops for crumbs if you want to use them as decoration.
- Place one cake layer on your cake plate or serving platter. Spread a layer of frosting over the top. Add the next cake layer and repeat if using three layers.
- Use the remaining frosting to cover the top and sides of the cake. Decorate the top with reserved crumbs if desired.
- Store the finished cake loosely covered in the refrigerator.
Why Cooks Rave About It
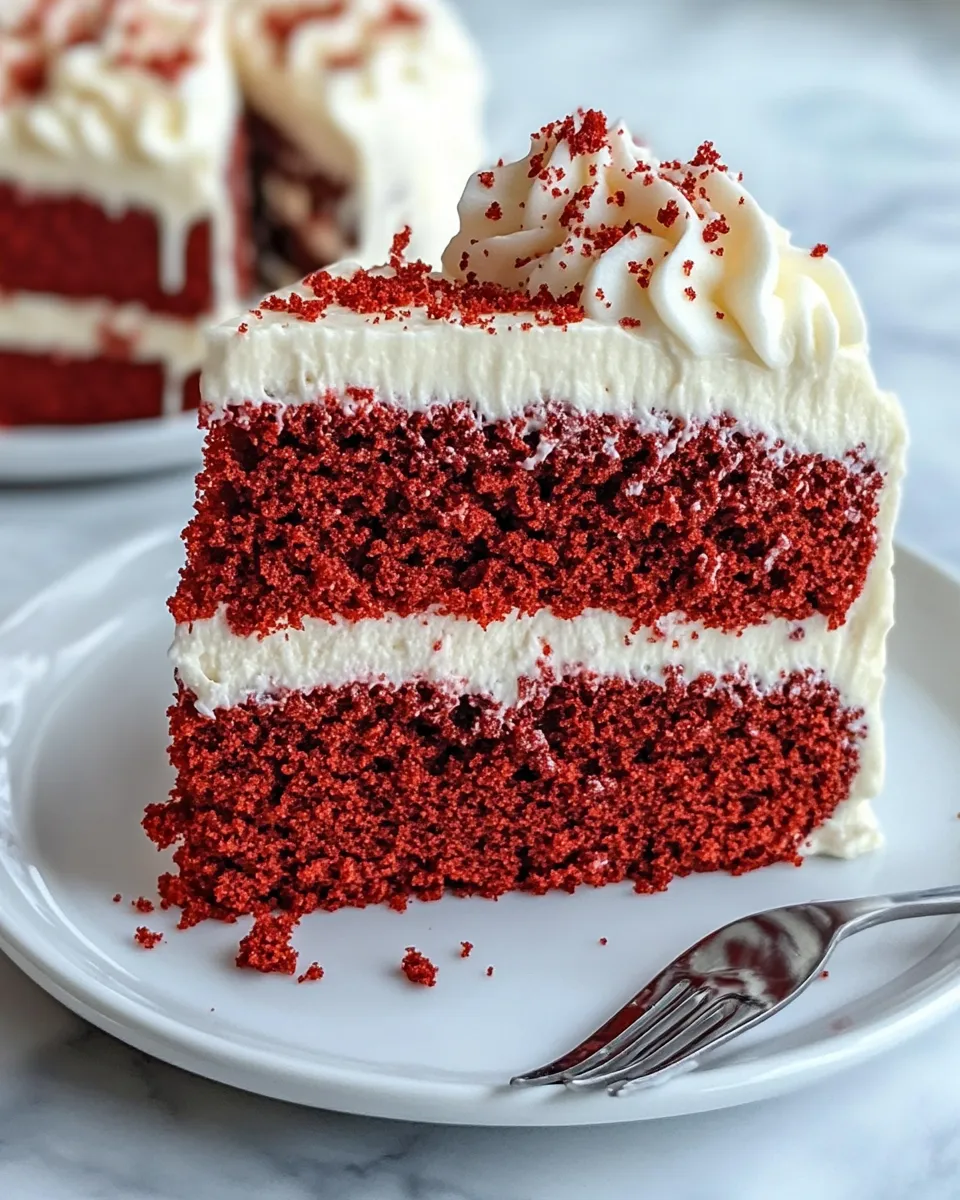
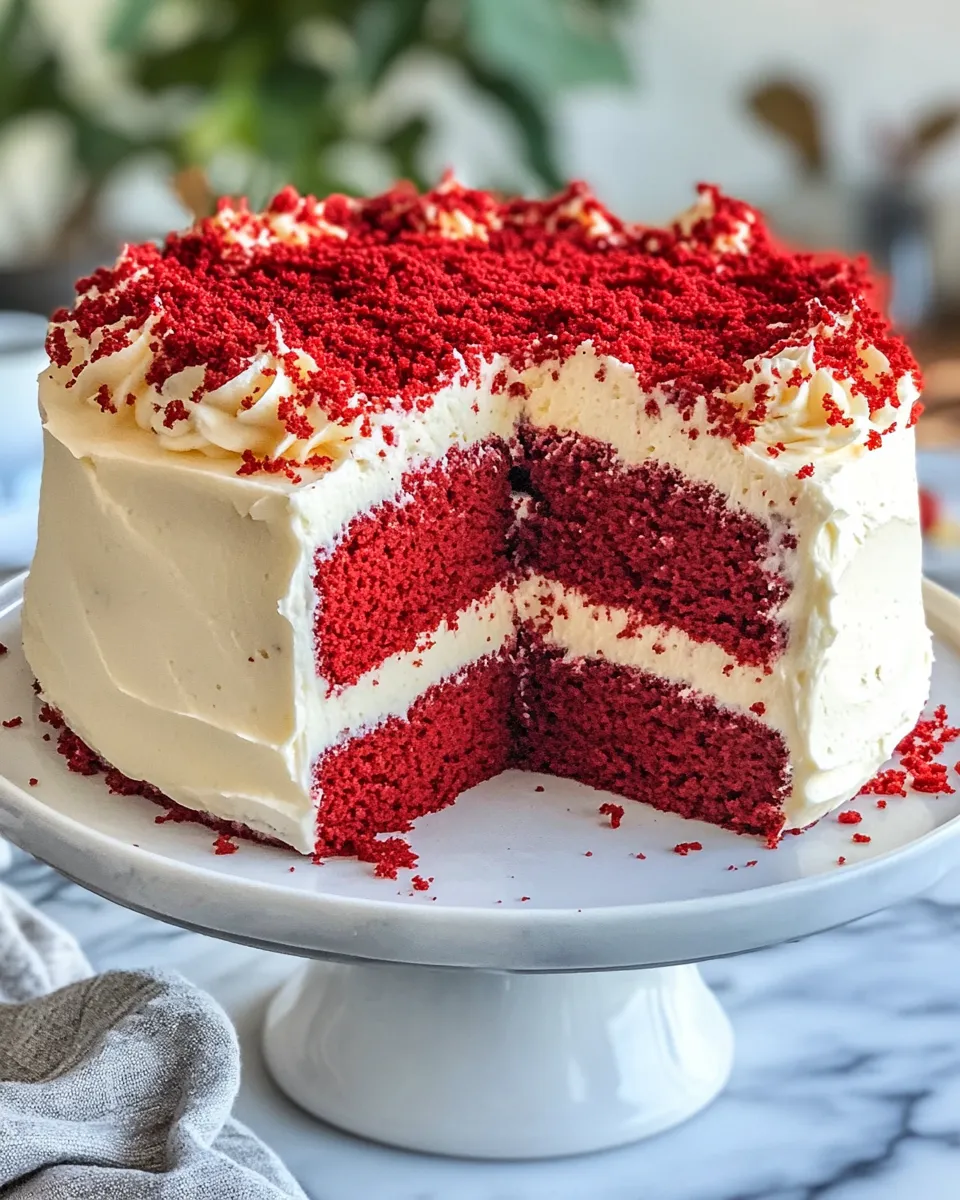
Red Velvet Cake hits a sweet spot: it isn’t aggressively chocolatey, but it has enough cocoa to deepen the flavor. The buttermilk and vinegar work together with baking soda to produce a soft, fine crumb that stays moist for days when stored properly. The cream cheese frosting adds a tang that cuts the cake’s sweetness, creating a balanced bite.
It also photographs well. That vivid red interior framed by pale frosting looks elegant with minimal effort. For many, there’s nostalgia attached—this cake shows up at celebrations, and it reliably signals “party.” But beyond looks and tradition, the real reason cooks recommend this recipe is consistency: the technique is straightforward and forgiving when you follow the steps and let the layers cool before frosting.
Low-Carb/Keto Alternatives
If you want to reduce carbs, think in swaps rather than exact conversions. Replace the all-purpose flour with a thoughtfully designed low-carb blend intended for cakes, and choose a powdered sweetener formulated for frosting to preserve texture. Use full-fat dairy for better mouthfeel in both cake and frosting.
For color, opt for natural, concentrated color products or a small amount of freeze-dried beet powder (used sparingly) to avoid added sugars. Keep in mind that leavening and moisture behavior change with different flours, so expect to adjust bake times and to test with a toothpick. Because quantities and outcomes vary widely with keto ingredients, start with small test cakes before scaling up for an event.
Prep & Cook Tools
- Two 9×2-inch or three 8×2-inch cake pans — choose the sizes listed in the recipe for correct layer thickness.
- Wire racks — essential for cooling the layers completely before frosting.
- Stand mixer or hand mixer — speeds up frosting and helps achieve a smooth texture.
- Large mixing bowls and a medium bowl or measuring cup — for dry and wet components.
- Serrated knife or cake leveler — for trimming domed tops so layers stack cleanly.
- Offset spatula — makes frosting sides and tops neat and even.
- Rubber spatula and whisk — for scraping bowls and smoothing batter.
- Toothpicks — for checking doneness.
Troubles You Can Avoid
Dense or Soggy Center
Make sure your baking soda is fresh. Also, don’t open the oven in the first 20 minutes—temperature drops can cause uneven rise. If your pans are too deep or you overfill them, the middle can stay underbaked; use the pan sizes listed for predictable results.
Crumbly Frosting or Lumpy Texture
Soften the cream cheese and butter to room temperature. If one is cold and the other soft, the mixture will seize or look curdled. Beat on medium speed until light, add the powdered sugar slowly, and scrape the bowl so everything incorporates evenly.
Sagging Layers After Assembly
Cool the layers completely—this is non-negotiable. Warm cake will melt your frosting. If you need a faster route, chill the layers for 20–30 minutes before frosting to firm them up; this makes leveling and stacking much easier.
Fresh Takes Through the Year
Spring: Top the cake with fresh berries and a few edible flowers to add brightness against the red crumb. The acidity in berries pairs well with cream cheese frosting.
Summer: Serve thinner slices with a scoop of vanilla ice cream and a drizzle of warm berry compote. The cold creaminess contrasts with the cake’s tender crumb.
Fall: Add a dusting of finely chopped toasted pecans around the base for crunch and a hint of warmth. You can also fold a touch of cinnamon into the frosting for a seasonal twist (use sparingly so the classic profile remains).
Winter/Holidays: Keep it classic and dramatic—decorate the top with reserved cake crumbs, or use piped frosting rosettes. The red interior makes for a striking centerpiece on any holiday table.
Recipe Notes & Chef’s Commentary
I stick to vegetable oil in this recipe because it keeps the crumb reliably moist and tender across a wide range of ovens. Butter will add flavor but can change the texture—if you substitute butter, melt it and allow it to cool slightly before mixing with the wet ingredients.
Red food coloring is listed as a tablespoon here for a vivid look. If you prefer a subtler hue, reduce the amount slightly; if you want a natural approach, be prepared for a different shade and some flavor differences. Use gel or paste food coloring for a richer pigment with less liquid.
When making the frosting, if you find it too sweet, add a touch more cream cheese; if it’s too loose, add more sifted powdered sugar in small increments until you reach spreadable stiffness.
Storage & Reheat Guide
Store the finished cake loosely covered in the refrigerator, as directed in the method. The cream cheese frosting needs refrigeration; when chilled, the cake holds its shape and flavor for up to 4–5 days. If you want a firmer set on the frosting, chill the assembled cake for 30–60 minutes after crumb coating, then apply a final coat.
To serve, remove slices from the refrigerator about 20–30 minutes before eating so the frosting softens slightly and the cake’s flavors open up. Avoid microwaving frosted slices; instead, let them sit at room temperature briefly or serve with room-temperature accompaniments like ice cream.
Your Top Questions
Q: Can I make the layers ahead? A: Yes. Bake, cool completely, wrap each layer well in plastic wrap, and refrigerate for up to 24 hours or freeze for up to one month. Thaw in the refrigerator before leveling and frosting.
Q: Why is there vinegar in the batter? A: The vinegar reacts with the baking soda and buttermilk to help tenderize the crumb and contribute to the cake’s lift and subtle tang.
Q: My frosting is too thin—what now? A: Chill it briefly and then beat again. If it’s still thin, incorporate more sifted powdered sugar a little at a time until it firms up.
Bring It to the Table
Slice with a clean, warmed knife for perfect parts and a smooth finish on each piece. Keep a small plate of reserved crumbs or a bowl of fresh berries nearby for guests to garnish their portions. This cake looks as good on a casual weekday table as it does on a celebration platter—serve with confidence and a smile.
If you make this, take a quick photo and note what you’d change next time—less color, more frosting, or extra crumb decoration. Baking is iterative, and this recipe responds well to small, thoughtful tweaks. Enjoy the process and the cake.
Ingredients
Equipment
Method
- Preheat oven to 350°F. Grease and flour two 9×2-inch cake pans or three 8×2-inch cake pans.
- In a large bowl, whisk together 2 cups (400 g) granulated sugar, 3 cups (372 g) all-purpose flour, 2 tablespoons (10 g) unsweetened cocoa powder, ¾ teaspoon salt, and 1½ teaspoons baking soda until evenly combined.
- In a medium bowl or large measuring cup, whisk ¾ cup (177 ml) vegetable oil, 1½ cups (355 ml) buttermilk, 3 large eggs, 1 teaspoon vanilla extract, and 1 tablespoon white vinegar until smooth.
- Pour the wet ingredients into the dry ingredients and whisk until the batter is smooth and uniform.
- Whisk in 1 tablespoon red food coloring until the color is even throughout the batter.
- Divide the batter evenly among the prepared pans. Smooth the tops and gently tap the pans on the counter to release large air bubbles.
- Bake until a toothpick inserted into the center comes out clean or with a few moist crumbs, about 30–35 minutes. If using multiple pans, you may rotate them halfway through baking for even browning.
- Let the cakes cool in the pans for 10–15 minutes. Run a knife around the edges, invert the cakes onto wire racks, remove the pans, and cool the cakes completely before frosting.
- To make the frosting, place 16 ounces (454 g) softened cream cheese and 1 cup (226 g) softened unsalted butter in the bowl of a stand mixer or a large mixing bowl if using a hand mixer. Beat on medium speed until light and fluffy.
- With the mixer on low, gradually add 5 cups (600 g) powdered sugar until incorporated, then increase speed and beat until the frosting is smooth.
- Add 2 teaspoons vanilla extract to the frosting and mix until combined and smooth.
- If the cooled cake layers have domed tops, level them with a serrated knife. Reserve any trimmed cake tops for crumbs if you want to use them as decoration.
- Place one cake layer on your cake plate or serving platter. Spread a layer of frosting over the top. Add the next cake layer and repeat if using three layers.
- Use the remaining frosting to cover the top and sides of the cake. Decorate the top with reserved crumbs if desired.
- Store the finished cake loosely covered in the refrigerator.
Notes
I prefer regular food coloring (not gel) for this cake, but either may be used. If using gel food coloring you will not need the full tablespoon.
Store cake loosely covered at room temp for up to 2 days or chilled for up to 3 days. You can freeze slices, or make ahead and chill/freeze cake layers well wrapped and frosting in an airtight container.