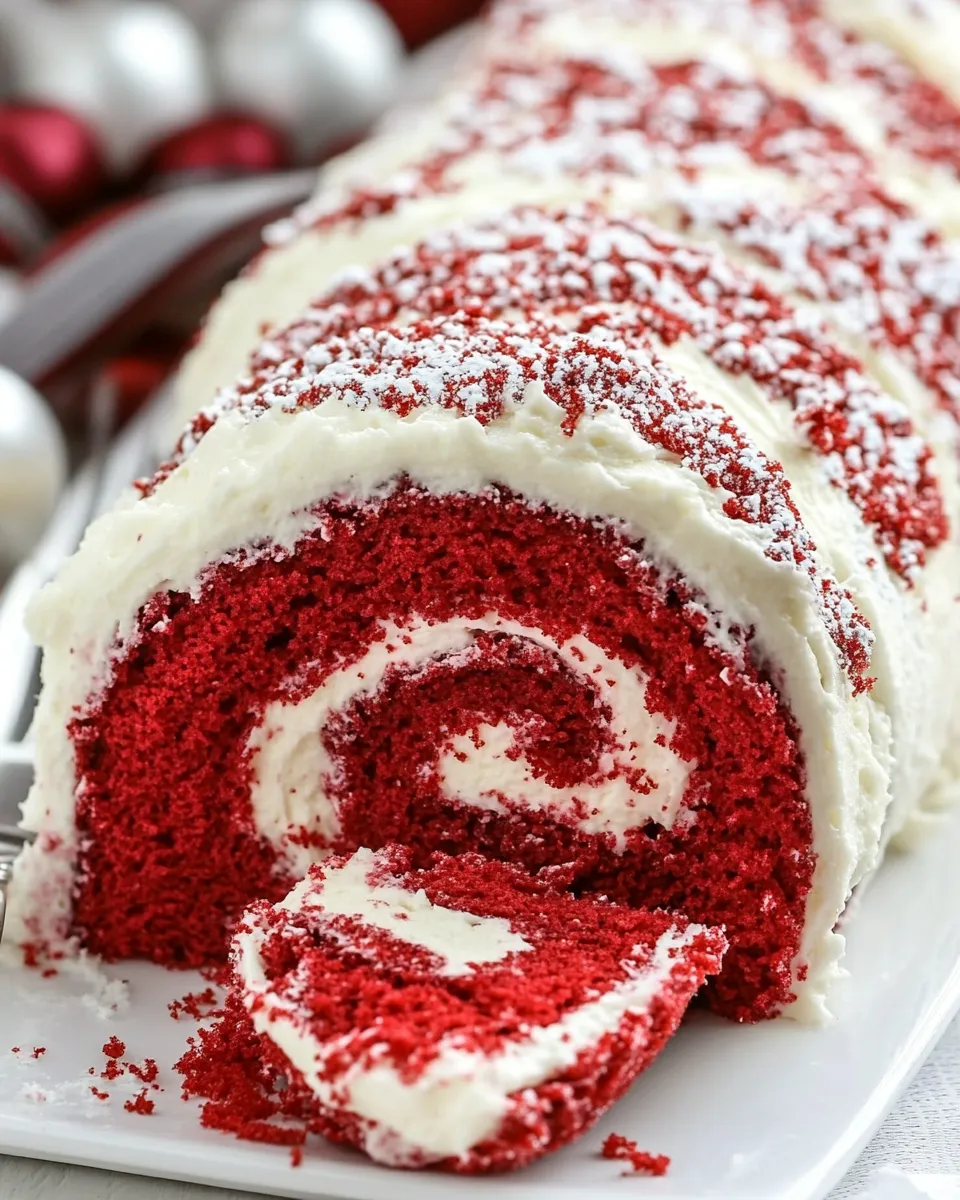
Red Velvet Cake Roll
I bake a lot, and this Red Velvet Cake Roll is one of those recipes I reach for when I want a showy dessert that’s not fussy. The sponge is light and quick to bake. The cream cheese filling is simple and reliably delicious. Together they make a roulade that slices beautifully and travels well.
What I like most about this cake roll is the rhythm of the work: whisking eggs until pale, a short bake, a careful roll, then a little patience while it chills. The technique gives consistent results once you know the small, critical bits—how to roll the hot cake, how cool it should be before filling, and how tightly to re-roll for clean slices.
Below you’ll find the exact ingredient list and step-by-step directions I always follow. I also include practical gear notes, troubleshooting tips, and storage guidance so you can make this at home with confidence.
What You’ll Need
Ingredients
- 3 large eggs — the structure and lift for the sponge; room temperature eggs whip more easily.
- ¾ cup (150 g) granulated sugar — sweetens and helps stabilize the whipped eggs.
- 1 tablespoon (15 ml) vegetable oil — adds moisture without changing flavor.
- 1 teaspoon baking powder — a little lift so the sponge stays light.
- ¼ teaspoon salt — balances sweetness and enhances flavor.
- 1 teaspoon vanilla extract — flavor base for both cake and filling.
- 1 tablespoon (5 g) unsweetened cocoa powder — the subtle cocoa note that makes it “red velvet.”
- ¾ cup (93 g) all-purpose flour — the body of the cake; measure by spooning into the cup and leveling or weigh for accuracy.
- 1 tablespoon (15 ml) red food coloring — gives the cake its signature color; mix evenly into the batter.
- Powdered sugar — to aid in rolling; dust the towel before inverting the hot cake.
- 4 ounces (113 g) cream cheese, room temperature — makes the filling tangy and smooth.
- ¼ cup (57 g) unsalted butter, room temperature — enriches the filling and smooths texture.
- 2 cups (226 g) powdered sugar — sweetens and firms the filling.
- 1 teaspoon vanilla — flavor lift for the filling.
From Start to Finish: Red Velvet Cake Roll
- Preheat oven to 350°F. Line a 10×15″ (or 10.5×15″) jelly-roll pan with foil and spray the foil with floured nonstick cooking spray.
- In a large bowl or the bowl of an electric mixer, place 3 large eggs. Beat at medium speed for 3–5 minutes, until foamy and pale yellow.
- Add 3/4 cup (150 g) granulated sugar and beat for 2 more minutes, until the mixture is slightly thickened.
- Add 1 tablespoon (15 ml) vegetable oil, 1 teaspoon baking powder, 1/4 teaspoon salt, 1 teaspoon vanilla extract, and 1 tablespoon (5 g) unsweetened cocoa powder. Mix to combine.
- Add 3/4 cup (93 g) all-purpose flour and mix slowly just until combined; do not overmix.
- Stir in 1 tablespoon (15 ml) red food coloring until the batter is evenly colored.
- Pour the batter into the prepared pan and spread it evenly with a spatula.
- Bake 10–15 minutes at 350°F, until the top is lightly browned and springs back when touched (mine took 12 minutes; ovens vary).
- While the cake bakes, lay a clean kitchen towel on the counter and sprinkle powdered sugar over the towel to coat it (powdered sugar is listed as “to aid in rolling”).
- When the cake is done, remove the pan from the oven using oven mitts. Immediately invert the pan onto the prepared towel so the cake transfers onto the towel with the foil facing up. Carefully remove the pan and peel off the foil (they will be hot).
- Starting at a short side, use the towel to roll the cake and towel together into a log. Let the rolled cake cool completely at room temperature (you may wrap it in plastic wrap and refrigerate overnight if desired).
- Make the filling: beat 4 ounces (113 g) cream cheese and 1/4 cup (57 g) unsalted butter (both at room temperature) until creamy. Gradually add 2 cups (226 g) powdered sugar, then 1 teaspoon vanilla, and beat until smooth.
- Once the cake is completely cool, carefully unroll the cake and remove the towel. Spread the filling evenly over the cake, leaving a small border around the edges.
- Re-roll the cake tightly (without the towel), using your hands or the towel to help keep it snug. Trim any uneven ends if desired.
- Wrap the rolled cake in plastic wrap and chill in the refrigerator for at least 1 hour before slicing.
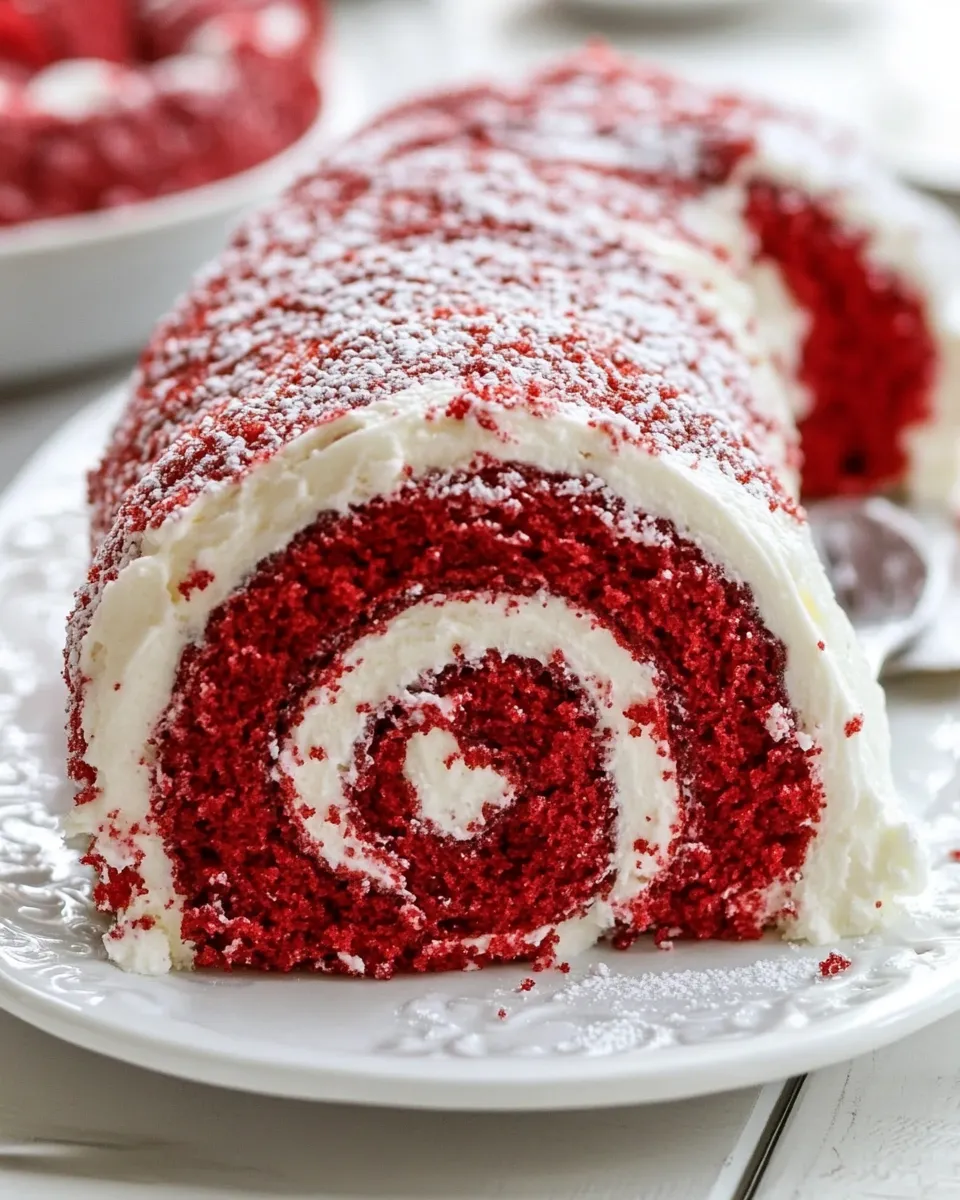
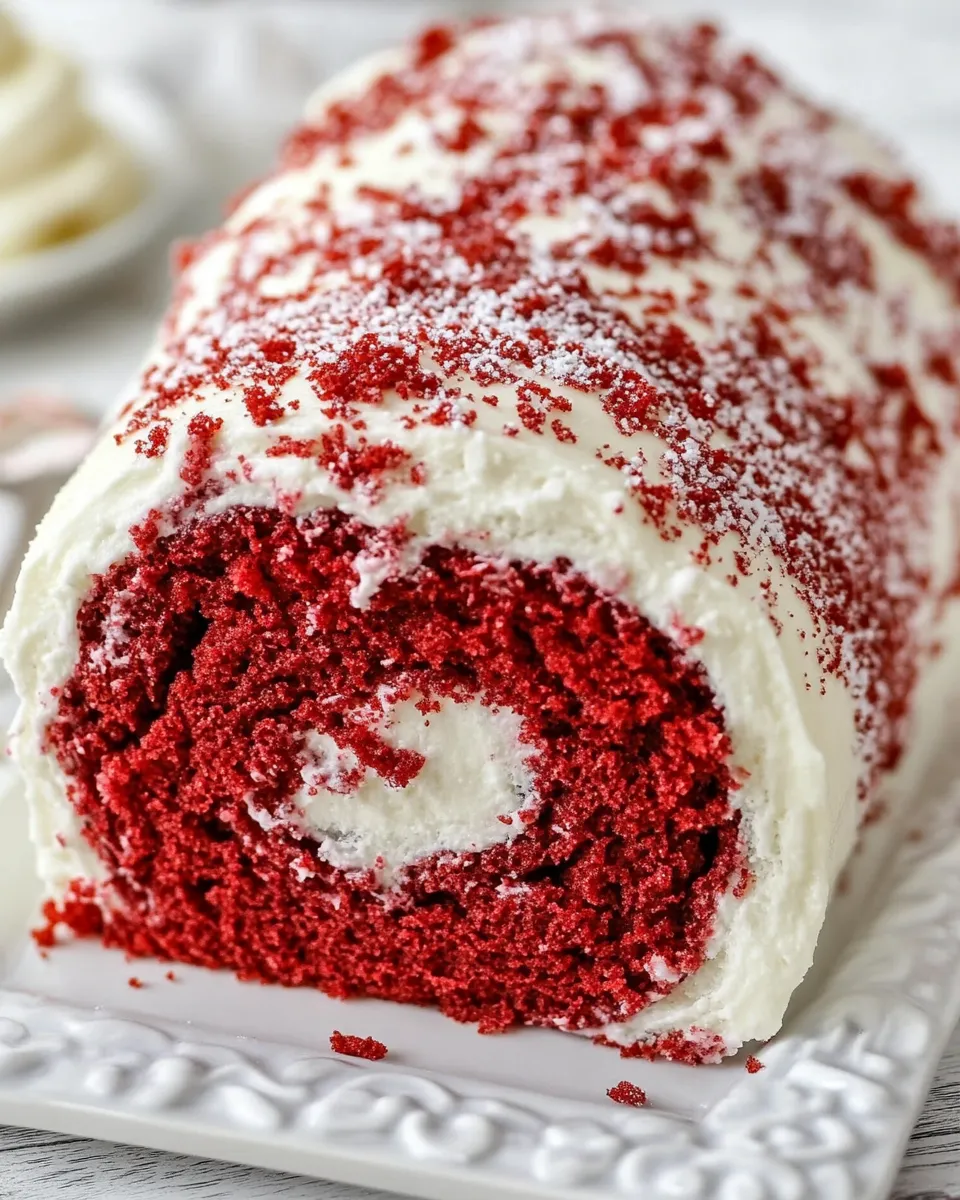
- Before serving, dust the top with powdered sugar.
What Makes This Recipe Special
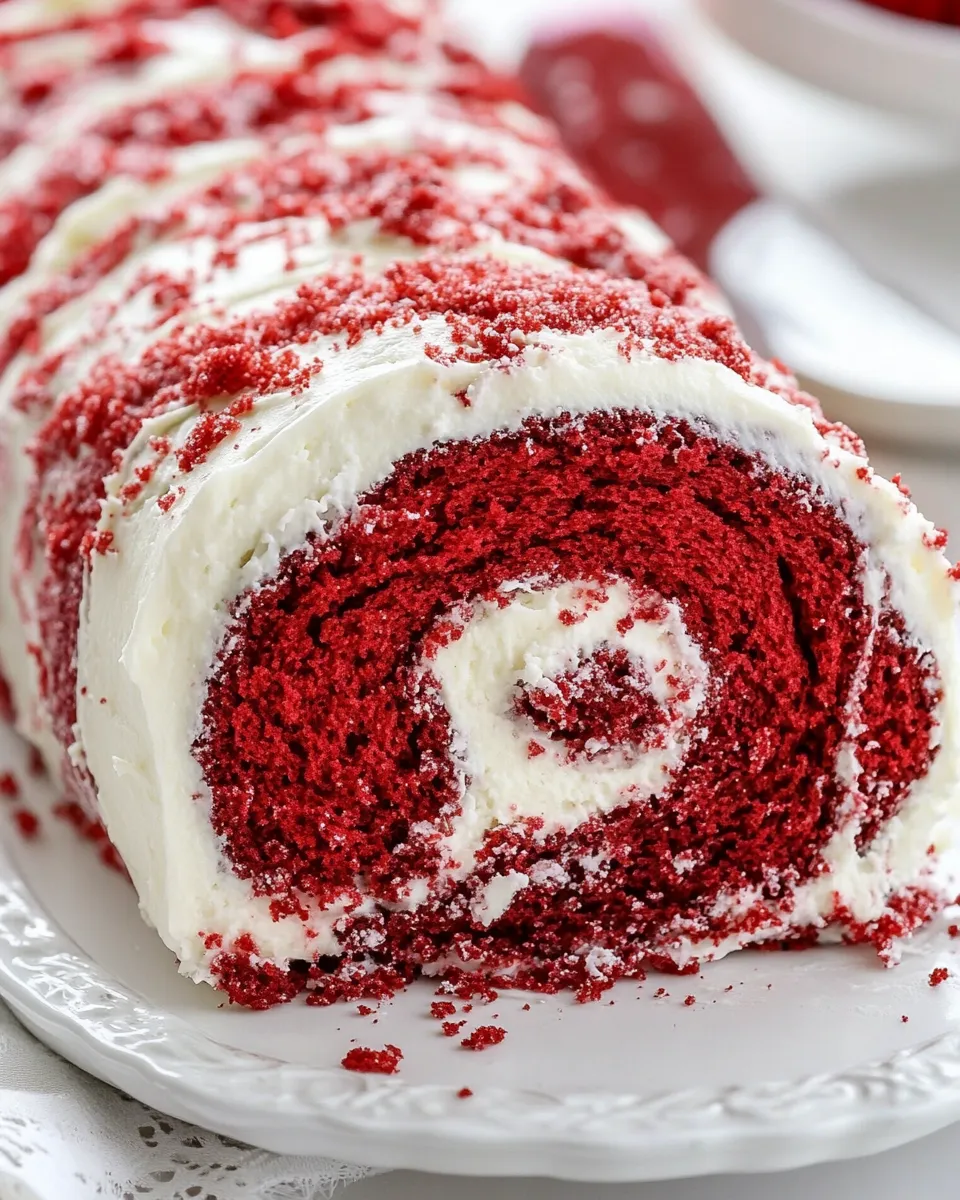
This roll balances a feathery sponge with a creamy, slightly tangy filling. It’s not a dense layer cake; it’s a sponge that’s deliberately tender so it can bend without cracking. The cocoa powder is minimal—just enough to give the cake that classic red-velvet hint without turning it into chocolate cake.
The shortcut of whipping eggs and using a modest amount of oil keeps the batter simple and steady. There’s also a technique element—rolling the hot cake into the towel. That step trains the sponge to remember the roll shape, making the final re-roll with filling neat and tidy. It’s a small step but it changes the whole result.
Healthier Substitutions
- Use a lighter cream cheese option if you want to reduce richness—this keeps the filling creamy but with fewer calories.
- Reduce the amount of powdered sugar in the filling slightly if you prefer less sweetness; taste as you go and stop when it suits you.
- Keep the baking oil but choose a neutral vegetable oil as listed; it’s already the lower-saturated-fat choice compared with solid fats.
Gear Up: What to Grab
- 10×15″ (or 10.5×15″) jelly-roll pan — the right size matters for even baking and correct roll shape.
- Foil and floured nonstick cooking spray — for easy release and quick transfer.
- Electric mixer or a very steady hand whisk — you need time and speed to whip the eggs to pale and foamy.
- Clean kitchen towel and a spatula — the towel is essential for rolling; the spatula spreads the batter and the filling.
- Plastic wrap for chilling — helps the roll hold its shape while the filling sets.
Watch Outs & How to Fix
- Overbaked sponge: If the cake cracks when you unroll it, it was likely overbaked. Next time shave a minute off and test at the earlier end of the bake window.
- Underwhipped eggs: If the batter seems flat, the eggs may not have been whipped long enough. Beat until pale and foamy; a minute or two makes a big difference.
- Filling too loose: If the filling is very soft, add a little more powdered sugar, a tablespoon at a time, until it holds shape. Chill before slicing to firm it up.
- Messy slices: Chill the wrapped roll at least an hour. Use a serrated knife and wipe it clean between cuts for tidy rounds.
Tailor It to Your Diet
Dietary adjustments are easier than they seem. For a lighter profile keep the sugar in the filling toward the lower end of what you find palatable. If you need gluten-free, swap the flour for a 1:1 gluten-free baking blend that you trust; results depend on the blend, so do a trial run first. The recipe is naturally free of nuts and eggs are central to the sponge, so keep that in mind for egg-free needs.
Recipe Notes & Chef’s Commentary
Timing is the trick. Once the cake comes out of the oven, you have a small window to invert and roll it while it’s hot. Do not skip coating the towel with powdered sugar—this prevents sticking and makes unrolling easier later.
When mixing the batter, fold the flour in gently. You want the batter combined, not taut. Overmixing deflates the aerated eggs and gives a denser result. Also, make sure the cream cheese and butter are truly at room temperature before making the filling. That keeps the texture smooth and prevents lumps.
Finally, don’t rush the chill. Slicing too soon will give you sloppy rounds. One hour is the minimum; if you can chill longer overnight, the slices will be cleaner and the flavors will marry better.
Keep It Fresh: Storage Guide
- Refrigerate: Wrap the cake roll tightly in plastic wrap and keep it in the fridge for up to 3–4 days. It’s best within 48 hours.
- Freeze: For longer storage, wrap tightly, place in a freezer bag or container, and freeze for up to 1 month. Thaw overnight in the refrigerator before slicing.
- Slicing tip after chilling: Use a sharp serrated knife. For clean, pretty slices dip the knife in hot water, wipe, and slice; repeat between cuts.
Red Velvet Cake Roll Q&A
Q: Can I make the sponge ahead of time?
A: Yes. You can bake and roll the sponge in its towel, then cool completely, wrap, and refrigerate overnight. Unroll, fill, and re-roll when ready to serve.
Q: My cake stuck to the foil. What happened?
A: Either the foil wasn’t sprayed/floured enough, or the cake needed a brief moment to loosen before inverting. Make sure the foil is well-sprayed, and when you invert, lift the pan carefully so the cake can release cleanly.
Q: The filling seemed grainy.
A: That usually means the powdered sugar wasn’t sifted or the cream cheese wasn’t properly softened. Beat until smooth and, if needed, press the powdered sugar through a sieve before adding.
The Takeaway
This Red Velvet Cake Roll is a practical centerpiece for dessert. It looks elegant but relies on straightforward technique: whip the eggs, bake briefly, roll while hot, and chill after filling. Once you nail the timing and texture, it becomes a reliable recipe for holidays, dinner parties, or a weekend treat.
Take your time with the roll and the chill. Those small pauses turn good results into great ones. And if you enjoy the process, you’ll find this is one you’ll make again and again.
Red Velvet Cake Roll
Ingredients
Equipment
Method
- Preheat oven to 350°F. Line a 10×15" (or 10.5×15") jelly-roll pan with foil and spray the foil with floured nonstick cooking spray.
- In a large bowl or the bowl of an electric mixer, place 3 large eggs. Beat at medium speed for 3–5 minutes, until foamy and pale yellow.
- Add 3/4 cup (150 g) granulated sugar and beat for 2 more minutes, until the mixture is slightly thickened.
- Add 1 tablespoon (15 ml) vegetable oil, 1 teaspoon baking powder, 1/4 teaspoon salt, 1 teaspoon vanilla extract, and 1 tablespoon (5 g) unsweetened cocoa powder. Mix to combine.
- Add 3/4 cup (93 g) all-purpose flour and mix slowly just until combined; do not overmix.
- Stir in 1 tablespoon (15 ml) red food coloring until the batter is evenly colored.
- Pour the batter into the prepared pan and spread it evenly with a spatula.
- Bake 10–15 minutes at 350°F, until the top is lightly browned and springs back when touched (mine took 12 minutes; ovens vary).
- While the cake bakes, lay a clean kitchen towel on the counter and sprinkle powdered sugar over the towel to coat it (powdered sugar is listed as “to aid in rolling”).
- When the cake is done, remove the pan from the oven using oven mitts. Immediately invert the pan onto the prepared towel so the cake transfers onto the towel with the foil facing up. Carefully remove the pan and peel off the foil (they will be hot).
- Starting at a short side, use the towel to roll the cake and towel together into a log. Let the rolled cake cool completely at room temperature (you may wrap it in plastic wrap and refrigerate overnight if desired).
- Make the filling: beat 4 ounces (113 g) cream cheese and 1/4 cup (57 g) unsalted butter (both at room temperature) until creamy. Gradually add 2 cups (226 g) powdered sugar, then 1 teaspoon vanilla, and beat until smooth.
- Once the cake is completely cool, carefully unroll the cake and remove the towel. Spread the filling evenly over the cake, leaving a small border around the edges.
- Re-roll the cake tightly (without the towel), using your hands or the towel to help keep it snug. Trim any uneven ends if desired.
- Wrap the rolled cake in plastic wrap and chill in the refrigerator for at least 1 hour before slicing.
- Before serving, dust the top with powdered sugar.
Notes
Roll it while it’s hot.
You can make the cake portion up to one day ahead, just wrap it (in the towel) in plastic wrap so it doesn’t get stale.
If the cake cracks, double the filling and frost the outside – no one will know.