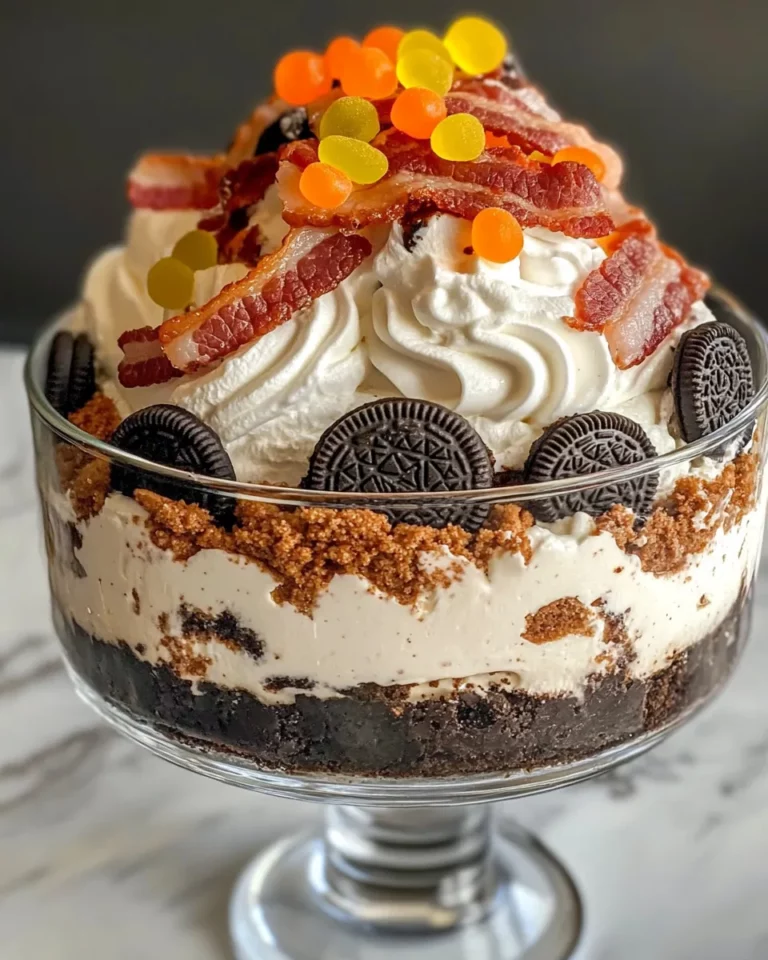
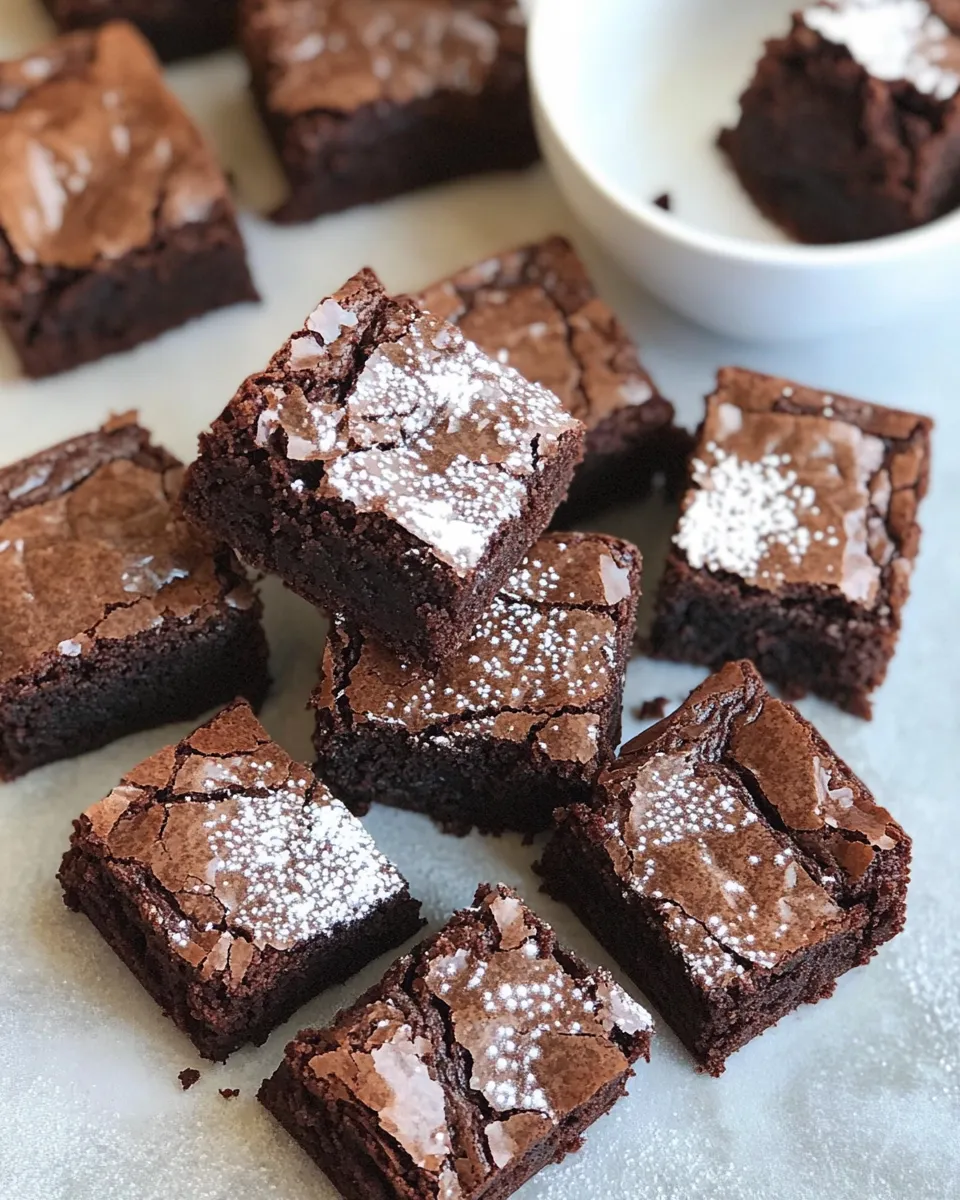
Rich Cocoa Brownies
These brownies are the version I make when I want something reliably chocolatey, dense, and not frilly. They land squarely between fudgy and cakey, with a glossy top and deep cocoa flavor thanks to alkalized cocoa and a generous amount of butter. If you like a brownie that reads like a serious chocolate statement, this is it.
I keep the method straightforward: melt some butter, whip eggs and sugar until pale and thick, fold in dry ingredients and chocolate chips, then bake until the center is set but still moist. The steps are forgiving, and the result is easy to slice into even squares that hold up on a plate.
The Ingredient Lineup
Ingredients
- ¾ cup all-purpose flour — provides structure; don’t over-measure to keep brownies tender.
- 1 cup unsweetened alkalized cocoa powder, “Dutch-process” — gives deep chocolate flavor and darker color; alkalized cocoa behaves differently than natural cocoa in some recipes.
- ¾ pound unsalted butter, cut into 1-inch pieces — richness and glossy top come from butter; cutting into pieces helps temperature control when melting.
- 1 teaspoon kosher salt — balances sweetness and enhances chocolate flavor; use measured kosher salt, not flaky finishing salt.
- 3 large eggs — eggs bind and give structure; beating them with sugar adds lift and a lighter crumb.
- 1-3/4 cups granulated sugar — sweetness and crust development; sugar also helps with that shiny, crackly top.
- ½ teaspoon vanilla extract — rounds flavors; a simple but effective note to lift the cocoa.
- 6 ounces semisweet chocolate chips* — pockets of melty chocolate inside; fold in at the end so they keep shape but soften during baking.
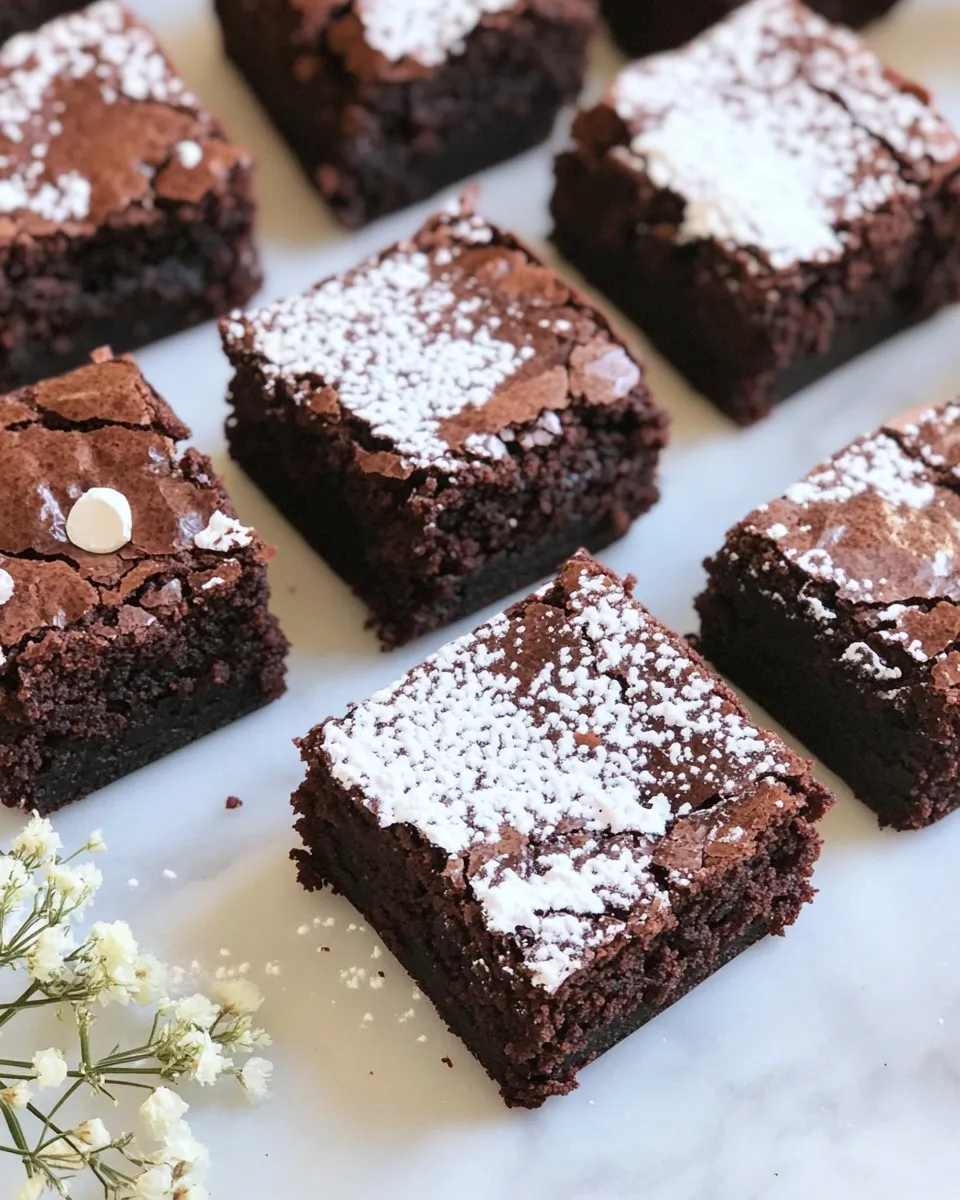
- Powdered sugar, for dusting — optional finishing touch; dust lightly just before serving for a pretty contrast.
Rich Cocoa Brownies: Step-by-Step Guide
- Preheat oven to 350°F (175°C). Position a rack in the center of the oven.
- Butter a 9-inch baking pan. Line the pan with a sheet of parchment paper so there is about a 2-inch overhang on two opposite sides. Lightly butter the top of the parchment.
- In a medium bowl, sift together the all-purpose flour, unsweetened alkalized cocoa powder, and kosher salt. Set this dry mixture aside.
- Put half of the butter pieces in a small saucepan or a microwave-safe bowl and melt until fully liquid. Place the remaining butter pieces in a medium heatproof bowl.
- Pour the hot melted butter over the butter pieces in the medium bowl. Stir continuously until almost all the butter pieces have melted and the mixture looks mostly smooth and creamy. Stir in the vanilla extract.
- In the bowl of a stand mixer fitted with the paddle attachment (or using a large mixing bowl and electric hand mixer), combine the eggs and granulated sugar. Beat on medium speed until the mixture is thickened and pale in color, about 3–5 minutes.
- Reduce the mixer speed to low. Add the sifted dry mixture and the butter mixture in three additions each, alternating between the dry and the butter: add one-third of the dry mixture, mix briefly; add one-third of the butter mixture, mix briefly; repeat two more times until fully combined. Scrape the bowl as needed so everything is evenly incorporated.
- Remove the bowl from the mixer and fold in the semisweet chocolate chips with a rubber spatula or wooden spoon until evenly distributed.
- Pour and spread the batter evenly into the prepared pan. Bake for 40–45 minutes, until a cake tester or toothpick inserted into the center comes out with a few moist crumbs but not wet batter. If the tester is coated with melted chocolate, test again in a different spot.
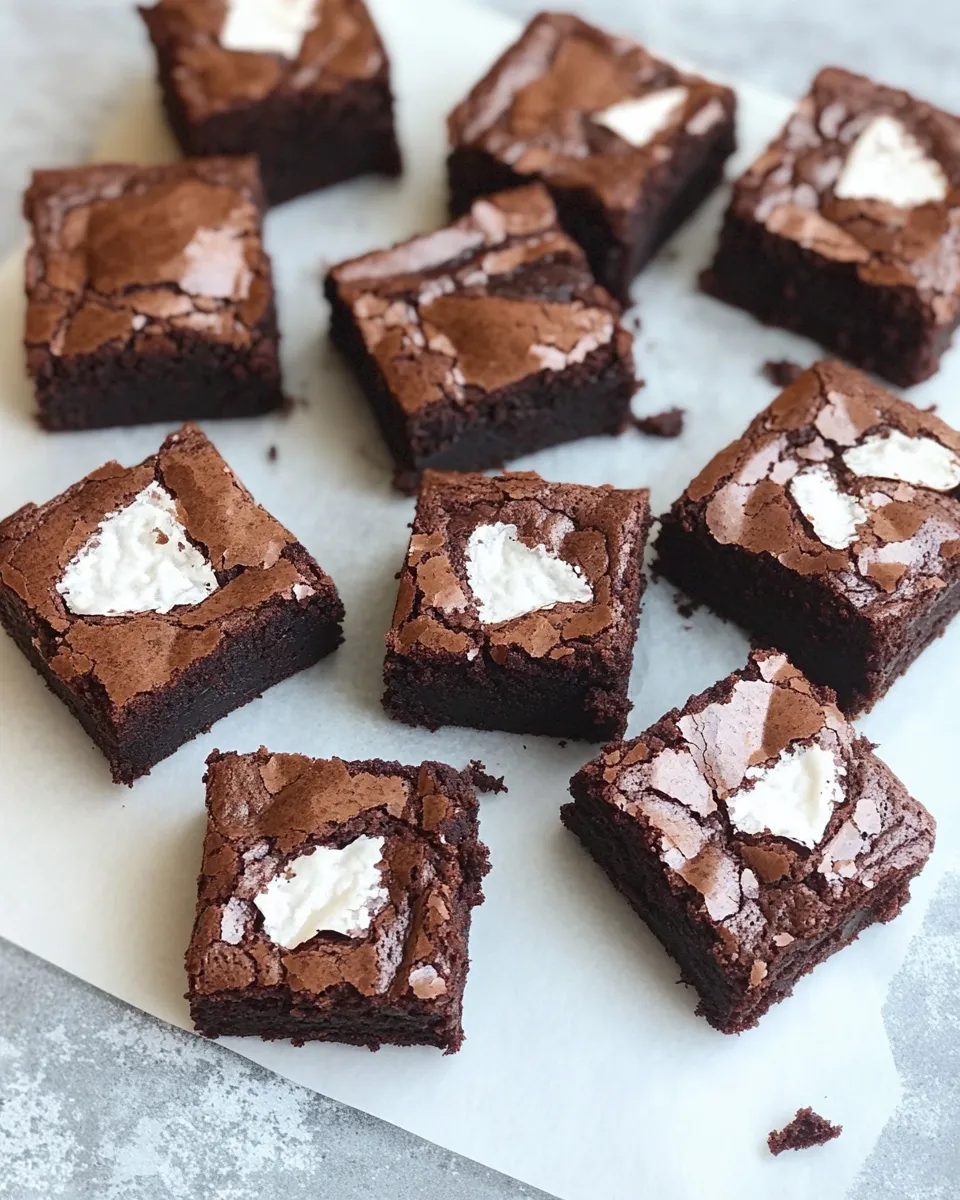
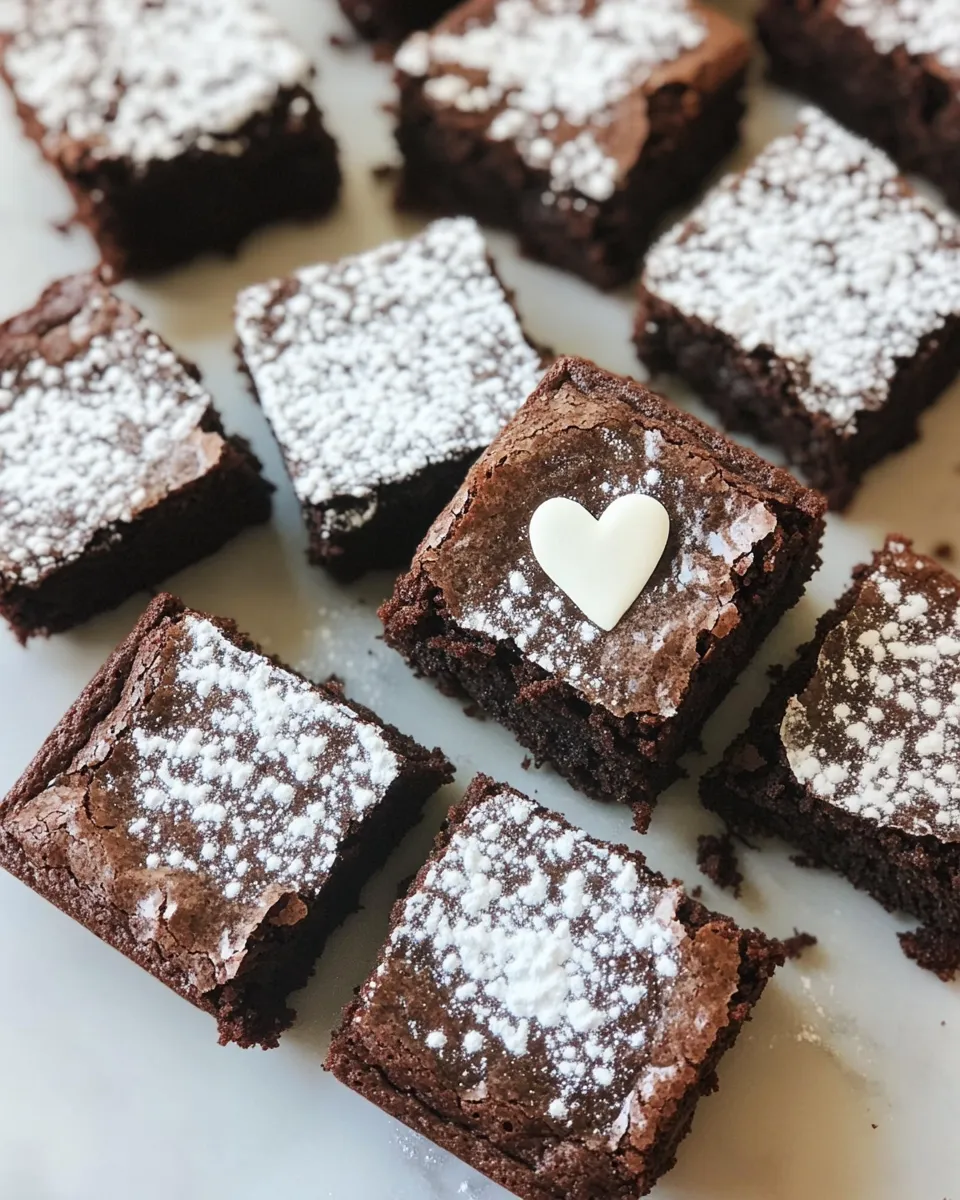
- Transfer the pan to a wire rack and let the brownies cool in the pan for 20 minutes. Use the parchment overhang to lift the brownies out onto a cutting board. Slice into 16 squares or 12 rectangles. Dust with powdered sugar before serving, and serve slightly warm.
Why I Love This Recipe
There’s a practical elegance to this brownie: it uses straightforward pantry ingredients and a technique that concentrates flavor without extra steps. The alternate additions—dry then butter, repeated three times—create a smooth, even batter that bakes into brownies with a confident texture. The melted-butter-over-cold-pieces trick produces a silky emulsion that preserves some buttery chunks, which help the top set with that coveted sheen.
Flavor-wise, the alkalized (Dutch-process) cocoa gives the brownies a mellow, rounded chocolate note rather than the sharp acidity of natural cocoa. The semisweet chocolate chips offer little bursts of melted chocolate without overwhelming the cocoa base. These brownies are versatile: they’re just as good as a simple afternoon treat as they are dressed up with a scoop of vanilla ice cream for dessert.
Substitutions by Category
Chocolate & Cocoa
- Swap Dutch-process cocoa for natural cocoa if that’s what you have—expect a slightly brighter, more acidic chocolate flavor and a lighter color.
- Replace semisweet chips with chopped bittersweet or milk chocolate if you prefer a different balance of sweetness.
Butter & Fats
- You can use salted butter instead of unsalted; reduce or omit the kosher salt to taste.
- For a slightly lighter texture, try half butter and half neutral oil, but note the flavor will shift away from classic butter richness.
Sugar & Sweeteners
- Granulated sugar is primary for structure and crust. If you swap some for brown sugar, expect more moisture and a hint of caramel flavor.
Flour & Gluten-Free Options
- Substitute a 1:1 gluten-free baking blend for the all-purpose flour. Results can vary; check doneness a little earlier.
Must-Have Equipment
- 9-inch baking pan — the recipe is scaled for this size so edges and depth bake evenly.
- Parchment paper — makes lifting the brownies out clean and easy.
- Stand mixer with paddle attachment or electric hand mixer — for beating eggs and sugar to the proper thickness.
- Medium heatproof bowl and small saucepan or microwave-safe bowl — for the two-stage butter melting technique.
- Sifter or fine mesh strainer — to blend flour and cocoa evenly and remove lumps.
- Wire rack and sharp knife — for cooling and clean slicing.
Steer Clear of These
- Underbaking: Remove the brownies too early and they’ll be gooey and collapse when cut. Look for a few moist crumbs on a tester, not wet batter.
- Overbeating: Once you add the flour and cocoa, mix only until combined. Overworking the batter can make brownies drier and more cake-like.
- Skipping the parchment overhang: Without it, you’ll struggle to lift the brownies from the pan cleanly.
- High oven temperature: Don’t increase the oven temp to speed things up. These brownies need gentle, even heat to develop the glossy top and proper interior texture.
Seasonal Ingredient Swaps
Seasonal swaps can make these brownies feel fresh without changing the method.
- Fall: Fold in a small handful of chopped toasted pecans or walnuts for warmth and crunch.
- Winter: Add a pinch of cinnamon and a few orange zest strips to the batter for bright, festive notes.
- Spring: Stir in a few tablespoons of chopped fresh strawberries just before baking for quick berry pockets—note this will add moisture.
- Summer: Top warm brownies with a scoop of seasonal fruit ice cream or salted caramel for contrast.
If You’re Curious
Why melt some butter and leave some as pieces? Pouring hot melted butter over the remaining butter pieces helps temper the mixture so it doesn’t seize and creates a slightly aerated, emulsified butter mixture that folds smoothly into the eggs. That textural play contributes to a fudgy interior and a glossy top.
Why Dutch-process cocoa? Alkalized cocoa produces a rounder, less acidic flavor and a darker color. If you only have natural cocoa, the brownies will still be excellent but will taste a touch brighter and the batter might react slightly differently with leavening if present; this recipe doesn’t depend on baking soda or powder, so the swap is uncomplicated.
If your top cracks or looks wrinkled, that’s not a failure—some cracking is normal and can be attractive. If the cracks are accompanied by dryness throughout, check oven temperature accuracy and bake time next time.
Storage & Reheat Guide
Room temperature: Store cooled, sliced brownies in an airtight container at room temperature for up to 3 days. Place parchment between layers to prevent sticking.
Refrigerator: For longer storage, refrigerate in an airtight container for up to 5 days. Bring to room temperature before serving, or warm briefly in the microwave to restore softness.
Freezer: Wrap individual squares tightly in plastic wrap and place in a freezer bag for up to 3 months. Thaw at room temperature or warm gently in the microwave. For best texture, let thaw completely before unwrapping to prevent condensation making the crust soggy.
To reheat: Microwave a brownie square for 8–12 seconds for a warm, just-soft center. For a crisper edge and warmed interior, place slices on a baking sheet and warm at 300°F (150°C) for 5–8 minutes.
Ask & Learn
Common question: “How do I know when these are done?” Use a cake tester or toothpick in the center—you’re aiming for a few moist crumbs, not a clean tester. If the tester is coated thickly in melted chocolate, try another spot toward the center but not the edge.
Common question: “Can I halve or double the recipe?” You can halve the recipe for a smaller pan or double it for a larger sheet pan, but adjust baking time: smaller pans will finish faster, larger pans will need more time and careful monitoring. Keep the same technique and check doneness earlier or later depending on pan size.
Got a question that isn’t covered here? Ask about texture, oven tweaks, or serving ideas and I’ll give a focused tip based on what you’re aiming for.
Bring It to the Table
Serve these brownies slightly warm with a dusting of powdered sugar and, if you like, a small scoop of vanilla or salted caramel ice cream. For a more grown-up finish, drizzle a little strong coffee syrup or a spoonful of raspberry jam and scatter toasted nuts on top. They pair beautifully with a cup of coffee or a glass of cold milk—whichever you prefer.
Slice cleanly with a long, sharp knife wiped between cuts to keep edges neat. If you’re bringing brownies to a gathering, cut and stack them between sheets of parchment in a container for easy transport. They hold up well on a dessert tray and are popular with both kids and adults alike.
Rich Cocoa Brownies
Ingredients
Equipment
Method
- Preheat oven to 350°F (175°C). Position a rack in the center of the oven.
- Butter a 9-inch baking pan. Line the pan with a sheet of parchment paper so there is about a 2-inch overhang on two opposite sides. Lightly butter the top of the parchment.
- In a medium bowl, sift together the all-purpose flour, unsweetened alkalized cocoa powder, and kosher salt. Set this dry mixture aside.
- Put half of the butter pieces in a small saucepan or a microwave-safe bowl and melt until fully liquid. Place the remaining butter pieces in a medium heatproof bowl.
- Pour the hot melted butter over the butter pieces in the medium bowl. Stir continuously until almost all the butter pieces have melted and the mixture looks mostly smooth and creamy. Stir in the vanilla extract.
- In the bowl of a stand mixer fitted with the paddle attachment (or using a large mixing bowl and electric hand mixer), combine the eggs and granulated sugar. Beat on medium speed until the mixture is thickened and pale in color, about 3–5 minutes.
- Reduce the mixer speed to low. Add the sifted dry mixture and the butter mixture in three additions each, alternating between the dry and the butter: add one-third of the dry mixture, mix briefly; add one-third of the butter mixture, mix briefly; repeat two more times until fully combined. Scrape the bowl as needed so everything is evenly incorporated.
- Remove the bowl from the mixer and fold in the semisweet chocolate chips with a rubber spatula or wooden spoon until evenly distributed.
- Pour and spread the batter evenly into the prepared pan. Bake for 40–45 minutes, until a cake tester or toothpick inserted into the center comes out with a few moist crumbs but not wet batter. If the tester is coated with melted chocolate, test again in a different spot.
- Transfer the pan to a wire rack and let the brownies cool in the pan for 20 minutes. Use the parchment overhang to lift the brownies out onto a cutting board. Slice into 16 squares or 12 rectangles. Dust with powdered sugar before serving, and serve slightly warm.
Notes
*The original recipe calls for a block of chocolate, cut into chip-sized pieces. Each time I've made this recipe, I've used quality chocolate chips with excellent results.
**Thomas Keller uses a 9-inch silicone baking mold. If using silicone, there's no need to butter the mold and line with parchment. Brownies baked in a metal or glass pan will have crisper edge pieces.
***For the best texture, it's important to not over-bake the brownies. Baking until the tester is totally clean in the center will result in dry brownies.