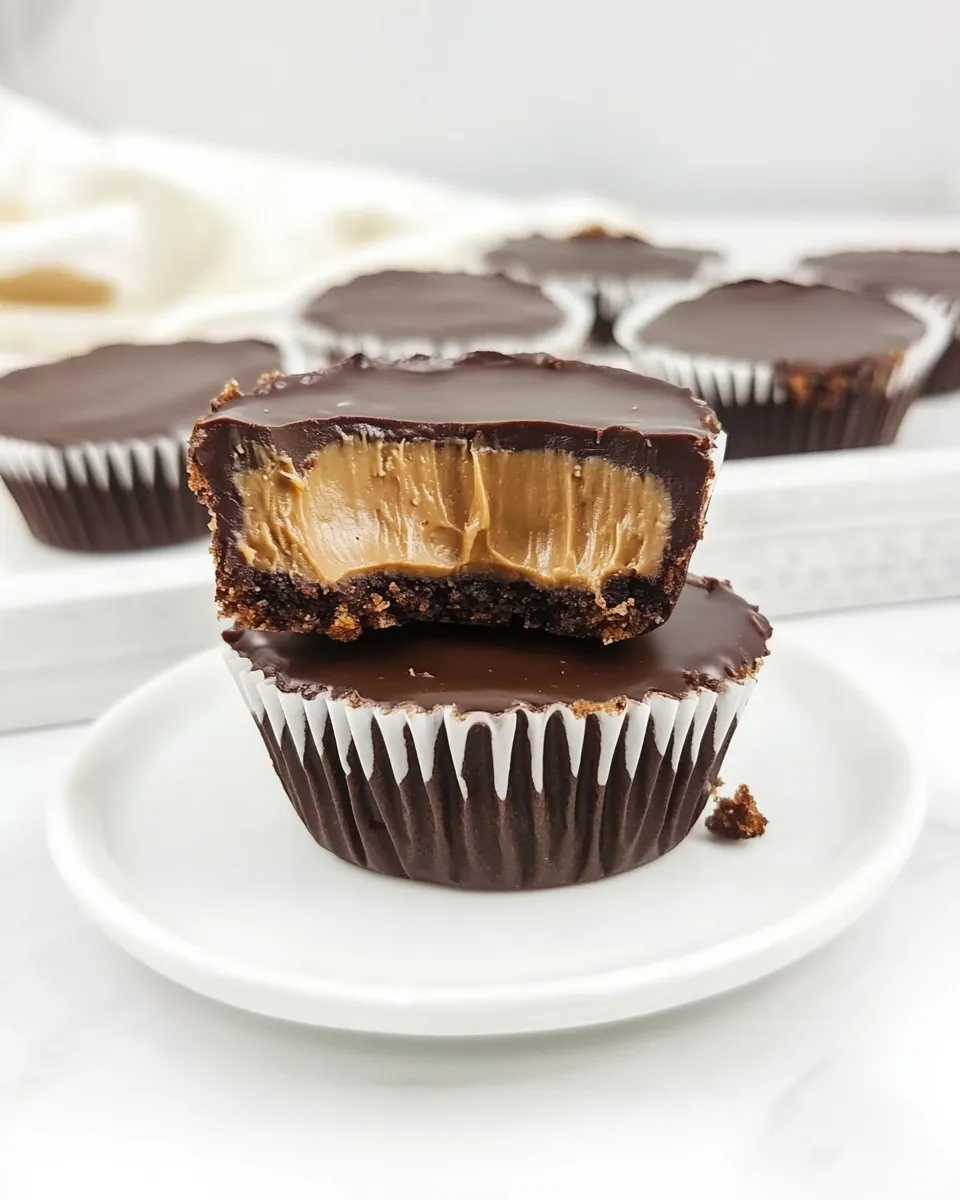
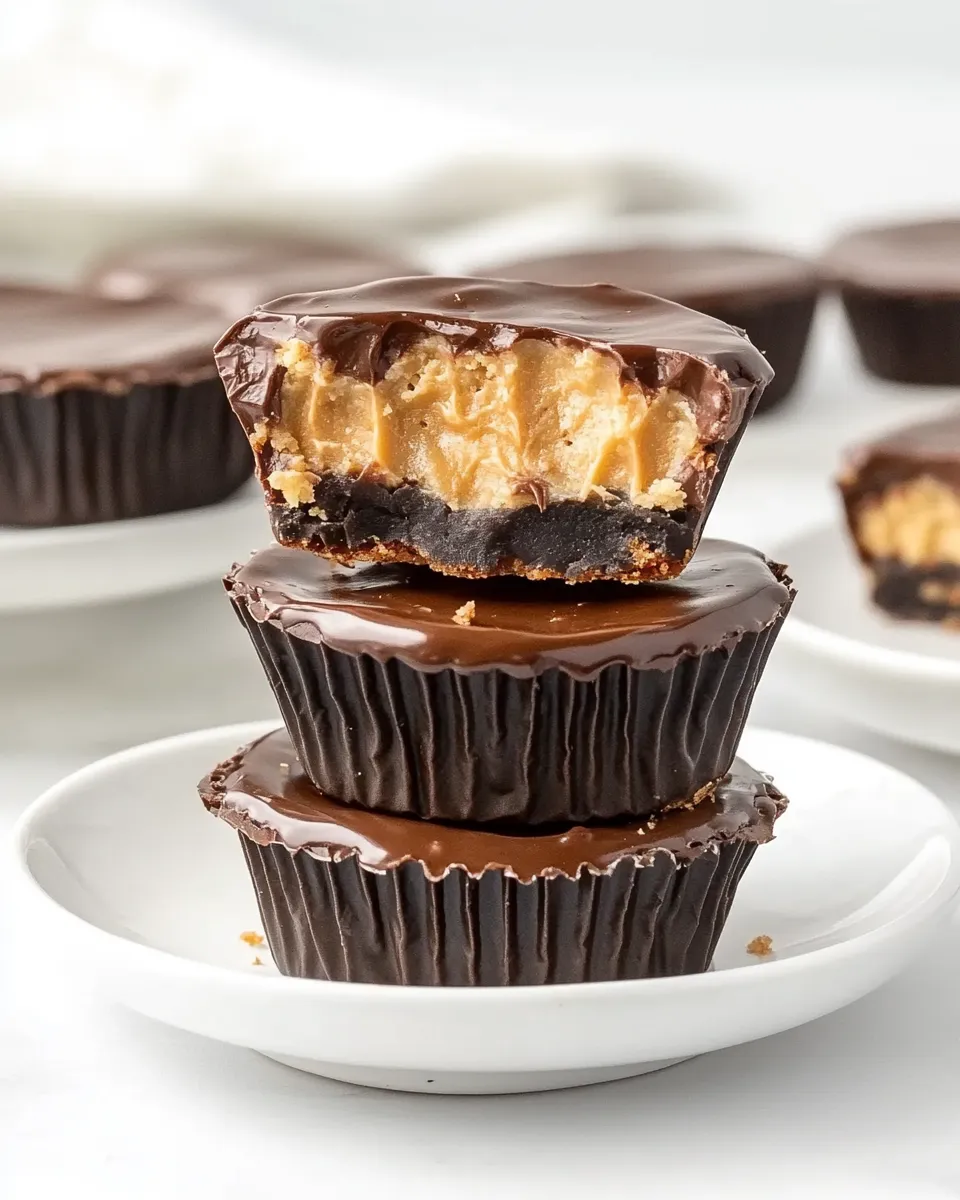
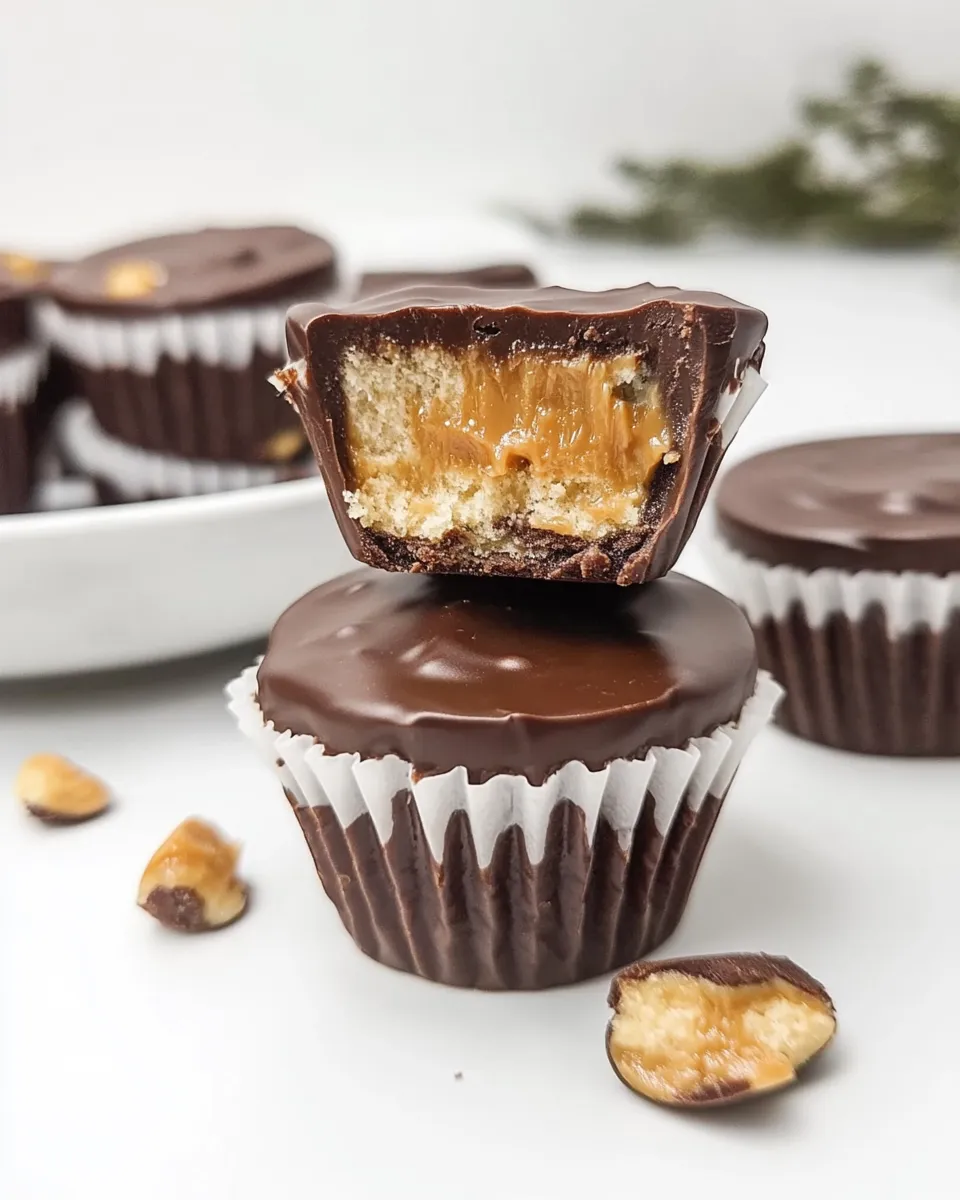
Snickers Cups
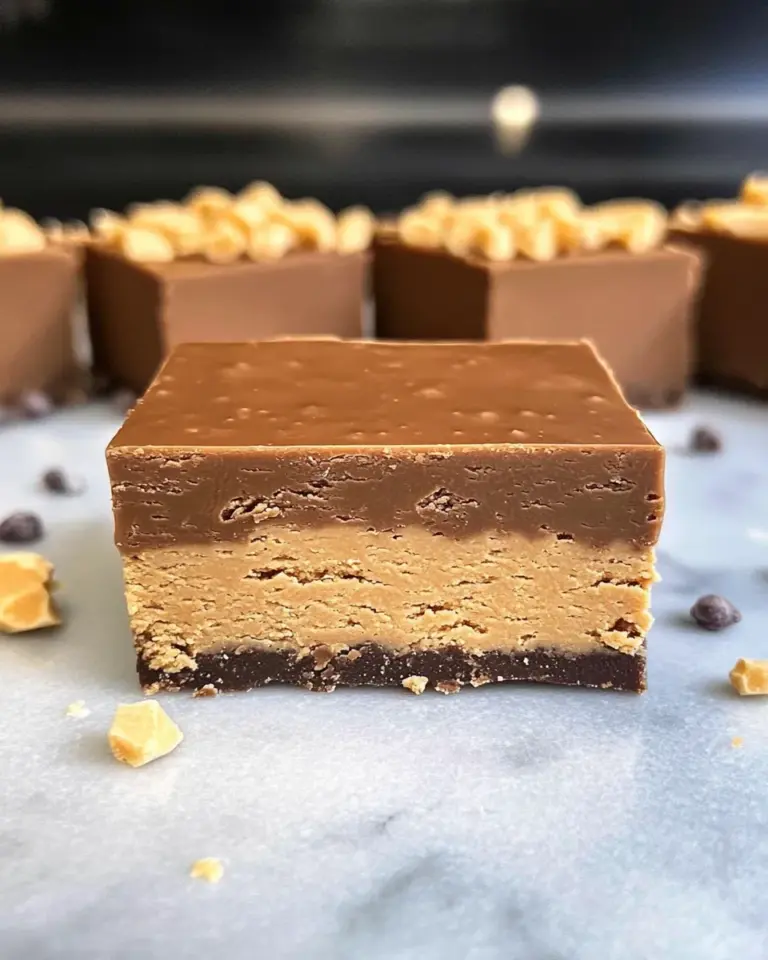
These Snickers Cups are a quick, reliable way to satisfy a peanut-butter-and-chocolate craving with minimal fuss. They’re portable, party-ready, and built from pantry staples: milk chocolate, caramel bits, peanuts and a simple peanut butter layer. The process is straightforward, and the result tastes like a mini candy bar—without the wrapping.
I designed this method so you can make a batch in under an hour, most of which is chilling time. The trick is to keep things warm and scoopable when you need them and firm when you don’t. Follow the steps in order and you’ll have evenly layered cups that hold together and look tidy.
If you bake or cook regularly, you’ll appreciate how repeatable this is. No tempering chocolate, no complex piping—just microwaving in short bursts, careful spreading, and a short chill. I’ll walk through ingredient notes, exact steps, substitutions, common mistakes, and storage so your first batch is as good as the tenth.
Ingredient Notes
Before you start, read these notes so assembly goes smoothly. The chocolate should be kept warm and pourable during the build; if it firms, brief reheating fixes it. The caramel bits melt quickly with a little water and act as the sticky, chewy layer paired with rough chopped peanuts for texture. The peanut butter combined with powdered sugar creates a thick, scoopable center that holds its shape but is easy to spread.
Measure out everything and have tools ready: liners, microwave-safe bowls, measuring spoons and cups, and a small spatula or spoon for spreading. Preparing in stations—chocolate, caramel, peanut layer—keeps the workflow clean and prevents the chocolate base from setting before you’re ready.
Ingredients
- 12 ounces milk chocolate chips — base and top seal; melt until smooth and keep warm so it pours.
- 1 cup caramel bits — melts into the chewy caramel layer; heats quickly with a little water.
- 2 tablespoons water — thins the caramel enough to melt smoothly without making it runny.
- ½ cup rough chopped peanuts — gives crunch and the classic Snickers texture.
- ⅔ cup creamy peanut butter — forms the thick middle layer; use smooth for best spreadability.
- ⅓ cup powdered sugar — sweetens and firms the peanut butter so it’s scoopable, not gooey.
Make (Snickers Cups): A Simple Method
- Line a standard 12-cup muffin pan with 12 paper liners and set aside.
- Place the 12 ounces milk chocolate chips in a medium microwave-safe bowl. Microwave on high for 1 minute, stir, then continue heating in 30-second intervals, stirring after each interval, until the chocolate is completely melted and smooth. Keep the melted chocolate warm and pourable; if it begins to firm before assembly you can reheat it briefly (see step 9).
- Using about 1 teaspoon of the melted chocolate per cup, spoon the chocolate into the bottom of each liner and gently spread it to cover the bottom (and a little up the sides, if you like) to form a chocolate base. Put the pan in the refrigerator to set while you prepare the fillings.
- In a small microwave-safe bowl combine the 1 cup caramel bits and 2 tablespoons water. Microwave on high for 1 minute, stir, then heat in 20-second intervals, stirring after each, until the caramel is fully melted and smooth. Be careful — the mixture will be hot.
- Stir the ½ cup rough chopped peanuts into the melted caramel until evenly combined. Set the caramel-peanut mixture aside to cool slightly so it is scoopable but still pourable.
- In a small mixing bowl combine the ⅔ cup creamy peanut butter and the ⅓ cup powdered sugar. Stir thoroughly until smooth and evenly mixed. The mixture should be thick but scoopable.
- Remove the muffin pan from the refrigerator once the chocolate bases are firm to the touch.
- For each chocolate cup, scoop about 2 teaspoons of the peanut butter mixture into the center and gently spread it, leaving space around the edges for the chocolate top.
- Spoon about 1 tablespoon of the caramel-peanut mixture over the peanut butter layer in each cup, spreading gently to cover the peanut butter.
- Top each cup with about 2 teaspoons of melted chocolate to seal. If the reserved melted chocolate has hardened, reheat it in the microwave in 10–15 second bursts, stirring between bursts, until smooth and pourable before topping.
- Return the pan to the refrigerator and chill the cups until the chocolate is fully firm, about 20–30 minutes. Remove from the liners to serve.
Why You’ll Keep Making It
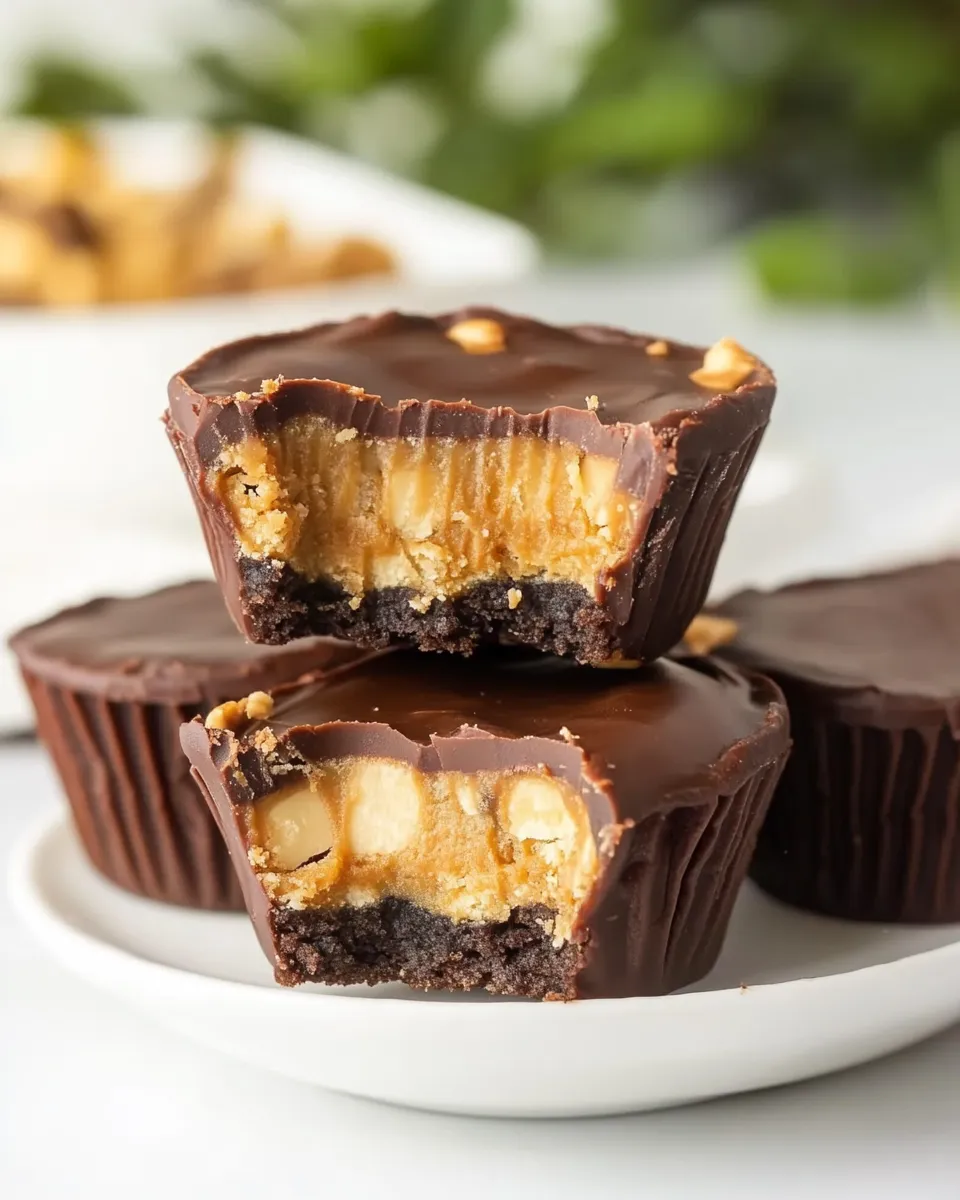
These cups are fast, portable, and hit flavor points everyone loves: creamy peanut butter, chewy caramel, crunchy peanuts and chocolate. They’re one-bowl simple for most of the process and don’t require advanced techniques. Make them for a potluck, pack them in lunchboxes, or keep a jar in the fridge for a quick dessert.
The ingredients are pantry-friendly. Once you know the timing—melt chocolate, chill base, build layers—you can adapt amounts for a smaller or larger batch without changing the method. They also travel well and can be frozen for longer storage.
Allergy-Friendly Substitutes
If you need to avoid common allergens, here are straightforward swaps that keep the texture and intent of the recipe.
- Nut allergies: Replace creamy peanut butter with sunflower seed butter and omit the chopped peanuts or replace them with roasted pumpkin seeds. Use caution if cross-contamination is a concern—choose labeled nut-free chocolate and caramel.
- Dairy sensitivities: Use dairy-free milk chocolate chips and dairy-free caramel bits (many brands make vegan caramel). The peanut butter layer remains the same.
- Egg-free/vegan: The recipe has no eggs. For fully vegan cups, choose vegan chocolate and vegan caramel and replace the peanuts only if needed for allergy reasons.
Must-Have Equipment
- Standard 12-cup muffin pan — forms the cups and keeps size uniform.
- 12 paper liners — makes removal simple and presentation clean.
- Microwave-safe bowls (medium and small) — for melting chocolate and caramel.
- Measuring cups and spoons — accurate portions keep layers balanced.
- Spoons and a small spatula — for spreading and scooping the layers.
- Refrigerator space — chilling is essential for firm chocolate shells.
Don’t Do This
Do not overheat the chocolate. Long bursts in the microwave will seize it. Heat in short intervals and stir. Don’t skip chilling the chocolate base; if you try to assemble while it’s still soft, the layers will mix and the cup won’t hold its shape.
Avoid adding too much water to the caramel. The recipe calls for 2 tablespoons specifically to soften the caramel bits; more water will make the caramel runny and hard to set. Also don’t overload the cups—leave space for the top chocolate seal so the edges stay neat.
Substitutions by Diet
Here are targeted swaps depending on diet goals. I list practical options that preserve texture and flavor as much as possible.
Dairy-Free / Vegan
Use dairy-free milk chocolate chips and vegan caramel bits. If you use vegan chocolate, check for coconut oil or non-dairy fats that melt similarly to milk chocolate.
Keto / Lower Sugar
This recipe relies on caramel bits and powdered sugar, which are high in sugar. To lower carbs you’d need specialty sugar-free caramel and a powdered erythritol blend for the peanut layer; those change texture and sweetness balance. If following strict keto, treat this as an occasional treat and adjust expectations.
Nut-Free
Sunflower seed butter replaces peanut butter well, and roasted pumpkin seeds or toasted soy nuts can provide crunch instead of peanuts. Always verify labels for cross-contact warnings.
What Could Go Wrong
Chocolate seizing: if a single drop of water contacts melted chocolate it can seize into clumps. If this happens, gently warm with a teaspoon of neutral oil or use it to re-melt in short bursts with careful stirring. Prevention is easier: keep bowls dry and stir often.
Caramel too thin or too thick: too hot caramel can become runny; let it cool until scoopable but still pourable. If it firms too much, brief reheating in 10-second bursts will loosen it. Too much water makes it runny; stick to the 2 tablespoons in the recipe.
Peanut butter layer collapsing: if the peanut butter and powdered sugar aren’t mixed thoroughly, the layer can be greasy or soft. Stir until smooth and scoopable. If it’s too soft, add a dusting more powdered sugar a teaspoon at a time until it firms slightly.
Storing Tips & Timelines
Refrigerator
Store in an airtight container in the refrigerator for up to 2 weeks. Keep layers cool to maintain structure and prevent melting. Let them sit at room temperature 5–10 minutes before serving if you prefer a softer bite.
Freezer
Freeze in a single layer on a tray until firm, then transfer to an airtight container or freezer bag for up to 3 months. Thaw in the fridge before serving to avoid condensation on the chocolate shell.
Room Temperature
These will soften at warm room temperatures. If you plan to serve at room temperature, do so within a few hours and keep them out of direct sun or heat.
Questions People Ask
Can I use dark chocolate instead of milk chocolate?
Yes. Dark chocolate will change the overall sweetness and flavor profile but works the same in the method.
Can I make these ahead?
Yes. You can assemble, chill, and store in the refrigerator up to 2 weeks or freeze for longer. If freezing, wrap well to avoid freezer burn.
Why did my chocolate crack after chilling?
Rapid temperature changes or overly firm chocolate can cause minor cracking. Let the cups sit at room temperature a few minutes before handling to reduce stress.
Can I pipe the peanut layer instead of scooping?
You can, if you have a fitted piping bag and a wide tip. The recipe’s consistency is thick, so it may need gentle pressure. Scooping with a teaspoon is easier and consistent.
See You at the Table
These Snickers Cups are one of those reliable, repeatable treats that make hosting simpler and dessert more approachable. They’re forgiving, portable, and deeply satisfying. Make a batch this week and tweak minor details—chocolate type, peanut crunch, or caramel amount—until they match your ideal bite.
I hope the step-by-step method and the troubleshooting tips help you get perfect cups on the first try. When they come out right, there’s nothing more rewarding than a tray of homemade candy that disappears fast. Enjoy, and see you at the table.
Ingredients
Equipment
Method
- Line a standard 12-cup muffin pan with 12 paper liners and set aside.
- Place the 12 ounces milk chocolate chips in a medium microwave-safe bowl. Microwave on high for 1 minute, stir, then continue heating in 30-second intervals, stirring after each interval, until the chocolate is completely melted and smooth. Keep the melted chocolate warm and pourable; if it begins to firm before assembly you can reheat it briefly (see step 9).
- Using about 1 teaspoon of the melted chocolate per cup, spoon the chocolate into the bottom of each liner and gently spread it to cover the bottom (and a little up the sides, if you like) to form a chocolate base. Put the pan in the refrigerator to set while you prepare the fillings.
- In a small microwave-safe bowl combine the 1 cup caramel bits and 2 tablespoons water. Microwave on high for 1 minute, stir, then heat in 20-second intervals, stirring after each, until the caramel is fully melted and smooth. Be careful — the mixture will be hot.
- Stir the ½ cup rough chopped peanuts into the melted caramel until evenly combined. Set the caramel-peanut mixture aside to cool slightly so it is scoopable but still pourable.
- In a small mixing bowl combine the ⅔ cup creamy peanut butter and the ⅓ cup powdered sugar. Stir thoroughly until smooth and evenly mixed. The mixture should be thick but scoopable.
- Remove the muffin pan from the refrigerator once the chocolate bases are firm to the touch.
- For each chocolate cup, scoop about 2 teaspoons of the peanut butter mixture into the center and gently spread it, leaving space around the edges for the chocolate top.
- Spoon about 1 tablespoon of the caramel-peanut mixture over the peanut butter layer in each cup, spreading gently to cover the peanut butter.
- Top each cup with about 2 teaspoons of melted chocolate to seal. If the reserved melted chocolate has hardened, reheat it in the microwave in 10–15 second bursts, stirring between bursts, until smooth and pourable before topping.
- Return the pan to the refrigerator and chill the cups until the chocolate is fully firm, about 20–30 minutes. Remove from the liners to serve.
Notes
You can also melt the chocolate chips on the stovetop in a saucepan if you prefer.
Do not skip the chilling step. The bottom layer of chocolate has to be set before adding any other layers on top.