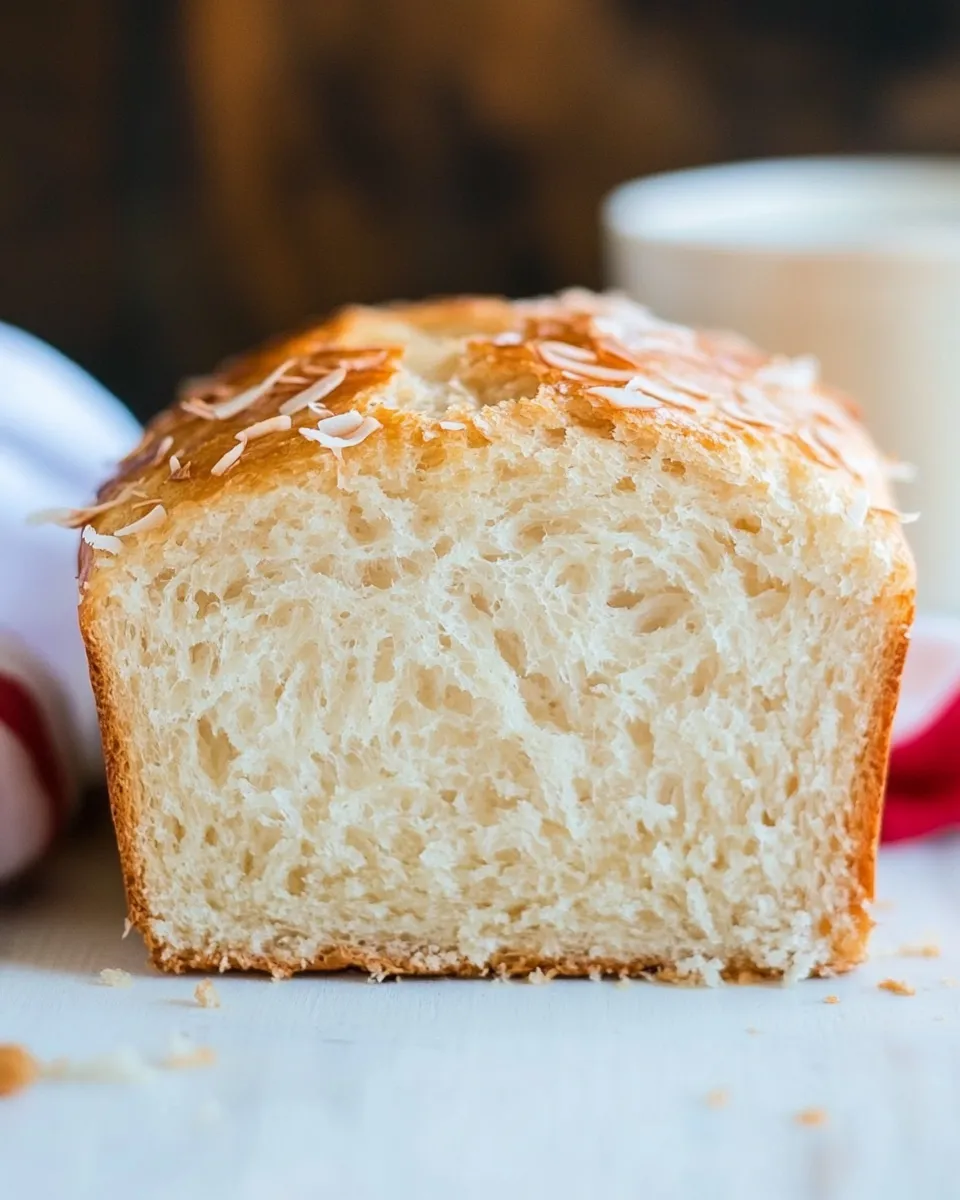
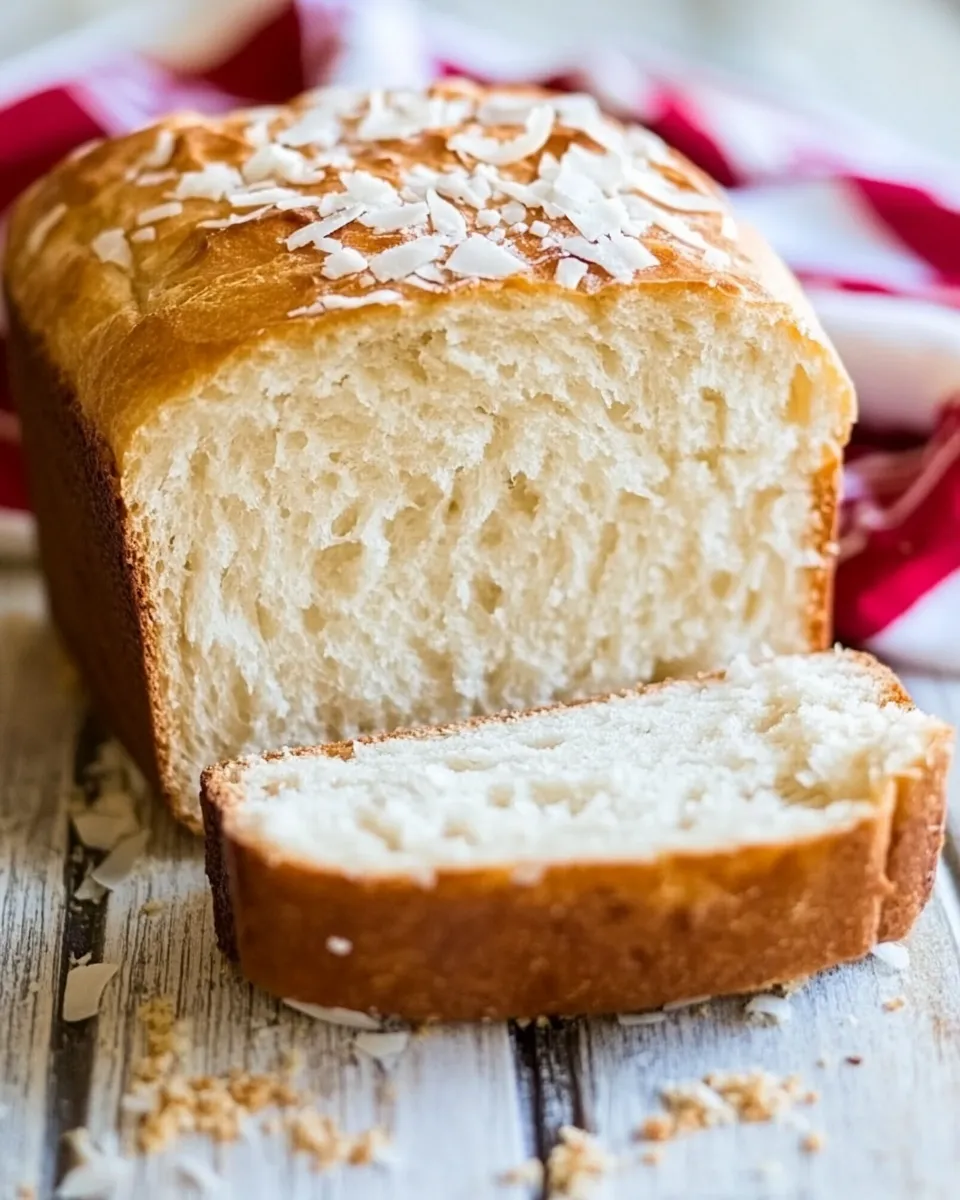
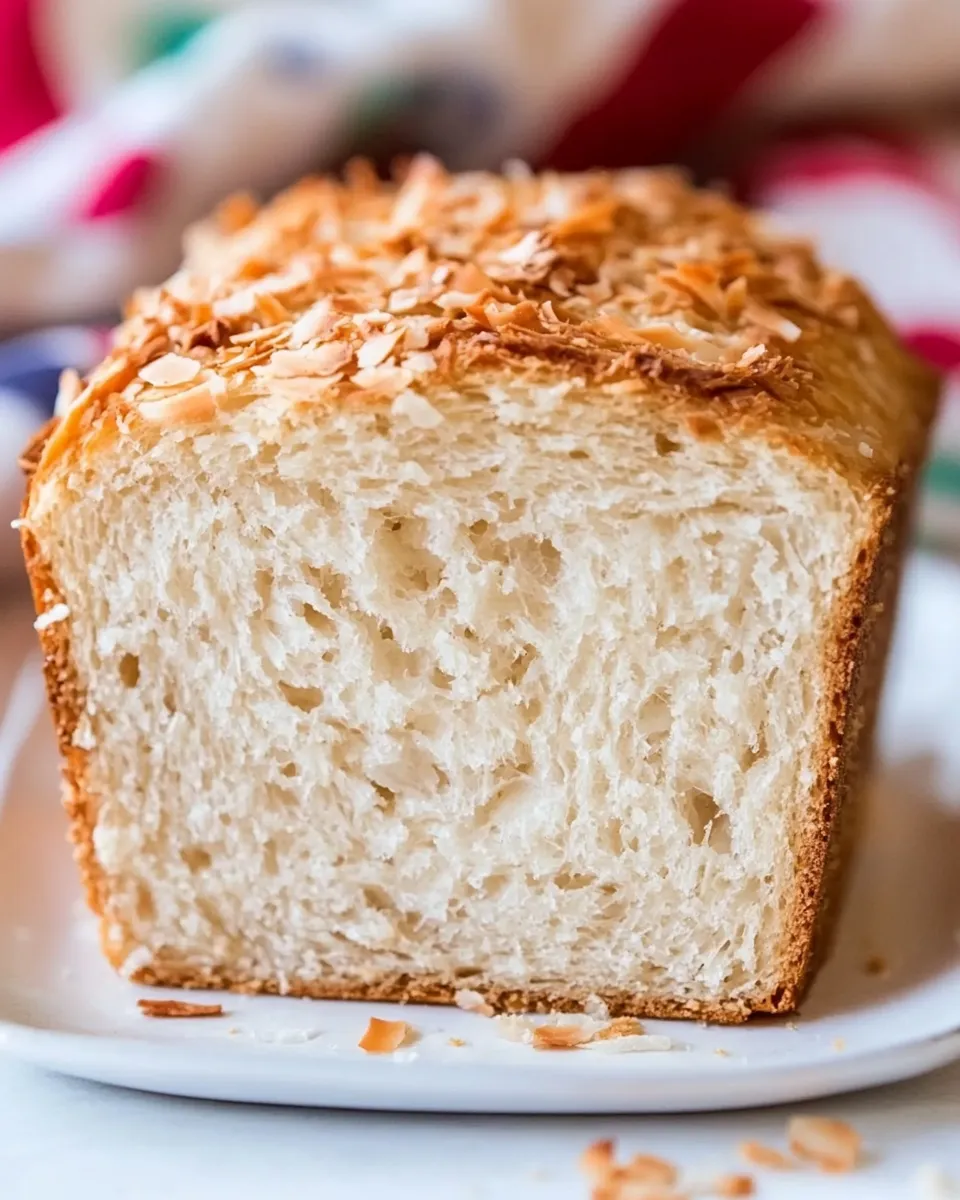
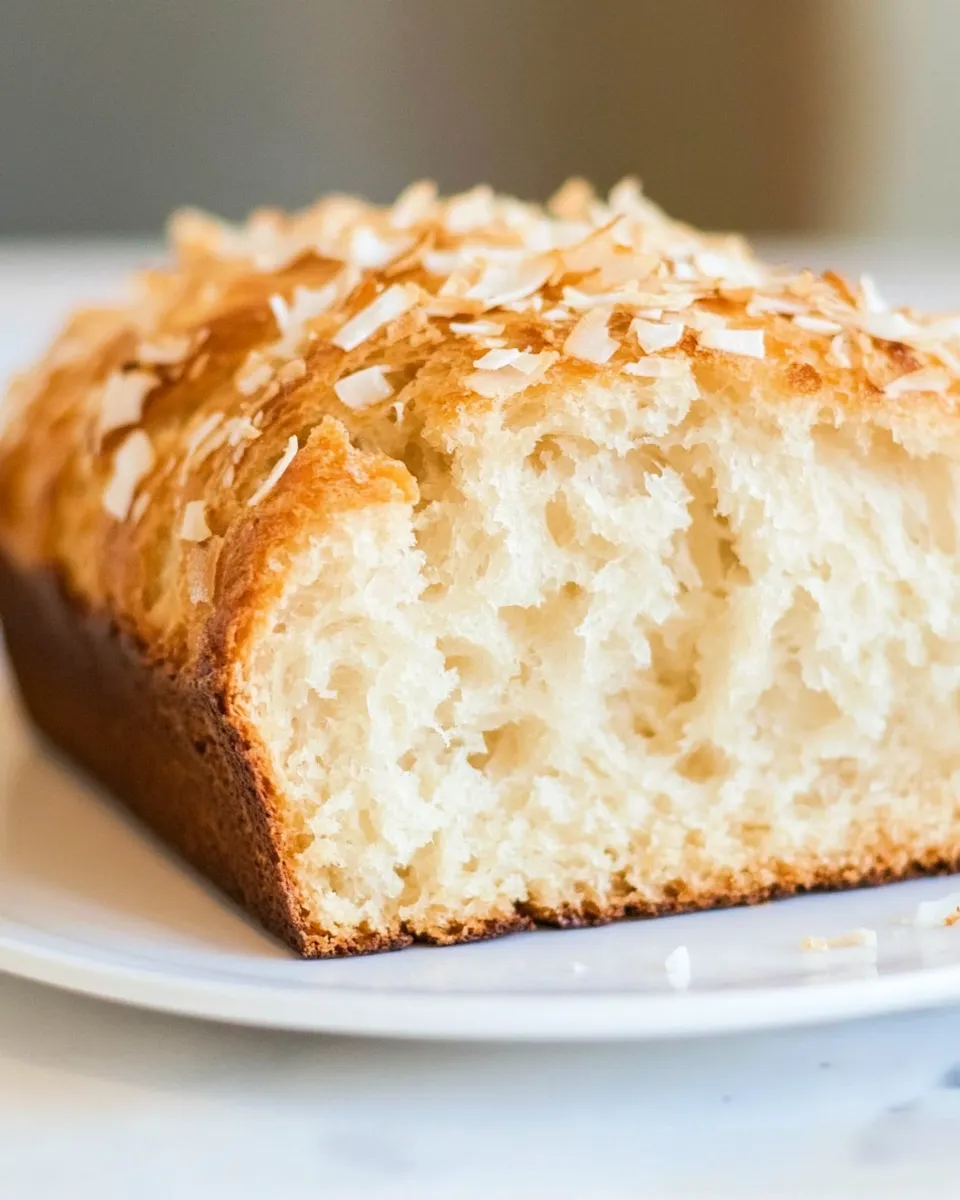
Soft and Chewy Coconut Milk Bread
I bake a lot of loaves, and this Soft and Chewy Coconut Milk Bread has a permanent spot in my rotation. It’s straightforward, forgiving, and delivers a tender crumb with a subtle coconut note thanks to the coconut milk and oil. The rolled oats add body and moisture so the slice stays soft the next day.
No special ingredients, no fancy technique. You’ll mix, knead, let it rise, shape, and bake. If you’re comfortable with basic yeast bread, this one is quick to learn. If you’re new to bread, follow the timing and temperature cues below and you’ll get a reliable loaf.
Ingredient List
- 1 cup coconut milk — I used Trader Joe’s Light; provides fat and coconut flavor that keeps the crumb tender.
- 1 cup old-fashioned whole rolled oats — not quick cook or instant; soaks with the milk and adds texture and moisture retention.
- ¼ cup water — from the tap, not hot and not cold; helps adjust dough hydration.
- 2 cups all-purpose flour — bread flour may be used and will create a heartier, chewier bread.
- 3 tablespoons coconut oil — melted (canola or vegetable oil may be substituted); adds richness and a faint coconut aroma.
- 2 tablespoons light brown sugar — packed; feeds the yeast slightly and balances the coconut flavor with a touch of caramel.
- 2 ¼ teaspoons instant dry yeast — one 1/4-ounce packet, I use Red Star Platinum; use instant yeast as written for timing and texture.
- pinch salt — optional and to taste; salt controls yeast activity and improves flavor.
Stepwise Method: Soft and Chewy Coconut Milk Bread
- In a microwave-safe 2-cup measuring cup or small bowl, combine 1 cup coconut milk and 1 cup old-fashioned rolled oats. Heat in the microwave until the milk just begins to simmer (about 2 minutes). Stir, then let the mixture cool until it is warm to the touch, about 100–110°F (30–43°C), about 15 minutes.
- Stir 1/4 cup tap water into the cooled oat mixture.
- In the bowl of a stand mixer fitted with the dough hook (or in a large mixing bowl if kneading by hand), add 2 cups all-purpose flour, 2 tablespoons packed light brown sugar, 2 1/4 teaspoons instant dry yeast, and a pinch of salt (optional). Mix briefly to combine the dry ingredients.
- Add the cooled oat mixture and 3 tablespoons melted coconut oil to the dry ingredients. Mix on low speed in the stand mixer, or begin combining by hand, until a moist, shaggy dough forms.
- Knead the dough: in the stand mixer on low speed for 5–7 minutes, or by hand on a lightly floured surface for about 10 minutes, until the dough is cohesive and smooth. The dough will be moist and slightly sticky; resist adding extra flour unless it is so wet it will not hold together. If the dough is too dry, add up to an additional 1/4 cup water, a tablespoon at a time.
- Lightly grease a large bowl. Turn the kneaded dough into the greased bowl, turn once to coat, cover tightly with plastic wrap, and let rise in a warm, draft-free place until doubled in size, about 1½–2 hours. (To create a warm spot, you can preheat your oven to 400°F for 1–2 minutes, turn the oven off, then place the covered bowl inside the warm oven—do not turn the oven back on while the dough is rising.)
- While the dough is rising (or during the last 15 minutes of the rise), prepare an 8×4-inch loaf pan by spraying it with cooking spray or greasing and lightly flouring it; set aside.
- When the dough has doubled, punch it down and turn it out onto a lightly floured surface or a Silpat. Knead gently for about 3 minutes to deflate and smooth the dough.
- Using your fingers or a rolling pin, press the dough into an approximately 10-inch by 6-inch rectangle (the long side should be slightly longer than the pan). Starting at a long edge, roll the dough into a tight cylinder with about 2–3 turns. Tuck the ends under, place the loaf seam-side down into the prepared pan.
- Cover the pan with plastic wrap and let the dough rise in a warm, draft-free place until roughly doubled, about 60–75 minutes.
- In the last few minutes of the final rise, preheat the oven to 350°F. Bake the loaf for about 30 minutes, or until the top is lightly golden, domed, and puffy. Rotate the pan halfway through baking if desired. The bread should sound hollow when tapped; an instant-read thermometer inserted into the center can read toward the higher end (many bakers use about 190–210°F as a done range).
- Remove the loaf from the oven and let it cool in the pan for 5–10 minutes. Turn the loaf out onto a wire rack and cool completely before slicing.
- Store a fully cooled loaf wrapped in plastic wrap and placed in a sealed bag at room temperature for up to about 5 days, or freeze in an airtight, freezer-safe container for up to 3 months.
Why This Recipe Is Reliable
This recipe balances hydration, fat, and gentle gluten development to produce a soft yet chewy crumb. Coconut milk and soaked rolled oats contribute fat and gelatinized starches that trap moisture—so the bread keeps longer than many plain white loaves. The modest amount of brown sugar helps yeast activity without making the dough overly sweet.
Instant yeast makes the process predictable. You don’t need a long autolyse or special starters; the stated rise times and warm proofing method give consistent results in typical home kitchens. The dough’s modest stickiness signals proper hydration; it should be tacky but still manageable after kneading.
Temperature cues are also practical. Warm-but-not-hot oat mixture and the specified oven temperature and final internal thermometer range are clear checkpoints. Follow them, and you’ll avoid under- or overproofing most of the time.
Smart Substitutions
- Flour — Swap all-purpose for bread flour for extra chew and structure. If you do, expect a slightly firmer crumb.
- Oil — If you don’t have coconut oil, use canola or vegetable oil in the same amount; the flavor will be a touch more neutral but the texture remains similar.
- Milk — I use Trader Joe’s Light coconut milk, but any canned or carton coconut milk works. Avoid thinning it with water unless the label is extremely thick; the oat soak handles the rest.
- Yeast — Instant dry yeast is used here. If using active dry yeast, proof it first in the warm oat mixture with the sugar (wait for bubbles) and expect slightly longer rise times.
- Oats — Do not use quick or instant oats; they break down too much. Old-fashioned rolled oats give the right body.
Tools of the Trade
- Stand mixer with dough hook (optional) — makes kneading faster and hands-free.
- Large mixing bowl — for hand-kneading and rising if you don’t use a mixer.
- 8×4-inch loaf pan — the specified size gives the right loaf shape and bake time.
- Plastic wrap or a clean kitchen towel — to cover rises and keep drafts off.
- Instant-read thermometer — optional, but handy to confirm doneness (190–210°F range).
- Wire rack — cools the loaf evenly and prevents soggy bottoms.
- Measuring cups and spoons — accurate measuring matters with yeast breads.
Problems & Prevention
Dense or Heavy Loaf
Cause: underproofing, too much flour, or insufficient kneading. Prevention: follow the rise times and resist adding extra flour unless the dough truly won’t hold together. The dough should be slightly sticky after kneading. If using active dry yeast, allow extra rise time.
Gummy or Moist Crumb
Cause: underbaking or cutting the loaf too soon. Prevention: bake until the top is golden and the loaf sounds hollow when tapped, or check the center with an instant-read thermometer. Always cool completely before slicing—this lets the crumb finish setting.
Overproofed, Collapsed Loaf
Cause: too warm or too long during final rise. Prevention: keep the rise environment warm but not hot. If your kitchen is very warm, check the dough earlier than the stated maximum and use the finger-dent test (gently press the dough—if the indentation springs back slowly and partially, it’s ready).
Too Sticky to Handle
Cause: high humidity, insufficient kneading, or incorrect measurements. Prevention: damp hands or a lightly floured surface help during shaping. Add water only in tablespoon increments if dough feels dry. Avoid dumping more flour in; that tightens the crumb.
Dietary Customizations
Gluten-free bakers: this recipe relies on wheat gluten for structure, so a straight swap won’t work. If you want to experiment, use a tested gluten-free bread flour blend formulated for yeast baking and follow the manufacturer’s recommendations for hydration and xanthan gum.
Dairy-free: this recipe is already dairy-free as written because it uses coconut milk and coconut oil. It’s a good option if you’re avoiding dairy but still want tender, rich bread.
Lower-fat option: use light coconut milk and reduce oil slightly, but expect a slightly less tender crumb. Because fat influences softness, don’t remove it entirely.
Pro Tips & Notes
Measure flour by spooning it into the cup and leveling it off or, better yet, weigh it if you have a scale. Kitchen cup measurements vary and can change the dough texture.
Soak the oats fully and allow them to cool to the recommended temperature. Too-hot liquid can kill yeast; too-cool liquid slows activity. Aim for that 100–110°F target—warm but not hot.
For an extra glossy top, brush the loaf with neutral oil right after baking. A soft butter or coconut oil brush after cooling adds flavor, but wait until the loaf is out of the pan and slightly cooled so the butter doesn’t pool.
Make-ahead: you can shape the loaf and refrigerate the pan, covered, for an overnight slow rise; allow extra time to come to room temp before baking and watch the final rise carefully.
Save It for Later
Wrap a fully cooled loaf tightly in plastic wrap and place it in a sealed bag at room temperature for up to 5 days, as stated in the recipe. For longer storage, freeze slices or the whole loaf in an airtight, freezer-safe container for up to 3 months. Thaw at room temperature or toast slices directly from frozen.
Popular Questions
- Can I use quick oats instead of rolled oats? No—quick or instant oats break down too much and change texture. Use old-fashioned rolled oats as specified.
- What if my dough never doubles? Check the temperature of your proofing spot. Yeast likes warmth (75–85°F). If your home is cool, use the warmed-oven trick in the recipe or let it rise longer.
- Can I make this in a bread machine? The ingredient order and timings might need adjusting for your machine. The dough is slightly stickier than typical machine recipes—if your machine handles wet doughs, try it on a dough cycle and then bake in a pan.
- How do I know when the loaf is done? Look for a golden, domed top, hollow sound when tapped, and an internal temperature in the approximate 190–210°F range.
Hungry for More?
If you enjoyed this loaf, try swapping the mix-ins next time—think toasted coconut flakes or a smear of jam on thick slices. Serve slices slightly toasted with butter for breakfast or use them for sandwiches; the sturdy-yet-tender crumb holds up well.
Thanks for baking along. If you have a question about a step or want to share your loaf photo, leave a comment—I read them all and love troubleshooting with fellow bakers.
Soft and Chewy Coconut Milk Bread
Ingredients
Equipment
Method
- In a microwave-safe 2-cup measuring cup or small bowl, combine 1 cup coconut milk and 1 cup old-fashioned rolled oats. Heat in the microwave until the milk just begins to simmer (about 2 minutes). Stir, then let the mixture cool until it is warm to the touch, about 100–110°F (30–43°C), about 15 minutes.
- Stir 1/4 cup tap water into the cooled oat mixture.
- In the bowl of a stand mixer fitted with the dough hook (or in a large mixing bowl if kneading by hand), add 2 cups all-purpose flour, 2 tablespoons packed light brown sugar, 2 1/4 teaspoons instant dry yeast, and a pinch of salt (optional). Mix briefly to combine the dry ingredients.
- Add the cooled oat mixture and 3 tablespoons melted coconut oil to the dry ingredients. Mix on low speed in the stand mixer, or begin combining by hand, until a moist, shaggy dough forms.
- Knead the dough: in the stand mixer on low speed for 5–7 minutes, or by hand on a lightly floured surface for about 10 minutes, until the dough is cohesive and smooth. The dough will be moist and slightly sticky; resist adding extra flour unless it is so wet it will not hold together. If the dough is too dry, add up to an additional 1/4 cup water, a tablespoon at a time.
- Lightly grease a large bowl. Turn the kneaded dough into the greased bowl, turn once to coat, cover tightly with plastic wrap, and let rise in a warm, draft-free place until doubled in size, about 1½–2 hours. (To create a warm spot, you can preheat your oven to 400°F for 1–2 minutes, turn the oven off, then place the covered bowl inside the warm oven—do not turn the oven back on while the dough is rising.)
- While the dough is rising (or during the last 15 minutes of the rise), prepare an 8x4-inch loaf pan by spraying it with cooking spray or greasing and lightly flouring it; set aside.
- When the dough has doubled, punch it down and turn it out onto a lightly floured surface or a Silpat. Knead gently for about 3 minutes to deflate and smooth the dough.
- Using your fingers or a rolling pin, press the dough into an approximately 10-inch by 6-inch rectangle (the long side should be slightly longer than the pan). Starting at a long edge, roll the dough into a tight cylinder with about 2–3 turns. Tuck the ends under, place the loaf seam-side down into the prepared pan.
- Cover the pan with plastic wrap and let the dough rise in a warm, draft-free place until roughly doubled, about 60–75 minutes.
- In the last few minutes of the final rise, preheat the oven to 350°F. Bake the loaf for about 30 minutes, or until the top is lightly golden, domed, and puffy. Rotate the pan halfway through baking if desired. The bread should sound hollow when tapped; an instant-read thermometer inserted into the center can read toward the higher end (many bakers use about 190–210°F as a done range).
- Remove the loaf from the oven and let it cool in the pan for 5–10 minutes. Turn the loaf out onto a wire rack and cool completely before slicing.
- Store a fully cooled loaf wrapped in plastic wrap and placed in a sealed bag at room temperature for up to about 5 days, or freeze in an airtight, freezer-safe container for up to 3 months.